Fomsie
-
Posts
46 -
Joined
-
Last visited
-
Released: Neon Samurai Bloodcrow Tortie Crypto Current Dallas Cowgirl Bronze Hornet Emerald Eagle Lady Gemstrike Impervium Lass
-

issue 27 Focused Feedback: Attack Typing Adjustments
Fomsie replied to The Curator's topic in [Open Beta] Focused Feedback
This almost feels both punitive and like a precursor for bigger changes, the type where someone wants to remove the free form nature of the game, and replace it with a system where you are required to have different types of character classes and powers to handle content, instead of players just being able to build up their characters and make do. Like someone doesn't like the way people are playing, and now wants to force a different game style on everyone. Just doesn't seem to make sense to change such a significant core mechanic at this stage of the game, especially with all the issues that the current defensive system allowed us to fix individually. -
Thank you!
-
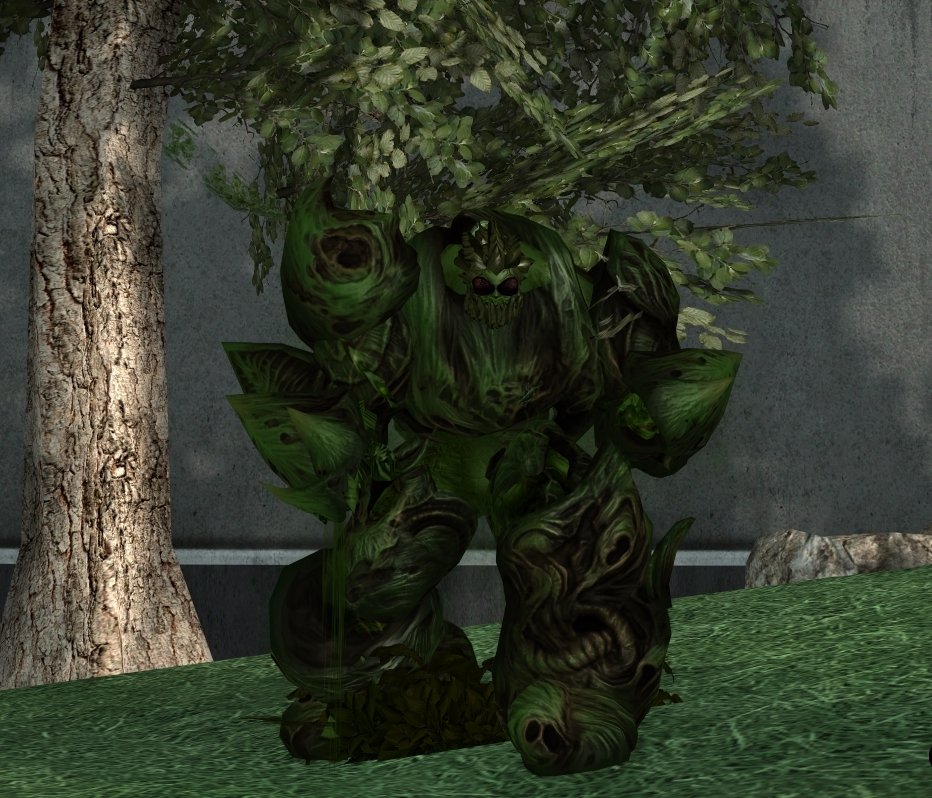
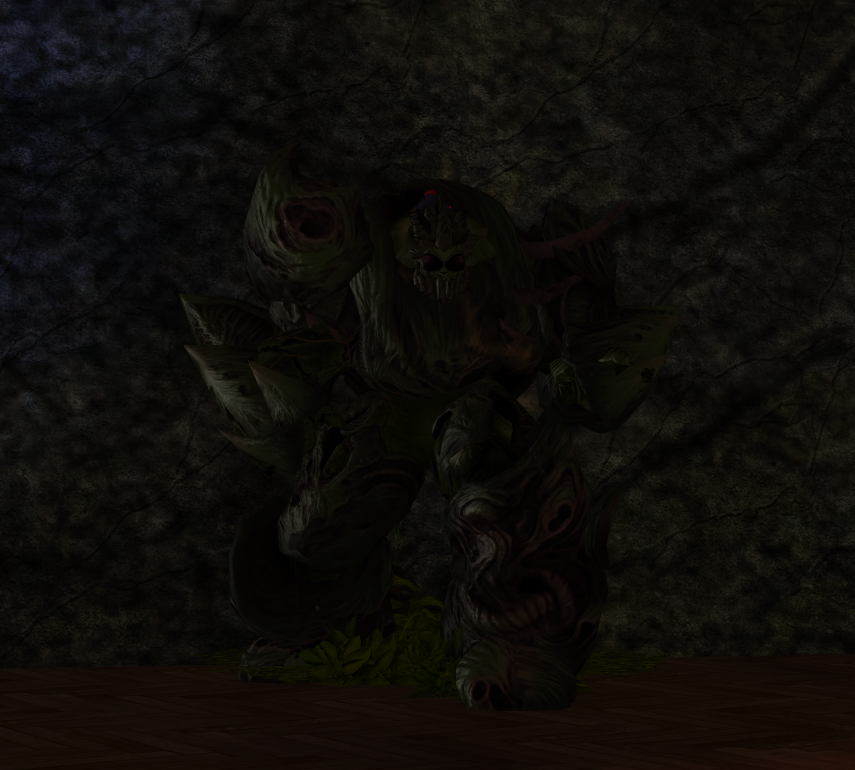
I went all in on Bio Armor's SFX for my Bio/Stone/Soul version of Swamp Thing/Manthing, the Shambling Mound.

-
Thanks! I found the axe but completely missed the WM... knew I should have taken FA.
-
Not sure if I missed it (damned old eyes) but did you try out Fire/War Mace? And if so, what did you think? I'd honestly love to use Axe for theme reasons, but it is just so underwhelming... and Mace is so very smashy.
-
Also, if anyone can tell me which format I am supposed to use for my MIDS export so that it works properly, that would be groovy too.
-
Hello all! Trying to work up a build for my MA/Ninjitsu Scrapper, and just not enamored with my results. Any suggestions or advice would be appreciated. (Note: I took the Caltrops and Shuriken for thematic reasons.) This Villain build was built using Mids Reborn 3.0.5.6 https://github.com/Reborn-Team/MidsReborn Raggedy Man: Level 50 Natural Scrapper Primary Power Set: Martial Arts Secondary Power Set: Ninjitsu Power Pool: Leaping Power Pool: Fighting Power Pool: Leadership Power Pool: Speed Ancillary Pool: Weapon Mastery Villain Profile: ------------ Level 1: Storm Kick (A) Touch of Death - Accuracy/Damage: Level 40 (43) Touch of Death - Damage/Endurance: Level 40 (43) Touch of Death - Damage/Recharge: Level 40 (45) Touch of Death - Accuracy/Damage/Endurance: Level 40 (45) Touch of Death - Damage/Endurance/Recharge: Level 40 (48) Touch of Death - Chance of Damage(Negative): Level 40 Level 1: Ninja Reflexes (A) Luck of the Gambler - Defense/Increased Global Recharge Speed: Level 50 (3) Red Fortune - Defense/Endurance: Level 50 (5) Red Fortune - Defense/Endurance/Recharge: Level 50 (5) Red Fortune - Defense: Level 50 (7) Red Fortune - Endurance: Level 50 (7) Red Fortune - Defense/Recharge: Level 50 Level 2: Cobra Strike (A) Mako's Bite - Accuracy/Damage: Level 50 (46) Mako's Bite - Damage/Endurance: Level 50 (46) Mako's Bite - Damage/Recharge: Level 50 (46) Mako's Bite - Accuracy/Endurance/Recharge: Level 50 (48) Mako's Bite - Accuracy/Damage/Endurance/Recharge: Level 50 (48) Mako's Bite - Chance of Damage(Lethal): Level 50 Level 4: Danger Sense (A) Luck of the Gambler - Defense/Increased Global Recharge Speed: Level 50 (9) Red Fortune - Defense/Endurance: Level 50 (9) Red Fortune - Defense/Recharge: Level 50 (15) Red Fortune - Defense/Endurance/Recharge: Level 50 (15) Red Fortune - Defense: Level 50 (17) Red Fortune - Endurance: Level 50 Level 6: Shinobi-Iri (A) Luck of the Gambler - Defense/Increased Global Recharge Speed: Level 50 (17) Shield Wall - Defense/Endurance: Level 50 (19) Shield Wall - Defense: Level 50 (19) Shield Wall - Defense/Endurance/Recharge: Level 50 (31) Shield Wall - +Res (Teleportation), +5% Res (All): Level 50 Level 8: Focus Chi (A) Adjusted Targeting - To Hit Buff/Recharge: Level 50 (42) Adjusted Targeting - Recharge: Level 50 (42) Gaussian's Synchronized Fire-Control - Chance for Build Up: Level 50 Level 10: Kuji-In Rin (A) Unbreakable Guard - Resistance/Endurance: Level 30 (11) Unbreakable Guard - Resistance: Level 50 (11) Unbreakable Guard - RechargeTime/Resistance: Level 50 (13) Unbreakable Guard - Resistance/Endurance/RechargeTime: Level 50 (13) Unbreakable Guard - +Max HP: Level 50 (43) Winter's Gift - Slow Resistance (20%): Level 50 Level 12: Combat Jumping (A) Luck of the Gambler - Defense/Increased Global Recharge Speed: Level 50 Level 14: Boxing (A) Empty Level 16: Seishinteki Kyoyo (A) Performance Shifter - EndMod: Level 50 (33) Performance Shifter - Chance for +End: Level 50 Level 18: Crippling Axe Kick (A) Superior Critical Strikes - Accuracy/Damage: Level 50 (33) Superior Critical Strikes - Damage/RechargeTime: Level 50 (34) Superior Critical Strikes - Accuracy/Damage/RechargeTime: Level 50 (34) Superior Critical Strikes - Damage/Endurance/RechargeTime: Level 50 (34) Superior Critical Strikes - Accuracy/Damage/Endurance/RechargeTime: Level 50 (36) Superior Critical Strikes - RechargeTime/+50% Crit Proc: Level 50 Level 20: Kuji-In Sha (A) Preventive Medicine - Heal: Level 50 (21) Preventive Medicine - Heal/Endurance: Level 50 (21) Preventive Medicine - Endurance/RechargeTime: Level 50 (23) Preventive Medicine - Heal/RechargeTime: Level 50 (23) Preventive Medicine - Heal/RechargeTime/Endurance: Level 50 (25) Preventive Medicine - Chance for +Absorb: Level 50 Level 22: Tough (A) Gladiator's Armor - End/Resist: Level 50 (25) Gladiator's Armor - Resistance/Rech/End: Level 50 (27) Gladiator's Armor - Resistance: Level 50 (27) Gladiator's Armor - TP Protection +3% Def (All): Level 50 Level 24: Weave (A) Reactive Defenses - Defense: Level 50 (29) Reactive Defenses - Defense/Endurance: Level 50 (29) Reactive Defenses - Endurance/RechargeTime: Level 50 (31) Reactive Defenses - Defense/RechargeTime: Level 50 (31) Reactive Defenses - Defense/Endurance/RechargeTime: Level 50 (33) Reactive Defenses - Scaling Resist Damage: Level 50 Level 26: Dragon's Tail (A) Superior Scrapper's Strike - Accuracy/Damage: Level 50 (36) Superior Scrapper's Strike - Damage/Recharge: Level 50 (36) Superior Scrapper's Strike - Accuracy/Damage/Recharge: Level 50 (37) Superior Scrapper's Strike - Damage/Endurance/Recharge: Level 50 (37) Superior Scrapper's Strike - Accuracy/Damage/Endurance/Recharge: Level 50 (37) Superior Scrapper's Strike - Recharge/Critical Hit Bonus: Level 50 Level 28: Bo Ryaku (A) Steadfast Protection - Resistance/+Def 3%: Level 30 Level 30: Super Jump (A) Blessing of the Zephyr - Knockback Reduction (4 points): Level 50 Level 32: Eagles Claw (A) Hecatomb - Damage/Recharge: Level 50 (39) Hecatomb - Accuracy/Damage/Recharge: Level 50 (39) Hecatomb - Accuracy/Recharge: Level 50 (39) Hecatomb - Damage/Endurance: Level 50 (40) Hecatomb - Chance of Damage(Negative): Level 50 (40) Touch of Death - Chance of Damage(Negative): Level 40 Level 35: Caltrops (A) Bombardment - Chance for Fire Damage: Level 50 Level 38: Assault (A) Endurance Reduction IO: Level 50 Level 41: Shuriken (A) Superior Winter's Bite - Accuracy/Damage: Level 50 (50) Superior Winter's Bite - Accuracy/Damage/Endurance: Level 50 (50) Superior Winter's Bite - Damage/Endurance/Accuracy/RechargeTime: Level 50 Level 44: Tactics (A) HamiO:Cytoskeleton Exposure (45) HamiO:Cytoskeleton Exposure Level 47: Hasten (A) Recharge Reduction IO: Level 50 (50) Recharge Reduction IO: Level 50 Level 49: Vengeance (A) Luck of the Gambler - Defense/Increased Global Recharge Speed: Level 40 Level 1: Brawl (A) Damage Increase IO: Level 50 Level 1: Critical Hit Level 1: Sprint (A) Celerity - +Stealth: Level 50 Level 2: Rest (A) Healing IO: Level 50 Level 1: Swift (A) Run Speed IO: Level 50 Level 1: Health (A) Panacea - +Hit Points/Endurance: Level 50 (3) Numina's Convalesence - +Regeneration/+Recovery: Level 50 Level 1: Hurdle (A) Jumping IO: Level 50 Level 1: Stamina (A) Power Transfer - EndMod: Level 50 (40) Power Transfer - Chance to Heal Self: Level 50 (42) Performance Shifter - Chance for +End: Level 50 Level 4: Ninja Run Level 50: Born In Battle Level 50: High Pain Threshold Level 50: Invader Level 50: Marshal Level 50: Musculature Radial Paragon Level 30: Double Jump Level 50: Assault Core Embodiment Level 50: Ageless Radial Epiphany Level 50: Diamagnetic Radial Flawless Interface ------------ ------------ Set Bonus Totals: 19.5% DamageBuff(Smashing) 19.5% DamageBuff(Lethal) 19.5% DamageBuff(Fire) 19.5% DamageBuff(Cold) 19.5% DamageBuff(Energy) 19.5% DamageBuff(Negative) 19.5% DamageBuff(Toxic) 19.5% DamageBuff(Psionic) 14.44% Defense(Smashing) 14.44% Defense(Lethal) 8.5% Defense(Fire) 8.5% Defense(Cold) 7.88% Defense(Energy) 7.88% Defense(Negative) 6% Defense(Psionic) 15.38% Defense(Melee) 9.75% Defense(Ranged) 11% Defense(AoE) 30% Enhancement(Accuracy) 10% Enhancement(Max EnduranceDiscount) 95% Enhancement(RechargeTime) 7.5% SpeedFlying GrantPower Preventive Medicine (when PreventiveMedicine, if Scourge) 261 HP (19.49%) HitPoints 7.5% JumpHeight 7.5% SpeedJumping Knockback (Mag -7) Knockup (Mag -7) MezResist(Confused) 97.5% MezResist(Held) 97.5% MezResist(Immobilized) 97.5% MezResist(Sleep) 97.5% MezResist(Stunned) 97.5% MezResist(Terrorized) 97.5% MezResist(Teleport) 100% (20% chance) 10.5% (0.18 End/sec) Recovery 16% (0.89 HP/sec) Regeneration 35% ResEffect(SpeedFlying) 35% ResEffect(RechargeTime) 35% ResEffect(SpeedRunning) 28.25% Resistance(Smashing) 28.25% Resistance(Lethal) 29% Resistance(Fire) 29% Resistance(Cold) 16.25% Resistance(Energy) 16.25% Resistance(Negative) 17% Resistance(Toxic) 17% Resistance(Psionic) 7.5% SpeedRunning 36% GlobalChanceMod PlayerCrit Raggedy Man - Scrapper (Martial Arts).mxd
-
Oh yeah, I have been playing a DM/Bio scrapper for a while now, and it is absolutely monstrous in capabilities.
-
Thank you for replying folks.
-
I went with Admiral Sutter: Mostly because of the first mission, but I also really like the last one and the difficulty of managing the bosses with a non optimized group. Silver Mantis: because it has a great final mission, and it gives the best badge 😛 Lady Grey: To me this is the "have it all" TF. You have a variety of challenges, some multi stage bosses, rescues and defeat objectives, and a nice mix of enemies in the fact that the Rikti can cover several bases.
-
Hello again folks! I am facing a conundrum. I have a Bio Armor/SS Tanker named Shambling Mound, that is based upon the old D&D monster of the same name. Essentially he is a Swamp Thing/ Man Thing type of characters, a walking mass of coherent plant matter. The problem I am facing is that I am not sure that Super Strength looks right for the character... I have gone through all of the other Secondary power sets for a Tanker, and the only others that seem to work visually, would be Dark Melee, as when it is colored to match it has a lovely spore burst like effect and the Midnight Grasp looks like roots or vines, or Stone Melee, using the Lava style matches the plant and root coloration of the character's body and bio armor as well as having a sort of lumbering feel to it. The rest of the options were either unable to be colored properly (like Ice), were lacking in weapon choices (Battle Axe and Claws), were far too agile and active (Savage Melee, Staff), or something I am already playing (Titan Weapons). And while Spines could certainly fit the bill appearance wise, I just found it to be so underwhelming performance wise in regular content. All that said, I have experience with DM on several characters, Tanker, Brute and Scrappers, including a DM/Bio scrapper, so I know what to expect from it. However, I have never played Stone Melee, and I have no idea how it performs on a Tanker, save that it has a very slow, very lackluster AOE. So I ask, what would you suggest? Should I go with my tried and true DM for fun loving tentacle/vine action? Should I go with Stone Melee for the natural earth/plant theme? Or should I just stick with Super Strength and Foot Stomp my way to success? Thanks.
-
Sadly, I have suffered serious CoH burnout recently... and in fact have only logged on grab the anniversary badge in the past few weeks... so alas it needs to be one character I can focus on, as I simply haven't the drive or desire to do it all twice again at this point.
-
So I am torn... or would it be shredded?... do I continue my love affair with Tankers and go Bio/Claws for the added survivability, or do I go Claws/Bio Scrapper for the added damage? Now, Bio is absolutely mandatory here because of the theme and look I am going for, so while some things may pair better with Claws, in this case it must be Bio. I have a couple of /Bio Scrappers, and the set works wonderfully on them for reactive survival (it feels very much like what my main back on live, /Regen, should have been), I have also done Claws before on a Scrapper. Additionally, I have a Bio/SS Tanker and know the durability it brings to the table. I guess my question to the experts out there is, are the benefits from Bio enough to make the Claws a solid solo performer as a Tanker? (I know how to Tank in groups in TFs and Trials, but when doing story content and hunting GMs/AVs, I am usually solo). Would I be well suited to use Bio/Claws Tanker as my "do everything" character, or would I be better off going with the greater damage of a Scrapper version? Help me Tanker forums, you're my only hope!
-
Concealment Pool Update: Stealth or Invisibility?
Fomsie replied to Jimmy's topic in Developer's Corner
Let's get all fancy, and call it obfuscation. *wiggly fingers*