-
Posts
100 -
Joined
-
Last visited
Content Type
Profiles
Forums
Events
Store
Articles
Patch Notes
Everything posted by Nic Mercy
-
Another nice primary for soloing, that still leaves you great in groups, is Pain. Unlike Empathy, Pain has a number of high impact powers that benefit the user as well as their companions. I have a Pain/Sonic Defender build that's built to solo and quite sturdy. Soft capped to S/L/E, perma-World of Pain for a heftyto-hit buff, damage buff, and a decent amount of resistance to all damage types (some better than others), lots of -res from attacks, procs, and dedicated debuff powers, self healing from Nullify Pain, Soothing Aura and healing procs in Health & Stamina, soft CC via Siren's Song (great for soloing) and still provides buffs and ally healing for a group! Hero Plan by Mids' Reborn : Hero Designer 2.6.0.7 https://github.com/ImaginaryDevelopment/imaginary-hero-designer Click this DataLink to open the build! Level 50 Magic Defender Primary Power Set: Pain Domination Secondary Power Set: Sonic Attack Power Pool: Flight Power Pool: Concealment Power Pool: Fighting Power Pool: Leaping Ancillary Pool: Mace Mastery Hero Profile: Level 1: Nullify Pain -- Prv-Absorb%(A), Prv-Heal/Rchg/EndRdx(3), Prv-Heal(3), Prv-Heal/EndRdx(5), Prv-EndRdx/Rchg(5), Prv-Heal/Rchg(7) Level 1: Shriek -- SprWntBit-Rchg/SlowProc(A), SprWntBit-Dmg/EndRdx/Acc/Rchg(7), SprWntBit-Dmg/Rchg(9), SprWntBit-Acc/Dmg/EndRdx(9), SprWntBit-Acc/Dmg/Rchg(11) Level 2: Scream -- SprDfnBst-Rchg/Heal%(A), SprDfnBst-Acc/Dmg/EndRdx/Rchg(11), SprDfnBst-Acc/Dmg(13), SprDfnBst-Dmg/Rchg(13), SprDfnBst-Dmg/EndRdx/Rchg(15), SprDfnBst-Acc/Dmg/EndRdx(15) Level 4: Howl -- Rgn-Knock%(A), Rgn-Dmg/EndRdx(21), Rgn-Dmg/Rchg(23), Rgn-Acc/Dmg/Rchg(23), Rgn-Acc/Rchg(25), Ann-ResDeb%(42) Level 6: Fly -- BlsoftheZ-ResKB(A) Level 8: Soothe -- Pnc-Heal(A), Pnc-Heal/EndRedux(25), Pnc-EndRdx/Rchg(27), Pnc-Heal/Rchg(27), Pnc-Heal/EndRedux/Rchg(29) Level 10: Shockwave -- OvrFrc-Dam/KB(A), OvrFrc-Acc/Dmg/End/Rech(29), OvrFrc-Acc/Dmg(31), OvrFrc-End/Rech(31), OvrFrc-Dmg/End/Rech(31), Ann-ResDeb%(50) Level 12: Stealth -- ShlWal-ResDam/Re TP(A) Level 14: Boxing -- Acc-I(A) Level 16: Shout -- SprVglAss-Rchg/+Absorb(A), SprVglAss-Acc/Dmg/EndRdx/Rchg(33), SprVglAss-Acc/Dmg(33), SprVglAss-Dmg/Rchg(33), SprVglAss-Dmg/EndRdx/Rchg(34), SprVglAss-Acc/Dmg/EndRdx(34) Level 18: World of Pain -- TtnCtn-ResDam(A), TtnCtn-ResDam/Rchg(34), TtnCtn-ResDam/EndRdx/Rchg(36), AdjTrg-ToHit(36), AdjTrg-ToHit/Rchg(36), AdjTrg-ToHit/EndRdx/Rchg(37) Level 20: Tough -- StdPrt-ResDam/Def+(A), GldArm-3defTpProc(37), UnbGrd-Max HP%(37), UnbGrd-ResDam/EndRdx(39), UnbGrd-ResDam(39) Level 22: Weave -- Rct-ResDam%(A), Rct-Def/EndRdx/Rchg(39), Rct-Def(40), Rct-Def/EndRdx(40), Rct-EndRdx/Rchg(40), Rct-Def/Rchg(42) Level 24: Soothing Aura -- HO:Golgi(A) Level 26: Anguishing Cry -- AchHee-ResDeb%(A), AnlWkn-Acc/Rchg(42), AnlWkn-Acc/Rchg/EndRdx(43) Level 28: Siren's Song -- FrtHyp-Plct%(A), FrtHyp-Sleep/EndRdx(43), FrtHyp-Sleep/Rchg(43), FrtHyp-Acc/Sleep/Rchg(45), FrtHyp-Acc/Rchg(45) Level 30: Amplify -- RctRtc-ToHit/Rchg(A), RctRtc-Pcptn(45) Level 32: Combat Jumping -- LucoftheG-Def/Rchg+(A) Level 35: Scorpion Shield -- LucoftheG-Def/Rchg+(A), RedFrt-Def(46), RedFrt-Def/EndRdx(46) Level 38: Dreadful Wail -- Arm-Dam%(A), Arm-Dmg/EndRdx(46), Arm-Dmg/Rchg(48), Arm-Acc/Dmg/Rchg(48), Arm-Acc/Rchg(48), FuroftheG-ResDeb%(50) Level 41: Painbringer -- DctWnd-Rchg(A), DctWnd-Heal/Rchg(50) Level 44: Hover -- LucoftheG-Def/Rchg+(A) Level 47: Afterburner -- LucoftheG-Def/Rchg+(A) Level 49: Grant Invisibility -- LucoftheG-Def/Rchg+(A) Level 1: Brawl -- Acc-I(A) Level 1: Quick Form Level 1: Prestige Power Dash -- Empty(A) Level 1: Prestige Power Slide -- Empty(A) Level 1: Prestige Power Quick -- Empty(A) Level 1: Prestige Power Rush -- Empty(A) Level 1: Prestige Power Surge -- Empty(A) Level 1: Sprint -- UnbLea-Stlth(A) Level 1: Vigilance Level 2: Rest -- RechRdx-I(A) Level 4: Ninja Run Level 2: Swift -- Flight-I(A) Level 2: Health -- Pnc-Heal/+End(A), Mrc-Rcvry+(17), NmnCnv-Regen/Rcvry+(17) Level 2: Hurdle -- Jump-I(A) Level 2: Stamina -- PrfShf-End%(A), PrfShf-EndMod/Rchg(19), PrfShf-EndMod(19), PwrTrns-+Heal(21) Level 0: Freedom Phalanx Reserve Level 0: Portal Jockey Level 0: Task Force Commander Level 0: The Atlas Medallion Level 50: Agility Core Paragon Level 50: Pyronic Core Final Judgement Level 50: Reactive Radial Flawless Interface Level 50: Phantom Core Superior Ally Level 50: Clarion Core Epiphany Level 50: Assault Radial Embodiment ------------
-

So how tall do you guys make your characters?
Nic Mercy replied to Beef Ninja's topic in General Discussion
I tend not to go much above 6 feet, and usually below 6 feet since I'm 5'7" IRL. -
Sure here's what I play with: Hero Plan by Mids' Reborn : Hero Designer 2.6.0.7 https://github.com/ImaginaryDevelopment/imaginary-hero-designer Click this DataLink to open the build! Kyriani: Level 50 Magic Defender Primary Power Set: Time Manipulation Secondary Power Set: Fire Blast Power Pool: Sorcery Power Pool: Concealment Power Pool: Fighting Power Pool: Speed Ancillary Pool: Power Mastery Hero Profile: Level 1: Time Crawl -- Acc-I(A) Level 1: Flares -- HO:Nucle(A), Dmg-I(48), GldJvl-Dam%(50) Level 2: Fire Blast -- SprVglAss-Rchg/+Absorb(A), SprVglAss-Acc/Dmg/EndRdx/Rchg(7), SprVglAss-Acc/Dmg(9), SprVglAss-Dmg/Rchg(9), SprVglAss-Dmg/EndRdx/Rchg(17), SprVglAss-Acc/Dmg/EndRdx(21) Level 4: Fire Ball -- Rgn-Knock%(A), Rgn-Dmg/EndRdx(21), Rgn-Dmg/Rchg(34), Rgn-Acc/Dmg/Rchg(36), Rgn-Acc/Rchg(36) Level 6: Mystic Flight -- BlsoftheZ-ResKB(A), WntGif-ResSlow(46) Level 8: Temporal Mending -- Prv-Absorb%(A), Prv-Heal/Rchg/EndRdx(36), Prv-Heal(37), Prv-Heal/EndRdx(37), Prv-EndRdx/Rchg(37), Prv-Heal/Rchg(39) Level 10: Rain of Fire -- Ann-ResDeb%(A), Ann-Acc/Dmg/EndRdx/Rchg(11), Ann-Acc/Dmg/Rchg(11), Ann-Dmg/Rchg(13), OvrFrc-Dam/KB(13) Level 12: Time Stop -- UnbCns-Dam%(A), UnbCns-EndRdx/Hold(15), UnbCns-Hold/Rchg(15), UnbCns-Acc/Hold/Rchg(17), UnbCns-Acc/Rchg(50), Lck-%Hold(50) Level 14: Stealth -- ShlWal-ResDam/Re TP(A), LucoftheG-Def/Rchg+(48) Level 16: Time's Juncture -- DarWtcDsp-ToHitDeb(A), DarWtcDsp-ToHitDeb/EndRdx(39), DarWtcDsp-ToHitdeb/Rchg/EndRdx(39), DarWtcDsp-Rchg/EndRdx(40) Level 18: Farsight -- LucoftheG-Def/Rchg+(A), HO:Membr(19), HO:Membr(19) Level 20: Boxing -- Acc-I(A) Level 22: Tough -- StdPrt-ResDam/Def+(A), GldArm-3defTpProc(23), UnbGrd-Max HP%(23), UnbGrd-ResDam/EndRdx(25), UnbGrd-ResDam(25) Level 24: Weave -- Rct-ResDam%(A), Rct-Def/EndRdx/Rchg(33), Rct-Def(33), Rct-Def/EndRdx(33), Rct-EndRdx/Rchg(34), Rct-Def/Rchg(34) Level 26: Slowed Response -- AchHee-ResDeb%(A), AnlWkn-Acc/Rchg(27), AnlWkn-Acc/Rchg/EndRdx(27) Level 28: Blaze -- SprDfnBst-Rchg/Heal%(A), SprDfnBst-Acc/Dmg/EndRdx/Rchg(29), SprDfnBst-Acc/Dmg(29), SprDfnBst-Dmg/Rchg(31), SprDfnBst-Dmg/EndRdx/Rchg(31), SprDfnBst-Acc/Dmg/EndRdx(31) Level 30: Hasten -- RechRdx-I(A), RechRdx-I(46) Level 32: Chrono Shift -- DctWnd-Rchg(A), DctWnd-Heal/Rchg(43) Level 35: Power Build Up -- AdjTrg-Rchg(A), AdjTrg-ToHit/Rchg(48) Level 38: Blazing Bolt -- Apc-Dam%(A), Apc-Dmg/EndRdx(40), Apc-Dmg/Rchg(40), Apc-Acc/Dmg/Rchg(42), Apc-Acc/Rchg(42), Apc-Dmg(42) Level 41: Inferno -- SprAvl-Rchg/KDProc(A), SprAvl-Acc/Dmg/EndRdx/Rchg(43), SprAvl-Dmg/EndRdx(43), SprAvl-Acc/Dmg/EndRdx(45), SprAvl-Acc/Dmg/Rchg(46) Level 44: Temp Invulnerability -- UnbGrd-ResDam(A), UnbGrd-ResDam/EndRdx(45), UnbGrd-ResDam/EndRdx/Rchg(45) Level 47: Aim -- RechRdx-I(A) Level 49: Grant Invisibility -- LucoftheG-Def/Rchg+(A) Level 1: Brawl -- Acc-I(A) Level 1: Quick Form Level 1: Prestige Power Dash -- Empty(A) Level 1: Prestige Power Slide -- Empty(A) Level 1: Prestige Power Quick -- Empty(A) Level 1: Prestige Power Rush -- Empty(A) Level 1: Prestige Power Surge -- Empty(A) Level 1: Sprint -- UnbLea-Stlth(A) Level 1: Vigilance Level 2: Rest -- RechRdx-I(A) Level 4: Ninja Run Level 2: Swift -- Flight-I(A) Level 2: Health -- Pnc-Heal/+End(A), Mrc-Rcvry+(3), NmnCnv-Regen/Rcvry+(3) Level 2: Hurdle -- Jump-I(A) Level 2: Stamina -- PrfShf-EndMod(A), PrfShf-EndMod/Rchg(5), PrfShf-End%(5), PwrTrns-+Heal(7) Level 50: Agility Radial Paragon Level 50: Pyronic Core Final Judgement Level 50: Reactive Radial Flawless Interface Level 50: Phantom Core Superior Ally Level 50: Clarion Core Epiphany Level 50: Assault Radial Embodiment ------------ Basically it has 41% defense to all positionals and psi without using the Power Buildup + Farsight combo. With the combo, you pick up another 12% defense putting you (and your group) well above the soft cap so you have some slack for defense debuffs. You also give everyone a hefty +to-hit buff too. It has perma-Hasten + perma-Chronoshift (which buffs your group too!), you can pbaoe heal yourself (and others) + self healing procs in health and stamina, Slowed Response debuffs foes and can be kept up permanently on hard targets which benefits you solo as well as your party when grouping, you have hard control with Time Stop and some soft control/debuffing with the way Rain of Fire and Inferno are slotted, and some more debuffing with Time's Juncture lowering enemy to-hit and damage by about 25% each.
-
Time/Fire with Power Mastery as your APP is an incredible combo if built right. Softcapped defenses, capped resistance to S/L damage, respectable damage output, and lot's of utility for both solo and group play. It's really one of my favorite Defender combos.
-
Here's a quick and dirty Energy/Devices build I threw together. The power selection order is probably not ideal but it generally has the basics of what you need to dish it out and take it. Has softcapped S/L/E defense (the most common damage types), some modest resistance to S/L/F/C/T damage and minor resistance to E/N/P. Also has perma-Hasten and some additional self-healing (on top of your regen from Field Operative) from heal procs in Health and Stamina. Some people prefer focusing mostly on ranged defense and that's perfectly valid. I prefer S/L/E since it covers the bulk of the damage types you encounter and because there are some maps that are cramped and don't allow you to stay at range. Hero Plan by Mids' Reborn : Hero Designer 2.6.0.7 https://github.com/ImaginaryDevelopment/imaginary-hero-designer Click this DataLink to open the build! Level 50 Technology Blaster Primary Power Set: Energy Blast Secondary Power Set: Devices Power Pool: Flight Power Pool: Fighting Power Pool: Leaping Power Pool: Speed Ancillary Pool: Mace Mastery Hero Profile: Level 1: Power Blast -- SprDfnBrr-Rchg/+Status Protect(A), SprDfnBrr-Acc/Dmg/EndRdx/Rchg(3), SprDfnBrr-Dmg/Rchg(3), SprDfnBrr-Acc/Dmg/Rchg(5), SprDfnBrr-Acc/Dmg/EndRdx(5), SprDfnBrr-Acc/Dmg(7) Level 1: Toxic Web Grenade -- HO:Nucle(A) Level 2: Energy Torrent -- Ann-Acc/Dmg/EndRdx/Rchg(A), Ann-Dmg/Rchg(11), Ann-Acc/Dmg/Rchg(11), Ann-Acc/Dmg/EndRdx(13) Level 4: Fly -- BlsoftheZ-ResKB(A) Level 6: Power Burst -- SprBlsWrt-Rchg/Dmg%(A), SprBlsWrt-Acc/Dmg/EndRdx/Rchg(19), SprBlsWrt-Acc/Dmg(19), SprBlsWrt-Dmg/Rchg(21), SprBlsWrt-Acc/Dmg/Rchg(21), SprBlsWrt-Acc/Dmg/EndRdx(23) Level 8: Sniper Blast -- SprWntBit-Rchg/SlowProc(A), SprWntBit-Dmg/EndRdx/Acc/Rchg(23), SprWntBit-Dmg/Rchg(25), SprWntBit-Acc/Dmg/EndRdx(25), SprWntBit-Acc/Dmg/Rchg(27), ExpStr-Dam%(27) Level 10: Targeting Drone -- GssSynFr--ToHit(A), GssSynFr--ToHit/Rchg(29), GssSynFr--ToHit/Rchg/EndRdx(29), GssSynFr--Rchg/EndRdx(31), GssSynFr--ToHit/EndRdx(31), GssSynFr--Build%(50) Level 12: Boxing -- KntCmb-Acc/Dmg(A), KntCmb-Dmg/EndRdx(31), KntCmb-Dmg/Rchg(33), KntCmb-Dmg/EndRdx/Rchg(33) Level 14: Tough -- StdPrt-ResDam/Def+(A), GldArm-3defTpProc(33), UnbGrd-Max HP%(34), UnbGrd-ResDam/EndRdx(34), UnbGrd-ResDam(34), ImpSki-Status(36) Level 16: Weave -- Rct-ResDam%(A), Rct-Def/EndRdx/Rchg(36), Rct-Def(36), Rct-Def/EndRdx(37), Rct-EndRdx/Rchg(37), Rct-Def/Rchg(37) Level 18: Hover -- LucoftheG-Def/Rchg+(A) Level 20: Field Operative -- NmnCnv-Heal(A), NmnCnv-Heal/Rchg(39), NmnCnv-Heal/EndRdx/Rchg(39), LucoftheG-Def/Rchg+(39), LucoftheG-Def(40), LucoftheG-Def/EndRdx(40) Level 22: Combat Jumping -- LucoftheG-Def/Rchg+(A), ShlWal-ResDam/Re TP(40) Level 24: Hasten -- RechRdx-I(A), RechRdx-I(42) Level 26: Explosive Blast -- Rgn-Dmg/EndRdx(A), Rgn-Dmg(42), Rgn-Dmg/Rchg(42), Rgn-Acc/Dmg/Rchg(43), Rgn-Acc/Rchg(43) Level 28: Trip Mine -- Obl-%Dam(A), Obl-Acc/Dmg/EndRdx/Rchg(43), Obl-Acc/Dmg/Rchg(45), Obl-Dmg(45), Obl-Acc/Rchg(45) Level 30: Aim -- RechRdx-I(A) Level 32: Nova -- Arm-Dam%(A), Arm-Dmg/EndRdx(46), Arm-Dmg/Rchg(46), Arm-Acc/Dmg/Rchg(46), Arm-Acc/Rchg(48) Level 35: Scorpion Shield -- LucoftheG-Def/Rchg+(A), LucoftheG-Def(48), LucoftheG-Def/EndRdx(48) Level 38: Gun Drone -- HO:Nucle(A), Dmg-I(50), GldJvl-Dam%(50) Level 41: Smoke Grenade -- Acc-I(A) Level 44: Caltrops -- ImpSwf-Dam%(A) Level 47: Afterburner -- LucoftheG-Def/Rchg+(A) Level 49: Power Push -- Acc-I(A) Level 1: Brawl -- KntCmb-Acc/Dmg(A), KntCmb-Dmg/EndRdx(7), KntCmb-Dmg/Rchg(9), KntCmb-Dmg/EndRdx/Rchg(9) Level 1: Defiance Level 1: Quick Form Level 1: Prestige Power Dash -- Empty(A) Level 1: Prestige Power Slide -- Empty(A) Level 1: Prestige Power Quick -- Empty(A) Level 1: Prestige Power Rush -- Empty(A) Level 1: Prestige Power Surge -- Empty(A) Level 1: Sprint -- UnbLea-Stlth(A) Level 2: Rest -- RechRdx-I(A) Level 4: Ninja Run Level 2: Swift -- Flight-I(A) Level 2: Health -- Pnc-Heal/+End(A), Mrc-Rcvry+(13), NmnCnv-Regen/Rcvry+(15) Level 2: Hurdle -- Jump-I(A) Level 2: Stamina -- PrfShf-EndMod(A), PrfShf-EndMod/Rchg(15), PrfShf-End%(17), PwrTrns-+Heal(17) Level 50: Agility Radial Paragon Level 50: Pyronic Core Final Judgement Level 50: Reactive Radial Flawless Interface Level 50: Warworks Core Superior Ally Level 50: Clarion Core Epiphany Level 50: Support Radial Embodiment ------------
-
My answer to that issue of "inattention" was to get permadom without Hasten and just put Domination on autofire. It takes about 130% global recharge to do it, and it can be done while still having softcapped defenses so it's not bad. I build all my doms that way now and skip Hasten entirely. I know that may sound like blasphemy to some, but it works well for me. As long as I don't get hit with a ton of -recharge debuffs I'm good.
-
I have a pretty nice Pain/Sonic myself. She's incredibly sturdy, solo's well, and still provides many benefits to a team! Hero Plan by Mids' Reborn : Hero Designer 2.6.0.7 https://github.com/ImaginaryDevelopment/imaginary-hero-designer Click this DataLink to open the build! Starsong: Level 50 Magic Defender Primary Power Set: Pain Domination Secondary Power Set: Sonic Attack Power Pool: Flight Power Pool: Concealment Power Pool: Fighting Power Pool: Speed Ancillary Pool: Mace Mastery Hero Profile: Level 1: Nullify Pain -- Prv-Absorb%(A), Prv-Heal/Rchg/EndRdx(3), Prv-Heal(3), Prv-Heal/EndRdx(5), Prv-EndRdx/Rchg(5), Prv-Heal/Rchg(7) Level 1: Shriek -- SprWntBit-Rchg/SlowProc(A), SprWntBit-Dmg/EndRdx/Acc/Rchg(7), SprWntBit-Dmg/Rchg(9), SprWntBit-Acc/Dmg/EndRdx(9), SprWntBit-Acc/Dmg/Rchg(11) Level 2: Scream -- SprDfnBst-Rchg/Heal%(A), SprDfnBst-Acc/Dmg/EndRdx/Rchg(11), SprDfnBst-Acc/Dmg(13), SprDfnBst-Dmg/Rchg(13), SprDfnBst-Dmg/EndRdx/Rchg(15), SprDfnBst-Acc/Dmg/EndRdx(15) Level 4: Howl -- Rgn-Knock%(A), Rgn-Dmg/EndRdx(25), Rgn-Dmg/Rchg(27), Rgn-Acc/Dmg/Rchg(27), Rgn-Acc/Rchg(29) Level 6: Fly -- BlsoftheZ-ResKB(A), WntGif-ResSlow(50) Level 8: Soothe -- DctWnd-Heal(A), DctWnd-Heal/EndRdx(21), DctWnd-EndRdx/Rchg(23), DctWnd-Heal/Rchg(23), DctWnd-Heal/EndRdx/Rchg(25) Level 10: Shockwave -- OvrFrc-Dam/KB(A), OvrFrc-Acc/Dmg/End/Rech(46), OvrFrc-Acc/Dmg(48), OvrFrc-End/Rech(48), OvrFrc-Dmg/End/Rech(48) Level 12: Stealth -- ShlWal-ResDam/Re TP(A), LucoftheG-Def/Rchg+(50) Level 14: Conduit of Pain -- RechRdx-I(A) Level 16: Shout -- SprVglAss-Rchg/+Absorb(A), SprVglAss-Acc/Dmg/EndRdx/Rchg(29), SprVglAss-Acc/Dmg(31), SprVglAss-Dmg/Rchg(31), SprVglAss-Dmg/EndRdx/Rchg(31), SprVglAss-Acc/Dmg/EndRdx(33) Level 18: World of Pain -- UnbGrd-ResDam/EndRdx/Rchg(A), UnbGrd-Rchg/ResDam(33), UnbGrd-ResDam(33), AdjTrg-Rchg(34), AdjTrg-ToHit(34), AdjTrg-ToHit/Rchg(34) Level 20: Enforced Morale -- Range-I(A) Level 22: Boxing -- Acc-I(A) Level 24: Tough -- StdPrt-ResDam/Def+(A), GldArm-3defTpProc(36), UnbGrd-Max HP%(36), UnbGrd-ResDam/EndRdx(36), UnbGrd-ResDam(37), UnbGrd-ResDam/EndRdx/Rchg(50) Level 26: Anguishing Cry -- AchHee-ResDeb%(A), AnlWkn-Acc/Rchg(37), AnlWkn-Acc/Rchg/EndRdx(37), ShlBrk-Acc/Rchg(39) Level 28: Siren's Song -- Acc-I(A) Level 30: Hasten -- RechRdx-I(A), RechRdx-I(39) Level 32: Weave -- Rct-ResDam%(A), Rct-Def/EndRdx/Rchg(39), Rct-Def(40), Rct-Def/EndRdx(40), Rct-EndRdx/Rchg(40), Rct-Def/Rchg(46) Level 35: Scorpion Shield -- LucoftheG-Def/Rchg+(A), RedFrt-Def(42), RedFrt-Def/EndRdx(42) Level 38: Dreadful Wail -- Arm-Dam%(A), Arm-Dmg/EndRdx(42), Arm-Dmg/Rchg(43), Arm-Acc/Dmg/Rchg(43), Arm-Acc/Rchg(43) Level 41: Painbringer -- DctWnd-Heal(A), DctWnd-Rchg(45), DctWnd-EndRdx/Rchg(45), DctWnd-Heal/EndRdx/Rchg(45), DctWnd-Heal/Rchg(46) Level 44: Hover -- LucoftheG-Def/Rchg+(A) Level 47: Afterburner -- LucoftheG-Def/Rchg+(A) Level 49: Grant Invisibility -- LucoftheG-Def/Rchg+(A) Level 1: Brawl -- Acc-I(A) Level 1: Prestige Power Dash -- Empty(A) Level 1: Prestige Power Slide -- Empty(A) Level 1: Prestige Power Quick -- Empty(A) Level 1: Prestige Power Rush -- Empty(A) Level 1: Prestige Power Surge -- Empty(A) Level 1: Sprint -- UnbLea-Stlth(A) Level 1: Vigilance Level 2: Rest -- RechRdx-I(A) Level 4: Ninja Run Level 2: Swift -- Flight-I(A) Level 2: Health -- Pnc-Heal/+End(A), Mrc-Rcvry+(17), NmnCnv-Regen/Rcvry+(17) Level 2: Hurdle -- Jump-I(A) Level 2: Stamina -- PrfShf-EndMod(A), PrfShf-EndMod/Rchg(19), PrfShf-End%(19), PrfShf-EndMod/Acc(21) Level 50: Pyronic Core Final Judgement Level 50: Reactive Radial Flawless Interface Level 50: Phantom Core Superior Ally Level 50: Clarion Core Epiphany Level 50: Support Radial Embodiment Level 0: Freedom Phalanx Reserve Level 0: Portal Jockey Level 0: Task Force Commander Level 0: The Atlas Medallion Level 50: Agility Core Paragon Level 1: Quick Form ------------
-
Another vote for Dark here. Dark provides a nice perk for Illusion (and Mind Control) thanks to Dark Servant providing an immobilize (which neither Illusion or Mind have as part of their kits) to trigger containment.
-
My own Ill/Time Controller sports 250% recharge (perma-Hasten/Chrono Shift/Phantom Army), softcapped defenses for me and my Phantasm (Powerboost + Farsight + Group Invisibility), plus additional mitigation for me and Phantasm from Time's Juncture (-to-hit and -dmg). What's nice is that while you're a complete powerhouse on your own, you still have lots to offer a group between your buffs and controls. Personal defenses have less importance once you have perma-PA, but it's still great to have them if things go south and PA either isn't available or something jumps you while they are focused on something else. Another thing of note is that while Phantom Army's Decoys can't be buffed from outside sources, they CAN buff themselves making the Soulbound Allegiance proc a great choice! They also benefit from the Assault Radial proc but like all pets, they must be summoned AFTER it's been activated to gain the benefits. Still it's a way to make Phantom Army (and Phantasm) provide more damage goodness! Hero Plan by Mids' Reborn : Hero Designer 2.6.0.7 https://github.com/ImaginaryDevelopment/imaginary-hero-designer Click this DataLink to open the build! Nozdormu: Level 50 Magic Controller Primary Power Set: Illusion Control Secondary Power Set: Time Manipulation Power Pool: Sorcery Power Pool: Speed Power Pool: Fighting Power Pool: Leaping Ancillary Pool: Primal Forces Mastery Hero Profile: Level 1: Spectral Wounds -- Dcm-Build%(A), Dcm-Acc/Dmg/Rchg(3), Dcm-Acc/Dmg(3), Dcm-Dmg/EndRdx(5), Dcm-Dmg/Rchg(5) Level 1: Time Crawl -- Acc-I(A) Level 2: Blind -- Apc-Dam%(A), Apc-Dmg/EndRdx(7), Apc-Acc/Dmg/Rchg(7), Apc-Dmg/Rchg(9), Apc-Acc/Rchg(9) Level 4: Mystic Flight -- BlsoftheZ-ResKB(A) Level 6: Deceive -- CrcPrs-Conf%(A), CrcPrs-Conf/EndRdx(15), CrcPrs-Conf/Rchg(15), CrcPrs-Acc/Conf/Rchg(17), CrcPrs-Acc/Rchg(17) Level 8: Superior Invisibility -- LucoftheG-Def/Rchg+(A), ShlWal-ResDam/Re TP(19), Rct-ResDam%(23) Level 10: Temporal Mending -- Pnc-Heal(A), Pnc-Heal/EndRedux(19), Pnc-EndRdx/Rchg(21), Pnc-Heal/Rchg(21), Pnc-Heal/EndRedux/Rchg(23) Level 12: Time's Juncture -- DarWtcDsp-ToHitDeb(A), DarWtcDsp-ToHitDeb/EndRdx(25), DarWtcDsp-ToHitdeb/Rchg/EndRdx(25), DarWtcDsp-Rchg/EndRdx(27) Level 14: Flash -- SprWiloft-Acc/Conf/Hold/Immob/Sleep/Stun/Fear/EndRdx/Rchg(A), SprWiloft-Acc/Conf/Hold/Immob/Sleep/Stun/Fear(27), SprWiloft-Conf/Hold/Immob/Sleep/Stun/Fear/Rchg(29), SprWiloft-EndRdx/Rchg(29), SprWiloft-Acc/Conf/Hold/Immob/Sleep/Stun/Fear/EndRdx(31), Lck-%Hold(31) Level 16: Hasten -- RechRdx-I(A), RechRdx-I(31) Level 18: Phantom Army -- ExpRnf-Acc/Rchg(A), ExpRnf-EndRdx/Dmg/Rchg(33), ExpRnf-Acc/Dmg(33), ExpRnf-Acc/Dmg/Rchg(33), SlbAll-Acc/Dmg/Rchg(34), SlbAll-Build%(34) Level 20: Time Stop -- UnbCns-Dam%(A), UnbCns-EndRdx/Hold(34), UnbCns-Hold/Rchg(36), UnbCns-Acc/Hold/Rchg(36), UnbCns-Acc/Rchg(36) Level 22: Boxing -- Acc-I(A) Level 24: Tough -- StdPrt-ResDam/Def+(A), GldArm-Res/Rech/End(37), UnbGrd-Max HP%(39), UnbGrd-ResDam/EndRdx(39), UnbGrd-ResDam/EndRdx/Rchg(50) Level 26: Weave -- LucoftheG-Def/Rchg+(A), RedFrt-Def(37), RedFrt-EndRdx(37), RedFrt-Def/EndRdx(39), RedFrt-Def/EndRdx/Rchg(43), RedFrt-Def/Rchg(50) Level 28: Farsight -- LucoftheG-Def/Rchg+(A), HO:Membr(40), HO:Membr(40) Level 30: Group Invisibility -- LucoftheG-Def/Rchg+(A), RedFrt-Def/EndRdx/Rchg(40), RedFrt-Def/Rchg(42) Level 32: Phantasm -- ExpRnf-Acc/Rchg(A), ExpRnf-Acc/Dmg(42), ExpRnf-Dmg/EndRdx(42), ExpRnf-Acc/Dmg/Rchg(43) Level 35: Power Blast -- Dcm-Acc/Dmg/Rchg(A), Dcm-Acc/Dmg(43), Dcm-Dmg/EndRdx(45), Dcm-Dmg/Rchg(45), Dcm-Acc/EndRdx/Rchg(45) Level 38: Slowed Response -- AchHee-ResDeb%(A), AnlWkn-Acc/Rchg(46), AnlWkn-Acc/Rchg/EndRdx(46) Level 41: Energy Torrent -- Rgn-Dmg/EndRdx(A), Rgn-Dmg(46), Rgn-Dmg/Rchg(48), Rgn-Acc/Dmg/Rchg(48), Rgn-Acc/Rchg(48) Level 44: Power Boost -- RechRdx-I(A) Level 47: Combat Jumping -- LucoftheG-Def/Rchg+(A) Level 49: Chrono Shift -- RechRdx-I(A), RechRdx-I(50) Level 1: Brawl -- Acc-I(A) Level 1: Containment Level 1: Prestige Power Dash -- Empty(A) Level 1: Prestige Power Slide -- Empty(A) Level 1: Prestige Power Quick -- Empty(A) Level 1: Prestige Power Rush -- Empty(A) Level 1: Prestige Power Surge -- Empty(A) Level 1: Sprint -- UnbLea-Stlth(A) Level 2: Rest -- RechRdx-I(A) Level 4: Ninja Run Level 2: Swift -- Flight-I(A) Level 2: Health -- Pnc-Heal/+End(A), Mrc-Rcvry+(11), NmnCnv-Regen/Rcvry+(11) Level 2: Hurdle -- Jump-I(A) Level 2: Stamina -- PrfShf-EndMod(A), PrfShf-EndMod/Rchg(13), PrfShf-End%(13) Level 50: Agility Core Paragon Level 0: Freedom Phalanx Reserve Level 0: Portal Jockey Level 0: Task Force Commander Level 0: The Atlas Medallion Level 50: Pyronic Core Final Judgement Level 50: Reactive Radial Flawless Interface Level 50: Phantom Core Superior Ally Level 50: Assault Radial Embodiment Level 50: Clarion Radial Epiphany ------------ | Copy & Paste this data into Mids' Reborn : Hero Designer to view the build | |-------------------------------------------------------------------| |MxDz;1612;735;1470;HEX;| |78DA65944B4F535110C7CFEDBDB5DCD2F22A2D50288FF26EA1B4802EDC684440144| |C138D3BAC57287893D2367D24EACEAF200B7C455079080B9746DDB93631C6950BBF| |828210137553A777FEB437F424CD6FCE9C99393373E676EEEE45C79BE907E784543| |791D0B2D9D8442A99CBA4128978C63AA72DEB0B8256D5D5D4FDC55466256FA34D77| |D9E2D838349348E4B37A2A79ACE832D95CC82F2D85AEEB2BF1D89C96D4D3F984962| |34BE188A6C8F15A2AB310CFDCB3F3261D8F2F3A0D714A5FBE93D393CB6C351BD7D2| |B4F14EA6F5855034A3AF6889D854D1334B31B3390AD04C898DD26F5D125805453C2| |3F4ABC2F2145C632A8FC0C7CCE78D251F21BC84882A36288E843852C462E84E85C1| |10B36A181C61AEF60A21238EFC9D752F28881571AC1AEB6A6E81F3CCBA9B608CF98| |A7C6CC6E5058BCD2D19BA862BB241CF51918A58A79C55C4553B59D7D0C66CF481ED| |4C4F0773837CAAD947AE7ECB77357F00DF31BDEF992FE95A27DB5A9D7BECEFDD66B| |6ED80AF99EDBBE03F8B413F4D492DE72FD506B99FEDE016E9EB11B77E9FEFEA3C02| |0FC04366D77970027DA1FC5DA8D93583B34BCCEE49700A9C664A948B1B6FE2C6DBC| |AA46BE2FC94A6A2E053454F98FBDBF7976BE9FBCDFBC81FA6423E2DEC636DC19BF4| |D480B5CC3E3B33E06446AA999B94772BDEB315BEFD67696B934BDC2CA6011BDFB10| |DE20C22CE0EA103EFD781DE0DA26783BF9801F4EE13A5ED47AFFC98FF00E67F08F3| |3F84F91F7AC2DCA23C7BD9C7D2FB91E2B85431FC85E30D7F651E3A841840DC81333| |81B658E8C81E3E069E667CA25883708620E3CD4CF10D72B42A8779BEE0F636EC2B0| |8B806DCAC96F5411BEB2AE10309F17688970852652A119ABD08C576866CD1A992B8| |A2AA57F072105391BB5AEF4F5177ED8E91CD549DD5CC17E596791BA78AAEC9725A3| |F3F61BDC819F66BF01F63B30FB3DE4FB1DABE01AF39F87C03685A8BDD83F96E74DB| |266926F9B647F63D9F79BAB2CF7B8CB7279EDFA4F68F78A2E28FB3F9E740D21| |-------------------------------------------------------------------|
-

Mid's Reborn: Hero Designer
Nic Mercy replied to Metalios's topic in Mids' Reborn Hero Designer's Forum
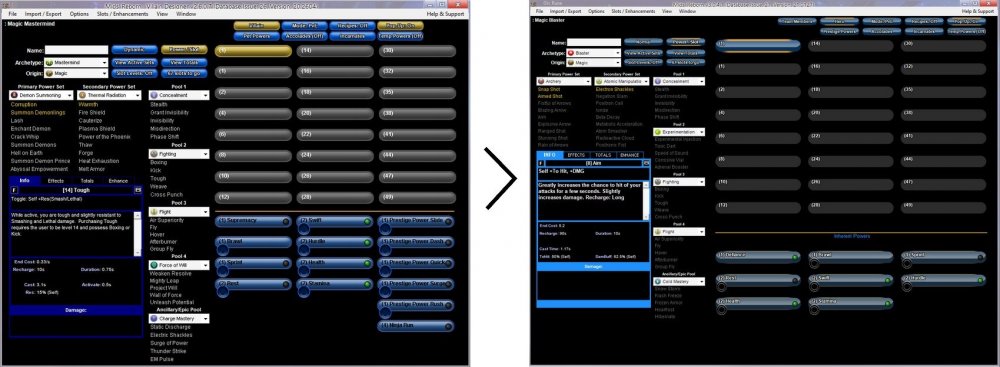
Is there any possibility of getting a "classic appearance" option for the hero designer? I really prefer the old appearance that looks more like the in game interfaces over the more modern look that current mid's is using. -

Does aid self + field medic mean no interupt on aid self?
Nic Mercy replied to tellania's topic in General Discussion
Field Medic only removes the interrupt on Aid Other. The benefit it gives to Aid Self is an endurance recovery buff. -
This is not my experience with the enhancement. Slotting it gives a minimum of 3% at all times on my monitor and at most gives 10% when your HP is very low.
-

Darkness Control / Dark Assault Build Question and Build
Nic Mercy replied to IneptAdept's topic in Dominator
I usually plan when I take all my builds power choices with leveling in mind. I don't typically IO out while leveling though. I use a few choice uniques/procs as soon as I can slot them (stuff like Panacea +hp/end, Miracle +recovery, Numina's +regen/recovery, etc) and the ATO's I intend to use. Outside of that I use generic crafteds or vendor enhancements while leveling. -

Reasons Your Dominator Isn't As Strong as it Could Be
Nic Mercy replied to oedipus_tex's topic in Dominator
I prefer not to take Hasten on my Doms. Instead I build for 130% global recharge so I can leave Domination on autofire cause I can't be bothered to keep track of hitting Dom before it falls off when Hasten is set to auto. What can I say, I'm lazy and have a low attention span, but 130% global recharge from sets/lotgs does the trick! I also prefer to build for S/L/E defense over ranged defense. I feel like it provides more comprehensive coverage than ranged does but that's just my opinion. Also: While not obvious (and certainly not as potent), Power Boost will boost the small defense bonus granted by Group Invisibility in Illusion Control and the boost lasts for the entire duration of Group Invisibility just like it does for Farsight. An Ill/Time controller can get a lot of defense mileage from Power Boost + Farsight + Group Invis -
Psi - Indomitable Will can serve as a LotG mule and provide mez protection. Ice - Ice Armor can act as a LotG mule. Ice Armor is probably the 2nd best defense toggle available to Controllers from APP's - all in all this is really good choice imo. Fire - I'm not sure where you think you can put a LotG in this set. It has no defense powers, only a resistance toggle which cannot take the LotG set. Soul - I'm not sure where you think you can put a LotG in this set. It has no defense powers, only a resistance toggle which cannot take the LotG set. Mace - Has the best defense toggle available to Controllers from APP's. Serves as a LotG mule as well. Redrawon the attacks is a drag as you mentioned. Primal - You can mitigate the scatter by slotting the Knockback to Knockdown IO from the Sudden Acceleration set in the attacks.
-
Holy SPACEBALLS! I'd love to see a video walk through of that. Commentary encouraged. ;) Well I am not the type to make videos like that but when I am done with the interior I will make the passcode public so anyone can visit and take a tour!
-
Prestige costs were restrictive to creativity. If prestige costs were still a thing I could never have created things like this: or this: or this: or this: The removal of prestige costs was one of the best things that could have ever happened to base construction as far as creative freedom is concerned.
-
@the mauler - Just a minor quibble... lose the extra slot in Hibernate (you shouldnt need to use it that frequently) and add it to Tough and slot the Gladiator's Armor: TP Protection/+3% defense enhancement. You'll get 3% more defense to everything that way. Add in a tier four Agility alpha and you'll basically be softcapped to ranged and be pretty decent against other stuff.
-
This is a great build. I'm just gonna offer a counter-argument: yes, S/L/E DEF is much more comprehensive when it applies, which will be the majority of the time, but when it doesn't apply, the change can be shocking. Ranged DEF offers a more consistent experience against all factions, and if you can grab Mez protection (via Clarion or elsewise), then your sustain + killing speed should carry you against the occasional melee/AoE attack that gets through. Obviously all of this is subjective, and largely dependent on playstyle. I favor Blasters with perma-Hover and few melee/blapper attacks, so YMMV. And happily, you don't really have to choose; as Nic's build shows, you can get a good mix of both types of DEF without too many problems. Or you could mix ranged DEF with a RES shield. One of the perks of the ranged DEF approach is that your Patron/Epic choices are a little more open, but of course this is a trade off too; as Nic says, the S/L approach lets your Patron/Epic shield do most of the work, leaving more margin for error in your IO choices. Me? I like having the option to take things like Electrifying Fences (Mu) for a little anti-scatter. (Unfortunately Web Envelope has terrible redraw, in my albeit distantly old experience). Bonfire with a KB-to-KD IO is a great idea too. Haven't tried that yet. There are many ways to skin this cat. I can totally appreciate where you're coming from. I wasn't trying to say s/l/e is the undisputed "better" choice, just that it "feels" better to "me" specifically... purely subjective. With that said... from a more objective perspective, S/L/E defense really does cover the majority of what you face in the game. Sure, the Clockwork King is going to have a lot easier time hitting you since he's only going to face 30% ranged defense instead of 45% (in the case of the build I posted above), but overall, it's really kind of silly how prevalent S/L/E damage is throughout the majority of the enemy groups. Even against most Fire and Negative attacks (which only a few have an S or L damage type attached), and the few Ice attacks that are just cold damage (most are a mix of cold/smashing or cold/lethal), the above build I posted has 37% defense against them, which is not bad at all. Back to subjective opinion, to me it just "feels" like it's easier to build for "type" defense rather than "positional" defense and, that being the case, I end up inadvertently (or in some cases intentionally) covering more damage types and positionals even if I'm mainly just focusing on S/L/E.
-
I can't help you with binds but I can tell you that you need about 80% global recharge (in addition to the 70% from Hasten and the 30% from Accelerate Metabolism) to perma them both. You'll also need to ED cap Hasten's recharge which you can do with two generic recharge IO's boosted to +5 using enhancement boosters (you save a slot this way). This is all not factoring in any recharge you might get from your alpha incarnate slot choice.
-
The thing that makes Phantom Army so good isn't just the damage it deals, but the fact that it summon three "invulnerable to pretty much everything except Hamidon" decoys that taunt while dealing damage. They are more than just DPS but act as an aggro management tool as well. Haunt's are, for all intents and purposes, a DoT, and the only aggro management that provide comes from damage they deal to foes that are otherwise un-engaged by anyone else. With enough recharge you can have three permanent, nigh unkillable, pocket tanks at all times. That leave Illusion controllers free to hold, deceive and dish out damage with impunity.
-
Spiritual alpha is a fine choice. Agility is also a decent alternative if you're also trying to stack defense. Ion judgement is great. Degenerative is fine, especially vs. AV's or Giant Monsters. Most people go for Reactive Radial but Degenerative is a good alternative too. Cimerorans are indeed the highest dps lore pets. One thing to keep in mind though, if you're soloing +4/x8 missions they will probably die in seconds :P Ageless can be a good choice depending on your build, but I'm not sure why you'd need it as an ill/rad though. The right build can net you all the recharge you need to get perma-Hasten/AccelMetab/Phantom Army, so the recharge from Ageless is kind of overkill. You might want to consider other choices such as the Clarion core line which at tier 3 and higher gives permanent mez protection to everything. Another good choice is Barrier to give you incredible amounts of defense AND resistance... and incidentally also gives that to your Cimroran buddies to keep them alive when soloing particularly difficult foes. For hybrid, Support is kind of a waste if you're thinking to use the "pets get extra buffs" bit. The only pet you'll be buffing is your Phantasm. Phantom Army's decoys can't be buffed through outside means (things like the leadership toggles do nothing for Phantom Army and Support works like those do sort of). I like going for the Assault Radial line since that gives Phantasm and Phantom Army the ability to "double hit". The reason this works is because Assault is a buff on YOU not the pets. They simply inherit it from you when they are spawned. The CATCH however is that you must re-summon your pets after activating Assault for them to inherit it (because it isn't a buff on them and they can't inherit Assault's properties without being freshly summoned while you have the Assault buff).
-
That's a great tidbit about Preventive Medicine: Chance for +Absorb! Added a note about that!
-
Stacking ranged defense works great... until you find yourself in a cramped office map, get hit with a -fly effect, or face foes who can fly as well. That's why I prefer going for Smashing/Lethal/Energy defense. They are the three most common types of damage in the game and S/L are often attached to other damage types, giving far more comprehensive coverage than ranged defense does imo. S/L/E defense is also MUCH easier to build for, especially if you take Scorpion Shield from the Mace Mastery Patron Pool. You're also not boned like in the above scenarios where staying at range is less of an option. Going S/L/E also ends up providing a decent amount of positional defense as well. Here's an example of such a build (I also factored in the upcoming snipe changes so I didn't take Leadership): Hero Plan by Mids' Hero Designer 1.962 http://www.cohplanner.com/ Click this DataLink to open the build! Atomica: Level 50 Science Blaster Primary Power Set: Radiation Blast Secondary Power Set: Atomic Manipulation Power Pool: Flight Power Pool: Concealment Power Pool: Fighting Power Pool: Leaping Ancillary Pool: Mace Mastery Hero Profile: Level 1: X-Ray Beam -- SprDfnBrr-Rchg/+Status Protect(A), SprDfnBrr-Acc/Dmg/EndRdx/Rchg(3), SprDfnBrr-Acc/Dmg(3), SprDfnBrr-Dmg/Rchg(5), SprDfnBrr-Acc/Dmg/EndRdx(5), SprDfnBrr-Acc/Dmg/Rchg(7) Level 1: Electron Shackles -- HO:Endo(A) Level 2: Negatron Slam -- SprBlsCol-Rchg/HoldProc(A), SprBlsCol-Dmg/EndRdx/Acc/Rchg(7), SprBlsCol-Dmg/EndRdx(9), SprBlsCol-Acc/Dmg/EndRdx(9), SprBlsCol-Acc/Dmg/Rchg(11), SprBlsCol-Acc/Dmg(11) Level 4: Positron Cell -- Apc-Dam%(A), Apc-Dmg/EndRdx(19), Apc-Dmg/Rchg(21), Apc-Acc/Dmg/Rchg(21), Apc-Acc/Rchg(23), UnbCns-Hold(23) Level 6: Electron Haze -- OvrFrc-Dam/KB(A), OvrFrc-Acc/Dmg/End/Rech(25), OvrFrc-Acc/Dmg(25), OvrFrc-End/Rech(27), OvrFrc-Dmg/End/Rech(27) Level 8: Fly -- BlsoftheZ-ResKB(A) Level 10: Hover -- LucoftheG-Rchg+(A) Level 12: Proton Volley -- SprBlsWrt-Rchg/Dmg%(A), SprBlsWrt-Acc/Dmg/EndRdx/Rchg(29), SprBlsWrt-Acc/Dmg(29), SprBlsWrt-Dmg/Rchg(31), SprBlsWrt-Acc/Dmg/Rchg(31), SprBlsWrt-Acc/Dmg/EndRdx(31) Level 14: Stealth -- ShlWal-ResDam/Re TP(A) Level 16: Boxing -- KntCmb-Acc/Dmg(A), KntCmb-Dmg/EndRdx(33), KntCmb-Dmg/Rchg(33), KntCmb-Dmg/EndRdx/Rchg(33) Level 18: Cosmic Burst -- SprWntBit-Rchg/SlowProc(A), SprWntBit-Dmg/EndRdx/Acc/Rchg(34), SprWntBit-Dmg/Rchg(34), SprWntBit-Acc/Dmg/EndRdx(34), SprWntBit-Acc/Dmg/Rchg(36), SprWntBit-Acc/Dmg(36) Level 20: Metabolic Acceleration -- NmnCnv-Heal(A), NmnCnv-Heal/EndRdx(36), NmnCnv-Heal/Rchg(37) Level 22: Tough -- StdPrt-ResDam/Def+(A), GldArm-3defTpProc(37), UnbGrd-Max HP%(37), UnbGrd-ResDam/EndRdx(39), UnbGrd-ResDam(39) Level 24: Weave -- Rct-ResDam%(A), Rct-Def/EndRdx/Rchg(39), Rct-Def(40), Rct-Def/EndRdx(40), Rct-EndRdx/Rchg(40), Rct-Def/Rchg(42) Level 26: Neutron Bomb -- Ann-Acc/Dmg/EndRdx/Rchg(A), Ann-Dmg/Rchg(42), Ann-Acc/Dmg/Rchg(42), Ann-Acc/Dmg/EndRdx(43) Level 28: Ionize -- RctRtc-ToHit/Rchg(A), RctRtc-ToHit(43) Level 30: Aim -- RctRtc-ToHit/Rchg(A), RctRtc-Pcptn(43) Level 32: Atomic Blast -- SprAvl-Rchg/KDProc(A), SprAvl-Acc/Dmg/EndRdx/Rchg(45), SprAvl-Dmg/EndRdx(45), SprAvl-Acc/Dmg/EndRdx(45), SprAvl-Acc/Dmg/Rchg(46), SprAvl-Acc/Dmg(46) Level 35: Scorpion Shield -- LucoftheG-Rchg+(A), RedFrt-Def(46), RedFrt-Def/EndRdx(48) Level 38: Radioactive Cloud -- SprEnt-Rchg/AbsorbProc(A), SprEnt-Acc/Hold/End/Rchg(48), SprEnt-Hold/Rchg(48), SprEnt-End/Rchg(50), SprEnt-Acc/Hold/End(50), SprEnt-Acc/Hold(50) Level 41: Combat Jumping -- LucoftheG-Rchg+(A) Level 44: Afterburner -- LucoftheG-Rchg+(A) Level 47: Grant Invisibility -- LucoftheG-Rchg+(A) Level 49: Phase Shift -- RechRdx-I(A) Level 1: Brawl -- Acc-I(A) Level 1: Defiance Level 1: Prestige Power Dash -- Empty(A) Level 1: Prestige Power Slide -- Empty(A) Level 1: Prestige Power Quick -- Empty(A) Level 1: Prestige Power Rush -- Empty(A) Level 1: Prestige Power Surge -- Empty(A) Level 1: Sprint -- UnbLea-Stlth(A) Level 2: Rest -- RechRdx-I(A) Level 4: Ninja Run Level 2: Swift -- Flight-I(A) Level 2: Health -- Pnc-Heal/+End(A), Mrc-Rcvry+(13), NmnCnv-Regen/Rcvry+(13), NmnCnv-Heal(15), NmnCnv-Heal/EndRdx(15), RgnTss-Regen+(17) Level 2: Hurdle -- Jump-I(A) Level 2: Stamina -- PrfShf-EndMod(A), PrfShf-EndMod/Rchg(17), PrfShf-End%(19) Level 50: Agility Radial Paragon Level 0: Freedom Phalanx Reserve Level 0: Portal Jockey Level 0: Task Force Commander Level 0: The Atlas Medallion Level 50: Ion Core Final Judgement Level 50: Reactive Radial Flawless Interface Level 50: Cimeroran Core Superior Ally Level 50: Clarion Core Epiphany Level 50: Assault Radial Embodiment ------------ | Copy & Paste this data into Mids' Hero Designer to view the build | |-------------------------------------------------------------------| |MxDz;1625;725;1450;HEX;| |78DA7594594F135114C7EF74A6D6520AC5B29555F64D0A55E216835151A342C2127| |D30220EA5C1496ADB4031F2E83750D098C8A66FE2F6195CBF830F18352E6F026E0F| |86877ADAFF1F3A09F1269DDF99FFB9E7CCB9E7DEDBBE1B3DB9CF4FDF3CAA34EF89A| |8393939725C9EC9C8846B286C4562E18892E13A968C5FB3C2A64BEC2AFA4706CDD8| |78642C38688E5966D28AC710D8B8E91E9A4A24E213499BBFCF8C5989A968E64579F| |AE3F168F054D41ABF9A2CC8D86762D7AD496BD48A5AC9692FBC69A7151BCFCDBCF5| |46CC84BC044E26AC7070F32B7D6638228FB43D5D2AD575C9EFA25771A49CCA69281| |53294C320156868A40EEE7080075AB66295DA9F5EBAAE0E8AA6319F7697F3EF803B| |6F933360CE2C790B3C24B13A63F5904334B7DAD50916B69341B0B883EC012FC93A9| |C88359C9FF44CBED28FE40A58F69EFC007A648B5CACDFB5823C6E11DC1A34779196| |D12E4B6E0FEBF22C21B66291BC0F56CD91F3E402E8957C5E7EC37B4ECFE4D344CB8| |7A6E7F70B6ADD6AF70039480E8123125CC06F173C439F6A9E92CBE463B0EE09F908| |3C22FDF4632D0EFF79ACA56E00AC1F0275A9A508738CA212312AC5B71775D6FF051| |BFF90BF4143624A10E32CF945DF4FB069955C23D7C1961FE015594F806B0F7CA3EF| |33F9056CFD0A1E96FACB31572B9F97FDF18B6F0E1C963C95F4556EFA1640537CD5E| |C59F543F462CF0372815C04DB97C87970C3276D67CF6AB9FFED7960470ED82D7535| |307FC35BC475BC215F82A157E46BF205582CBD6BE6F96A667E55AC541BCF481BB53| |C9917A416A4E613AD935A673A40B40AC37607CBA0D5A4357C23D56AF7A764A8CE6D| |4A689BB26F9BD2B54DE9B52B3A6E4FBFB175FB95C60ADDBEAD5B9DFA9E237EAE5EA| |B837F2DAB39B51AEC7CEE59119A8417D80D9EDE3C9E5E5F374EEAAA3D5F33F2AD67| |35873683BA7CB3FC37B9076E48C743EC507F4EFA0CC11EB6D9A6CD1EB5D981C26CE| |C3B7FD6761765ED659BFEDFB15C9B9DF40F80471898| |-------------------------------------------------------------------| The above build has softcapped s/le without the alpha slot. With the Agility alpha, it also has 37% n/f/c defense and 28% melee/30% ranged/27% aoe defense. The build also regenerates 44hp/sec, has fair amount of global recharge even without Hasten, and a nice panic button in Phase Shift (since we couldn't take Personal Force Field). I went with Agility for some extra defense in case I get hit with -defense debuffs and to shore up the non-s/l/e defenses a tad but the alpha choice is really open. Since more defense would be overkill on the three biggies (s/l/e) I opted for Assault Radial for some double hit damage and the passive damage boost it provides at all times, but like the alpha slot, the hybrid slot choice is open. Taking the Support hybrid would shore up your non-s/l/e defenses further and could be good choice to make up for any deficiencies against the rare foe that doesn't have any s/l/e damage in their arsenal. A tier 3 or 4 clarion core gives comprehensive mez protection, but for leveling/exemping you've still got your ATO2 proc in a tier1 or 2 attack that stacks mez protection and a -KB IO. As an alternative you could go with Ageless for defense debuff protection, or Barrier to buff yourself and your Lore pets. My opinion is obviously subjective, but I feel much safer building for s/l/e than I do for ranged, and I have no fear when I want to use my pbaoe nuke or some mob flies into my face or grounds me with a web grenade. I can pop them in the face with my Negatron Slam, knock them on their butt, and maybe trigger the hold proc I have in there, secure in the knowledge that they will almost certainly have just as hard a time hitting me in melee as they do at range.


