

optimistic
-
Posts
18 -
Joined
-
Last visited
Content Type
Profiles
Forums
Events
Store
Articles
Patch Notes
Posts posted by optimistic
-
-
Hi. I'm leveling up (currently in the mid 40s) my first VEAT of any kind, and would appreciate a review of my build for level 50. I currently have Reinforcements and Spiderlings, but I'm thinking I'll respec out of them. They are helpful with soloing, but too squishy at +3 or +4. So I'm thinking I'll just stick to team play on this toon and try to make him the best teammate he can be. I've focused on survivability/tank-lite with lots of AoE and debuffs. However, I'm completely open to rethinking the character. Below is my build and a screenshot of my totals.
Thanks in advance!
This Villain build was built using Mids Reborn 3.1.1.2
https://github.com/LoadedCamel/MidsRebornClick this DataLink to open the build!
Maryland Crab: Level 50 Science Arachnos Soldier
Primary Power Set: Crab Spider Soldier
Secondary Power Set: Crab Spider Training
Power Pool: Leaping
Power Pool: Fighting
Power Pool: Speed
Power Pool: Leadership
Ancillary Pool: Leviathan MasteryVillain Profile:
Level 1: Channelgun- (A) Superior Dominion of Arachnos - Accuracy/Damage
- (45) Superior Dominion of Arachnos - Accuracy/Damage/Recharge
- (45) Superior Dominion of Arachnos - Damage/Endurance/Recharge
- (46) Superior Dominion of Arachnos - Accuracy/Damage/Endurance/Recharge
- (46) Superior Dominion of Arachnos - Recharge/Chance for -Dmg and Terrorize
Level 1: Crab Spider Armor Upgrade
- (A) Steadfast Protection - Resistance/+Def 3%
Level 2: Longfang
- (A) Apocalypse - Damage
- (3) Apocalypse - Damage/Recharge
- (3) Apocalypse - Accuracy/Damage/Recharge
- (5) Apocalypse - Accuracy/Recharge
- (5) Apocalypse - Damage/Endurance
- (7) Apocalypse - Chance of Damage(Negative)
Level 4: Combat Training: Defensive
- (A) Luck of the Gambler - Defense/Increased Global Recharge Speed
Level 6: Super Jump
- (A) Blessing of the Zephyr - Knockback Reduction (4 points)
Level 8: Suppression
- (A) Positron's Blast - Damage/Range
- (9) Positron's Blast - Chance of Damage(Energy)
- (9) Bombardment - Chance for Fire Damage
- (15) Ragnarok - Chance for Knockdown
- (15) Touch of Lady Grey - Chance for Negative Damage
- (17) Achilles' Heel - Chance for Res Debuff
Level 10: Tactical Training: Maneuvers
- (A) Reactive Defenses - Defense
- (11) Reactive Defenses - Defense/Endurance
- (11) Reactive Defenses - Endurance/RechargeTime
- (13) Reactive Defenses - Defense/RechargeTime
- (13) Reactive Defenses - Defense/Endurance/RechargeTime
- (36) Reactive Defenses - Scaling Resist Damage
Level 12: Venom Grenade
- (A) Superior Spider's Bite - Accuracy/Damage
- (17) Superior Spider's Bite - Damage/RechargeTime
- (31) Superior Spider's Bite - Accuracy/Damage/RechargeTime
- (31) Superior Spider's Bite - Damage/Endurance/RechargeTime
- (34) Superior Spider's Bite - Accuracy/Damage/Endurance/RechargeTime
- (34) Superior Spider's Bite - RechargeTime/Global Toxic
Level 14: Boxing
- (A) Empty
Level 16: Combat Jumping
- (A) Luck of the Gambler - Defense/Increased Global Recharge Speed
Level 18: Frag Grenade
- (A) Positron's Blast - Accuracy/Damage
- (19) Positron's Blast - Chance of Damage(Energy)
- (19) Bombardment - Chance for Fire Damage
- (25) Javelin Volley - Chance of Damage(Lethal)
- (29) Overwhelming Force - Damage/Chance for Knockdown/Knockback to Knockdown
- (31) Explosive Strike - Chance for Smashing Damage
Level 20: Tactical Training: Leadership
- (A) Gaussian's Synchronized Fire-Control - To Hit Buff
- (21) Gaussian's Synchronized Fire-Control - To Hit Buff/Recharge
- (21) Gaussian's Synchronized Fire-Control - To Hit Buff/Recharge/Endurance
- (23) Gaussian's Synchronized Fire-Control - Recharge/Endurance
- (23) Gaussian's Synchronized Fire-Control - To Hit Buff/Endurance
- (25) Gaussian's Synchronized Fire-Control - Chance for Build Up
Level 22: Mental Training
- (A) Run Speed IO
Level 24: Tough
- (A) Unbreakable Guard - Resistance
- (40) Unbreakable Guard - Resistance/Endurance/RechargeTime
- (48) Unbreakable Guard - Resistance/Endurance
- (50) Unbreakable Guard - +Max HP
Level 26: Fortification
- (A) Gladiator's Armor - End/Resist
- (27) Gladiator's Armor - Resistance
- (27) Gladiator's Armor - Recharge/Resist
- (29) Gladiator's Armor - TP Protection +3% Def (All)
Level 28: Serum
- (A) Preventive Medicine - Heal
- (40) Preventive Medicine - Heal/Endurance
- (43) Preventive Medicine - Endurance/RechargeTime
- (46) Preventive Medicine - Heal/RechargeTime
- (48) Preventive Medicine - Heal/RechargeTime/Endurance
- (48) Preventive Medicine - Chance for +Absorb
Level 30: Frenzy
- (A) Armageddon - Damage
- (34) Armageddon - Damage/Endurance
- (36) Armageddon - Chance for Fire Damage
- (37) Obliteration - Chance for Smashing Damage
- (37) Eradication - Chance for Energy Damage
- (37) Touch of Lady Grey - Chance for Negative Damage
Level 32: Weave
- (A) Shield Wall - Defense/Endurance
- (33) Shield Wall - Defense
- (33) Shield Wall - Defense/Endurance/Recharge
- (33) Shield Wall - +Res (Teleportation), +5% Res (All)
Level 35: Hasten
- (A) Recharge Reduction IO
- (36) Recharge Reduction IO
Level 38: School of Sharks
- (A) Positron's Blast - Damage/Range
- (39) Positron's Blast - Chance of Damage(Energy)
- (39) Bombardment - Chance for Fire Damage
- (39) Javelin Volley - Chance of Damage(Lethal)
- (40) Trap of the Hunter - Chance of Damage(Lethal)
Level 41: Arctic Breath
- (A) Superior Frozen Blast - Accuracy/Damage
- (42) Superior Frozen Blast - Damage/Endurance
- (42) Superior Frozen Blast - Accuracy/Damage/Endurance
- (42) Superior Frozen Blast - Accuracy/Damage/Recharge
- (43) Superior Frozen Blast - Recharge/Chance for Immobilize
- (43) Achilles' Heel - Chance for Res Debuff
Level 44: Tactical Training: Assault
- (A) Endurance Reduction IO
Level 47: Maneuvers
- (A) Luck of the Gambler - Defense/Endurance
- (50) Luck of the Gambler - Defense
- (50) Luck of the Gambler - Defense/Increased Global Recharge Speed
Level 49: Assault
- (A) Endurance Reduction IO
Level 1: Conditioning | Hidden
Level 1: Brawl
-
1 minute ago, Without_Pause said:
Guessing converting them over to Transcendent Merits and giving them to the new build.
So earn Empyrean Merits on Farmer Toon, convert to Transcendent Merits, email (5 of them) to Alt Toon, and then convert them back to Empyrean Merits. That's a hassle, but I get it. Why would this preclude the poster from selling enhancements on the market though?
-
On 1/26/2022 at 11:05 AM, Ukase said:
Sadly (or not) this is my first farmer. De-slotted, retired once I realized I could just re-roll them for the emp merits.
How/what do you re-roll for Empyrean Merits?
-
Thanks for the replies. I'm definitely keeping the creepers now, and I'll likely swap Spirit Tree out for Tactics. Any advice on how to slot Sleet or Ice Storm? Damage Procs did not seem to work in either of them. How can I test if the Achilles Heel proc works in Sleet?
-
 1
1
-
-
I can answer at least a couple of my own questions after experimenting on the test server.
- Any problem with skipping Carrion Creepers, Spore Burst, and Unkindness?
I definitely want Carrion Creepers. It seems to do very good damage. Moreover, it travels with you which I did not realize. I am wondering how Procs work in it still.
- I have lots of Procs slotted in Sleet and Ice Storm. Is that a good idea?
The procs I had slotted in Sleet and Ice Storm appear to be completely useless. So, I'll be taking them out. I had read about people placing a -Res Proc in Sleet, but is anyone sure it's working?
-
1
-
Hi all. I'd like to get some feedback on my Dominator. I have plenty of influence, so that's not a consideration. I'll be playing solo and on teams. All feedback is welcome. I specifically would like to know:
- Any problem with skipping Carrion Creepers, Spore Burst, and Unkindness?
- I have lots of Procs slotted in Sleet and Ice Storm. Is that a good idea?
- Any suggestions on how to use Feral Charge other than to start a fight? After playing a Savage Stalker, I was disappointed to find out Feral Charge is single target.
Thanks in advance!
This Villain build was built using Mids Reborn 3.1.1.2
https://github.com/LoadedCamel/MidsRebornClick this DataLink to open the build!
Feral Ferment: Level 50 Science Dominator
Primary Power Set: Plant Control
Secondary Power Set: Savage Assault
Power Pool: Leaping
Power Pool: Fighting
Power Pool: Leadership
Power Pool: Speed
Ancillary Pool: Ice MasteryVillain Profile:
Level 1: Strangler- (A) Decimation - Accuracy/Damage
- (17) Decimation - Damage/Endurance
- (17) Decimation - Damage/Recharge
- (33) Decimation - Accuracy/Endurance/Recharge
- (34) Decimation - Accuracy/Damage/Recharge
Level 1: Call Swarm
- (A) Accuracy IO
Level 2: Maiming Slash
- (A) Superior Blistering Cold - Accuracy/Damage
- (3) Superior Blistering Cold - Damage/Endurance
- (3) Superior Blistering Cold - Accuracy/Damage/Endurance
- (13) Superior Blistering Cold - Accuracy/Damage/Recharge
- (15) Superior Blistering Cold - Damage/Endurance/Accuracy/RechargeTime
Level 4: Vicious Slash
- (A) Hecatomb - Damage
- (5) Hecatomb - Accuracy/Damage/Recharge
- (5) Hecatomb - Accuracy/Recharge
- (11) Hecatomb - Damage/Endurance
- (11) Hecatomb - Chance of Damage(Negative)
- (13) Force Feedback - Chance for +Recharge
Level 6: Entangle
- (A) Accuracy IO
Level 8: Seeds of Confusion
- (A) Superior Ascendency of the Dominator - Accuracy/Control Duration
- (9) Superior Ascendency of the Dominator - Control Duration/Recharge
- (9) Superior Ascendency of the Dominator - Endurance/Recharge
- (15) Superior Ascendency of the Dominator - Accuracy/Control Duration/Endurance
- (40) Superior Ascendency of the Dominator - Recharge/Chance for +Damage
Level 10: Combat Jumping
- (A) Luck of the Gambler - Defense/Increased Global Recharge Speed
Level 12: Spirit Tree
- (A) Healing IO
Level 14: Kick
- (A) Force Feedback - Chance for +Recharge
Level 16: Spot Prey
- (A) Gaussian's Synchronized Fire-Control - Chance for Build Up
Level 18: Vines
- (A) Unbreakable Constraint - Hold
- (19) Unbreakable Constraint - Accuracy/Hold/Recharge
- (19) Unbreakable Constraint - Accuracy/Recharge
- (21) Unbreakable Constraint - Endurance/Hold
- (21) Unbreakable Constraint - Chance for Smashing Damage
- (50) Ghost Widow's Embrace - Chance of Damage(Psionic)
Level 20: Rending Flurry
- (A) Obliteration - Damage
- (23) Obliteration - Accuracy/Recharge
- (23) Obliteration - Damage/Recharge
- (25) Obliteration - Accuracy/Damage/Recharge
- (25) Obliteration - Accuracy/Damage/Endurance/Recharge
- (27) Obliteration - Chance for Smashing Damage
Level 22: Tough
- (A) Gladiator's Armor - TP Protection +3% Def (All)
- (27) Steadfast Protection - Resistance/+Def 3%
- (33) Unbreakable Guard - +Max HP
- (43) Unbreakable Guard - Resistance
- (46) Unbreakable Guard - Resistance/Endurance
Level 24: Weave
- (A) Luck of the Gambler - Defense/Increased Global Recharge Speed
Level 26: Maneuvers
- (A) Luck of the Gambler - Defense/Increased Global Recharge Speed
Level 28: Blood Craze
- (A) Preventive Medicine - Heal
- (29) Preventive Medicine - Heal/Endurance
- (29) Preventive Medicine - Endurance/RechargeTime
- (31) Preventive Medicine - Heal/RechargeTime
- (31) Preventive Medicine - Heal/RechargeTime/Endurance
- (33) Preventive Medicine - Chance for +Absorb
Level 30: Hasten
- (A) Recharge Reduction IO
- (31) Recharge Reduction IO
Level 32: Fly Trap
- (A) Expedient Reinforcement - Accuracy/Damage
- (34) Expedient Reinforcement - Accuracy/Recharge
- (34) Expedient Reinforcement - Damage/Endurance
- (37) Expedient Reinforcement - Accuracy/Damage/Recharge
- (37) Expedient Reinforcement - Endurance/Damage/Recharge
Level 35: Call Hawk
- (A) Apocalypse - Damage
- (36) Apocalypse - Accuracy/Damage/Recharge
- (36) Apocalypse - Accuracy/Recharge
- (36) Apocalypse - Damage/Endurance
- (37) Apocalypse - Chance of Damage(Negative)
- (48) Gladiator's Javelin - Chance of Damage(Toxic)
Level 38: Feral Charge
- (A) Touch of Death - Accuracy/Damage
- (39) Touch of Death - Damage/Endurance
- (39) Touch of Death - Damage/Recharge
- (39) Touch of Death - Accuracy/Damage/Endurance
- (40) Touch of Death - Damage/Endurance/Recharge
- (40) Touch of Death - Chance of Damage(Negative)
Level 41: Sleet
- (A) Positron's Blast - Accuracy/Damage
- (42) Positron's Blast - Chance of Damage(Energy)
- (42) Touch of Lady Grey - Chance for Negative Damage
- (42) Bombardment - Chance for Fire Damage
- (43) Ice Mistral's Torment - Chance for Cold Damage
- (43) Achilles' Heel - Chance for Res Debuff
Level 44: Frozen Armor
- (A) Reactive Defenses - Defense
- (45) Reactive Defenses - Defense/Endurance
- (45) Reactive Defenses - Endurance/RechargeTime
- (45) Reactive Defenses - Defense/RechargeTime
- (46) Reactive Defenses - Defense/Endurance/RechargeTime
- (46) Reactive Defenses - Scaling Resist Damage
Level 47: Ice Storm
- (A) Javelin Volley - Chance of Damage(Lethal)
- (48) Positron's Blast - Chance of Damage(Energy)
- (48) Bombardment - Chance for Fire Damage
- (50) Impeded Swiftness - Chance of Damage(Smashing)
- (50) Ice Mistral's Torment - Chance for Cold Damage
Level 49: Super Speed
- (A) Winter's Gift - Slow Resistance (20%)
Level 1: Domination
Level 1: Brawl-
1
-
Very cool. I will definitely try this out. I really appreciate the help from everyone. I'm terrible at making costumes but feel that having a good costume adds greatly to my playing experience. Thanks so much!
-
That looks awesome! Thanks so much. I'm now considering switching the character to Demon/Dark MM as well.
-
I'm making a Fire/Dark corruptor villain with a backstory that he is the offspring of Durin's Bane (the Balrog Gandalf fought in LOTR). Can anyone workup a costume that would be appropriate? I'd like him to look similar to Durin's Bane but maybe a little less imposing as he's not as powerful as his father. I don't really have any specifics other than that.
Thanks in advance!
-
On 4/24/2021 at 2:06 PM, Christopher Robin said:
There is some dithering in that regard but a Cassock is usually black, has buttons in front,
is fitted and has no hood whereas Habits can be brown or black, have no buttons, can be more
voluminous and often add a cowl/hood as well. Nuns also wear a habit but add a wimple (their hat).
As Vulpoid above suggested the robes are geared more towards Asiatic style monks so the closest I could
find, though it's a bit on the short side, was a combination of the "Baggy" top a corded waist and a Kilt.
You can also use Baggy pants and a cape to suggest the long robe shape but it's obviously detached
and separates the legs. With the kilt you can add wrapped gloves but I found the tied look more
like simple homespun and match the white cord belt better. Full beard works but I kind of
prefer the neck beard the Resistance gets. Depending on the expression you're going for
there are several faces that will do the job. This one looks the most "Monastic" to me.
This is great! Thanks so much!
-
3
-
-
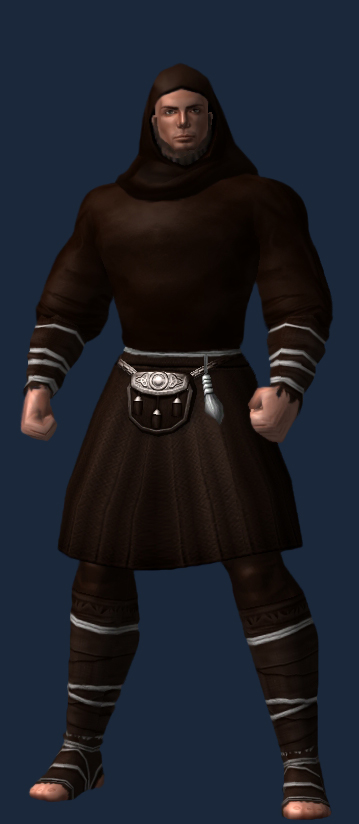
Hi. I'm trying to create a Water/Fire blaster where the Water is RP'd as air. His name is Air Friar. I'd like him to look as much like a stereotypical friar/monk as possible. Below are some images that show what I have in mind. Is there any costume pieces that would resemble the friar robe at all? Any suggestions would be greatly appreciated.
-
2
-
-
Wow! This is extremely helpful. Thanks so much. I believe we're going to choose from the sets with Good to Great degen then. Thanks again!
-
Thanks for all the input. I should have added that I have another character at the influence cap, so we'll be able to slot these characters with strong IO sets. I'd definitely prefer the duo be able to complete all content than to steamroll through most of it. I don't mind normal mobs taking longer to defeat and requiring more strategy. But, most importantly, we want it to be fun. I appreciate all of the advice. If anyone else wants to chime in, it would be much appreciated. I'm especially interested in the controller vs dominator aspect if someone has more insight about that.
-
My brother and I are planning to play controllers as a duo. We are going to play through the Praetoria content for the first time and aren't looking to level too quickly. We'd like to eventually do all content as a duo though, so that means AVs. Does anyone have recommendations for a strong duo? Would a Dominator (or 2?) be better than 2 controllers? We'd like powersets that fit thematically. I'm considering any 2 from the following group (mainly based on powerset theme). But, I'm completely open to other suggestions.
Illusion/Time
Gravity/Time
Mind/Time
Mind/Dark
Dark/Dark
Fire/Cold
Ice/Cold
Fire/Thermal
Ice/Thermal
Plant/Nature
Plant/Poison
Ice/Storm
Thanks!


Tough Crab to Crack
in Arachnos Soldier & Widow
Posted
Great advise thanks! How do you setup a chat window that displays damage taken?