

asmartfellow
-
Posts
19 -
Joined
-
Last visited
Content Type
Profiles
Forums
Events
Store
Articles
Patch Notes
Posts posted by asmartfellow
-
-
Hi all. I'm not the world's best, or even close to building and min/maxxing a toon. On live however, I had an archery/Psi blaster who was a sneaky nuke KING. Basically, Super Speed/ Stealth into middle of a group. Aim/Build Up. Launch AOE nukes in sequence and almost everything was dead.
I'd like to remake something similar except this time w/ Ninja Training. I think it's doable w/ the AOE's I have available from both primary/secondary.
Currently, my build is something like this (For power selection, not sets yet. That's what I need help with).
This Hero build was built using Mids Reborn 3.0.6.0
https://github.com/LoadedCamel/MidsRebornClick this DataLink to open the build!
Level 50 Magic Blaster
Primary Power Set: Archery
Secondary Power Set: Ninja Training
Power Pool: Leaping
Power Pool: Concealment
Power Pool: Speed
Power Pool: Fighting
Ancillary Pool: Munitions MasteryHero Profile:
Level 1: Aimed Shot -- Empty(A), Empty(3), Empty(3), Empty(5), Empty(5), Empty(7)
Level 1: Immobilizing Dart -- Empty(A)
Level 2: Fistful of Arrows -- Empty(A), Empty(7), Empty(9), Empty(9), Empty(11), Empty(11)
Level 4: Sting of the Wasp -- Empty(A), Empty(13), Empty(13), Empty(15), Empty(46), Empty(46)
Level 6: Combat Jumping -- Empty(A)
Level 8: Blazing Arrow -- Empty(A), Empty(15), Empty(17), Empty(17), Empty(19), Empty(19)
Level 10: Stealth -- Empty(A)
Level 12: Explosive Arrow -- Empty(A), Empty(21), Empty(21), Empty(23), Empty(23), Empty(25)
Level 14: Shinobi -- Empty(A), Empty(25), Empty(27), Empty(46)
Level 16: The Lotus Drops -- Empty(A), Empty(27), Empty(29), Empty(29), Empty(31), Empty(31)
Level 18: Ranged Shot -- Empty(A), Empty(31), Empty(33), Empty(33)
Level 20: Kuji-In Toh -- Empty(A), Empty(33), Empty(34), Empty(34), Empty(34), Empty(36)
Level 22: Super Speed -- Empty(A)
Level 24: Hasten -- Empty(A), Empty(36), Empty(36)
Level 26: Kick -- Empty(A)
Level 28: Tough -- Empty(A), Empty(37), Empty(37)
Level 30: Weave -- Empty(A), Empty(37), Empty(39), Empty(48)
Level 32: Rain of Arrows -- Empty(A), Empty(39), Empty(39), Empty(40), Empty(40), Empty(40)
Level 35: Body Armor -- Empty(A), Empty(42), Empty(42)
Level 38: Golden Dragonfly -- Empty(A), Empty(42), Empty(43), Empty(43), Empty(43), Empty(45)
Level 41: Surveillance -- Empty(A), Empty(45), Empty(45)
Level 44: Smoke Flash -- Empty(A)
Level 47: Aim -- Empty(A), Empty(48), Empty(48)
Level 49: Super Jump -- Empty(A)
Level 1: Brawl -- Empty(A)
Level 1: Defiance
Level 1: Sprint -- Empty(A)
Level 2: Rest -- Empty(A)
Level 1: Swift -- Empty(A)
Level 1: Health -- Empty(A), Empty(50)
Level 1: Hurdle -- Empty(A)
Level 1: Stamina -- Empty(A), Empty(50), Empty(50)
Level 49: Quick Form
Level 22: Speed Phase
Level 49: Double Jump
------------| Copy & Paste this data into Mids Reborn : Hero Designer to view the build | |-------------------------------------------------------------------| |MxDz;1189;484;968;HEX;| |78DA65936D4FDA5014C76F69998A74CA9CA053405027C359DD2758F668CC6431EA7| |B52B1C16B48694A5DC6CB7DA17D09F775DC43346ECB5E7487730EF5C436E92FB7BF| |F3E7DC07DAD6E7B7F9AFBB5F5E2AC37ED3730783F66B60E485D996DBD51D35BA26E| |02EB26E1FBA7ED73B755E859D332F1C56C6FAE82208FA61E47CD4FEB9DB3E0E5DED| |6BBFABF207FD7ECFD9F7DC009E0AF8B0E77FD2037DA27B3A1AE6D01C059E776AE3F| |0BDEE9E45102DBE0B74C7695DF83AD27D7FD06EE12CC30558491DEEB21A5F7156C5| |70A98CA025F80079DD48F28AF215181BDCC110C949C19CE00D7430396FA2C90B3E4| |46E0916E1D0B23C63164D954F72D46142FC6A56F091A00DE129EE3085A606E369EE| |308DE6B160517001790B6BB6296FDAC23F11EBFC0D9919EE3923AACB8215C1D1E91| |7B86741F815C13FD0738E7BCE095F4B7195083B9DE79DCED32C604A64322599A47F| |19AA8B9C5F446382593228BF84664DD0826A99AA6659F8A7C86D3250ADF29AABA24| |ADC48F1125E863ACF5847F34CF01F9CC03A775B17BE99E273E4AFBC520DDE6F4378| |E25F286DF27E37E93C61EC70DE11BB209660BF3B9CDFA1FFD1BAFFFED7ACF10710C| |7FBA9EA81957C1D8ABE8EAB5C92E7CC8F3B63907981FC9E4AFEBC331999247E6826| |AB8D2F9BC99B107F13FE3F705407CD| |-------------------------------------------------------------------|
-
PS- The above build is quite expensive, but when it comes to optimizing....that's gonna happen.
-
2nd character I ever built on live was Kin/Elec Defender. I've loved him. I love him even more now that Elec got a bump. I'm not very good at min/max or building, but I had some help from a wonderful player whose name I've lost to time. But, since he shared w/ me, I thought I'd share with you.
This build is for solo, and is, as far as I can tell, just about as OP as the build can get.
Main thing to know is, get close, and STAY close to your enemies. I use this build to drain the Bosses of all END foremost, and then keep them drained while my AOE's do their work. I can farm with him, but mainly I use him to pump a team up to maximum DPS and SPEED. I was always about using Siphon Speed, but the builder of this recommended it would be unnecessary as it's already ULTRA fast, and it truly is.
Enjoy.This Hero build was built using Mids Reborn 3.0.6.0
https://github.com/LoadedCamel/MidsRebornClick this DataLink to open the build!
Level 50 Natural Defender
Primary Power Set: Kinetics
Secondary Power Set: Electrical Blast
Power Pool: Speed
Power Pool: Leaping
Power Pool: Fighting
Power Pool: Leadership
Ancillary Pool: Flame MasteryHero Profile:
Level 1: Transfusion- (A) Touch of the Nictus - Accuracy/Healing/Absorb
Level 1: Charged Bolts
- (A) Superior Vigilant Assault - Accuracy/Damage
- (34) Superior Vigilant Assault - Damage/RechargeTime
- (40) Superior Vigilant Assault - Damage/Endurance/RechargeTime
Level 2: Lightning Bolt
- (A) Superior Vigilant Assault - Accuracy/Damage/Endurance
- (27) Superior Vigilant Assault - RechargeTime/PBAoE +Absorb
- (43) Superior Vigilant Assault - Accuracy/Damage/Endurance/RechargeTime
Level 4: Ball Lightning
- (A) Ragnarok - Damage
- (5) Ragnarok - Damage/Recharge
- (7) Ragnarok - Accuracy/Damage/Recharge
- (9) Ragnarok - Accuracy/Recharge
- (9) Ragnarok - Damage/Endurance
Level 6: Super Speed
- (A) Winter's Gift - Run Speed, Jump, Flight Speed, Range
- (7) Winter's Gift - Run Speed, Jump, Flight Speed, Range/Endurance
Level 8: Increase Density
- (A) Gladiator's Armor - TP Protection +3% Def (All)
Level 10: Combat Jumping
- (A) Luck of the Gambler - Defense/Increased Global Recharge Speed
- (11) Kismet - Accuracy +6%
- (13) Shield Wall - +Res (Teleportation), +5% Res (All)
- (13) Winter's Gift - Run Speed, Jump, Flight Speed, Range
- (15) Winter's Gift - Run Speed, Jump, Flight Speed, Range/Endurance
Level 12: Speed Boost
- (A) Blessing of the Zephyr - Knockback Reduction (4 points)
Level 14: Short Circuit
- (A) Armageddon - Chance for Fire Damage
- (15) Armageddon - Damage/Recharge
- (17) Armageddon - Accuracy/Damage/Recharge
- (19) Armageddon - Accuracy/Recharge
- (19) Armageddon - Damage/Endurance
- (34) Fury of the Gladiator - Chance for Res Debuff
Level 16: Aim
- (A) Rectified Reticle - To Hit Buff
- (17) Rectified Reticle - To Hit Buff/Recharge
Level 18: Boxing
- (A) Kinetic Combat - Accuracy/Damage
- (43) Kinetic Combat - Damage/Endurance
- (46) Kinetic Combat - Damage/Recharge
- (50) Kinetic Combat - Damage/Endurance/Recharge
Level 20: Tough
- (A) Reactive Armor - Resistance
- (21) Reactive Armor - Resistance/Endurance
- (21) Reactive Armor - Resistance/Recharge
- (27) Reactive Armor - Resistance/Endurance/Recharge
Level 22: Weave
- (A) Reactive Defenses - Defense
- (23) Reactive Defenses - Defense/Endurance
- (23) Reactive Defenses - Endurance/RechargeTime
- (25) Reactive Defenses - Defense/RechargeTime
- (25) Reactive Defenses - Defense/Endurance/RechargeTime
- (29) Reactive Defenses - Scaling Resist Damage
Level 24: Zapp
- (A) Superior Winter's Bite - Accuracy/Damage
- (31) Superior Winter's Bite - Damage/RechargeTime
- (33) Superior Winter's Bite - Accuracy/Damage/Endurance
- (33) Superior Winter's Bite - Accuracy/Damage/Recharge
- (33) Superior Winter's Bite - Damage/Endurance/Accuracy/RechargeTime
- (34) Superior Winter's Bite - Recharge/Chance for -Speed & -Recharge
Level 26: Transference
- (A) Efficacy Adaptor - Accuracy/Recharge
Level 28: Maneuvers
- (A) Luck of the Gambler - Defense/Increased Global Recharge Speed
- (29) Luck of the Gambler - Defense
- (31) Luck of the Gambler - Defense/Endurance
- (31) Luck of the Gambler - Defense/Endurance/Recharge
Level 30: Tactics
- (A) Rectified Reticle - To Hit Buff
- (36) Rectified Reticle - To Hit Buff/Recharge
Level 32: Fulcrum Shift
- (A) Accuracy IO
Level 35: Hasten
- (A) Recharge Reduction IO
- (36) Recharge Reduction IO
- (36) Recharge Reduction IO
- (37) Recharge Reduction IO
Level 38: Thunderous Blast
- (A) Superior Frozen Blast - Accuracy/Damage
- (39) Superior Frozen Blast - Damage/Endurance
- (39) Superior Frozen Blast - Accuracy/Damage/Endurance
- (39) Superior Frozen Blast - Accuracy/Damage/Recharge
- (40) Superior Frozen Blast - Damage/Endurance/Accuracy/RechargeTime
- (40) Superior Frozen Blast - Recharge/Chance for Immobilize
Level 41: Consume
- (A) Superior Avalanche - Accuracy/Damage
- (42) Superior Avalanche - Damage/Endurance
- (42) Superior Avalanche - Accuracy/Damage/Endurance
- (42) Superior Avalanche - Accuracy/Damage/Recharge
- (43) Superior Avalanche - Accuracy/Damage/Endurance/Recharge
- (46) Superior Avalanche - Recharge/Chance for Knockdown
Level 44: Fire Shield
- (A) Reactive Armor - Resistance
- (45) Reactive Armor - Resistance/Endurance
- (45) Reactive Armor - Resistance/Recharge
- (45) Reactive Armor - Resistance/Endurance/Recharge
- (46) Steadfast Protection - Resistance/+Def 3%
Level 47: Greater Fire Sword
- (A) Superior Blistering Cold - Accuracy/Damage
- (48) Superior Blistering Cold - Damage/Endurance
- (48) Superior Blistering Cold - Accuracy/Damage/Endurance
- (48) Superior Blistering Cold - Accuracy/Damage/Recharge
- (50) Superior Blistering Cold - Damage/Endurance/Accuracy/RechargeTime
- (50) Superior Blistering Cold - Recharge/Chance for Hold
Level 49: Inertial Reduction
- (A) Empty
Level 1: Vigilance
Level 1: Brawl| Copy & Paste this data into Mids Reborn : Hero Designer to view the build | |-------------------------------------------------------------------| |MxDz;1501;715;1430;HEX;| |78DA6594594F135114C7EFED4C414A29D4D202652914102C746C594CDC428280519| |62024BE369332C0247568DAC1E8A3EF1AC5E549DCDEDCC025E2F2ECD7F02B08A86F| |26663CCCFF50889D64F29BFBBFE79E7BEE39E7CEF4F531FFE6859B234206CEE7F46| |23133662C1AD68251A89CD1EDD5829E137B4F25BD91FD99CCE8EAE2A236695A866D| |668BED25794EB7968C056D3C6764ED8299D5739951F268072F5ACB46C1B06C6DFFC| |337BBB292D3E6F386B1E0773FA70C3D6F5A4B35EE60C25C5AB66954BB3F45BE8BCB| |663E329E37B31AED9699C8E9578DCC34F9360A371A29B45E7A2D8FE0C71122AC089| |156C5C681E61129D5D53AD260CF00B84936926DE420B4E830981802DF928D021B55| |19F0B89A3A08560C8147869927C14ECA99D775EC486F13E2A98882050F52BA176BE| |500B4080955B057ABC2D2D57C7F69D8AA0AFF246CFCEC27C07E8AE4A79AFD547FC7| |BEEF0835D0BC35E7A0054E8175A7C1A3679867C18E11F87B4FC35AAC95B58F6810A| |235EBA0A4F882985382B38438E5E732989C03D3F3A042B6219C4509C5E9A34715F5| |6DCC1818ED0055B20DC3D61BDEE65CEC3077C1C69FCC5F60CB6FF00385D6C0676D7| |8815AB5BD04DB5F315F33DF70FD37C0555ADBC4B96BBA833C042996668EBB996BD0| |520FB6D5314360886C5BB9BEAD9CAB4ECED53542CCED2A47C4A2C2B58F937D9C7DC| |7FBA075FEC72EE616ADEFE673757F44BCC7B6989F989FB98FBF30BF82BEC4DE7D70| |F7F6F6AE433BFE98F984F994FBFB19987C0EFA696D1FF7601FD7AD9FEBD6CF75EBE| |7BA251BA4DB9B015AA371ACDA5DF839B1C6BCC7BC0FA61F301F82369D33C5354839| |F488199AC075749C16B5747B15C11DE7E38EEBE28EEBE28E9B520FDD7ED7D3AC5AB| |AD742BACA0F1F2992952432BD7D58EB85B673A0497985BBF412B87B30E791B7D035| |9EDBCC353051164BAA4C4997298365CA5099525557FA0F397F22B41967EA1BD5C0C| |BFA64A29453E71F9F7EE716| |-------------------------------------------------------------------|
- (A) Touch of the Nictus - Accuracy/Healing/Absorb
-
I tried editing the post, as I saw I'd inserted the wrong MIDS type post. HOpefully this one works. My forum posting skills are lacking.
This Hero build was built using Mids Reborn 3.0.6.0
https://github.com/LoadedCamel/MidsRebornClick this DataLink to open the build!
Level 50 Natural Defender
Primary Power Set: Kinetics
Secondary Power Set: Electrical Blast
Power Pool: Speed
Power Pool: Leaping
Power Pool: Fighting
Power Pool: Leadership
Ancillary Pool: Flame MasteryHero Profile:
Level 1: Transfusion- (A) Touch of the Nictus - Accuracy/Healing/Absorb
Level 1: Charged Bolts
- (A) Superior Vigilant Assault - Accuracy/Damage
- (34) Superior Vigilant Assault - Damage/RechargeTime
- (40) Superior Vigilant Assault - Damage/Endurance/RechargeTime
Level 2: Lightning Bolt
- (A) Superior Vigilant Assault - Accuracy/Damage/Endurance
- (27) Superior Vigilant Assault - RechargeTime/PBAoE +Absorb
- (43) Superior Vigilant Assault - Accuracy/Damage/Endurance/RechargeTime
Level 4: Ball Lightning
- (A) Ragnarok - Damage
- (5) Ragnarok - Damage/Recharge
- (7) Ragnarok - Accuracy/Damage/Recharge
- (9) Ragnarok - Accuracy/Recharge
- (9) Ragnarok - Damage/Endurance
Level 6: Super Speed
- (A) Winter's Gift - Run Speed, Jump, Flight Speed, Range
- (7) Winter's Gift - Run Speed, Jump, Flight Speed, Range/Endurance
Level 8: Increase Density
- (A) Gladiator's Armor - TP Protection +3% Def (All)
Level 10: Combat Jumping
- (A) Luck of the Gambler - Defense/Increased Global Recharge Speed
- (11) Kismet - Accuracy +6%
- (13) Shield Wall - +Res (Teleportation), +5% Res (All)
- (13) Winter's Gift - Run Speed, Jump, Flight Speed, Range
- (15) Winter's Gift - Run Speed, Jump, Flight Speed, Range/Endurance
Level 12: Speed Boost
- (A) Blessing of the Zephyr - Knockback Reduction (4 points)
Level 14: Short Circuit
- (A) Armageddon - Chance for Fire Damage
- (15) Armageddon - Damage/Recharge
- (17) Armageddon - Accuracy/Damage/Recharge
- (19) Armageddon - Accuracy/Recharge
- (19) Armageddon - Damage/Endurance
- (34) Fury of the Gladiator - Chance for Res Debuff
Level 16: Aim
- (A) Rectified Reticle - To Hit Buff
- (17) Rectified Reticle - To Hit Buff/Recharge
Level 18: Boxing
- (A) Kinetic Combat - Accuracy/Damage
- (43) Kinetic Combat - Damage/Endurance
- (46) Kinetic Combat - Damage/Recharge
- (50) Kinetic Combat - Damage/Endurance/Recharge
Level 20: Tough
- (A) Reactive Armor - Resistance
- (21) Reactive Armor - Resistance/Endurance
- (21) Reactive Armor - Resistance/Recharge
- (27) Reactive Armor - Resistance/Endurance/Recharge
Level 22: Weave
- (A) Reactive Defenses - Defense
- (23) Reactive Defenses - Defense/Endurance
- (23) Reactive Defenses - Endurance/RechargeTime
- (25) Reactive Defenses - Defense/RechargeTime
- (25) Reactive Defenses - Defense/Endurance/RechargeTime
- (29) Reactive Defenses - Scaling Resist Damage
Level 24: Zapp
- (A) Superior Winter's Bite - Accuracy/Damage
- (31) Superior Winter's Bite - Damage/RechargeTime
- (33) Superior Winter's Bite - Accuracy/Damage/Endurance
- (33) Superior Winter's Bite - Accuracy/Damage/Recharge
- (33) Superior Winter's Bite - Damage/Endurance/Accuracy/RechargeTime
- (34) Superior Winter's Bite - Recharge/Chance for -Speed & -Recharge
Level 26: Transference
- (A) Efficacy Adaptor - Accuracy/Recharge
Level 28: Maneuvers
- (A) Luck of the Gambler - Defense/Increased Global Recharge Speed
- (29) Luck of the Gambler - Defense
- (31) Luck of the Gambler - Defense/Endurance
- (31) Luck of the Gambler - Defense/Endurance/Recharge
Level 30: Tactics
- (A) Rectified Reticle - To Hit Buff
- (36) Rectified Reticle - To Hit Buff/Recharge
Level 32: Fulcrum Shift
- (A) Accuracy IO
Level 35: Hasten
- (A) Recharge Reduction IO
- (36) Recharge Reduction IO
- (36) Recharge Reduction IO
- (37) Recharge Reduction IO
Level 38: Thunderous Blast
- (A) Superior Frozen Blast - Accuracy/Damage
- (39) Superior Frozen Blast - Damage/Endurance
- (39) Superior Frozen Blast - Accuracy/Damage/Endurance
- (39) Superior Frozen Blast - Accuracy/Damage/Recharge
- (40) Superior Frozen Blast - Damage/Endurance/Accuracy/RechargeTime
- (40) Superior Frozen Blast - Recharge/Chance for Immobilize
Level 41: Consume
- (A) Superior Avalanche - Accuracy/Damage
- (42) Superior Avalanche - Damage/Endurance
- (42) Superior Avalanche - Accuracy/Damage/Endurance
- (42) Superior Avalanche - Accuracy/Damage/Recharge
- (43) Superior Avalanche - Accuracy/Damage/Endurance/Recharge
- (46) Superior Avalanche - Recharge/Chance for Knockdown
Level 44: Fire Shield
- (A) Reactive Armor - Resistance
- (45) Reactive Armor - Resistance/Endurance
- (45) Reactive Armor - Resistance/Recharge
- (45) Reactive Armor - Resistance/Endurance/Recharge
- (46) Steadfast Protection - Resistance/+Def 3%
Level 47: Greater Fire Sword
- (A) Superior Blistering Cold - Accuracy/Damage
- (48) Superior Blistering Cold - Damage/Endurance
- (48) Superior Blistering Cold - Accuracy/Damage/Endurance
- (48) Superior Blistering Cold - Accuracy/Damage/Recharge
- (50) Superior Blistering Cold - Damage/Endurance/Accuracy/RechargeTime
- (50) Superior Blistering Cold - Recharge/Chance for Hold
Level 49: Inertial Reduction
- (A) Empty
Level 1: Vigilance
Level 1: Brawl-
 1
1
- (A) Touch of the Nictus - Accuracy/Healing/Absorb
-
The only Sentinel I've made is Psychic/Energy Aura/Psionic Mastery. He's pretty tough, except against Psychic. (Fault of EA). And an AOE machine.
One of the easiest toons I have to play. Just jump in the middle of mobs, and start spamming AOE in rotation. Boom. Mitigation of damage from the sleeps lets my self healing work OT. -
-
Waaaaay back on Day 2 of live I made a comical character. Mr. Taxi. The concept? A "Flash" speedster who teleported normies around the city for $$.
Fast forward to the current iteration of the game, and I was gifted a build for this powerset which effectively makes a God Mode defender (IMO).
With the recent changes to electric powerset, he's even more fun and still makes teams just STEAMROLL enemies.
So thought I'd share the build. Enjoy.
http://www.cohplanner.com/mids/download.php?uc=1477&c=700&a=1400&f=HEX&dc=78DA6594594F135114C7EFED4C414A29D4D202652FAB40C796C5C42D240818650942E26B33291798A40E4D3B187DF45DA3B83C89DB9B1BB8445CBE8B5F41407D3331F530FF43217692C96FEEFF9E73E6DC73CECCCC8D71FFD6C55BA342062E64CC7C3E35AE9694BDA872E5B3A6B396333362FF2AA73B72B0931A5B5B5A32A62C5B39563ADF5694E74D7B592D1A131995767256DACCA4C628A213BC64AFA89CB21DE3E0C137B7BA9A3116B24A2DFADDC76965662D7BB9CA5D4C5ACB2B0EADAA0FB628767EC5CA4626B256DAA0B7A52633E635959AA1D82A77B39E52EBA6DBF608BE0A4284352192BAD83CD43C22A1BB5A7B12EC1904B7C846B28D1C82161D01FB86C17764A3C146D7063DAEA60F8165C3E0B111E629B0836AE6750317A4B701F99445C19C0725DDCFB57C105A84840AD8EB1561E96ABEBFB46CD6857F0A367E8E13E038798A53C9712ABFE3BDEF0955D0BC55E7A1054E833567C0E36799E7C0F651C4FB40CB6AF8CAEAC7B40891CF062829BF20F6B4E01C2146F5B902C6E7C1E402A8916D0867D142317AE8D1456D0BB3158CB6833AD98661EB0DEF702D76997B60FD4FE62FB0E937F89152ABE3B3D6BD44AF5A5E816DAF996F986FB9FF9BE01AF93670ED1AEEA20E41CAA591F36EE41E34D5822D35CC101822DB66EE6F33D7AA836B759DD0EA4E5541B446856B1F23FB18C78EF543EBF88F9DCC6DF2EFE273757D42BEDDDBCCCFCC2F3CC75F99DF405F9F10BD78B7B77703DA8927CCA7CC673CDFCFC1F80BD04FBEFD3C83FDDCB701EEDB00F76D80FB16AF93EE6C06C8C7E05C8D7B8873729D799FF9004C3E643E021D3A67827B9028D0259AF4E217AB099E321F4F59274F59274F599F7EE48B77BD13254AB244192A51864B94E91265765F41650A737AF18F21A4BB5B5153FC3F147EF86857F26E1CFDDC3DD4A4BCCA737F19DC396ADF0BFBBD43CD236F63363D7798EBE09F088133FA07F4BDE181 -
On 12/24/2021 at 5:35 PM, Sovera said:
You're facing debuffers when you're hit like that. What you need is to monitor your defenses (if you don't know how it's explained somewhere in the guide in my signature) and be ready to peel off if they drop to red until your defenses have come back. If you have Hover it's as simple as to simply fly up a bit to be out of reach. Ten seconds is usually enough for the defenses to return to normal and you can start over.
Against enemies who debuff (like for example the romans, but not only) pre-emptive use of purples saves trouble. A simple medium purple before the fight should be enough (you can buy more between missions by typing /ah).
Other than defense debuffs you should be able to take on the world with those resists and the fast heals.
I first ran him through a smashing/lethal farm in AE at +2/x8, and that's about as maxxed as I can seem to get him. Also, it's seat of the pants play. TONS of inspirations falling, and I just gobble them as quick as they fall. THat makes him survive, but if I take it to +3, it's a nope.
I'm not sure if I'm not playing it right or what. I'll keep testing though. -
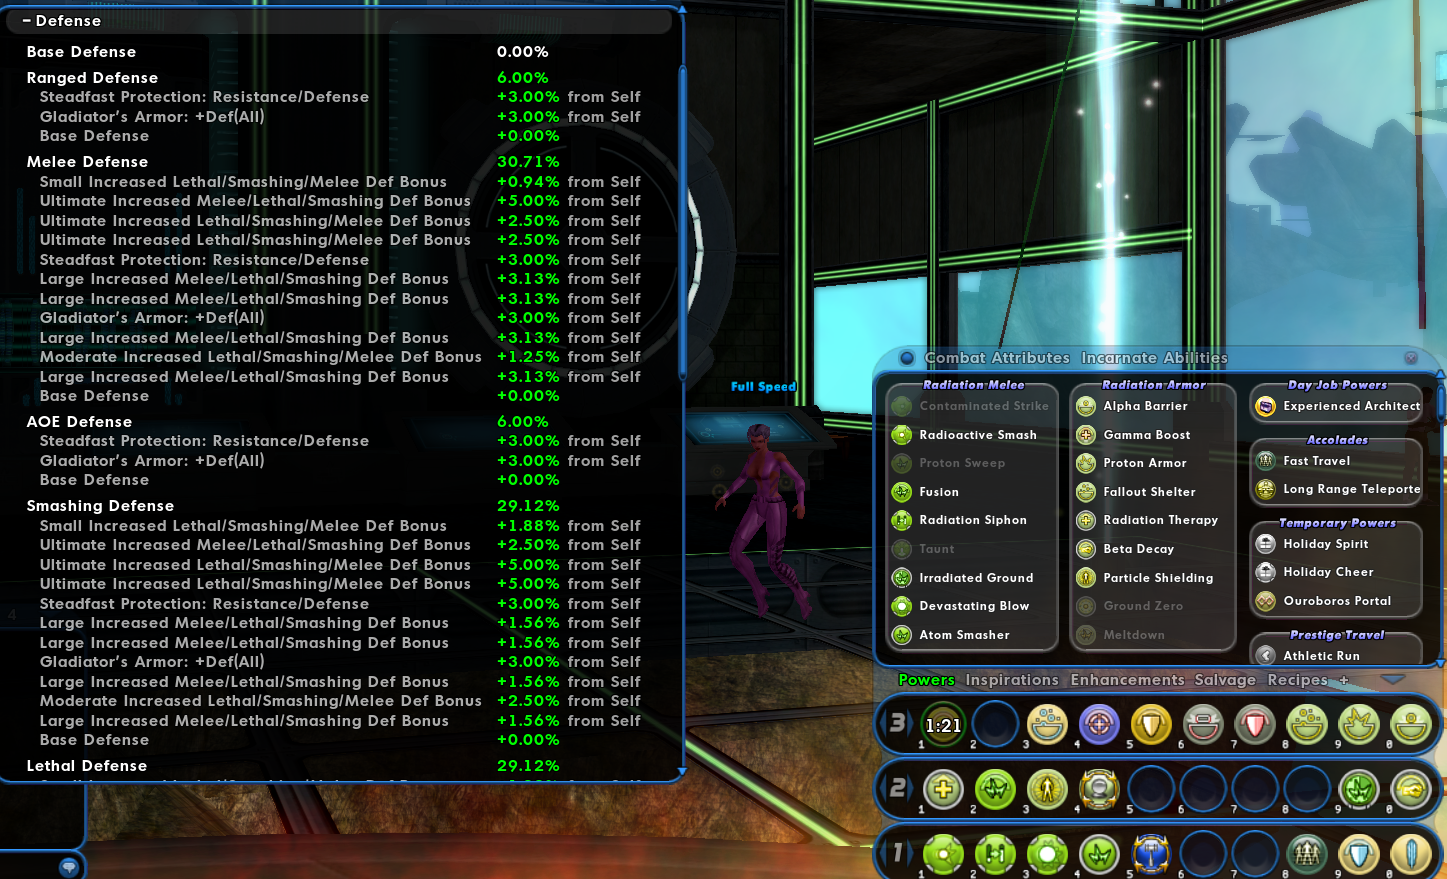
Made my first Rad/Rad brute this week. Got him to 50. I've slotted him up exactly as your build Sovera (thanks) except I don't have the Hecatomb yet.
What I like about this build: Very few buttons to mash. My attacks are, minimal, to say the least. That's a positive.
What I'm not loving so far, and maybe you'll have some insight. When I'm tough...I'm TOUGH. But if I'm not, meaning if any of the mobs are getting through, then they ALL are getting through. Now, this might change when I get the slots up to where they need to be. I don't know yet.
Not certain where this build is supposed to shine yet. -
Kinetic/Fire. You want to solo? Good to go. You want to team? You bring Speed Boost and spot heals.
This is possibly my favorite Defender build. It's just got everything. I prefer to play it as a Fire/Kin Corruptor, but that's because I get more Damage out of it with the secondary, as a solo player.
If you're teaming a lot though, the usage of Maneuvers and Tactics by a Defender along w/ your buffs make you very valuable.
Hope this helps. -
For starters, I'm horrible at builds. This one was done by @Hawks, who is pretty phenomenal at builds for me in the past. Just wanted to share here as this one is really working and pretty tight. Just wondering if any of you number lovin' geeks would've done anything differently. Lack of a Verticle travel power is disconcerting is my only beef. Might swap one out for Inertial Reduction.
Hero Plan by Hero Hero Designer 2.23
https://github.com/ImaginaryDevelopment/imaginary-hero-designerClick this DataLink to open the build!
Level 50 Natural Defender
Primary Power Set: Kinetics
Secondary Power Set: Electrical Blast
Power Pool: Speed
Power Pool: Leaping
Power Pool: Fighting
Power Pool: Leadership
Ancillary Pool: Flame MasteryHero Profile:
Level 1: Transfusion -- TchoftheN-Acc/Heal(A)
Level 1: Charged Bolts -- SprVglAss-Acc/Dmg(A), SprVglAss-Dmg/Rchg(34), SprVglAss-Dmg/EndRdx/Rchg(40)
Level 2: Lightning Bolt -- SprVglAss-Acc/Dmg/EndRdx(A), SprVglAss-Rchg/+Absorb(27), SprVglAss-Acc/Dmg/EndRdx/Rchg(43)
Level 4: Ball Lightning -- Rgn-Dmg(A), Rgn-Dmg/Rchg(5), Rgn-Acc/Dmg/Rchg(7), Rgn-Acc/Rchg(9), Rgn-Dmg/EndRdx(9)
Level 6: Super Speed -- WntGif-RunSpd/Jump/Fly/Rng(A), WntGif-RunSpd/Jump/Fly/Rng/EndRdx(7)
Level 8: Increase Density -- GldArm-3defTpProc(A)
Level 10: Combat Jumping -- LucoftheG-Rchg+(A), Ksm-ToHit+(11), ShlWal-ResDam/Re TP(13), WntGif-RunSpd/Jump/Fly/Rng(13), WntGif-RunSpd/Jump/Fly/Rng/EndRdx(15)
Level 12: Speed Boost -- BlsoftheZ-ResKB(A)
Level 14: Short Circuit -- Arm-Dam%(A), Arm-Dmg/Rchg(15), Arm-Acc/Dmg/Rchg(17), Arm-Acc/Rchg(19), Arm-Dmg/EndRdx(19), FuroftheG-ResDeb%(34)
Level 16: Aim -- RctRtc-ToHit(A), RctRtc-ToHit/Rchg(17)
Level 18: Boxing -- KntCmb-Acc/Dmg(A), KntCmb-Dmg/EndRdx(43), KntCmb-Dmg/Rchg(46), KntCmb-Dmg/EndRdx/Rchg(50)
Level 20: Tough -- RctArm-ResDam(A), RctArm-ResDam/EndRdx(21), RctArm-ResDam/Rchg(21), RctArm-ResDam/EndRdx/Rchg(27)
Level 22: Weave -- Rct-Def(A), Rct-Def/EndRdx(23), Rct-EndRdx/Rchg(23), Rct-Def/Rchg(25), Rct-Def/EndRdx/Rchg(25), Rct-ResDam%(29)
Level 24: Zapp -- SprWntBit-Acc/Dmg(A), SprWntBit-Dmg/Rchg(31), SprWntBit-Acc/Dmg/EndRdx(33), SprWntBit-Acc/Dmg/Rchg(33), SprWntBit-Dmg/EndRdx/Acc/Rchg(33), SprWntBit-Rchg/SlowProc(34)
Level 26: Transference -- EffAdp-Acc/Rchg(A)
Level 28: Maneuvers -- LucoftheG-Rchg+(A), LucoftheG-Def(29), LucoftheG-Def/EndRdx(31), LucoftheG-Def/EndRdx/Rchg(31)
Level 30: Tactics -- RctRtc-ToHit(A), RctRtc-ToHit/Rchg(36)
Level 32: Fulcrum Shift -- Acc-I(A)
Level 35: Hasten -- RechRdx-I(A), RechRdx-I(36), RechRdx-I(36), RechRdx-I(37)
Level 38: Thunderous Blast -- SprFrzBls-Acc/Dmg(A), SprFrzBls-Dmg/EndRdx(39), SprFrzBls-Acc/Dmg/EndRdx(39), SprFrzBls-Acc/Dmg/Rchg(39), SprFrzBls-Dmg/EndRdx/Acc/Rchg(40), SprFrzBls-Rchg/ImmobProc(40)
Level 41: Consume -- SprAvl-Acc/Dmg(A), SprAvl-Dmg/EndRdx(42), SprAvl-Acc/Dmg/EndRdx(42), SprAvl-Acc/Dmg/Rchg(42), SprAvl-Acc/Dmg/EndRdx/Rchg(43), SprAvl-Rchg/KDProc(46)
Level 44: Fire Shield -- RctArm-ResDam(A), RctArm-ResDam/EndRdx(45), RctArm-ResDam/Rchg(45), RctArm-ResDam/EndRdx/Rchg(45), StdPrt-ResDam/Def+(46)
Level 47: Greater Fire Sword -- SprBlsCol-Acc/Dmg(A), SprBlsCol-Dmg/EndRdx(48), SprBlsCol-Acc/Dmg/EndRdx(48), SprBlsCol-Acc/Dmg/Rchg(48), SprBlsCol-Dmg/EndRdx/Acc/Rchg(50), SprBlsCol-Rchg/HoldProc(50)
Level 49: Inertial Reduction -- Empty(A)
Level 1: Brawl -- KntCmb-Acc/Dmg(A), KntCmb-Dmg/EndRdx(11), KntCmb-Dmg/Rchg(37), KntCmb-Dmg/EndRdx/Rchg(37)
Level 1: Prestige Power Dash -- Empty(A)
Level 1: Prestige Power Slide -- Empty(A)
Level 1: Prestige Power Quick -- Empty(A)
Level 1: Prestige Power Rush -- Empty(A)
Level 1: Prestige Power Surge -- Empty(A)
Level 1: Sprint -- Empty(A)
Level 1: Vigilance
Level 2: Rest -- Empty(A)
Level 4: Ninja Run
Level 2: Swift -- Run-I(A)
Level 2: Health -- NmnCnv-Regen/Rcvry+(A), Mrc-Rcvry+(5)
Level 2: Hurdle -- Jump-I(A)
Level 2: Stamina -- EffAdp-EndMod(A), EffAdp-EndMod/Rchg(3), EffAdp-EndMod/EndRdx(3)
Level 50: Agility Core Paragon
------------
http://www.cohplanner.com/mids/download.php?uc=1477&c=700&a=1400&f=HEX&dc=78DA6594594F135114C7EFED4C414A29D4D202652FAB40C796C5C42D240818650942E26B33291798A40E4D3B187DF45DA3B83C89DB9B1BB8445CBE8B5F41407D3331F530FF43217692C96FEEFF9E73E6DC73CECCCC8D71FFD6C55BA342062E64CC7C3E35AE9694BDA872E5B3A6B396333362FF2AA73B72B0931A5B5B5A32A62C5B39563ADF5694E74D7B592D1A131995767256DACCA4C628A213BC64AFA89CB21DE3E0C137B7BA9A3116B24A2DFADDC76965662D7BB9CA5D4C5ACB2B0EADAA0FB628767EC5CA4626B256DAA0B7A52633E635959AA1D82A77B39E52EBA6DBF608BE0A4284352192BAD83CD43C22A1BB5A7B12EC1904B7C846B28D1C82161D01FB86C17764A3C146D7063DAEA60F8165C3E0B111E629B0836AE6750317A4B701F99445C19C0725DDCFB57C105A84840AD8EB1561E96ABEBFB46CD6857F0A367E8E13E038798A53C9712ABFE3BDEF0955D0BC55E7A1054E833567C0E36799E7C0F651C4FB40CB6AF8CAEAC7B40891CF062829BF20F6B4E01C2146F5B902C6E7C1E402A8916D0867D142317AE8D1456D0BB3158CB6833AD98661EB0DEF702D76997B60FD4FE62FB0E937F89152ABE3B3D6BD44AF5A5E816DAF996F986FB9FF9BE01AF93670ED1AEEA20E41CAA591F36EE41E34D5822D35CC101822DB66EE6F33D7AA836B759DD0EA4E5541B446856B1F23FB18C78EF543EBF88F9DCC6DF2EFE273757D42BEDDDBCCCFCC2F3CC75F99DF405F9F10BD78B7B77703DA8927CCA7CC673CDFCFC1F80BD04FBEFD3C83FDDCB701EEDB00F76D80FB16AF93EE6C06C8C7E05C8D7B8873729D799FF9004C3E643E021D3A67827B9028D0259AF4E217AB099E321F4F59274F59274F599F7EE48B77BD13254AB244192A51864B94E91265765F41650A737AF18F21A4BB5B5153FC3F147EF86857F26E1CFDDC3DD4A4BCCA737F19DC396ADF0BFBBD43CD236F63363D7798EBE09F088133FA07F4BDE181
I've never posted a build here either. I'm hoping I chose the correct format.
Build Request: Dual Pistols/Temporal Manipulation (Time)
in Blaster
Posted
300+ Million INF later, I've built this EXACT build. Now to learn how to play it. Hahaha.
Thanks for sharing.