

cgilm2526
-
Posts
58 -
Joined
-
Last visited
Content Type
Profiles
Forums
Events
Store
Articles
Patch Notes
Posts posted by cgilm2526
-
-
After I have completed all Incarnate powers to Tier 4, is there anything I can do with my excess Incarnate Thread? I continue to get them and would love to be able to convert them to something useful. Thanks
-
Hi All,
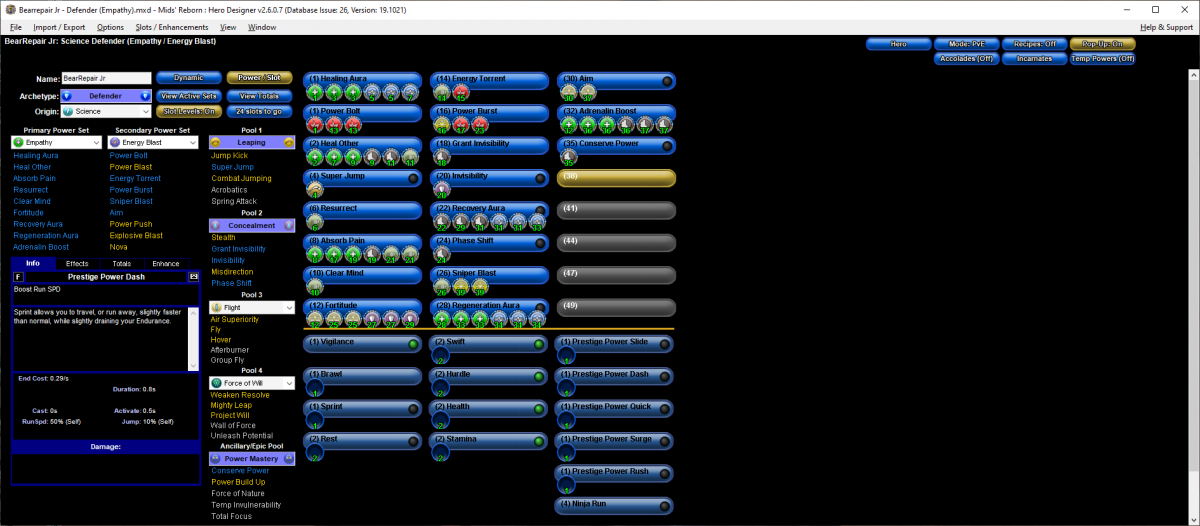
I am trying to solo level my empathy healer and its not going well. I am currently at level 40. It seems when I try to complete missions, I either die quickly or it takes me forever to kill 1 mob. I have even set my missions to -1, 1 and it doesn’t seem to help. Am I just stuck at leveling with groups or can I actually solo level? Below is my build.

Hero Plan by Mids' Reborn : Hero Designer 2.6.1.25
https://github.com/Crytilis/mids-reborn-hero-designerClick this DataLink to open the build!
Bearrepair Jr: Level 49 Science Defender
Primary Power Set: Empathy
Secondary Power Set: Energy Blast
Power Pool: Leaping
Power Pool: Concealment
Ancillary Pool: Power MasteryHero Profile:
Level 1: Healing Aura -- Heal(A), Heal(3), Heal(3), EndRdx(5), EndRdx(5), EndRdx(7)
Level 1: Power Bolt -- Dmg(A), Dmg(7), Dmg(37)
Level 2: Heal Other -- Heal(A), Heal(9), Heal(9), RechRdx(11), RechRdx(11), Range(13)
Level 4: Super Jump -- Jump(A)
Level 6: Resurrect -- Range(A)
Level 8: Absorb Pain -- Heal(A), Heal(13), Heal(15), Range(15), RechRdx(17), RechRdx(17)
Level 10: Clear Mind -- Range(A)
Level 12: Fortitude -- ToHit(A), ToHit(19), ToHit(19), DefBuff(21), DefBuff(21), DefBuff(23)
Level 14: Energy Torrent -- Range(A), Range(23)
Level 16: Power Blast -- Acc(A), Dmg(25), Dmg(25)
Level 18: Grant Invisibility -- RechRdx(A)
Level 20: Invisibility -- DefBuff(A)
Level 22: Recovery Aura -- RechRdx(A), RechRdx(27), RechRdx(27), EndRdx(29), EndRdx(29), EndRdx(31)
Level 24: Power Burst -- RechRdx(A), RechRdx(31)
Level 26: Sniper Blast -- Range(A), Range(31)
Level 28: Regeneration Aura -- Heal(A), Heal(33), Heal(33), EndRdx(33), EndRdx(34), EndRdx(34)
Level 30: Aim -- ToHit(A), ToHit(34)
Level 32: Adrenalin Boost -- Heal(A), Heal(36), Heal(36), RechRdx(36), RechRdx(37), RechRdx(37)
Level 35: Conserve Power -- RechRdx(A), RechRdx(40)
Level 38: Nova -- Dmg(A), Dmg(39), Dmg(39), Acc(39)
Level 41: [Empty]
Level 44: [Empty]
Level 47: [Empty]
Level 49: [Empty]
Level 1: Brawl -- Dmg(A)
Level 1: Quick Form
Level 1: Prestige Power Dash -- Empty(A)
Level 1: Prestige Power Slide -- Empty(A)
Level 1: Prestige Power Quick -- Empty(A)
Level 1: Prestige Power Rush -- Empty(A)
Level 1: Prestige Power Surge -- Empty(A)
Level 1: Sprint -- Run(A)
Level 1: Vigilance
Level 2: Rest -- Heal(A)
Level 4: Ninja Run
Level 2: Swift -- Flight(A)
Level 2: Health -- Heal(A), Heal(40)
Level 2: Hurdle -- Jump(A)
Level 2: Stamina -- EndMod(A), EndMod(40)
------------ -
Hi all,
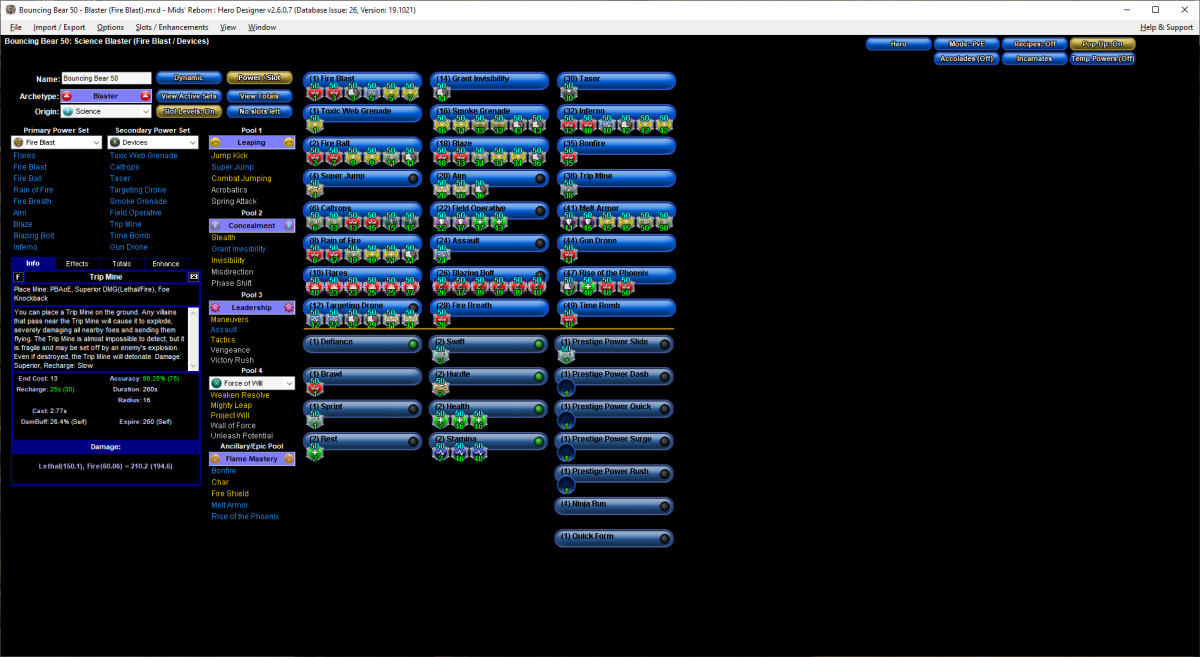
I am getting ready to respec and was wondering if my build was good for a Fire Blaster.
Thoughts?
Hero Plan by Mids' Reborn : Hero Designer 2.6.0.7
https://github.com/ImaginaryDevelopment/imaginary-hero-designerClick this DataLink to open the build!
Bouncing Bear 50: Level 50 Science Blaster
Primary Power Set: Fire Blast
Secondary Power Set: Devices
Power Pool: Leaping
Power Pool: Concealment
Power Pool: Leadership
Ancillary Pool: Flame MasteryHero Profile:
Level 1: Fire Blast- (A) Damage Increase IO
- (3) Damage Increase IO
- (3) Recharge Reduction IO
- (5) Endurance Reduction IO
- (5) Accuracy IO
- (7) Accuracy IO
Level 1: Toxic Web Grenade
- (A) Accuracy IO
Level 2: Fire Ball
- (A) Damage Increase IO
- (7) Damage Increase IO
- (9) Accuracy IO
- (9) Accuracy IO
- (11) Range IO
- (11) Recharge Reduction IO
Level 4: Super Jump
- (A) Jumping IO
Level 6: Caltrops
- (A) Range IO
- (13) Range IO
- (13) Damage Increase IO
- (15) Damage Increase IO
- (15) Slow IO
- (17) Slow IO
Level 8: Rain of Fire
- (A) Damage Increase IO
- (17) Damage Increase IO
- (19) Range IO
- (19) Accuracy IO
- (21) Accuracy IO
- (21) Recharge Reduction IO
Level 10: Flares
- (A) Superior Blaster's Wrath - Accuracy/Damage
- (23) Superior Blaster's Wrath - Damage/Recharge
- (23) Superior Blaster's Wrath - Accuracy/Damage/Recharge
- (25) Superior Blaster's Wrath - Accuracy/Damage/Endurance
- (25) Superior Blaster's Wrath - Accuracy/Damage/Endurance/Recharge
- (27) Superior Blaster's Wrath - Recharge/Chance for Fire Damage
Level 12: Targeting Drone
- (A) Endurance Reduction IO
- (27) Endurance Reduction IO
- (29) Recharge Reduction IO
- (29) Recharge Reduction IO
- (31) To Hit Buff IO
- (31) To Hit Buff IO
Level 14: Grant Invisibility
- (A) Recharge Reduction IO
Level 16: Smoke Grenade
- (A) Accuracy IO
- (31) Accuracy IO
- (33) To Hit Debuff IO
- (33) To Hit Debuff IO
- (43) Recharge Reduction IO
- (43) Recharge Reduction IO
Level 18: Blaze
- (A) Damage Increase IO
- (33) Damage Increase IO
- (34) Range IO
- (34) Accuracy IO
- (34) Accuracy IO
- (36) Recharge Reduction IO
Level 20: Aim
- (A) To Hit Buff IO
- (36) To Hit Buff IO
- (36) Recharge Reduction IO
Level 22: Field Operative
- (A) Defense Buff IO
- (37) Defense Buff IO
- (37) Healing IO
- (43) Healing IO
Level 24: Assault
- (A) Endurance Reduction IO
Level 26: Blazing Bolt
- (A) Superior Defiant Barrage - Accuracy/Damage
- (37) Superior Defiant Barrage - Damage/RechargeTime
- (39) Superior Defiant Barrage - Accuracy/Damage/RechargeTime
- (39) Superior Defiant Barrage - Accuracy/Damage/Endurance
- (39) Superior Defiant Barrage - Accuracy/Damage/Endurance/RechargeTime
- (40) Superior Defiant Barrage - RechargeTime/+Status
Level 28: Fire Breath
- (A) Damage Increase IO
Level 30: Taser
- (A) Disorient Duration IO
Level 32: Inferno
- (A) Damage Increase IO
- (40) Damage Increase IO
- (40) Endurance Reduction IO
- (42) Recharge Reduction IO
- (42) Accuracy IO
- (42) Accuracy IO
Level 35: Bonfire
- (A) Damage Increase IO
Level 38: Trip Mine
- (A) Knockback Distance IO
Level 41: Melt Armor
- (A) Defense Debuff IO
- (45) Defense Debuff IO
- (45) Accuracy IO
- (45) Accuracy IO
- (50) Range IO
- (50) Range IO
Level 44: Gun Drone
- (A) Damage Increase IO
Level 47: Rise of the Phoenix
- (A) Recharge Reduction IO
- (48) Healing IO
- (48) Damage Increase IO
- (50) Damage Increase IO
Level 49: Time Bomb
- (A) Damage Increase IO
Level 1: Brawl
- (A) Damage Increase IO
Level 1: Defiance
Level 1: Quick Form
Level 1: Prestige Power Dash -
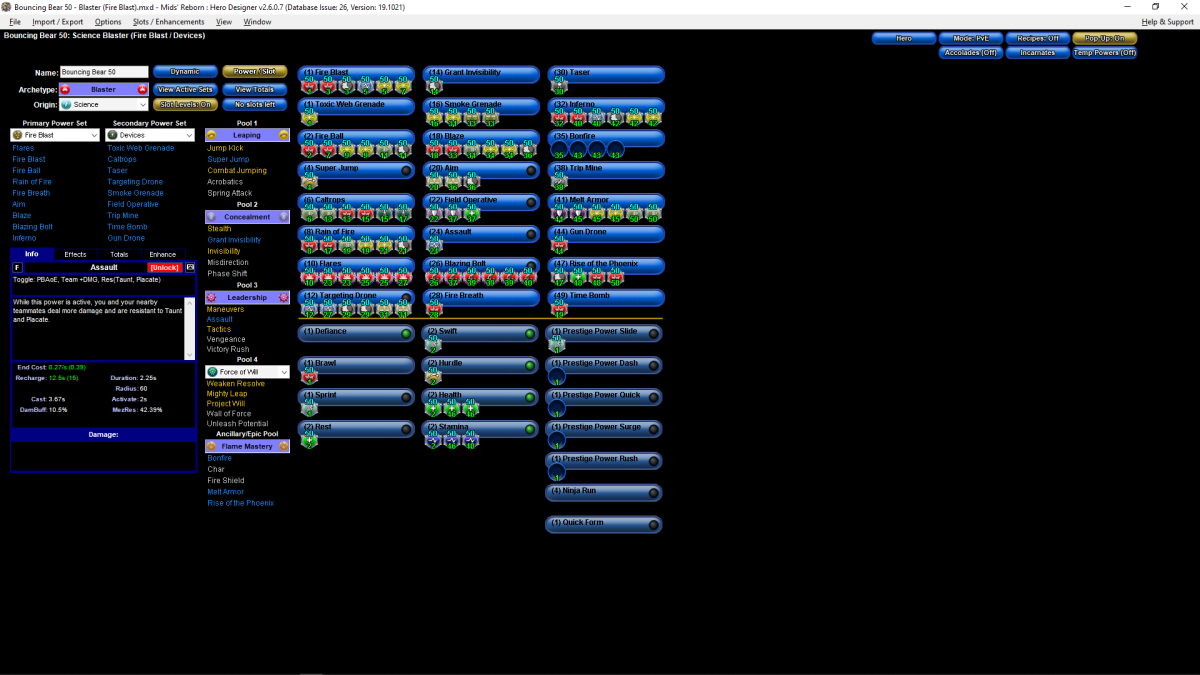
I just revised my built to reflect the set changes:
Hero Plan by Mids' Reborn : Hero Designer 2.6.0.7
https://github.com/ImaginaryDevelopment/imaginary-hero-designerClick this DataLink to open the build!
Bouncing Bear 50: Level 50 Science Blaster
Primary Power Set: Fire Blast
Secondary Power Set: Devices
Power Pool: Leaping
Power Pool: Concealment
Power Pool: Leadership
Ancillary Pool: Flame MasteryHero Profile:
Level 1: Fire Blast -- Dmg-I(A), Dmg-I(3), RechRdx-I(3), EndRdx-I(5), Acc-I(5), Acc-I(7)
Level 1: Toxic Web Grenade -- Acc-I(A)
Level 2: Fire Ball -- Dmg-I(A), Dmg-I(7), Acc-I(9), Acc-I(9), Range-I(11), RechRdx-I(11)
Level 4: Super Jump -- Jump-I(A)
Level 6: Caltrops -- Range-I(A), Range-I(13), Dmg-I(13), Dmg-I(15), Slow-I(15), Slow-I(17)
Level 8: Rain of Fire -- Dmg-I(A), Dmg-I(17), Range-I(19), Acc-I(19), Acc-I(21), RechRdx-I(21)
Level 10: Flares -- SprBlsWrt-Acc/Dmg(A), SprBlsWrt-Dmg/Rchg(23), SprBlsWrt-Acc/Dmg/Rchg(23), SprBlsWrt-Acc/Dmg/EndRdx(25), SprBlsWrt-Acc/Dmg/EndRdx/Rchg(25), SprBlsWrt-Rchg/Dmg%(27)
Level 12: Targeting Drone -- EndRdx-I(A), EndRdx-I(27), RechRdx-I(29), RechRdx-I(29), ToHit-I(31), ToHit-I(31)
Level 14: Grant Invisibility -- RechRdx-I(A)
Level 16: Smoke Grenade -- Acc-I(A), Acc-I(31), ToHitDeb-I(33), ToHitDeb-I(33)
Level 18: Blaze -- Dmg-I(A), Dmg-I(33), Range-I(34), Acc-I(34), Acc-I(34), RechRdx-I(36)
Level 20: Aim -- ToHit-I(A), ToHit-I(36), RechRdx-I(36)
Level 22: Field Operative -- DefBuff-I(A), DefBuff-I(37), Heal-I(37)
Level 24: Assault -- EndRdx-I(A)
Level 26: Blazing Bolt -- SprDfnBrr-Acc/Dmg(A), SprDfnBrr-Dmg/Rchg(37), SprDfnBrr-Acc/Dmg/Rchg(39), SprDfnBrr-Acc/Dmg/EndRdx(39), SprDfnBrr-Acc/Dmg/EndRdx/Rchg(39), SprDfnBrr-Rchg/+Status Protect(40)
Level 28: Fire Breath -- Dmg-I(A)
Level 30: Taser -- Dsrnt-I(A)
Level 32: Inferno -- Dmg-I(A), Dmg-I(40), EndRdx-I(40), RechRdx-I(42), Acc-I(42), Acc-I(42)
Level 35: Bonfire -- Empty(A), Empty(43), Empty(43), Empty(43)
Level 38: Trip Mine -- KBDist-I(A)
Level 41: Melt Armor -- DefDeb-I(A), DefDeb-I(45), Acc-I(45), Acc-I(45), Range-I(50), Range-I(50)
Level 44: Gun Drone -- Dmg-I(A)
Level 47: Rise of the Phoenix -- RechRdx-I(A), Heal-I(48), Dmg-I(48), Dmg-I(50)
Level 49: Time Bomb -- Dmg-I(A)
Level 1: Brawl -- Dmg-I(A)
Level 1: Defiance
Level 1: Quick Form
Level 1: Prestige Power Dash -- Empty(A)
Level 1: Prestige Power Slide -- Run-I(A)
Level 1: Prestige Power Quick -- Empty(A)
Level 1: Prestige Power Rush -- Empty(A)
Level 1: Prestige Power Surge -- Empty(A)
Level 1: Sprint -- Run-I(A)
Level 2: Rest -- Heal-I(A)
Level 4: Ninja Run
Level 2: Swift -- Run-I(A)
Level 2: Health -- Heal-I(A), Heal-I(46), Heal-I(46)
Level 2: Hurdle -- Jump-I(A)
Level 2: Stamina -- EndMod-I(A), EndMod-I(46), EndMod-I(48)
------------ -
1 minute ago, Shred Monkey said:
These two sets will grant maximum damage and recharge. If these are the only IO sets you're going to use, I would put them in your two highest DPA powers so you can use those powers as often as possible. This would be Blaze and Blazing Bolt.
An alternative you might consider is to put them in Flares and Blaze then run an attack chain of: flares > Blaze > flares > blazing bolt > flares > blaze > flares > fireball. ( I'd put the attacks in my tray to so the chain is: 3 4 3 2 3 4 3 1 repeat)
There's a lot of other things you can do with more IOs, but this would a way to get started.
Awesome. That is what I was looking for. I know I use Flares all the time so that would definitely be a must. As for the second power, Blazing Bolt vs Blaze is a toss up. I try to use Blazing Bolt only when it procs, but could start to use it more if I had a set bonus slotting for it.
-
Here is my Level 50 build. Thoughts?
Hero Plan by Mids' Reborn : Hero Designer 2.6.0.7
https://github.com/ImaginaryDevelopment/imaginary-hero-designerClick this DataLink to open the build!
Bouncing Bear 50: Level 50 Science Blaster
Primary Power Set: Fire Blast
Secondary Power Set: Devices
Power Pool: Leaping
Power Pool: Concealment
Ancillary Pool: Flame MasteryHero Profile:
Level 1: Fire Blast- (A) Superior Defiant Barrage - Accuracy/Damage
- (3) Superior Defiant Barrage - Damage/RechargeTime
- (3) Superior Defiant Barrage - Accuracy/Damage/RechargeTime
- (5) Superior Defiant Barrage - Accuracy/Damage/Endurance
- (5) Superior Defiant Barrage - Accuracy/Damage/Endurance/RechargeTime
- (7) Superior Defiant Barrage - RechargeTime/+Status
Level 1: Toxic Web Grenade
- (A) Accuracy IO
Level 2: Fire Ball
- (A) Damage Increase IO
- (7) Damage Increase IO
- (9) Accuracy IO
- (9) Accuracy IO
- (11) Range IO
- (11) Recharge Reduction IO
Level 4: Super Jump
- (A) Jumping IO
Level 6: Caltrops
- (A) Range IO
- (13) Range IO
- (13) Damage Increase IO
- (15) Damage Increase IO
- (15) Slow IO
- (17) Slow IO
Level 8: Rain of Fire
- (A) Damage Increase IO
- (17) Damage Increase IO
- (19) Range IO
- (19) Accuracy IO
- (21) Accuracy IO
- (21) Recharge Reduction IO
Level 10: Flares
- (A) Superior Blaster's Wrath - Accuracy/Damage
- (23) Superior Blaster's Wrath - Damage/Recharge
- (23) Superior Blaster's Wrath - Accuracy/Damage/Recharge
- (25) Superior Blaster's Wrath - Accuracy/Damage/Endurance
- (25) Superior Blaster's Wrath - Accuracy/Damage/Endurance/Recharge
- (27) Superior Blaster's Wrath - Recharge/Chance for Fire Damage
Level 12: Targeting Drone
- (A) Endurance Reduction IO
- (27) Endurance Reduction IO
- (29) Recharge Reduction IO
- (29) Recharge Reduction IO
- (31) To Hit Buff IO
- (31) To Hit Buff IO
Level 14: Grant Invisibility
- (A) Recharge Reduction IO
Level 16: Smoke Grenade
- (A) Accuracy IO
- (31) Accuracy IO
- (33) To Hit Debuff IO
- (33) To Hit Debuff IO
Level 18: Blaze
- (A) Damage Increase IO
- (33) Damage Increase IO
- (34) Range IO
- (34) Accuracy IO
- (34) Accuracy IO
- (36) Recharge Reduction IO
Level 20: Aim
- (A) To Hit Buff IO
- (36) To Hit Buff IO
- (36) Recharge Reduction IO
Level 22: Field Operative
- (A) Healing IO
- (37) Defense Buff IO
- (37) Defense Buff IO
Level 24: Invisibility
- (A) Defense Buff IO
Level 26: Blazing Bolt
- (A) Damage Increase IO
- (37) Damage Increase IO
- (39) Recharge Reduction IO
- (39) Endurance Reduction IO
- (39) Accuracy IO
- (40) Accuracy IO
Level 28: Fire Breath
- (A) Damage Increase IO
Level 30: Taser
- (A) Disorient Duration IO
Level 32: Inferno
- (A) Damage Increase IO
- (40) Damage Increase IO
- (40) Endurance Reduction IO
- (42) Recharge Reduction IO
- (42) Accuracy IO
- (42) Accuracy IO
Level 35: Bonfire
- (A) Damage Increase IO
- (43) Damage Increase IO
- (43) Knockback Distance IO
- (43) Knockback Distance IO
Level 38: Trip Mine
- (A) Knockback Distance IO
Level 41: Melt Armor
- (A) Defense Debuff IO
- (45) Defense Debuff IO
- (45) Accuracy IO
- (45) Accuracy IO
- (50) Range IO
- (50) Range IO
Level 44: Gun Drone
- (A) Damage Increase IO
Level 47: Rise of the Phoenix
- (A) Recharge Reduction IO
- (48) Healing IO
- (48) Damage Increase IO
- (50) Damage Increase IO
Level 49: Time Bomb
- (A) Damage Increase IO
Level 1: Brawl
- (A) Damage Increase IO
Level 1: Defiance
Level 1: Quick Form
Level 1: Prestige Power Dash -
Another question. Does it matter which powers I slot for the 6-set bonus powers? Was thinking Fire Blast or flares but wasnt sure which was the best.
-
15 minutes ago, Without_Pause said:
FYI, IO crafting cost goes up based on the level of the IO. Two level 50 IOs can be close enough to three lower levels to where there is no real need to slot three of them. More so if you enhancement boost them. DO NOT use an all common IO build with enhanced IOs. You want them for a build with IO sets and just a few token common IOs in something like Hasten. Have a character earn the level 25-30 common IOs badges. Slot those into builds once you hit 22. Using SOs is wasting money.
I tried converting the build over to common IOs as that built, to be frank, is a mess, but I ran out of slots, so I'll let someone with better experience with /dev chime in with advice. Case in point, slot attacks with end reduction. There might be one power in all of the game I would slot for range. Maybe. As long as an attack takes acc, slot acc. 1 for single target, 2 for multi-target. Single target for me is slotted 1 acc, 1 end, 3 damage, 1 recharge. Early attacks can go with 5 slots skipping the recharge. Multi-target attacks get a second acc and skip on recharge.
I would switch over to to a proper common IO build, work on the four stat boosting accolades, and going full incarnate. Doing that is far more straightforward than finding and affording a IO set based build depending on the budget.
Thanks for the feedback. The reason I didnt slot much Acc is that I have Targeting Drone slotted with 3 To Hit Buffs. I figured that would help out with Acc without having to use slots for accuracy.
-
Hi Everyone,
I just hit Level 47 on my Fire Blaster/Device toon. So, now I am going to be looking at Level 50 enhancement slots(Level 50 IO’s for everything). So, I was needing help on a few things:
1. Do I have the correct amount of enchantment slots for the powers that I have?
2. I am going to look at the 2 Blaster Sets (Superior Blaster’s Wrath and Superior Defiant Barrage). Which 2 powers would be the best to slot these sets of 6?
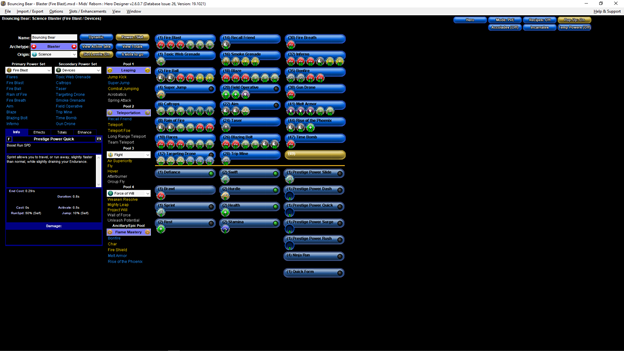
Any other suggestions would be greatly appreciated. MID’s build is below:
Hero Plan by Mids' Reborn : Hero Designer 2.6.0.7
https://github.com/ImaginaryDevelopment/imaginary-hero-designerClick this DataLink to open the build!
Bouncing Bear: Level 49 Science Blaster
Primary Power Set: Fire Blast
Secondary Power Set: Devices
Power Pool: Leaping
Power Pool: Teleportation
Ancillary Pool: Flame MasteryHero Profile:
Level 1: Fire Blast -- Dmg(A), Dmg(3), Dmg(3), Range(5), Range(5), Range(7)
Level 1: Toxic Web Grenade -- Range(A)
Level 2: Fire Ball -- RechRdx(A), RechRdx(7), Dmg(9), Dmg(9), Acc(11), Acc(11)
Level 4: Super Jump -- Jump(A)
Level 6: Caltrops -- Range(A), Range(13), Range(13), Slow(15), Slow(15), Slow(17)
Level 8: Rain of Fire -- RechRdx(A), RechRdx(17), Range(19), Range(19), Dmg(21), Dmg(21)
Level 10: Flares -- Dmg(A), Dmg(23), Dmg(23), Range(25), Range(25), Range(27)
Level 12: Targeting Drone -- ToHit(A), ToHit(27), ToHit(29), EndRdx(29), EndRdx(31), EndRdx(31)
Level 14: Recall Friend -- RechRdx(A)
Level 16: Smoke Grenade -- ToHitDeb(A), ToHitDeb(31), Acc(33), Acc(33)
Level 18: Blaze -- Dmg(A), Dmg(33), Dmg(34), Range(34), Range(34), Range(36)
Level 20: Field Operative -- Heal(A), Heal(36), DefBuff(36)
Level 22: Aim -- RechRdx(A), RechRdx(37), ToHit(37)
Level 24: Taser -- Dsrnt(A)
Level 26: Blazing Bolt -- Dmg(A), Dmg(37), Range(39), Range(39), RechRdx(39), RechRdx(40)
Level 28: Trip Mine -- KBDist(A)
Level 30: Fire Breath -- Dmg(A)
Level 32: Inferno -- Dmg(A), Dmg(40), Dmg(40), RechRdx(42), Acc(42), Acc(42)
Level 35: Bonfire -- KBDist(A), KBDist(43), Dmg(43), Dmg(43)
Level 38: Gun Drone -- Dmg(A)
Level 41: Melt Armor -- DefDeb(A), DefDeb(45), DefDeb(45), Range(45), Range(46)
Level 44: Rise of the Phoenix -- RechRdx(A), RechRdx(46), Heal(46)
Level 47: Time Bomb -- Dmg(A)
Level 49: [Empty]
Level 1: Brawl -- Dmg(A)
Level 1: Defiance
Level 1: Quick Form
Level 1: Prestige Power Dash -- Empty(A)
Level 1: Prestige Power Slide -- Run(A)
Level 1: Prestige Power Quick -- Empty(A)
Level 1: Prestige Power Rush -- Empty(A)
Level 1: Prestige Power Surge -- Empty(A)
Level 1: Sprint -- Run(A)
Level 2: Rest -- Heal(A)
Level 4: Ninja Run
Level 2: Swift -- Run(A)
Level 2: Health -- Heal(A)
Level 2: Hurdle -- Jump(A)
Level 2: Stamina -- EndMod(A)
------------ -
On 5/19/2020 at 2:06 PM, Scientist said:
OP, if you want to be a really effective addition to your team, both as a healer and as a secondary blaster, I'd suggest doing this. You can slot most sets in the game by your level, and you will notice definite improvements in recharge of heals, defenses, and a number of other areas. Then, when you hit 50, you can pull out any sets you had slotted, such as Decimation or Positrons Blast, and replace them with your final sets, storing the sets you pulled out for your next character. I've got some sets that have been passed through 3 characters now on the way to 50, so you don't have to keep buying them. Just make sure to buy the Attuned versions, so you can start slotting them around SO time, and they are effective up to 50.
If, for example, you want to 6-slot heals, if you put a Numina in you get some ranged defense, or a Preventative Medicine for some recharge. For Recovery Aura (which should have Endurance Modification, not End Reduction, by the way) slot one of the new EndMod sets, Preemptive Optimization, for both defense and some recharge. Also, though they are more expensive, the Defender ATOs are some of the best in the game.
Stupid question. How do I pull IO's out? Arent they Soul bound(Sorry, thats a WoW term. LOL
-
1 hour ago, War_L0ck said:
I wouldn't use SOs for anything. You can buy or craft non-set IOs that are as good and don't ever expire. You can go to the university or a SG base and buy recipes from the table. You can use /ah to also buy recipes, the enhancements themselves, or the materials needed to craft the recipes.
So that I am clear. If I buy a level 37 IO that levels with me, when I hit 50, will it be just as good as a level 50 IO?
-
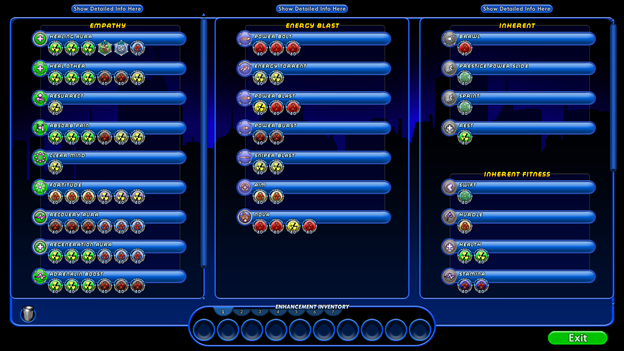
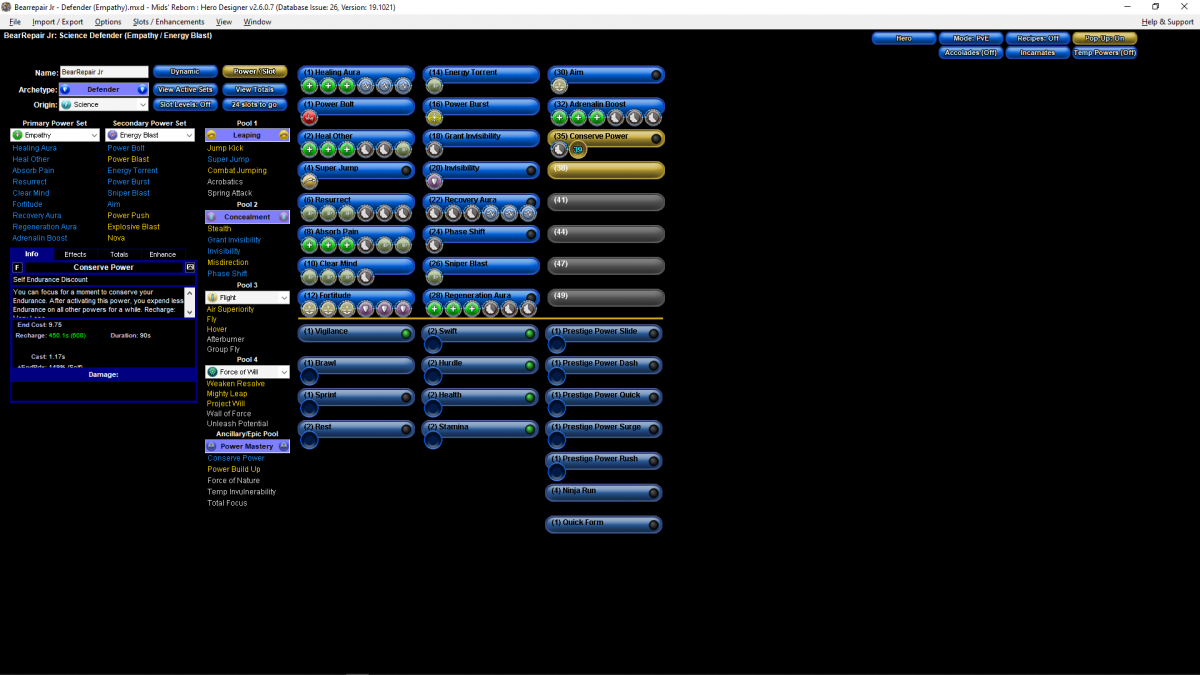
Ok, I did a quick revision of my enhancements. Thoughts?
Hero Plan by Mids' Reborn : Hero Designer 2.6.0.7
https://github.com/ImaginaryDevelopment/imaginary-hero-designerClick this DataLink to open the build!
BearRepair Jr: Level 49 Science Defender
Primary Power Set: Empathy
Secondary Power Set: Energy Blast
Power Pool: Leaping
Power Pool: Concealment
Ancillary Pool: Power MasteryHero Profile:
Level 1: Healing Aura -- Heal(A), Heal(3), Heal(3), EndRdx(5), EndRdx(5), EndRdx(7)
Level 1: Power Bolt -- Dmg(A), Dmg(13), Dmg(13)
Level 2: Heal Other -- Heal(A), Heal(7), Heal(9), RechRdx(9), RechRdx(11), Range(11)
Level 4: Super Jump -- Jump(A)
Level 6: Resurrect -- Range(A)
Level 8: Absorb Pain -- Heal(A), Heal(17), Heal(19), RechRdx(19), Range(21), Range(21)
Level 10: Clear Mind -- Range(A)
Level 12: Fortitude -- ToHit(A), ToHit(25), ToHit(25), DefBuff(27), DefBuff(27), DefBuff(29)
Level 14: Energy Torrent -- Range(A), Dmg(15)
Level 16: Power Burst -- Acc(A), Dmg(17), Dmg(23)
Level 18: Grant Invisibility -- RechRdx(A)
Level 20: Invisibility -- DefBuff(A)
Level 22: Recovery Aura -- RechRdx(A), RechRdx(29), RechRdx(31), EndRdx(31), EndRdx(31), EndRdx(33)
Level 24: Phase Shift -- RechRdx(A)
Level 26: Sniper Blast -- Range(A), Acc(39), Acc(39)
Level 28: Regeneration Aura -- Heal(A), Heal(33), Heal(33), EndRdx(34), EndRdx(34), EndRdx(34)
Level 30: Aim -- ToHit(A), ToHit(37)
Level 32: Adrenalin Boost -- Heal(A), Heal(36), Heal(36), RechRdx(36), RechRdx(37), RechRdx(37)
Level 35: Conserve Power -- RechRdx(A)
Level 38: [Empty]
Level 41: [Empty]
Level 44: [Empty]
Level 47: [Empty]
Level 49: [Empty]
Level 1: Brawl -- Empty(A)
Level 1: Quick Form
Level 1: Prestige Power Dash -- Empty(A)
Level 1: Prestige Power Slide -- Empty(A)
Level 1: Prestige Power Quick -- Empty(A)
Level 1: Prestige Power Rush -- Empty(A)
Level 1: Prestige Power Surge -- Empty(A)
Level 1: Sprint -- Empty(A)
Level 1: Vigilance
Level 2: Rest -- Empty(A)
Level 4: Ninja Run
Level 2: Swift -- Empty(A)
Level 2: Health -- Empty(A)
Level 2: Hurdle -- Empty(A)
Level 2: Stamina -- Empty(A)
------------ -
2 minutes ago, Peacemoon said:
On the AH you can buy 'attuned enhancements' and these will scale with you as you level, so that at level 50 they will work as if they are a level 50 version. And if you exempler down, they will scale down, and the set bonuses (providing you are within the level range that the set stretches to), will also continue to work. So I would recommend using those while leveling, if you can afford them 😊
I was looking at Defender's Bastion and Vigilant Assault as the 2 sets to get.
-
1 minute ago, Peacemoon said:
Pretty much. On the Mids builder, when the enhanced numbers start going yellow and red, it means you're into diminished returns area. To fully enhance a specific stat you want to get it into the red, but without going far over as you start getting very heavy diminished returns.
That makes a lot of sense. My other level 50(Controller), I waited till I hit 50 before I started with Set Bonus and IO's. He is now fully slotted with all IO's and 2 6-set enhancements. If I got for a set bonus now at level 37, wont I just be replacing it again at 50?
-
Since I am still new to the game, I read about diminishing returns for enhancements. Is more than 3 of the same type of enhancements a waste?
-
21 minutes ago, Peacemoon said:
Pure healer is a bit of a folly in this game. Obviously its your hero and you can do what you like, but my advice would be to diversify a bit.
Its more about the 'opportunity cost', i.e. what you are comparably losing by pushing so hard in one direction for small gains. For example, you have 3 range slots in ressurect which takes the range from 15yards to 23.4 yards. Obviously more range in ressurect can be handy, but the opportunity cost is you could use those slots to double the damage of one of your blasts, and on balance that will support your team much more powerfully than the extra range on ressurect. Thats just one example that can be replicated across your build.
There is nothing wrong with being an Empath that focuses on teams and support, but don't go "all in" and waste slots on your primary powers where they aren't needed and are providing very little gain. As a start I would take out the slots from ressurect and clear mind, and just stick with the original slot, and put those slots in your blast powers. A Defender can definitely do a lot of damage if you put some emphasis on it, and dead enemies don't hut people.
I think this would be a good start 😊
Thank you. That is what I was looking for. Aside from the slots form REs and Clear Mind, What other powers do I have extra slots for?
-
25 minutes ago, Carnifax said:
Healing is nice and all but I think here youre way overslotted for heals, at the cost of your attacks. Pure healers arent needed in CoH, especially later as peoples builds mature.
You have a whole secondary stuffed with Blasts for a reason. You can certainly focus more on buffs and then heals and finally blasts but effectively ignoring your secondary is going to gimp you and leave you with very little to do on a strong team who doesnt need much healing.
Also recovery aura should be slotted with End Mod rather than End Red.
Theres a whole post stickied at the top of this forum explaining the fallacy of the "pure healer" in CoH.
Thanks for the feedback. With the next levels coming, my slots are going to go to my secondary powers so I will be slotting them. I was just wanting to know if the enhancements that I had in my current build for my heals were correct.
Thank you
-
Hi All,
I have hit level 37 and was wondering if I am slotting my powers correctly. This toon only plays in a group so his secondary powers only have 1 slot. I havent start with IO's yet, still doing SO's for now. Main concern is that I have the right amount of Heals, Recharge etc's in my powers.
Thank you
Hero Plan by Mids' Reborn : Hero Designer 2.6.0.7
https://github.com/ImaginaryDevelopment/imaginary-hero-designerClick this DataLink to open the build!
BearRepair Jr: Level 49 Science Defender
Primary Power Set: Empathy
Secondary Power Set: Energy Blast
Power Pool: Leaping
Power Pool: Concealment
Ancillary Pool: Power MasteryHero Profile:
Level 1: Healing Aura -- Heal(A), Heal(3), Heal(3), EndRdx(5), EndRdx(5), EndRdx(7)
Level 1: Power Bolt -- Dmg(A)
Level 2: Heal Other -- Heal(A), Heal(7), Heal(9), RechRdx(9), RechRdx(11), Range(11)
Level 4: Super Jump -- Jump(A)
Level 6: Resurrect -- Range(A), Range(13), Range(13), RechRdx(15), RechRdx(15), RechRdx(17)
Level 8: Absorb Pain -- Heal(A), Heal(17), Heal(19), RechRdx(19), Range(21), Range(21)
Level 10: Clear Mind -- Range(A), Range(23), Range(23), RechRdx(37)
Level 12: Fortitude -- ToHit(A), ToHit(25), ToHit(25), DefBuff(27), DefBuff(27), DefBuff(29)
Level 14: Energy Torrent -- Range(A)
Level 16: Power Burst -- Acc(A)
Level 18: Grant Invisibility -- RechRdx(A)
Level 20: Invisibility -- DefBuff(A)
Level 22: Recovery Aura -- RechRdx(A), RechRdx(29), RechRdx(31), EndRdx(31), EndRdx(31), EndRdx(33)
Level 24: Phase Shift -- RechRdx(A)
Level 26: Sniper Blast -- Range(A)
Level 28: Regeneration Aura -- Heal(A), Heal(33), Heal(33), RechRdx(34), RechRdx(34), RechRdx(34)
Level 30: Aim -- ToHit(A)
Level 32: Adrenalin Boost -- Heal(A), Heal(36), Heal(36), RechRdx(36), RechRdx(37), RechRdx(37)
Level 35: Conserve Power -- RechRdx(A)
Level 38: [Empty]
Level 41: [Empty]
Level 44: [Empty]
Level 47: [Empty]
Level 49: [Empty]
Level 1: Brawl -- Empty(A)
Level 1: Quick Form
Level 1: Prestige Power Dash -- Empty(A)
Level 1: Prestige Power Slide -- Empty(A)
Level 1: Prestige Power Quick -- Empty(A)
Level 1: Prestige Power Rush -- Empty(A)
Level 1: Prestige Power Surge -- Empty(A)
Level 1: Sprint -- Empty(A)
Level 1: Vigilance
Level 2: Rest -- Empty(A)
Level 4: Ninja Run
Level 2: Swift -- Empty(A)
Level 2: Health -- Empty(A)
Level 2: Hurdle -- Empty(A)
Level 2: Stamina -- Empty(A)
------------ -
I am still leaning the lingo of CoH. What exactly do you mean by Attuned IO's? Do I get them from the Vending maching?
-
Sounds good. Aside from having more than one ability per Incarnate power, there isnt much otter use for the Incarnate salvage then correct?
-
30 minutes ago, Peacemoon said:
You can send your empyrean merits to other characters by converting them to transcendent merit (50 empyrean to 1 transcendent, Send and then convert back, like what you can do with regular and hero merits).
Normal salvage such as threads and shards you can’t do anything with.
There is some benefit from having alternative incarnate powers, particularly alpha and destiny I find, so there is always that to use spares on.So you are saying that I can have multiple Incarnate options for each power and then slot accordingly to the battle?
-
So I have been grinding alot with my Controller over the past 2 weeks. I have gotten all 6 Incarnate abilities to Tier 4. I have gotten both Tier Sets(Superior Overpowering Presence and Superior Will of the Controller). I have replaced all enchantments with IO's. What else can I do to make my Controller better?
Thank you
-
For my first 50, I finally got all Tier 4 abilities for my Incarnate powers. Is there anything else I can do with the Incarnate Salvage that I am still getting? Also, is there a way to send them to another toon?
-
And even it CoH only starts with a basic calendar that allows Super groups to schedule events. It could later expand the CoH events server wide. Just something in-game that will allowing scheuling of events would be great.


Incarnate Thread - Salvage
in General Discussion
Posted
Thanks for the feedback. I will check out the vendor in Oroboros. I was thinking that there was a conversion that could be used for the threads. But, oh well. Inspirations it is.