

S33k3r
-
Posts
32 -
Joined
-
Last visited
Content Type
Profiles
Forums
Events
Store
Articles
Patch Notes
Posts posted by S33k3r
-
-
I have a Fire/Fire/Fire Blaster, and took Rain of Fire -- it looks really good "on paper". But then, like everyone else, I began to "enjoy" the scatter effect caused by the inherent fear in the power (yay). I do have a chance for knockdown proc in the power, but everything I have since read -- some of which I have experienced -- has made that less optimal than I would have considered. This brings me to you folks, Blaster Experts: Is there a way to retain Rain of Fire's AoE goodness, using just enhancements? If so, can you please offer me some suggestions?
FYI, this is a level 50 build, so I am not concerned with exemplaring the character. I specifically want to keep Rain of Fire for it's AoE capabilities, having taken ALL the AoE damage powers in the Fire Primary (I'm Fire/Atomic/Fire).
Thanks!
-
Before the issue 27 changes, I played a Fire / Tactical Arrow Blaster. After the changes, I have mothballed it, and am trying a different build. I have far more experience with Corruptors/Defenders and Controllers; more recently with Tankers and other melee types. Can you please assist me? Assume expense is not a problem, and Thanks!
Notes:
- Defenses are low; I have a different build that focuses more on defense/resistance, but this one has done well so far. I am interested in better defenses, always, but not at the cost of damage or recharge. I can currently cast a fully pumped Inferno every 39 seconds or so. Even Rise of the Phoenix is available every 75 seconds or so, and neither of those includes using Burnout.
- I am focussing on AoE attacks. So I am not looking for better single target damage.
- This is a team build and is expected never to solo.
Hero Plan by Mids' Reborn : Hero Designer 2.6.1.25
https://github.com/Crytilis/mids-reborn-hero-designerIncendiary Effect: Level 50 Mutation Blaster
Primary Power Set: Fire Blast
Secondary Power Set: Atomic Manipulation
Power Pool: Sorcery
Power Pool: Concealment
Power Pool: Leadership
Power Pool: Speed
Ancillary Pool: Flame MasteryHero Profile:
------------
Level 1: Flares
(A) Superior Defiant Barrage - RechargeTime/+Status
(3) Superior Defiant Barrage - Accuracy/Damage
(3) Superior Defiant Barrage - Damage/RechargeTime
(5) Superior Defiant Barrage - Accuracy/Damage/RechargeTime
(5) Superior Defiant Barrage - Accuracy/Damage/Endurance
(7) Superior Defiant Barrage - Accuracy/Damage/Endurance/RechargeTime
Level 1: Electron Shackles
(A) Decimation - Chance of Build Up
Level 2: Fire Ball
(A) Ragnarok - Chance for Knockdown
(7) Positron's Blast - Accuracy/Damage
(9) Positron's Blast - Damage/Endurance
(9) Positron's Blast - Damage/Recharge
(11) Positron's Blast - Damage/Range
(11) Positron's Blast - Accuracy/Damage/Endurance
Level 4: Mystic Flight
(A) HamiO:Microfilament Exposure
Level 6: Rain of Fire
(A) Overwhelming Force - Damage/Chance for Knockdown/Knockback to Knockdown
(13) Positron's Blast - Accuracy/Damage
(15) Positron's Blast - Damage/Endurance
(15) Positron's Blast - Damage/Recharge
(17) Positron's Blast - Damage/Range
(17) Positron's Blast - Accuracy/Damage/Endurance
Level 8: Fire Breath
(A) Artillery - Accuracy/Damage
(19) Artillery - Damage/Endurance
(19) Artillery - Damage/Recharge
(21) Artillery - Accuracy/Damage/Recharge
(21) Artillery - Accuracy/Recharge/Range
(23) Artillery - Endurance/Recharge/Range
Level 10: Ionize
(A) Adjusted Targeting - Recharge
(23) Adjusted Targeting - To Hit Buff/Recharge
(25) Adjusted Targeting - Endurance/Recharge
(25) Adjusted Targeting - To Hit Buff/Endurance/Recharge
(27) Adjusted Targeting - To Hit Buff/Endurance
Level 12: Aim
(A) Adjusted Targeting - Recharge
(27) Adjusted Targeting - To Hit Buff/Recharge
(29) Adjusted Targeting - Endurance/Recharge
(29) Adjusted Targeting - To Hit Buff/Endurance/Recharge
(31) Adjusted Targeting - To Hit Buff/Endurance
Level 14: Stealth
(A) Shield Wall - +Res (Teleportation), +5% Res (All)
(31) Shield Wall - Defense
(31) Luck of the Gambler - Defense/Increased Global Recharge Speed
Level 16: Beta Decay
(A) Achilles' Heel - Defense Debuff
Level 18: Maneuvers
(A) Reactive Defenses - Scaling Resist Damage
(33) Reactive Defenses - Defense
(33) Reactive Defenses - Defense/Endurance
(33) Reactive Defenses - Defense/RechargeTime
(34) Reactive Defenses - Defense/Endurance/RechargeTime
(34) Reactive Defenses - Endurance/RechargeTime
Level 20: Metabolic Acceleration
(A) Numina's Convalescence - +Regeneration/+Recovery
(34) Numina's Convalescence - Heal/Endurance
(36) Numina's Convalescence - Endurance/Recharge
(36) Numina's Convalescence - Heal/Recharge
(36) Numina's Convalescence - Heal/Endurance/Recharge
(37) Numina's Convalescence - Heal
Level 22: Assault
(A) Endurance Reduction IO
Level 24: Tactics
(A) Gaussian's Synchronized Fire-Control - Chance for Build Up
Level 26: Blazing Bolt
(A) Apocalypse - Damage
(37) Apocalypse - Damage/Recharge
(37) Apocalypse - Accuracy/Damage/Recharge
(39) Apocalypse - Accuracy/Recharge
(39) Apocalypse - Damage/Endurance
(39) Apocalypse - Chance of Damage(Negative)
Level 28: Hasten
(A) Recharge Reduction IO
(40) Recharge Reduction IO
Level 30: Spirit Ward
(A) Preventive Medicine - Chance for +Absorb
Level 32: Inferno
(A) Superior Blaster's Wrath - Recharge/Chance for Fire Damage
(40) Superior Blaster's Wrath - Accuracy/Damage
(40) Superior Blaster's Wrath - Damage/Recharge
(42) Superior Blaster's Wrath - Accuracy/Damage/Recharge
(42) Superior Blaster's Wrath - Accuracy/Damage/Endurance
(42) Superior Blaster's Wrath - Accuracy/Damage/Endurance/Recharge
Level 35: Bonfire
(A) Ragnarok - Damage
(43) Ragnarok - Damage/Recharge
(43) Ragnarok - Accuracy/Damage/Recharge
(43) Ragnarok - Accuracy/Recharge
(45) Ragnarok - Damage/Endurance
(45) Sudden Acceleration - Knockback to Knockdown
Level 38: Rune of Protection
(A) Gladiator's Armor - TP Protection +3% Def (All)
(45) Impervious Skin - Status Resistance
Level 41: Fire Shield
(A) Steadfast Protection - Resistance/+Def 3%
(46) Unbreakable Guard - Resistance
(46) Unbreakable Guard - +Max HP
(46) Unbreakable Guard - Resistance/Endurance
Level 44: Rise of the Phoenix
(A) Armageddon - Damage
(48) Armageddon - Damage/Recharge
(48) Armageddon - Accuracy/Damage/Recharge
(48) Armageddon - Accuracy/Recharge
(50) Armageddon - Damage/Endurance
(50) Armageddon - Chance for Fire Damage
Level 47: Super Speed
(A) Winter's Gift - Slow Resistance (20%)
Level 49: Burnout
(A) Recharge Reduction IO
(50) Recharge Reduction IO
Level 1: Brawl
(A) Empty
Level 1: Defiance
Level 1: Quick Form
Level 1: Prestige Power Dash
(A) Empty
Level 1: Prestige Power Slide
(A) Empty
Level 1: Prestige Power Quick
(A) Empty
Level 1: Prestige Power Rush
(A) Empty
Level 1: Prestige Power Surge
(A) Empty
Level 1: Sprint
(A) Celerity - +Stealth
Level 2: Rest
(A) Empty
Level 4: Ninja Run
Level 2: Swift
(A) HamiO:Microfilament Exposure
Level 2: Health
(A) Panacea - +Hit Points/Endurance
(13) Regenerative Tissue - +Regeneration
Level 2: Hurdle
(A) Jumping IO
Level 2: Stamina
(A) Efficacy Adaptor - EndMod
Level 50: Assault Core Embodiment
Level 50: Agility Radial Paragon
Level 50: Pyronic Radial Final Judgement
Level 50: Clarion Radial Epiphany
Level 50: Degenerative Core Flawless Interface
Level 50: Banished Pantheon Radial Superior Ally
------------| Copy & Paste this data into Mids' Reborn : Hero Designer to view the build |
|-------------------------------------------------------------------|
|MxDz;1561;726;1452;HEX;|
|78DA6594CB4F135114C6EF74A6940205DA42791628EF47195A4051C047788A4082A|
|06EC9D80E3A496D9B763076E9DE8D3171A1283E160A0B37A22EFD5B8C4BC3C3D7C2|
|B8A8A7733E18924E02BF3B67CEF79D736EEFCCF2FD998AF7F30F2E09C9339DD0B2D|
|9F529FA6FEA99D2E54D53338D5452D0E55B48C6F464DCD0CC4CAE6D7663438F992E|
|0A3720777D554BDED6E3EA9C91D159DF7DFC646D339D4E654C75552BA8C96E7D594|
|B1AE9CD047B57ACA45209752D9589E9999CD7BA5948DE33B2C62D236198B92A2BB2|
|A46B713D93BD63A4CB383DADEB71DF6CDA88A97309EDAE4E96855AB97A6A294C7F9|
|7C5F195770AA7224454110E014A4CC501CACC128539D677A215628BD0A388298204|
|3F69CCC1F91F84C5D23DF023B3EC13F899F9B84B0859623F7982A0C8629AE0849FF|
|3AB6CE555C0AF127E95F0AB865F35FC66082E685DB2D38AF914D0C9AC29015DCC40|
|29739C6673B35671BFE13902DBCCFA57E04B66E36BE62C659743530E4D2334CDD03|
|443D3028D871AF4F0CC0ECF22CFD77215AC952C4E502F55D897AA2FA4F32BC24B3A|
|2FC79CDE5F9CDF76001E823F98A19FE0117392FCFCD0FA6F728DD03566C72AB8065|
|E6776DE60FAA86E2D7AA90D15F6D92DFC14AB43AC6E87E79A2F1C79EC7D4398639D|
|83A0CAEC1E02236094D94E7E4DEC27350D708D1EF0119D9120CE5C709FE7B94277A|
|DA8D5BACDB19EA7E03366DF16F81C7CC17C4B6887B67D98EBF78F80A3E01966F82C|
|F88DCFFF13EAA58BB552D730FB8583D478D02D76E8B69767907B0B9B1354C4E06FC|
|E19FC0BFE61EE1206D0C3C039AE31741E1C072798D149F002B383F64AC57EA84DEC|
|E7080811415F11EC5B146C564EBDB379BA4448397E65F3F9C5FE93A7F9FEA2CC485|
|1245A1419298A8C164596EC8AF492F11C2BCAC97743485696BB9ABE06E865BF8C9E|
|4221E1CB7068C72429842FC345DEE983D3F9BD3CF9D1E9D843AEFA8E7EFA2866FF1|
|7B0D71D35F67AD76FAFE7EAECF5F74E7BFD1F3E2BF524|
|-------------------------------------------------------------------| -
If a Blaster is a master of all damage, what is the point of a Scrapper -- what niche do they fill?
During the days of live I simply didn't play blasters. I'd play a Defender and then Corruptors once they became available. I also played Controllers and Dominators. But I truly hated being in melee, especially on a squishy archetype. So why do I have to be "incentivized" to play in melee? Why can't I just play at range? Why are the powers in the Blaster Archetype set up to force them into melee?
I have learned a lot about how to play the game since it has been back, and there are changes to it that have made some things very easy. I'm even enjoying melee archetypes. But if I want to melee, I'm going to use a melee archetype, and leave the face planting to others who want to play blasters in melee. Because it doesn't matter how much damage you are capable of, the bad guys don't care when all you can do is lie there and inspect the carpet/take a dirt nap.
-
"After the game shut down, several new Blaster secondary sets were developed (eg: Tactical Arrow, Atomic Manipulation, Plant Manipulation), but these sets were generally quite overtuned in the crowd control department, whilst also lacking in incentives to get into melee range - both of these factors contributed towards the sets being a tad too safe."
I debated as to whether or not to respond in this thread, and finally decided I should at least try to get my voice to be heard. So here I go...
I disagree with the range changes to Tactical Arrow, and specifically take issue with this phrase: "whilst also lacking in incentives to get into melee range". Why does a Blaster need to be incentivized to get into melee range? Either a player has fun playing his blaster there and can pick a different set, or a player never wants to be in melee range and chooses their powers accordingly.
Said another way: Back in live, I never considered playing melee sets because I had trouble seeing around the melees, and I hadn't tried the melee-focussed archetypes. This resulted in fear of insta death if I were in melee -- with lots of confirmations on my Defenders, Controllers, Corruptors, etc. It wasn't until the game returned that I tried Tanks, Brutes, Stalkers, and Scrappers.
So my question is this: Why does game design insist on getting blasters into melee range? It just seems dumb, especially when there are so many, other melee archetypes. Because I know if I play a blaster, I do not want to be in melee.
Please do not reduce the ranges on Tactical Arrow.
Thank you.
-
 5
5
-
 1
1
-
-
Why is it considered a good thing for Blasters to be forced into melee range? I mean, if I wanted to play melee, I'd play a Brute, Scrapper, Stalker or Tanker. I too would ask that the ranges on Tactical Arrow not be nerfed. I used to avoid melee -- and melee ATs -- like the plague. since CoH has been back, I have learned to play melee. And I still feel the same about blastes: They need all range options and NOT to be forced into melee.
-
4
-
 1
1
-
-
On 5/24/2020 at 5:47 AM, FrauleinMental said:
Mender Ramiel's first mission is the one in your far future where you have godmode activated.
Is there a way to get this again if you have already completed it?
-
Ran this last night using this document as a reference -- along with some help. That document is nicely thorough! This was particularly helpful:
"For the raid leader: Balancing the teams is important to keep rewards well spread across all participants. Most important of course is to have a level 50 leader for each team. After that, distribute every AT equally across the available teams. (For example, no team should have 2 Masterminds if any team would be left with 0 Masterminds.)"
Thanks, Eda!
-
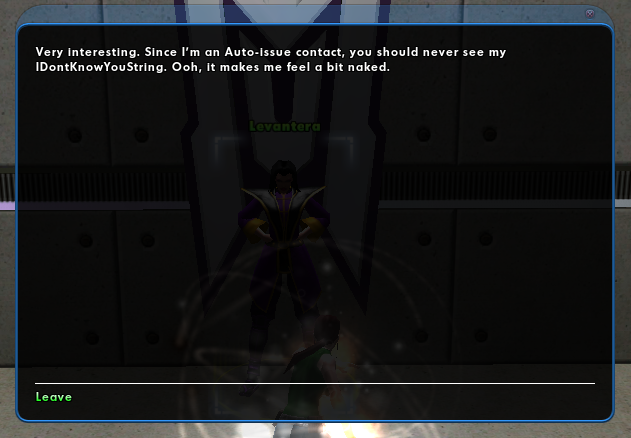
"Very interesting. Since I'm an Auto-issue contact, you should never see my IDontKnowYouString. Ooh, it makes me feel a bit naked."
I am playing on a Mac (64-bit)
This occurred after I teleported into the RWZ via the Lady Gray Taskforce -- via LFG
Borea did not have a problem with my character -- only Levantera
The issue persisted until I zoned out of RWZ and then zoned back in again (via base portal)
This was reported here per GM's suggestion.
Thank you!

-
2
-
-
First, thank you for your kind response. Second, do you have any suggestions on with what I should replace those Impervious Skin Status Resistance pieces, or the additional Psi resist pieces? Third, I'd forgotten I removed HamiOs except for the movement powers, in game; I have updated Mids to reflect that. Fourth, if I understand HamiOs correctly, they will exemplar down with you, where a level 50 movement piece would not. Further, Sprint can take leap and running sets, so the Hamio there adds to both. Swift adds to Flight and Running, not that I currently have a flight power. Hurdle only applies to leaping, so I would make the change there, except for the whole Exemplar thoughts, above.
Here is the build, in its current form, including incarnate content. Please let me know if you have further suggestions, and thank you again!
Hero Plan by Mids' Reborn : Hero Designer 2.6.0.7
https://github.com/ImaginaryDevelopment/imaginary-hero-designerLevel 50 Magic Brute
Primary Power Set: Savage Melee
Secondary Power Set: Shield Defense
Power Pool: Speed
Power Pool: Fighting
Power Pool: Leadership
Power Pool: Leaping
Ancillary Pool: Energy MasteryHero Profile:
------------
Level 1: Maiming Slash
(A) Mako's Bite - Accuracy/Damage
(19) Mako's Bite - Damage/Endurance
(48) Mako's Bite - Damage/Recharge
(48) Mako's Bite - Accuracy/Endurance/Recharge
(48) Mako's Bite - Accuracy/Damage/Endurance/Recharge
(50) Mako's Bite - Chance of Damage(Lethal)
Level 1: Deflection
(A) Impervious Skin - Status Resistance
(31) Impervium Armor - Psionic Resistance
(42) Luck of the Gambler - Defense
(42) Luck of the Gambler - Defense/Increased Global Recharge Speed
Level 2: Shred
(A) Superior Brute's Fury - Accuracy/Damage
(3) Superior Brute's Fury - Damage/Recharge
(3) Superior Brute's Fury - Accuracy/Damage/Recharge
(5) Superior Brute's Fury - Damage/Endurance/RechargeTime
(5) Superior Brute's Fury - Accuracy/Damage/Endurance/Recharge
(7) Superior Brute's Fury - Recharge/Fury Bonus
Level 4: Battle Agility
(A) Gift of the Ancients - Defense/Endurance
(31) Gift of the Ancients - Defense/Recharge
(34) Gift of the Ancients - Defense
(37) Shield Wall - +Res (Teleportation), +5% Res (All)
(40) Luck of the Gambler - Defense/Increased Global Recharge Speed
Level 6: True Grit
(A) Unbreakable Guard - Resistance
(13) Impervium Armor - Psionic Resistance
(40) Unbreakable Guard - Resistance/Endurance
(43) Unbreakable Guard - Resistance/Endurance/RechargeTime
(43) Unbreakable Guard - RechargeTime/Resistance
(45) Impervious Skin - Status Resistance
Level 8: Vicious Slash
(A) Hecatomb - Damage
(9) Hecatomb - Damage/Recharge
(9) Hecatomb - Accuracy/Damage/Recharge
(11) Hecatomb - Accuracy/Recharge
(11) Hecatomb - Damage/Endurance
(13) Hecatomb - Chance of Damage(Negative)
Level 10: Hasten
(A) Recharge Reduction IO
Level 12: Kick
(A) Force Feedback - Chance for +Recharge
Level 14: Tough
(A) Steadfast Protection - Resistance/+Def 3%
(15) Impervious Skin - Status Resistance
(15) Impervium Armor - Psionic Resistance
(17) Aegis - Psionic/Status Resistance
(17) Gladiator's Armor - TP Protection +3% Def (All)
Level 16: Super Speed
(A) Winter's Gift - Slow Resistance (20%)
Level 18: Rending Flurry
(A) Superior Unrelenting Fury - Accuracy/Damage
(23) Superior Unrelenting Fury - Damage/RechargeTime
(45) Superior Unrelenting Fury - Accuracy/Damage/RechargeTime
(46) Superior Unrelenting Fury - Damage/Endurance/RechargeTime
(46) Superior Unrelenting Fury - Accuracy/Damage/Endurance/RechargeTime
(46) Superior Unrelenting Fury - RechargeTime/+Regen/+End
Level 20: Phalanx Fighting
(A) Gift of the Ancients - Defense/Endurance
(21) Gift of the Ancients - Defense/Recharge
(21) Gift of the Ancients - Defense
(23) Reactive Defenses - Scaling Resist Damage
Level 22: Taunt
(A) Perfect Zinger - Chance for Psi Damage
Level 24: Weave
(A) Gift of the Ancients - Defense/Endurance
(25) Gift of the Ancients - Defense/Recharge
(25) Gift of the Ancients - Defense/Endurance/Recharge
(29) Gift of the Ancients - Defense
(31) Gift of the Ancients - Endurance/Recharge
(50) Luck of the Gambler - Defense/Increased Global Recharge Speed
Level 26: Maneuvers
(A) Gift of the Ancients - Defense/Endurance
(27) Gift of the Ancients - Defense/Recharge
(27) Gift of the Ancients - Endurance/Recharge
(29) Gift of the Ancients - Defense/Endurance/Recharge
(42) Gift of the Ancients - Defense
(43) Luck of the Gambler - Defense/Increased Global Recharge Speed
Level 28: Blood Thirst
(A) Recharge Reduction IO
Level 30: Against All Odds
(A) Recharge Reduction IO
Level 32: Savage Leap
(A) Superior Avalanche - Accuracy/Damage
(33) Superior Avalanche - Damage/Endurance
(33) Superior Avalanche - Accuracy/Damage/Endurance
(33) Superior Avalanche - Accuracy/Damage/Recharge
(34) Superior Avalanche - Accuracy/Damage/Endurance/Recharge
(34) Superior Avalanche - Recharge/Chance for Knockdown
Level 35: Shield Charge
(A) Armageddon - Damage
(36) Armageddon - Damage/Recharge
(36) Armageddon - Accuracy/Damage/Recharge
(36) Armageddon - Accuracy/Recharge
(37) Armageddon - Damage/Endurance
(37) Armageddon - Chance for Fire Damage
Level 38: One with the Shield
(A) Unbreakable Guard - Resistance
(39) Unbreakable Guard - Endurance/RechargeTime
(39) Unbreakable Guard - RechargeTime/Resistance
(39) Unbreakable Guard - Resistance/Endurance/RechargeTime
(40) Unbreakable Guard - +Max HP
(45) Impervium Armor - Psionic Resistance
Level 41: Superior Conditioning
(A) Performance Shifter - Chance for +End
Level 44: Physical Perfection
(A) Preventive Medicine - Chance for +Absorb
Level 47: Combat Jumping
(A) Luck of the Gambler - Defense/Increased Global Recharge Speed
Level 49: Active Defense
(A) Recharge Reduction IO
Level 1: Brawl
(A) Empty
Level 1: Prestige Power Dash
(A) Empty
Level 1: Prestige Power Slide
(A) Celerity - +Stealth
Level 1: Prestige Power Quick
(A) Empty
Level 1: Prestige Power Rush
(A) Empty
Level 1: Prestige Power Surge
(A) Empty
Level 1: Fury
Level 1: Sprint
(A) HamiO:Microfilament Exposure
Level 2: Rest
(A) Empty
Level 4: Ninja Run
Level 2: Swift
(A) HamiO:Microfilament Exposure
Level 2: Health
(A) Panacea - +Hit Points/Endurance
(7) Miracle - +Recovery
(19) Numina's Convalesence - Heal
(50) Numina's Convalesence - +Regeneration/+Recovery
Level 2: Hurdle
(A) HamiO:Microfilament Exposure
Level 2: Stamina
(A) Performance Shifter - Chance for +End
Level 1: Blood Frenzy
Level 50: Agility Partial Core Revamp
Level 50: Mighty Judgement
Level 50: Degenerative Core Interface
Level 50: Knives of Vengeance Core Ally
Level 50: Clarion Radial Invocation
Level 50: Melee Total Core Graft
------------| Copy & Paste this data into Mids' Reborn : Hero Designer to view the build |
|-------------------------------------------------------------------|
|MxDz;1532;698;1396;HEX;|
|78DA6D94594F135114C7EF74A694D21DE8062DD85268A7C5DABA242A1A8D2C264A0|
|D09D1576CE0D28E36D0B468E4D1073F832F2EA0F8A051125FFC10AED1EF819AB8A0|
|4FF530E74F87A44EDAFCEE3DF7FEEF59EE9929DD99726F5FBC7B4E28AEC95AB9D95|
|CB8D0B8B526EDA572C558147B8F83FE11D3B850923529F3F3E5DBE50A26315E9892|
|CB72A5494B5543D696F6A7A2676E75B5969FAF4BB9E431873346A5BA66AC547CE66|
|C56969764A35935EAEEFD799D16A3D37563313FBD221B95F58552B9B9261BEB1C55|
|844219A7FFF38CC0D3B28B65425113BD15E6912A68803798C59BCCB76EA2626A551|
|1A7415C13433A31AD09BD5F31F7E8419EBF203F0AEFB52B1BAAB966DB049F30B5A7|
|E016B3EB19F31DF95159ABA91A9F37646726BA99A9CBBC371D64BFEF4963873FFB4|
|F5E7323B6F42F9E67FF80BBCC71E47045E7ABDAD33AC66CE65A771ACC307B7430CB|
|74E79849123A592B9C39AE938D6C2E8E45B8EEF13E956C1EE4E409B35F2FFC7B11A|
|7FF04E7E23FCAF18D90C687B37D836C7B49750D20CF805B336D210F73DCCB3CEC03|
|FD6080F9896AD487FBEB435DFB51D77ED435F44335F98AFC04E13BD8E41C348A270|
|CDF61E823D0471CCC18CE19EA6216D10F01D246A18D423B00ED00F6C670868E33B2|
|B8DB6D8A6510B10CA2C61F2997B8D98C2D1187ED35ED1BC63D0E3FE09C0F3D041F8|
|18F99890D7093F999CE4B429B3CC9F98E9C024F8313CCD419F02CF30B6947A11D45|
|EF8DFD06D16B63E8BDF45FF41EEEDC191022835EC9DC476F912D075B6E87F787A87|
|E79D4208FBA7C20BF05D80AA8414C6BBFDFF4A347643B2C05ADFD1E53F3B2CF62C7|
|AE631D96E31D9619EBA4D6ECC1D50982A68A390DCB64534C85D34FEF365B5A3B3DE|
|D6F8450A0F866D9542581EFC225AE55EF55CEBB788DF9F53FFAEF076DA8A74C5B51|
|EE86C884F175DD1A9F0F5BE39D9435DEEAB3C66F92D6F81F73F4DF0C|
|-------------------------------------------------------------------| -
This is my build, a little updated. Thanks for your build, too!
Hero Plan by Mids' Reborn : Hero Designer 2.6.0.7
https://github.com/ImaginaryDevelopment/imaginary-hero-designerLevel 50 Magic Brute
Primary Power Set: Savage Melee
Secondary Power Set: Shield Defense
Power Pool: Speed
Power Pool: Fighting
Power Pool: Leadership
Power Pool: Leaping
Ancillary Pool: Energy MasteryHero Profile:
------------
Level 1: Savage Strike
(A) Mako's Bite - Accuracy/Damage
(19) Mako's Bite - Damage/Endurance
(48) Mako's Bite - Damage/Recharge
(48) Mako's Bite - Accuracy/Endurance/Recharge
(48) Mako's Bite - Accuracy/Damage/Endurance/Recharge
(50) Mako's Bite - Chance of Damage(Lethal)
Level 1: Deflection
(A) Impervious Skin - Status Resistance
(31) Impervium Armor - Psionic Resistance
(42) Luck of the Gambler - Defense
(42) Luck of the Gambler - Defense/Increased Global Recharge Speed
Level 2: Shred
(A) Superior Unrelenting Fury - Accuracy/Damage
(3) Superior Unrelenting Fury - Damage/RechargeTime
(3) Superior Unrelenting Fury - Accuracy/Damage/RechargeTime
(5) Superior Unrelenting Fury - Damage/Endurance/RechargeTime
(5) Superior Unrelenting Fury - Accuracy/Damage/Endurance/RechargeTime
(7) Superior Unrelenting Fury - RechargeTime/+Regen/+End
Level 4: Battle Agility
(A) Gift of the Ancients - Defense/Endurance
(31) Gift of the Ancients - Defense/Recharge
(34) Gift of the Ancients - Defense
(37) Shield Wall - +Res (Teleportation), +5% Res (All)
(40) Luck of the Gambler - Defense/Increased Global Recharge Speed
Level 6: True Grit
(A) Unbreakable Guard - Resistance
(13) Impervium Armor - Psionic Resistance
(40) Unbreakable Guard - Resistance/Endurance
(43) Unbreakable Guard - Endurance/RechargeTime
(43) Unbreakable Guard - RechargeTime/Resistance
(45) Impervious Skin - Status Resistance
Level 8: Vicious Slash
(A) Hecatomb - Damage
(9) Hecatomb - Damage/Recharge
(9) Hecatomb - Accuracy/Damage/Recharge
(11) Hecatomb - Accuracy/Recharge
(11) Hecatomb - Damage/Endurance
(13) Hecatomb - Chance of Damage(Negative)
Level 10: Hasten
(A) Recharge Reduction IO
Level 12: Kick
(A) Force Feedback - Chance for +Recharge
Level 14: Tough
(A) Steadfast Protection - Resistance/+Def 3%
(15) Impervious Skin - Status Resistance
(15) Impervium Armor - Psionic Resistance
(17) Aegis - Psionic/Status Resistance
(17) Gladiator's Armor - TP Protection +3% Def (All)
Level 16: Against All Odds
(A) HamiO:Ribosome Exposure
Level 18: Rending Flurry
(A) Superior Avalanche - Accuracy/Damage
(45) Superior Avalanche - Damage/Endurance
(45) Superior Avalanche - Accuracy/Damage/Endurance
(46) Superior Avalanche - Accuracy/Damage/Recharge
(46) Superior Avalanche - Accuracy/Damage/Endurance/Recharge
(46) Superior Avalanche - Recharge/Chance for Knockdown
Level 20: Phalanx Fighting
(A) Gift of the Ancients - Defense/Endurance
(21) Gift of the Ancients - Defense/Recharge
(21) Gift of the Ancients - Defense
(23) Gift of the Ancients - Defense/Endurance/Recharge
(23) Reactive Defenses - Scaling Resist Damage
Level 22: Taunt
(A) Perfect Zinger - Chance for Psi Damage
Level 24: Weave
(A) Gift of the Ancients - Defense/Endurance
(25) Gift of the Ancients - Defense/Recharge
(25) Gift of the Ancients - Defense/Endurance/Recharge
(29) Gift of the Ancients - Defense
(31) Gift of the Ancients - Endurance/Recharge
(50) Luck of the Gambler - Defense/Increased Global Recharge Speed
Level 26: Maneuvers
(A) Gift of the Ancients - Defense/Endurance
(27) Gift of the Ancients - Defense/Recharge
(27) Gift of the Ancients - Endurance/Recharge
(29) Gift of the Ancients - Defense/Endurance/Recharge
(42) Gift of the Ancients - Defense
(43) Luck of the Gambler - Defense/Increased Global Recharge Speed
Level 28: Super Speed
(A) Winter's Gift - Slow Resistance (20%)
Level 30: Blood Thirst
(A) HamiO:Membrane Exposure
Level 32: Savage Leap
(A) Superior Brute's Fury - Accuracy/Damage
(33) Superior Brute's Fury - Damage/Recharge
(33) Superior Brute's Fury - Accuracy/Damage/Recharge
(33) Superior Brute's Fury - Damage/Endurance/RechargeTime
(34) Superior Brute's Fury - Accuracy/Damage/Endurance/Recharge
(34) Superior Brute's Fury - Recharge/Fury Bonus
Level 35: Shield Charge
(A) Armageddon - Damage
(36) Armageddon - Damage/Recharge
(36) Armageddon - Accuracy/Damage/Recharge
(36) Armageddon - Accuracy/Recharge
(37) Armageddon - Damage/Endurance
(37) Armageddon - Chance for Fire Damage
Level 38: One with the Shield
(A) Unbreakable Guard - Resistance/Endurance
(39) Unbreakable Guard - Endurance/RechargeTime
(39) Unbreakable Guard - RechargeTime/Resistance
(39) Unbreakable Guard - Resistance/Endurance/RechargeTime
(40) Unbreakable Guard - +Max HP
(50) Impervium Armor - Psionic Resistance
Level 41: Combat Jumping
(A) Luck of the Gambler - Defense/Increased Global Recharge Speed
Level 44: Superior Conditioning
(A) Performance Shifter - Chance for +End
Level 47: Physical Perfection
(A) Regenerative Tissue - +Regeneration
Level 49: Active Defense
(A) HamiO:Ribosome Exposure
Level 1: Brawl
(A) Empty
Level 1: Prestige Power Dash
(A) Empty
Level 1: Prestige Power Slide
(A) Celerity - +Stealth
Level 1: Prestige Power Quick
(A) Empty
Level 1: Prestige Power Rush
(A) Empty
Level 1: Prestige Power Surge
(A) Empty
Level 1: Fury
Level 1: Sprint
(A) HamiO:Microfilament Exposure
Level 2: Rest
(A) Empty
Level 4: Ninja Run
Level 2: Swift
(A) HamiO:Microfilament Exposure
Level 2: Health
(A) Panacea - +Hit Points/Endurance
(7) Numina's Convalesence - +Regeneration/+Recovery
(19) Preventive Medicine - Chance for +Absorb
Level 2: Hurdle
(A) HamiO:Microfilament Exposure
Level 2: Stamina
(A) Performance Shifter - Chance for +End
Level 1: Blood Frenzy
------------| Copy & Paste this data into Mids' Reborn : Hero Designer to view the build |
|-------------------------------------------------------------------|
|MxDz;1460;673;1346;HEX;|
|78DA6D94594F13511886CF74A640A1A52D5028D0826C6DA7C54A5D1205C544012FA|
|48684C45BD2C0A11D6DA069D1C8A517FE066F5CC025314649FC1BAED1FFE192B85F|
|D58F795F96A44E3A79E67CE7BCDF36DF347F6BC6BF73E9F67965B45D2C176AB5A50|
|BD51B1BDA9B2F149D65B57B35CB1D758D4B795DD63ABB58B859287211C3C68C5ED5|
|6B35D92A39BABCB2B754AD0BEBEBE5EC6245EB9580FB38E7144B1BCE5A31E8AEE67|
|56145576B25A7E2DF5B5764B377B6E22C6767D774B5B8B9942FD436747513594525|
|9584DCCF528A57DDAB5605394B7514C16325D221AF81B9EBE06BBFD070B5A68ACB4|
|3DC5203B6306929BBCB70CFD811F0B9C43170D66BF82DD7E60990EDA01524436053|
|187C23714C682DD382FF012F38D4028E5E36DDB349C67B2B1A2FE3797F60CFCFDC9|
|23FB14EFF227F83E3ACE18A8D57B5AB6D4E78DCBD962499025B6D320DFA33E0B008|
|7DD02A5F067DF288AD0DB9A8B63B38678A2DC09A023D88DBCEF8EDCC33740AB5848|
|E23BFF75253D06D625D05A70596A95E485FC3CC357C0FFD1ABF4F3E008F3E24B7C8|
|6DF083F8EB640E9DEC6B17FBDAC5BE763793DF4D972F255E84F5456AA8C5925A7AD|
|8EB1EFA89D24F94FA18FD0D3481B90818166D2FB5BDD4F651DBC7B331FAB0E923CD|
|773C22DA7EF6B5BF1F3DDA91FCE2CC2F3E891EBD12DB20630C6EE1DC916DF211F91|
|81C7A423E053F4A8F86D9DFE1D3A877E40C39494E81A367C973E027D18E513BC699|
|4B70E6129CB9C41FCEED5F30676306BAA5B6146B4BB15E9FBCE80C6D99BB9C3BB16|
|569CB4E43FB4EE24EB007139C9398B5FF9DCB4F2E956EB04C58FBDFB30C31FCE71A|
|4E9D68B09C6CB0CC1D78AACF1FDE9D42360B16B7C566B80A5F48BE7158EA9F5BF7F|
|F2B9441C5D7039BC71842AF9AAEA22F1D9FB1FEF21FDDB7C336F64C270FB2FB07E5|
|67CC97|
|-------------------------------------------------------------------| -
What follows is my current build plan for a Savage Melee / Shield Defense Brute. Could those of you with more experience at building and playing Brutes please offer any insight/advice into making my build better, or even provide play advice for these sets? Thank you in advance for any help you may provide!
Build goals:
1) Survivability; opponents typically faced will be using Energy, Psi, and Smashing/Lethal
2) Damage
3) Recharge
Villain Plan by Mids' Reborn : Hero Designer 2.6.0.7
https://github.com/ImaginaryDevelopment/imaginary-hero-designerLevel 50 Magic Brute
Primary Power Set: Savage Melee
Secondary Power Set: Shield Defense
Power Pool: Speed
Power Pool: Fighting
Power Pool: Leadership
Power Pool: Leaping
Ancillary Pool: Energy MasteryVillain Profile:
------------
Level 1: Savage Strike
(A) Touch of Death - Accuracy/Damage/Endurance
(25) Touch of Death - Damage/Endurance/Recharge
Level 1: Deflection
(A) Luck of the Gambler - Defense/Increased Global Recharge Speed
(31) Luck of the Gambler - Defense
Level 2: Shred
(A) Superior Unrelenting Fury - Accuracy/Damage
(3) Superior Unrelenting Fury - Damage/RechargeTime
(3) Superior Unrelenting Fury - Accuracy/Damage/RechargeTime
(5) Superior Unrelenting Fury - Damage/Endurance/RechargeTime
(5) Superior Unrelenting Fury - Accuracy/Damage/Endurance/RechargeTime
(7) Superior Unrelenting Fury - RechargeTime/+Regen/+End
Level 4: Battle Agility
(A) Gift of the Ancients - Defense/Endurance
(31) Gift of the Ancients - Defense/Recharge
(34) Gift of the Ancients - Defense
(37) Gift of the Ancients - Defense/Endurance/Recharge
(40) Luck of the Gambler - Defense/Increased Global Recharge Speed
Level 6: True Grit
(A) Unbreakable Guard - Resistance
(40) Unbreakable Guard - Resistance/Endurance
(43) Unbreakable Guard - Endurance/RechargeTime
(43) Unbreakable Guard - RechargeTime/Resistance
(45) Impervious Skin - Status Resistance
Level 8: Vicious Slash
(A) Hecatomb - Damage
(9) Hecatomb - Damage/Recharge
(9) Hecatomb - Accuracy/Damage/Recharge
(11) Hecatomb - Accuracy/Recharge
(11) Hecatomb - Damage/Endurance
(13) Hecatomb - Chance of Damage(Negative)
Level 10: Hasten
(A) Recharge Reduction IO
Level 12: Boxing
(A) Mako's Bite - Accuracy/Endurance/Recharge
(13) Mako's Bite - Accuracy/Damage/Endurance/Recharge
Level 14: Tough
(A) Steadfast Protection - Resistance/+Def 3%
(15) Impervious Skin - Status Resistance
(15) Impervium Armor - Psionic Resistance
(17) Aegis - Psionic/Status Resistance
(17) Gladiator's Armor - TP Protection +3% Def (All)
Level 16: Against All Odds
(A) HamiO:Ribosome Exposure
Level 18: Rending Flurry
(A) Superior Avalanche - Accuracy/Damage
(45) Superior Avalanche - Damage/Endurance
(45) Superior Avalanche - Accuracy/Damage/Endurance
(46) Superior Avalanche - Accuracy/Damage/Recharge
(46) Superior Avalanche - Accuracy/Damage/Endurance/Recharge
(46) Superior Avalanche - Recharge/Chance for Knockdown
Level 20: Phalanx Fighting
(A) Gift of the Ancients - Defense/Endurance
(21) Gift of the Ancients - Defense/Recharge
(21) Gift of the Ancients - Defense
(23) Gift of the Ancients - Defense/Endurance/Recharge
(23) Luck of the Gambler - Defense/Increased Global Recharge Speed
Level 22: Taunt
(A) Perfect Zinger - Chance for Psi Damage
Level 24: Weave
(A) Gift of the Ancients - Defense/Endurance
(25) Gift of the Ancients - Defense/Recharge
(29) Gift of the Ancients - Defense/Endurance/Recharge
(31) Gift of the Ancients - Defense
(42) Luck of the Gambler - Defense/Increased Global Recharge Speed
Level 26: Maneuvers
(A) Gift of the Ancients - Defense/Endurance
(27) Gift of the Ancients - Defense/Endurance/Recharge
(27) Gift of the Ancients - Defense
(29) Gift of the Ancients - Defense/Recharge
(43) Luck of the Gambler - Defense/Increased Global Recharge Speed
Level 28: Super Speed
(A) Winter's Gift - Slow Resistance (20%)
Level 30: Maiming Slash
(A) Touch of Death - Accuracy/Damage/Endurance
(50) Touch of Death - Damage/Endurance/Recharge
Level 32: Savage Leap
(A) Superior Brute's Fury - Accuracy/Damage
(33) Superior Brute's Fury - Damage/Recharge
(33) Superior Brute's Fury - Accuracy/Damage/Recharge
(33) Superior Brute's Fury - Damage/Endurance/RechargeTime
(34) Superior Brute's Fury - Accuracy/Damage/Endurance/Recharge
(34) Superior Brute's Fury - Recharge/Fury Bonus
Level 35: Shield Charge
(A) Armageddon - Damage
(36) Armageddon - Damage/Recharge
(36) Armageddon - Accuracy/Damage/Recharge
(36) Armageddon - Accuracy/Recharge
(37) Armageddon - Damage/Endurance
(37) Armageddon - Chance for Fire Damage
Level 38: One with the Shield
(A) Unbreakable Guard - Resistance/Endurance
(39) Unbreakable Guard - Endurance/RechargeTime
(39) Unbreakable Guard - RechargeTime/Resistance
(39) Unbreakable Guard - Resistance/Endurance/RechargeTime
(40) Unbreakable Guard - +Max HP
Level 41: Combat Jumping
(A) Gift of the Ancients - Defense/Endurance
(42) Gift of the Ancients - Defense/Recharge
(42) Gift of the Ancients - Defense/Endurance/Recharge
Level 44: Superior Conditioning
(A) Performance Shifter - Chance for +End
Level 47: Physical Perfection
(A) Doctored Wounds - Heal/Endurance
(48) Doctored Wounds - Endurance/Recharge
(48) Doctored Wounds - Heal/Recharge
(48) Doctored Wounds - Heal/Endurance/Recharge
(50) Doctored Wounds - Heal
(50) Doctored Wounds - Recharge
Level 49: Active Defense
(A) HamiO:Ribosome Exposure
Level 1: Brawl
(A) Empty
Level 1: Prestige Power Dash
(A) Empty
Level 1: Prestige Power Slide
(A) Celerity - +Stealth
Level 1: Prestige Power Quick
(A) Empty
Level 1: Prestige Power Rush
(A) Empty
Level 1: Prestige Power Surge
(A) Empty
Level 1: Fury
Level 1: Sprint
(A) Empty
Level 2: Rest
(A) Empty
Level 4: Ninja Run
Level 2: Swift
(A) HamiO:Microfilament Exposure
Level 2: Health
(A) Panacea - +Hit Points/Endurance
(7) Numina's Convalesence - +Regeneration/+Recovery
(19) Miracle - +Recovery
(19) Preventive Medicine - Chance for +Absorb
Level 2: Hurdle
(A) HamiO:Microfilament Exposure
Level 2: Stamina
(A) Performance Shifter - Chance for +End
Level 1: Blood Frenzy
------------ -
Bio seems too clicky for me. I don't really like how it seems to need to be played. Thanks for the suggestions on Radiation and Shield!
-
I had never tanked before -- I *despised* melee. Back in the days of live, I played a LOT of defenders, but eventually settled on Controllers as my favorite Archetype. Then that changed...
I have a very consistent play group, so I felt like I could give tanking a try and, if I tanked, well, I'd be with my friends and roll something else. One of the group, when he found out what was up, suggested I try an Electric Armor tank; I paired that with Dark Melee, thinking the -to hit of Dark would make it even tankier... I *love* the build. It even exemplars decently.
But now I'm stuck. I still am pretty ignorant when it comes to tanker primaries, and I kind of want to try something else.
Can anyone suggest another set, similar in play to Electric Armor? And, with that suggestion, any Melee sets I should avoid pairing / must pair with that set? Beter yet, if anyone has suggested builds, I am open to them as well.
Thanks!
-
On 3/17/2020 at 12:58 PM, Keen said:
To answer the OP, I've done quite a bit of research about what would be the best Hamidon tank ever. My parameters for this would be that a good tank:
- should endure Hamidon + 18 mitos as long as possible,
- alone in the goo,
- without any external buffs or temporary powers,
- and only relying on EoEs and their own powers.
Bio Armor/Dark Melee Tanker is currently the top contender. Thanks to endurance drain and slow resistances in an auto power, it can stay stunned and not have endurance dropped to zero (hence not die). This build is currently capable of staying for almost 3 minutes taking full Hamidon + 18 mito damage until defeat.
Stone Armor/Dark Melee Tanker made a good run, taking second place for tanking duration alone. It lasts around 2 minutes. Best thing of this build is stun protection (34), which allows more variety in Incarnate choices. But this is quite a hard build to play with due to movement restrictions by Granite + Rooted. Teleport is a must here. The biggest issue with this build is the lack of unresistable big heal: Earth's Embrace is their version of Dull Pain, but the heal is resistable so it doesn't work against Hami. If it did, it would surpass Bio Armor in survivability. Unfortunately, Siphon Life alone isn't enough to make this build survive for long.
Dark Melee/Regeneration Brute makes third place. They have a serious issue with endurance recovery, and Ageless Destiny isn't able to protect them for long. They don't last more than 1 minute alone in the goo as all their endurance will be drained quickly and they will be unable to heal or use any powers.
Dark Armor/Dark Melee Tanker makes fourth place. They last longer than Regeneration Brutes, but they have a larger number of issues. Their endurance drain protection is in a toggle, which gets suppressed when stunned. Incarnate mez protection isn't able to protect them for more than 1 minute when solo, so Clarion + Melee Hybrid has to be stacked and this is really counterproductive. Their lack of KB protection/resistance also makes it harder to build. In a league setting however, they're as good as Regeneration Brutes.
You wouldn't be willing to share your build for the Bio / Dark tanker, would you? 🙂
Thanks!
-
1
-
On 3/7/2020 at 3:37 PM, Generator said:
Let me ask, why do you think it isn't working? And as far as your Secondary, is there something specific you want from it? Most of them can at least put something on the table...
It just doesn't seem like the 5% -to hit is actually mattering. I have since achieved a better understanding of how everything works together, so it doesn't suck. I just wonder if there isn't abetter melee set with which to smack things. Fire is supposed to be more damage, but I like riders, myself -- like -to hit. So, if I were looking elsewhere, more damage, or an interesting rider is what I am seeking.
-
Electric Armor works really well. That said, what is the suggestion for a secondary? I took Dark Melee, with the thought that the -To Hit would be like extra defense. Not sure it is working out as well as I intended...
-
@NEW DAWN Could you please elaborate on what you said? It is not clear to me.
I have a Electric Armor / Dark Melee tank as well.
-
So I just finished leveling my Electric Armor / Dark Melee Tank, and was wondering if anyone had any advice to tweak it in any way. The only place it seems lackluster is in damage output, but such is a Tank's life:
Hero Plan by Mids' Reborn : Hero Designer 2.6.0.7
https://github.com/ImaginaryDevelopment/imaginary-hero-designerPedantia: Level 50 Mutation Tanker
Primary Power Set: Electric Armor
Secondary Power Set: Dark Melee
Power Pool: Speed
Power Pool: Leaping
Power Pool: Fighting
Power Pool: Leadership
Ancillary Pool: Energy MasteryHero Profile:
------------
Level 1: Charged Armor
(A) Unbreakable Guard - Resistance
(3) Unbreakable Guard - Resistance/Endurance
(3) Unbreakable Guard - RechargeTime/Resistance
(5) Unbreakable Guard - Resistance/Endurance/RechargeTime
(5) Gladiator's Armor - TP Protection +3% Def (All)
Level 1: Shadow Punch
(A) Hecatomb - Damage
(7) Hecatomb - Damage/Recharge
(7) Hecatomb - Accuracy/Damage/Recharge
(9) Hecatomb - Accuracy/Recharge
(9) Hecatomb - Damage/Endurance
(11) Hecatomb - Chance of Damage(Negative)
Level 2: Lightning Field
(A) Superior Might of the Tanker - Accuracy/Damage
(11) Superior Might of the Tanker - Damage/Recharge
(13) Superior Might of the Tanker - Accuracy/Damage/Recharge
(13) Superior Might of the Tanker - Damage/Endurance/Recharge
(15) Superior Might of the Tanker - Accuracy/Damage/Endurance/Recharge
(15) Superior Might of the Tanker - Recharge/Chance for +Res(All)
Level 4: Shadow Maul
(A) Armageddon - Damage/Recharge
(19) Armageddon - Accuracy/Damage/Recharge
(21) Armageddon - Accuracy/Recharge
(21) Armageddon - Damage/Endurance
(23) Armageddon - Chance for Fire Damage
Level 6: Conductive Shield
(A) Unbreakable Guard - Resistance
(23) Unbreakable Guard - Resistance/Endurance
(25) Unbreakable Guard - RechargeTime/Resistance
(25) Unbreakable Guard - Resistance/Endurance/RechargeTime
(27) Steadfast Protection - Resistance/+Def 3%
Level 8: Static Shield
(A) Unbreakable Guard - Resistance
(27) Unbreakable Guard - Resistance/Endurance
(29) Unbreakable Guard - RechargeTime/Resistance
(29) Unbreakable Guard - Resistance/Endurance/RechargeTime
(31) Unbreakable Guard - +Max HP
Level 10: Grounded
(A) Unbreakable Guard - Resistance
(31) Unbreakable Guard - Resistance/Endurance
(31) Unbreakable Guard - RechargeTime/Resistance
(33) Unbreakable Guard - Resistance/Endurance/RechargeTime
(33) Impervium Armor - Psionic Resistance
Level 12: Super Speed
(A) Winter's Gift - Slow Resistance (20%)
Level 14: Combat Jumping
(A) Luck of the Gambler - Defense/Increased Global Recharge Speed
(33) Luck of the Gambler - Defense
(34) Shield Wall - +Res (Teleportation), +5% Res (All)
(34) Reactive Defenses - Scaling Resist Damage
Level 16: Energize
(A) Panacea - Heal/Endurance
(34) Panacea - Endurance/Recharge
(36) Panacea - Hea/Recharge
(36) Panacea - Heal/Endurance/Recharge
(36) Panacea - Heal
Level 18: Taunt
(A) Mocking Beratement - Taunt
(19) Mocking Beratement - Taunt/Recharge
(37) Mocking Beratement - Taunt/Recharge/Range
(37) Mocking Beratement - Accuracy/Recharge
(37) Mocking Beratement - Taunt/Range
(39) Mocking Beratement - Recharge
Level 20: Kick
(A) Force Feedback - Chance for +Recharge
Level 22: Siphon Life
(A) Preventive Medicine - Chance for +Absorb
Level 24: Lightning Reflexes
(A) HamiO:Microfilament Exposure
Level 26: Power Sink
(A) Performance Shifter - EndMod/Accuracy/Recharge
(39) Efficacy Adaptor - EndMod/Accuracy/Recharge
Level 28: Soul Drain
(A) Superior Gauntleted Fist - Accuracy/Damage
(39) Superior Gauntleted Fist - Damage/RechargeTime
(40) Superior Gauntleted Fist - Accuracy/Damage/RechargeTime
(40) Superior Gauntleted Fist - Damage/Endurance/RechargeTime
(40) Superior Gauntleted Fist - Accuracy/Damage/Endurance/RechargeTime
(42) Superior Gauntleted Fist - RechargeTime/+Absorb
Level 30: Tough
(A) Unbreakable Guard - Resistance
(42) Unbreakable Guard - Resistance/Endurance
(42) Unbreakable Guard - RechargeTime/Resistance
(43) Unbreakable Guard - Resistance/Endurance/RechargeTime
(43) Aegis - Psionic/Status Resistance
Level 32: Weave
(A) Luck of the Gambler - Defense
(43) Luck of the Gambler - Defense/Increased Global Recharge Speed
Level 35: Dark Consumption
(A) Superior Avalanche - Accuracy/Damage
(45) Superior Avalanche - Damage/Endurance
(45) Superior Avalanche - Accuracy/Damage/Endurance
(45) Superior Avalanche - Accuracy/Damage/Recharge
(46) Superior Avalanche - Accuracy/Damage/Endurance/Recharge
(46) Superior Avalanche - Recharge/Chance for Knockdown
Level 38: Maneuvers
(A) Luck of the Gambler - Defense/Increased Global Recharge Speed
(46) Luck of the Gambler - Defense
Level 41: Midnight Grasp
(A) Superior Blistering Cold - Accuracy/Damage
(48) Superior Blistering Cold - Damage/Endurance
(48) Superior Blistering Cold - Accuracy/Damage/Endurance
(48) Superior Blistering Cold - Accuracy/Damage/Recharge
(50) Superior Blistering Cold - Damage/Endurance/Accuracy/RechargeTime
(50) Superior Blistering Cold - Recharge/Chance for Hold
Level 44: Hasten
(A) Recharge Reduction IO
(50) Recharge Reduction IO
Level 47: Focused Accuracy
(A) HamiO:Membrane Exposure
Level 49: Laser Beam Eyes
(A) Entropic Chaos - Chance of Heal Self
Level 1: Brawl
(A) Empty
Level 1: Gauntlet
Level 1: Prestige Power Dash
(A) Empty
Level 1: Prestige Power Slide
(A) Empty
Level 1: Prestige Power Quick
(A) Empty
Level 1: Prestige Power Rush
(A) Empty
Level 1: Prestige Power Surge
(A) Empty
Level 1: Sprint
(A) Empty
Level 2: Rest
(A) Empty
Level 4: Ninja Run
Level 2: Swift
(A) HamiO:Microfilament Exposure
Level 2: Health
(A) Panacea - +Hit Points/Endurance
(17) Numina's Convalesence - +Regeneration/+Recovery
(17) Miracle - +Recovery
Level 2: Hurdle
(A) HamiO:Microfilament Exposure
Level 2: Stamina
(A) Performance Shifter - Chance for +End
------------The majority of this build came from @Hyperstrike in this thread: https://forums.homecomingservers.com/topic/10657-tank-elecdark/?tab=comments#comment-100646
Thanks for any feedback!
-
17 hours ago, boggo2300 said:
and they didn't abuse us, they didn't think about us at all, we were a rounding error to them, it was nothing personal, there was no intent to hurt anyone, the playerbase of City just wasn't important enough to think about
Just because there was not intent behind abuse, abuse us they did.
-
On 12/30/2019 at 4:59 PM, Chris24601 said:
The benefit of licensing the IP is that you get yourself legal protections (it’s a contract), certainty for our devs that all their hard work isn’t going to have to be dumped due to changing legal winds because the whole thing is legally dubious, and, most importantly, the ability to really let people know that City of Heroes is back (right now it’s all word of mouth and articles that are now 7-8 months old and moving further down the search results all the time).
My only concern with this approach is that I wouldn't want NCSoft to own anything the HC Devs -- or any one else, for that matter -- created. It is bad enough NCSoft owns the base IP -- we know how they treated it and us -- but I wouldn't want their IP to become more valuable for them to again abuse us.
-
2
-
-
On 11/8/2019 at 5:48 PM, metacore said:
Thanks for the reply. I'm only at 42 so far and will see how it goes once finished to see if I need PL.
How did this go?
-
7 minutes ago, nihilii said:
Ninjitsu has the most complete mez protection, and the highest magnitude if you doublestack the antimez power (which is a click).
If you don't like a click for mez protection, Willpower has the most complete passive (toggle) protection.SWEET!!! That is what I was looking for, thank you. As an anecdote, Willpower was my first thought, too. After having read on all the SR / Ninjitsu comparisons, however, I was seriously considering Ninjitsu.
-
1
-
-
For those of you in both places, I apologize: I posted this in Discord chat as well.
I am building my first Sentinel, and I am looking for the best secondary set for Mez Protection. Basically, whichever set will give me the best chance to not be Mezzed, with being mezzed the least amount of time being an okay follow up (if required).
For what it is worth, I have a reason for choosing Sentinel for my AT; and my primary will be Energy Blast.
Thanks!
-
The build is to act as a pusher in Rikti Mothership Raids. The character and her bots will be standing around the lip of the Rikti mothership bowl, pushing straggler groups of Rikti into said bowl, for efficient clean up by allies. Additionally, the build will function as a backup buffer, tossing occasional heals and status protection on others sweeping the rim, and Tankers/Brutes going back and forth, bringing in more targets. The build will sometimes function in the bowl, where it will be expected to help clean up the Rikti pulled in by the Tanks and pushed down into the bowl by the Pushers.
The build needs to be survivable, with minimal assistance from support characters, and effective at moving targets in specific directions. Taking a few targets out along the way is optional, but highly satisfying.
My playstyle is such that I LOVE high recharge. On this build, that helps me spam Tornado and Lightning Storm, as well as the hand full of other, direct attack powers.
I am sure I missed something else, but I can only look at what y'all are dong, and answer your questions. And appreciate the fact you are helping me. And say "thanks". 🙂
Thanks!
GM_Bot Introduces Revolutionary Graphical Enhancements!
in Announcements
Posted
No one can be told... Exactly what the Matrix is...