

tellania
-
Posts
106 -
Joined
-
Last visited
Content Type
Profiles
Forums
Events
Store
Articles
Patch Notes
Posts posted by tellania
-
-
AFK farmer
in Brute
Just curious on the strategy here. While a brute can be a monster farmer, they depend upon fury to be competitive (or exceed) tankers and scrappers. If the brute is on autofollow, it may not take any alpha, nor build lots of fury (curious what the other toon would be). Just a thought, if the other toon followed the brute, sure. If the brute is following, I'd personally go tanker or scrapper.
-
 1
1
-
-
It helps with specifics of what you are looking for, and why we appreciate an initial build.
Are you looking for soft capped defense, incarnate level defense, maximumize damage, resistance, recharge, endurance, patch psi hole, budget (purple builds, non purple builds, etc).
Help us identify what bonuses you are looking to acquire.
-
10 hours ago, Hyperstrike said:
Incorrect order.
Defense is your primary layer.
If the attack doesn't hit, it does NOTHING. You don't have to resist damage or heal or anything.
If an attack gets through your Defense, Resistance is your next option. Simply ignore a portion of the damage that's inflicted.
Then +Absorb. It gives you a pool of "phantom HP" which come off first, before hitting your real HP.
From there, we move on to Heal/RegenWasnt meant to be in order 😄 adding +absorb, there is only a single IO i'm aware of, and I was brainstorming for a fire/fire specifically.
I agree, defense avoidance means no mezz, while resist, you can still be held.
-
Thanks Nemu,
I agree with your statement, but I enjoy trying alternative builds and means, as opposed to IO'ing only for defense bonuses. It might be a decent starter build, using the proc, esp on teams, but in the long run, I agree, it wont save me.
-
For some reason, I cant get mid's to work with the datalinks (it crashes). Can you post the data chunk as well as the datalink?
I make a few rough suggestions just from a casual glance:
1. MOve kismet %tohit from combat jumping (level 49) to Deflection (level 1). Help you more at lower levels, and if you exempt/flashback to lower level arcs.
2. Change Deflection LucoftheG-Def/Rchg to LucoftheG-Def/EndRed (save some extra endurance).
3. True Grit, move Prv-Absorb%(31) to Prv-Heal/Rchg(29), for better +hp bonus. Put the Prv-Absorb% into health (yes, need to free a slot, cant see where offhand; maybe Deflection, remove the Luck of the Gambler Def/Rech? Hard to tell without being able to see the full build).
If you are, at least, 45% to melee/Ranged/Aoe defense, then working on resistance (I can see some +regen bonuses, which are good, but not at expense of resistance). I assume you are, with martial arts adding some nice +def
-
Reading on electric blasters and endurance drain thread, and wondered .... Has anyone slotted power transfer with %heal?
I'm wondering if its worth slotting the proc to keep your health up. anyone with experience trying this?
-
There are some GREAT tactical suggestions here, on how to wait for a tank to grab aggro. I mostly play tanks (I did have a 50 fire/fire blaster before shutdown that was fun to play), and I'll offer some other suggestions:
In order to survive:
1. Resistance / defense / heals / mezz protection - these are the traditional methods people think to survive.
2. Mezz control - holds, sleep , traditional controller features, there are a few available to you.
3. Other - knockdown/knockback can be extremely effective in reducing damage. Mediocre tanks will whine about knockback. Great tanks will suggest KB proc (KB to KD), but understand the limitations of your powers, and welcome it as a challenge.
4. Other2 - Placate / phase shift
I recommend you look into some knockdown/back and fear powers. Try them on test server and see which works with your play styel
What kills you more?
a. Alpha strike? tactical here (let the tank/brute/scrapper take the alpha), then show your power.
b. Just raw damage over a short time?
c. Mezzed by enemy?
partial Solutions to (b) and (c) are inspirations, pool powers, and/or IO's:
i. break frees / defense inspirations
ii. combat jumping/hover (immob protection),
iii. acrobatics or IO's (knockback protection),
iv. misdirection (concealment, but long recharge does a placate) or phase shift (cant be affected or affect, gives time to hit inspirations, run away etc),
vi. presence (intimidate and invoke panic) can fear an enemy (GREAT POWER, under rated!)
v. force of will ( wall of force) for knockdown,ted; invoke panic can fear most of a group, intimidate+invoke panic can fear a boss),
vii. sorcery has arcane bolt (knockdown, single target), and rune of protection (+res,+status; longish recharge)
viii. speed has wirlwind (knockdown) (heavy endurance usage)
ix. IO overwhelming force proc (% to knockdown) - unique, can only be slotted once, can go into any damage power, I recommend fireball (or any damage power). Burn works well, but the dot tends to double up the KD (and becomes KB), which may not be a problem for you (its more for tankers and control).
x. WInter IO avalanche has a kd proc, unique, can goe into PBOE's (fire sword circle, combustion, burn)
xi. Epic power pool soul master: gloom can disorientate minions (and slot a stun stupifey chance for knockback)
xii. Epic pool mace mastery mace beam (cone) knockdown
apologies for the slighly incoherent post, having limited time and wanted to share some options.
-
 1
1
-
-
I have a lvl 50 WP/Stone tanker, minimum size, dressed like an anime character, so I can bring the giant mallet wallop!
Its fun, and a bit endurance heavy, so it pairs well.
There are 2 aoe's which do knockdown, so some extra mitigation.
-
1
-
-
For a generic AFK tank, whichis fun invul/anything will do. I'm partial to Invul/ss, but invul/xxx might suite his playstyle best.
Though, something to think about is a fire/ice tank. With tough (or IO set bonuses) and acrobatics (or KB IO sets), you can cap SL/Fire resistance. With some IO investments, you can cap energy/dark resistance, or get a decent level of defense (e.g. 45% melee). Not as tough as an invul/ tank, but a more fun if you want to do things (make baddies flop, or arrest them with fire).
Plus burn at 18 and ice patch at 20, it can be an easy mode : ice patch, burn, repeat (not a lot of complicated combos or other buttons to smash).
Not sure what you and your wife play with your 13+ son, but there are buff's.
-
Kudos to Acadian Avenger. Most fun I ever had, sole tank on a team with 7 blasters ...
-
 1
1
-
-
For those who attempt this, I highly recommend looking at
(in his sig)
The only time I face planted on my invul/ss, I either had recovery set to zero (electric control -recovery), or cascade defense failure (radiation -def, and heavy gunners) (rage really helped with the -20% base defense drop for cascade failure, and rage/hasten helped murder me with -endurance (esp with low recovery). Helps to keep the power attribute window up to monitor.
Once I targetted the rads and electrics, life got MUCH easier.
-
On 3/10/2021 at 2:33 PM, Bopper said:
The description looks very good. If anyone needs pictures, these might help.
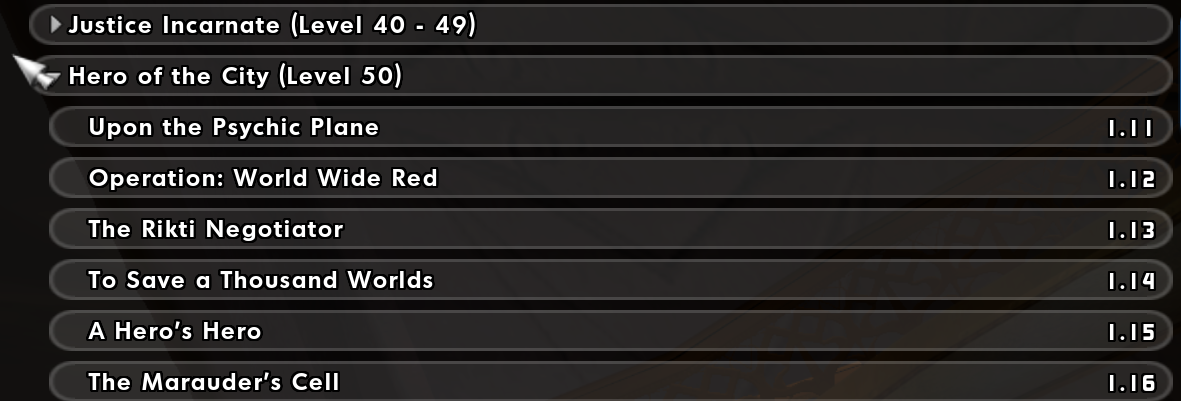
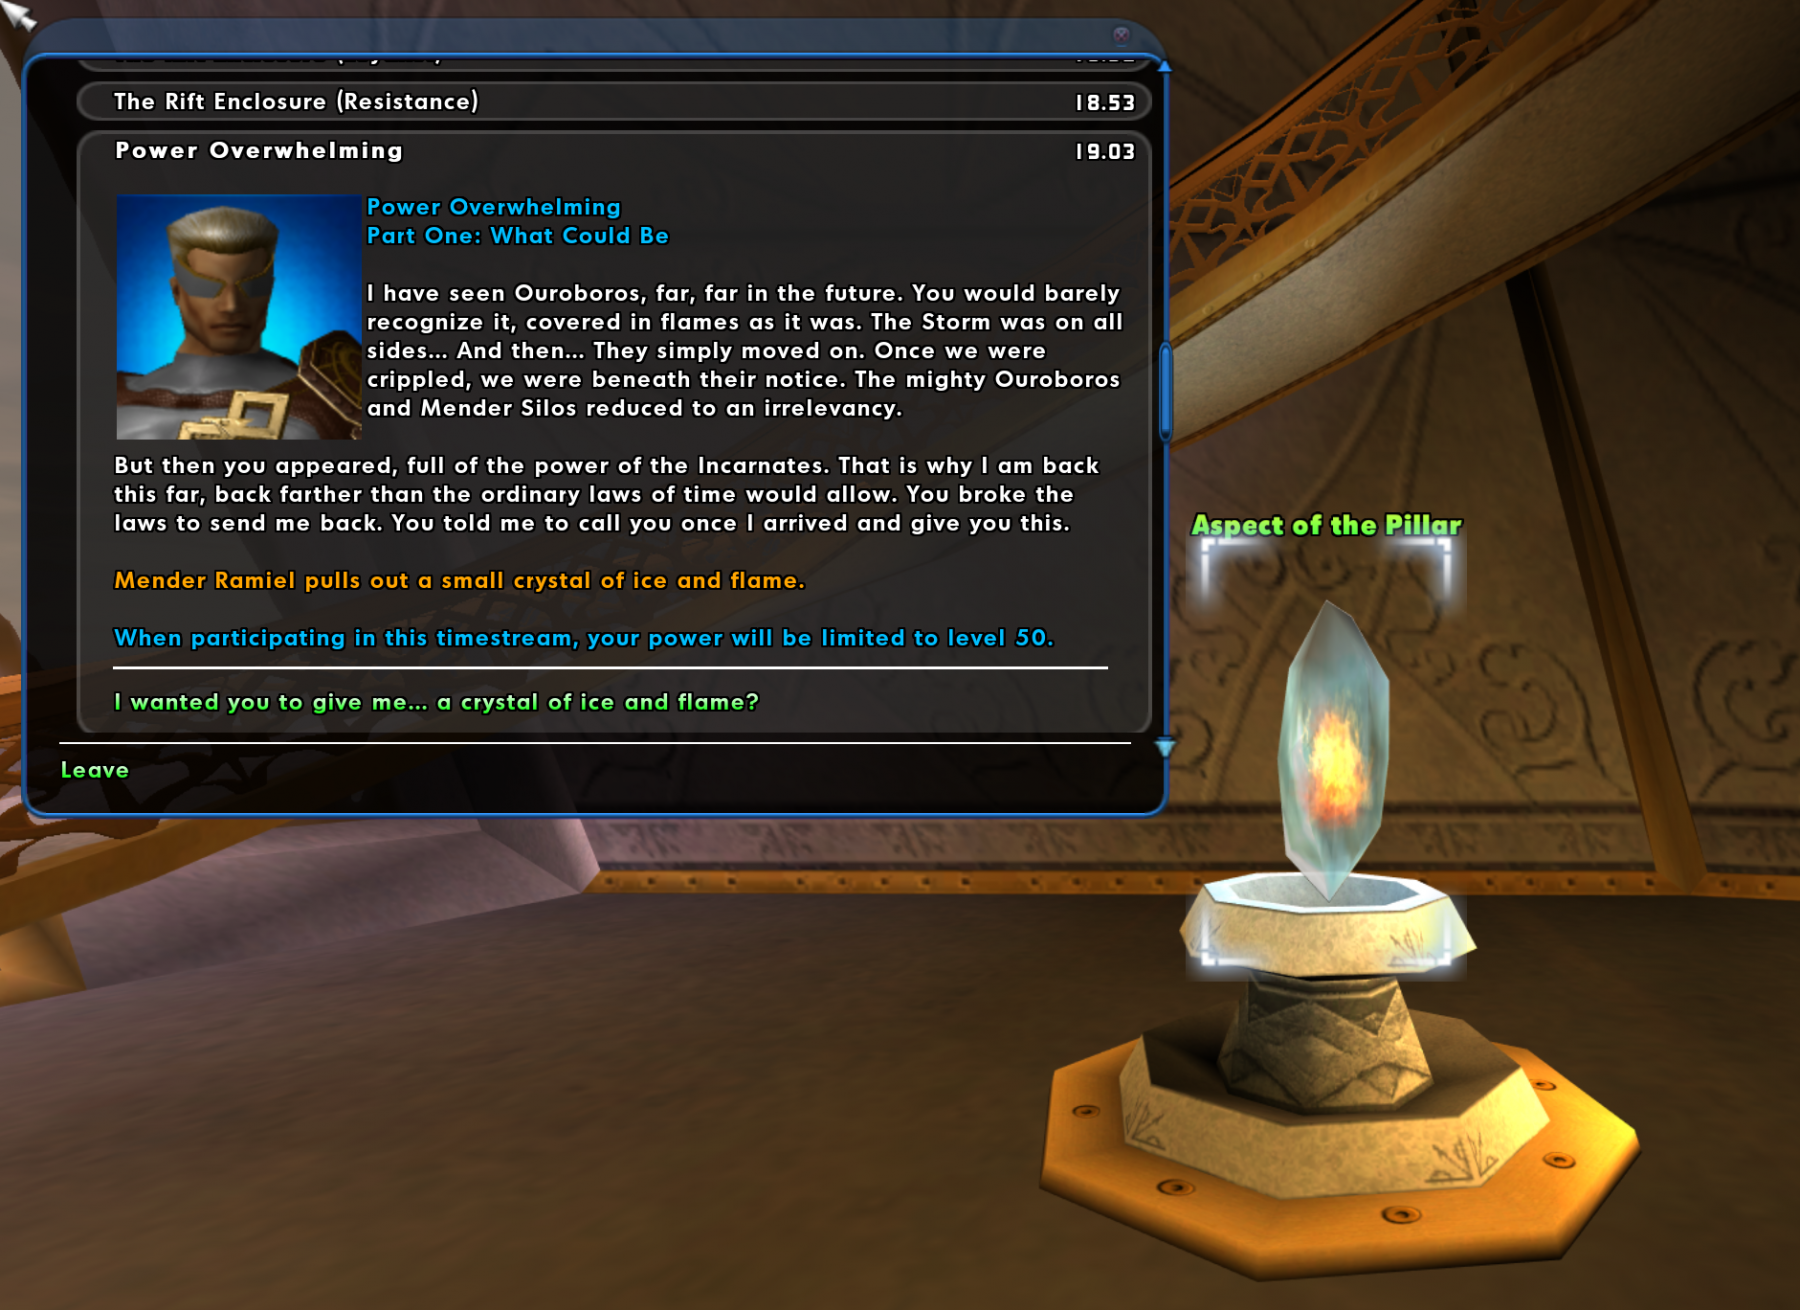
Go to Ouro, expand the level 50 category:

Then scroll down to 19.03 to find Power Overwhelming
anyone know where this mission in ourobous is located at, red side?
-
But wait! Act now, and you can have THREE Dark/MA tank builds for the price for one! Act now, operators are standing by!
Dark tank with presence pool for da Fear meh!
This Hero build was built using Mids Reborn 3.0.4.7
https://github.com/Reborn-Team/MidsRebornClick this DataLink to open the build!
Level 50 Magic Tanker
Primary Power Set: Dark Armor
Secondary Power Set: Martial Arts
Power Pool: Fighting
Power Pool: Sorcery
Power Pool: Presence
Ancillary Pool: Pyre MasteryHero Profile:
Level 1: Dark Embrace -- GldArm-ResDam(A), GldArm-End/Res(3), GldArm-3defTpProc(3), StdPrt-ResDam/Def+(9)
Level 1: Thunder Kick -- KntCmb-Acc/Dmg(A), KntCmb-Dmg/EndRdx(39), KntCmb-Dmg/Rchg(39), KntCmb-Dmg/EndRdx/Rchg(39)
Level 2: Murky Cloud -- UnbGrd-Max HP%(A), UnbGrd-ResDam(11), UnbGrd-ResDam/EndRdx(15), UnbGrd-Rchg/ResDam(15)
Level 4: Storm Kick -- PlvFst-Acc/Dmg(A), PlvFst-Acc/Dmg/Rchg(5), PlvFst-Acc/Dmg/EndRdx/Rchg(5), PndSlg-Dmg/Rchg(9), PndSlg-Acc/Dmg(11), PndSlg-Dmg/EndRdx(17)
Level 6: Obsidian Shield -- RctArm-ResDam/EndRdx(A), RctArm-ResDam(7), RctArm-ResDam/Rchg(7)
Level 8: Kick -- Dmg-I(A)
Level 10: Mystic Flight -- BlsoftheZ-ResKB(A)
Level 12: Cloak of Darkness -- ShlWal-Def(A), ShlWal-Def/EndRdx(13), ShlWal-Def/Rchg(13), ShlWal-ResDam/Re TP(31), Rct-ResDam%(33), Ksm-ToHit+(34)
Level 14: Provoke -- Acc-I(A)
Level 16: Crane Kick -- KntCmb-Acc/Dmg(A), KntCmb-Dmg/Rchg(17), KntCmb-Dmg/EndRdx(19), KntCmb-Dmg/EndRdx/Rchg(21)
Level 18: Cloak of Fear -- HO:Endo(A), HO:Endo(19)
Level 20: Dark Regeneration -- ThfofEss-+End%(A), TchoftheN-Acc/EndRdx/Rchg(21), TchoftheN-Heal(27), TchoftheN-Heal/HP/Regen/Rchg(27), RechRdx-I(29)
Level 22: Intimidate -- GlmoftheA-Acc/Fear/Rchg(A), Ngh-Acc/Fear/Rchg(23), UnsTrr-Acc/Fear/Rchg(23)
Level 24: Invoke Panic -- UnsTrr-Acc/Fear/Rchg(A), Ngh-Acc/Fear/Rchg(25), GlmoftheA-Acc/Fear/Rchg(25), EndRdx-I(37)
Level 26: Dragon's Tail -- FuroftheG-ResDeb%(A), Arm-Dmg(34), Arm-Dmg/EndRdx(34), SprMghoft-Rchg/Res%(40), SprGntFis-Rchg/+Absorb(50)
Level 28: Focus Chi -- RechRdx-I(A), RechRdx-I(40), GssSynFr--Build%(40)
Level 30: Tough -- UnbGrd-ResDam(A), UnbGrd-ResDam/EndRdx(31), UnbGrd-Rchg/ResDam(31)
Level 32: Weave -- GifoftheA-Def(A), GifoftheA-Run+(33), GifoftheA-Def/EndRdx(33)
Level 35: Crippling Axe Kick -- SprBlsCol-Rchg/HoldProc(A), SprBlsCol-Dmg/EndRdx/Acc/Rchg(36), SprBlsCol-Acc/Dmg(36), SprBlsCol-Acc/Dmg/Rchg(36), SprBlsCol-Dmg/EndRdx(37), SprBlsCol-Acc/Dmg/EndRdx(50)
Level 38: Eagles Claw -- KntCmb-Acc/Dmg(A), KntCmb-Dmg/EndRdx(43), KntCmb-Dmg/Rchg(45), KntCmb-Dmg/EndRdx/Rchg(45)
Level 41: Char -- SprEnt-Rchg/AbsorbProc(A), SprEnt-Acc/Hold/End/Rchg(42), SprEnt-Acc/Hold(42), SprEnt-Hold/Rchg(42), SprEnt-End/Rchg(43), SprEnt-Acc/Hold/End(43)
Level 44: Fire Blast -- SprWntBit-Rchg/SlowProc(A), SprWntBit-Dmg/EndRdx/Acc/Rchg(45), SprWntBit-Acc/Dmg(46), SprWntBit-Dmg/Rchg(46), SprWntBit-Acc/Dmg/EndRdx(48), SprWntBit-Acc/Dmg/Rchg(50)
Level 47: Cobra Strike -- SprGntFis-Acc/Dmg(A), SprGntFis-Dmg/Rchg(48), SprGntFis-Dmg/EndRdx/Rchg(48)
Level 49: Death Shroud -- OvrFrc-Dam/KB(A)
Level 1: Gauntlet
Level 1: Brawl -- Empty(A)
Level 1: Sprint -- Empty(A)
Level 2: Rest -- Empty(A)
Level 2: Swift -- Empty(A)
Level 2: Hurdle -- Empty(A)
Level 2: Health -- Pnc-Heal/+End(A), NmnCnv-Regen/Rcvry+(29), Mrc-Rcvry+(37)
Level 2: Stamina -- EndMod-I(A), EndMod-I(46)
Level 1: Prestige Power Dash -- Empty(A)
Level 1: Prestige Power Slide -- Empty(A)
Level 1: Prestige Power Quick -- Empty(A)
Level 1: Prestige Power Rush -- Empty(A)
Level 1: Prestige Power Surge -- Empty(A)
Level 4: Ninja Run
Level 50: Cardiac Core Paragon
Level 50: The Atlas Medallion
Level 50: Task Force Commander
Level 50: Portal Jockey
Level 50: Freedom Phalanx Reserve
------------| Copy & Paste this data into Mids Reborn : Hero Designer to view the build | |-------------------------------------------------------------------| |MxDz;1483;706;1412;HEX;| |78DA6594DB4E13511486F77476A52D45E8015A0E2DB482400B85AA315E9820500A5| |69B5431DE996624234EA82D99D6442E4D34C63B157D07F174EB39F1804FE08D4413| |E3037848D4182F4C5DCCFA8126D3A4FDF6FCB3F65EFFACB5A6F94B19EFA3D9CB134| |2F14E97B46AB5784A2B2FE9A633AF2D1A0B62F3D344DF4E568B19FD9C5EAEEAA98C| |662E1527CD0B1573EB4E5E2FE97A2AAF9935432BD1AD5A55B4142A95522A6B2C9EA| |F19E545AF75355F31177473C5675DE4B5B2B17CB1A4D58C4A59F866968D855461C5| |D48B79AD5AA3A030254ED0F7899B7E944D2B75558CA942A4A570A4C17D4C5788022| |2521CE910F8506C81109762EF09F02438CF7C4AE72A3857F9CBE7787E3177FF06FF| |3027E95C95639DEA14212C859C06334C574E581E3C73CCB6A3CC6794C7C97B1DCE2| |82D06A5D815077B998E262E34C588A688B072AE0E08E186E6FEE4B0B4172434C347| |738EBD79B3E02C337A8CD9F79319FBC73EBA28410BCE6BE9E21C197AAE56D4AB15F| |56A439DFCA85B10F57A49B97D9C5BF11D244855F8C1E7742F6015B32E037ED5CA17| |0C71FEAE001864F624397737F969E7DC8EF6CF8AA5756C80EFB99F3D141382BF10B| |43062C2D8D31FE3F366E9593AD99FEC9CC0B31FE2BAC50E33073FB29EBE2E2DCED0| |9E6E78E886AFC12DAEF11E953C44D0BF08E6238AF988623E24C5F422A6D7C53DED7| |3839299A55C71CEE58CDFE1FC7B6E8337C05566FF4D66FA16738EF60EA00E03E853| |02FD1941BF46D0A70F6469083332F48EF70FAF83AFC0D7CCC41BF02D7383F626E13| |1F990B59107CCD1BBE01A73EC1E3CDE674E91C7146A99BA8298ABE035E6639A9371| |CCE0F817AEDDB0DC7EBFEB3D72FBFDDDBCACD7C5719B5290082745B194AF9EED371| |9CA379BF27D477128314CE2694C508E3BF463274651FA780A46C184CDC7B84D49DB| |94FD36E5804D71B7D17F0B2BF5890025432DCE7A76D65AC3FA4CC3BAD0B0FE0F693| |8E99B| |-------------------------------------------------------------------|
| Copy & Paste this data into Mids Reborn : Hero Designer to view the build |
|-------------------------------------------------------------------|
|MxDz;1431;673;1346;HEX;|
|78DA6594CB6F125114C6EF308308A552A085BE680BF609ED00EA5E9BBE7C94A489C|
|6850BC9A4BD5252A46486855D9AF8DC697D6DD4D6C4F7C2ADEF7FC3B78989AE7C27|
|6A8C2B3C9DEF144D6692E197FBDDF39D7BCE9D7BC91D19F7DF9B3ABA5D28FEB1926|
|159F97D4679419AEE9C5128CE8AB5C7436F1BD4FCB83C24CB96D4C70D73213F6A1E|
|5E34D76772B224A59E33CC6AD128D154D5128D338B8B257DB25898AF16CB85803D9|
|A96C69C34ADF962C5678FF756A49CF3AF4F55282E3C5129CEEA1365691696F239C3|
|AA4A73A9954AE8A3F7BE977E94B5A26A6E71591322AB09D72AF31AA85D615E0537A|
|C803B22829F9A220E100668EE20F880F22A9C57F9A3DAF11B7F327F81BE8462C7FA|
|BAC05037F890BC2A7B55F6F8D9E3FF0D6ED22920464C824D31F01179DDF0BADC5B1|
|0DB94064359F031C578ECE26AAA27A4DABEE68F2EF01318F90C8E528F5EE4D3BC83|
|2EDB1F19025BFB9929309B049F50FE06F634B428B6D6BE1B6BB74F829D53CC5DA04|
|267A2117B291A6BF408959400771288A0BBFE28B3157C4A2B0511A306DF61A5DEB7|
|CCF7E8A0FF0338459D847957C3CFB16AFC19B8F915F335F305D8FB12D4A89616EEA|
|8853BEAD9C339B8B3387736C29D05C913E5F5A2ECE9E2D81E8EEDE1D834EF42FA07|
|18266F1B7BDB6E6157876F82233798D779D7EF306F8309F276C02B3A52025F8CB41|
|83425C6B50C348363B42FDDBCF3DD16724C929680E64E9CC7691F38C33C0B0E2D33|
|CF312F803BC9DBC7B5F79D84963CC13CCE3C060E9F669E0257A8FD41AE65906BBF4|
|BC722C5FDA4F6A3E6095A43E79BA7AFA2E6F40A18A55E339C23F306DA9056BFE5B5|
|4EAD7E6BD78674D2A61DCA8CC6E1A428B6F2C557BFCFAC7C7528DFFE57E2F892DFF|
|F692EE512AAE95A665E04938EF5330E25EB50B63A946D0EC5DB44FF24506A7F0149|
|29E65D|
|-------------------------------------------------------------------|
-
A few build issues:
1. Death shroud - not a good level 1 pick, too endurance heavy, you are better off with a shield.
2. Dark regeneration - you really want a single theft of essense proc
3. Stamina should be slotted over physical perfection (stamina is 2x endurance recover of physical perfection)
4. Try to find some recharge into build up (and take it sooner). Its too good of a power to take so late in the game
5. The Panacea proc is best in health, over the other health +recovery procs
I noticed the power choice and slotting of oppressive gloom and cloak of fear. From my experience, oppressive gloom will allow the mobs to stagger away, and go to range. Cloak of fear will hold them in place (same magnitude), but OG has a much better hit chance than cof. Together, not as effective (i've seen some strange running stagger out of CoF, when OG is on).
You can think about the presence pool, and make it a fear tank. I do this on my dark tanks/brutes, and find it very effective.
Here is a planned build for my dark/ice tank (your build has better defense, mine depends on more mezz), but I take the presence pool to stack fear.
This Hero build was built using Mids Reborn 3.0.4.7
https://github.com/Reborn-Team/MidsRebornClick this DataLink to open the build!
Level 50 Technology Tanker
Primary Power Set: Dark Armor
Secondary Power Set: Ice Melee
Power Pool: Flight
Power Pool: Presence
Power Pool: Leadership
Ancillary Pool: Arctic MasteryHero Profile:
Level 1: Dark Embrace -- ImpArm-ResDam/EndRdx(A), ImpArm-ResDam(3), ImpArm-ResDam/Rchg(3), ImpArm-ResDam/EndRdx/Rchg(33)
Level 1: Frozen Fists -- SprGntFis-Dmg/EndRdx/Rchg(A), SprGntFis-Acc/Dmg/Rchg(25)
Level 2: Murky Cloud -- ImpArm-ResDam(A), ImpArm-ResDam/EndRdx(5), ImpArm-ResDam/Rchg(5), ImpArm-ResDam/EndRdx/Rchg(33)
Level 4: Fly -- BlsoftheZ-ResKB(A)
Level 6: Obsidian Shield -- ImpArm-ResDam/EndRdx/Rchg(A), ImpArm-ResDam/EndRdx(7), ImpArm-ResDam(7), ImpArm-ResDam/Rchg(46)
Level 8: Dark Regeneration -- ThfofEss-+End%(A), RechRdx-I(9), HO:Golgi(9), TchoftheN-Acc/EndRdx/Heal/HP/Regen(11), RechRdx-I(11), HO:Golgi(13)
Level 10: Ice Sword -- SprGntFis-Dmg/Rchg(A), SprGntFis-Acc/Dmg/EndRdx/Rchg(13), HO:Nucle(25)
Level 12: Cloak of Darkness -- ShlWal-ResDam/Re TP(A), Krm-ResKB(17), Rct-ResDam%(34), Ksm-ToHit+(34)
Level 14: Frost -- HO:Centri(A), HO:Centri(15), HO:Centri(15)
Level 16: Provoke -- Acc-I(A)
Level 18: Cloak of Fear -- HO:Endo(A), HO:Endo(19), GlmoftheA-Acc/EndRdx(19), EndRdx-I(34)
Level 20: Build Up -- RechRdx-I(A), RechRdx-I(21), GssSynFr--Build%(23)
Level 22: Ice Patch -- RechRdx-I(A), RechRdx-I(23)
Level 24: Intimidate -- GlmoftheA-Acc/Fear/Rchg(A), Ngh-Acc/Fear/Rchg(33), Ngh-Acc/Rchg(37), UnsTrr-Acc/Fear/Rchg(43), EndRdx-I(50)
Level 26: Invoke Panic -- GlmoftheA-Acc/Fear/Rchg(A), Ngh-Acc/Fear/Rchg(27), UnsTrr-Acc/Fear/Rchg(27), Ngh-Acc/Rchg(46), EndRdx-I(50)
Level 28: Freezing Touch -- Hct-Dam%(A), Hct-Dmg/Rchg(29), Hct-Dmg(29), Lck-%Hold(31), UnbCns-Dam%(31), GhsWdwEmb-Dam%(31)
Level 30: Death Shroud -- OvrFrc-Dam/KB(A), OvrFrc-Acc/Dmg(40), OvrFrc-Acc/Dmg/End/Rech(43)
Level 32: Assault -- EndRdx-I(A)
Level 35: Greater Ice Sword -- SprGntFis-Rchg/+Absorb(A), SprGntFis-Acc/Dmg(36), PcnoftheT--Rchg%(36), SprBlsCol-Rchg/HoldProc(36), Hct-Dmg/EndRdx(37), HO:Nucle(37)
Level 38: Frozen Aura -- Arm-Dam%(A), Arm-Dmg/Rchg(39), Arm-Dmg(39), FrtHyp-Plct%(39), SprAvl-Rchg/KDProc(40), SprMghoft-Rchg/Res%(40)
Level 41: Block of Ice -- UnbCns-Hold/Rchg(A), UnbCns-Acc/Hold/Rchg(42), Lck-%Hold(42), SprEnt-Rchg/AbsorbProc(42), HO:Endo(43)
Level 44: Ice Blast -- SprWntBit-Rchg/SlowProc(A), Apc-Dmg/EndRdx(45), Apc-Dmg(45), Apc-Dam%(45)
Level 47: Ice Storm -- Rgn-Dmg/Rchg(A), Rgn-Dmg(48), Bmbdmt-+FireDmg(48), PstBls-Dam%(48)
Level 49: Tactics -- HO:Cyto(A), HO:Cyto(50)
Level 1: Gauntlet
Level 1: Brawl -- Empty(A)
Level 1: Sprint -- Empty(A)
Level 2: Rest -- Empty(A)
Level 2: Swift -- Empty(A)
Level 2: Hurdle -- Empty(A)
Level 2: Health -- Pnc-Heal/+End(A), Mrc-Rcvry+(21), NmnCnv-Regen/Rcvry+(46)
Level 2: Stamina -- PrfShf-End%(A), PrfShf-EndMod(17)
Level 50: Cardiac Radial Paragon
Level 50: Portal Jockey
Level 50: Task Force Commander
Level 50: The Atlas Medallion
Level 50: Freedom Phalanx Reserve
-------------
1
-
-
Wanted to add:
Fire/ice tank-troller plays differently, and uses knockdown for primary mitigation, as well as resists and heals. This is important to me, as it can be boring playing the same tank style over and over.
-
1
-
-
4 hours ago, StriderIV said:
To clarify, you like the Fire/Ice, correct? I’m interested in that combo.
I do, actually. Ice patch is a GREAT defensive melee power (taunt has -range to bring into melee range, so most, except flying flop).
Frozen aura is footstomp level damage (but all cold, so exotic), add in burn, great aoe (frost works well, but I recommend the cheap dam/range HO to extend range, and a turtle proc to add to the -recharge of it), and blazing aura ... Its very nice!
Freezing touch (mag 2 hold), plus an epic hold, you can hold bosses (plus, both take hold procs). I've been able to hold boss/elite bosses constantly (tank-troller). While this is small fries compared to an actual controller, but you have MUCH more survivability, and damage.
for a pure defensive build, you can get 45% melee defense, but I just find it more fun using resists (90% SLF, 66% EN dam res), ice patch, healing flames, and hold any pesky boss, and LOTS of damage (wheeee!)
I have a fire/axe and a fire/ice, and I have much more fun with fire/ice.
Though, against GM's and AV's, you only have resistance and healing flames to keep you alive.
-
1
-
-
Things changed due to issue changes:
stone/fire - love granite, but your status protection is like -90% run speed ... ugh, not fun
fire/ice - wished I had a fire/fire, then they nerfed burn to have fear (making burn useless), but I had ice patch ... then my tier 9 went from a sleep to foostomp level damage of pure cold. Went tank-troller mode (boss held easy). Great fun!
currently, an SR/spines is the least fun to play. Spines worked on my spines/fire scrapper, but not so much on my tanker
-
1
-
-
Here is my 50 bio/dark tank. Capped defense (including SL), 90% SL/50% FC/52% EN resiss, 3434 HP, ...
She's a beast. Note: defensive mode, AND you need 1 enemy in melee range to get 45% SL (evolving armor).
Incarnate is spirtiual for recharge/heals (your bread and butter)
Things to watch out for:
You have no defense debuff. Capped defense is to get in an hit hard.
anything/dark tank is very survivable, but lacks aoe
-heal/-regen is pain (your HP and +absorb are life savers), felt during hami raids
Edit: Note: I always do 2 builds for my tanks, one to survive anything (teams or +4/8), another to maximize damage (solo).
This Hero build was built using Mids Reborn 3.0.4.7
https://github.com/Reborn-Team/MidsRebornClick this DataLink to open the build!
Level 50 Technology Tanker
Primary Power Set: Bio Armor
Secondary Power Set: Dark Melee
Power Pool: Flight
Power Pool: Leadership
Power Pool: Fighting
Power Pool: Leaping
Ancillary Pool: Arctic MasteryHero Profile:
Level 1: Hardened Carapace -- UnbGrd-ResDam(A), UnbGrd-ResDam/EndRdx(3), UnbGrd-Rchg/ResDam(3), UnbGrd-ResDam/EndRdx/Rchg(5), GldArm-3defTpProc(5)
Level 1: Shadow Punch -- SprBlsCol-Acc/Dmg(A), SprBlsCol-Rchg/HoldProc(7), SprBlsCol-Dmg/EndRdx(7), SprBlsCol-Acc/Dmg/EndRdx(9), SprBlsCol-Acc/Dmg/Rchg(9)
Level 2: Inexhaustible -- NmnCnv-Heal(A), NmnCnv-Heal/EndRdx(11), NmnCnv-Heal/Rchg(11)
Level 4: Environmental Modification -- ShlWal-Def(A), ShlWal-Def/EndRdx(19), ShlWal-Def/Rchg(19), ShlWal-ResDam/Re TP(21), Rct-ResDam%(21)
Level 6: Adaptation
Level 8: Ablative Carapace -- DctWnd-Heal(A), DctWnd-Rchg(23), DctWnd-EndRdx/Rchg(23), DctWnd-Heal/Rchg(25), DctWnd-Heal/EndRdx/Rchg(25)
Level 10: Shadow Maul -- Arm-Dam%(A), Arm-Dmg(27), Arm-Dmg/EndRdx(27)
Level 12: Evolving Armor -- UnbGrd-ResDam(A), UnbGrd-ResDam/EndRdx(29), UnbGrd-Rchg/ResDam(29), UnbGrd-Max HP%(31)
Level 14: Taunt -- PrfZng-Dam%(A)
Level 16: Siphon Life -- KntCmb-Acc/Dmg(A), KntCmb-Dmg/EndRdx(31), KntCmb-Dmg/Rchg(31), KntCmb-Dmg/EndRdx/Rchg(33), TchoftheN-Heal(33), TchoftheN-Acc/EndRdx/Heal/HP/Regen(33)
Level 18: DNA Siphon -- SprMghoft-Dmg/Rchg(A), SprMghoft-Acc/Dmg/Rchg(34), SprMghoft-Acc/Dmg/EndRdx/Rchg(34), TchoftheN-Heal(34), TchoftheN-Acc/Heal(36)
Level 20: Fly -- WntGif-ResSlow(A)
Level 22: Maneuvers -- ShlWal-Def(A), ShlWal-Def/EndRdx(36), ShlWal-Def/Rchg(36), ShlWal-Def/EndRdx/Rchg(37)
Level 24: Boxing -- KntCmb-Acc/Dmg(A), KntCmb-Dmg/EndRdx(37), KntCmb-Dmg/Rchg(37), KntCmb-Dmg/EndRdx/Rchg(39)
Level 26: Genetic Contamination -- SprGntFis-Dmg/Rchg(A), SprGntFis-Acc/Dmg/Rchg(39), SprGntFis-Acc/Dmg/EndRdx/Rchg(39)
Level 28: Soul Drain -- GssSynFr--Build%(A), RechRdx-I(40), RechRdx-I(40)
Level 30: Tough -- StdPrt-ResDam/Def+(A)
Level 32: Weave -- ShlWal-Def(A), ShlWal-Def/EndRdx/Rchg(42), ShlWal-Def/EndRdx(42), ShlWal-Def/Rchg(42)
Level 35: Parasitic Aura -- NmnCnv-EndRdx/Rchg(A), NmnCnv-Heal/Rchg(43), NmnCnv-Heal/EndRdx/Rchg(43)
Level 38: Midnight Grasp -- SprMghoft-Rchg/Res%(A), SprMghoft-Acc/Dmg(43), SprMghoft-Dmg/EndRdx/Rchg(45), SprGntFis-Rchg/+Absorb(45), SprGntFis-Acc/Dmg(45), SprGntFis-Dmg/EndRdx/Rchg(46)
Level 41: Block of Ice -- SprWntBit-Rchg/SlowProc(A), SprWntBit-Dmg/EndRdx/Acc/Rchg(46), Apc-Dam%(46), Apc-Dmg(47), Apc-Dmg/Rchg(47)
Level 44: Chilblain -- SprWntBit-Acc/Dmg(A), SprWntBit-Dmg/Rchg(48), Apc-Dmg/EndRdx(48), Apc-Acc/Dmg/Rchg(48), Apc-Acc/Rchg(49)
Level 47: Dark Consumption -- RechRdx-I(A)
Level 49: Combat Jumping -- Ksm-ToHit+(A), LucoftheG-Def/Rchg+(50)
Level 1: Gauntlet
Level 1: Brawl -- Empty(A)
Level 1: Sprint -- Empty(A)
Level 2: Rest -- Empty(A)
Level 2: Swift -- Empty(A)
Level 2: Hurdle -- Empty(A)
Level 2: Health -- Pnc-Heal/+End(A), Prv-Absorb%(13), RgnTss-Regen+(13), Prv-Heal(15)
Level 2: Stamina -- PwrTrns-+Heal(A), PrfShf-End%(15), PrfShf-EndMod(17), PrfShf-EndMod/Acc(17)
Level 50: Spiritual Partial Radial Revamp
Level 50: Task Force Commander
Level 50: The Atlas Medallion
Level 50: Freedom Phalanx Reserve
Level 50: Portal Jockey
Level 6: Defensive Adaptation
Level 6: Efficient Adaptation
Level 6: Offensive Adaptation
-------------
1
-
-
6 hours ago, SwitchFade said:
Take master, don't look back.
Seriously, take master. Don't even debate it.
already sold. I have an SR scrapper, but playing wiht builds in Mid's, I was worried about the lack of status protection (which I understand is put into the other armors).
-
Thanks for the info, master brawler it is!
-
1
-
-
Looking to build a new sentinel, and playing with mid's, I noticed there is a 'master brawler' and 'practiced brawler', which appear to be mutually exclusive.
I'm aware practice brawler provides status protection, and it appears master brawler provides an absorb shield (plus +special, which I dont know what it is).
Wonder what those who took each think of it. Seems painful to forgo the status protection for an +absorb shield, or do I understand it wrong.
-
I recommend fear for mitigation if your dark/dark, add presense. Its a fun (and somewhat uber) way to play.
As for fighting pool being the new fitness, I actualy thought that was the sorcery pool. Decent resists, decent uptime, and some basic mezz protection (from memory).
-
defense and resistance are the traditional means of survival, followed by heals, knock downs, and finally +hp/regen.
But many people forget fear.
My old dark/dark brute use presence pool, to layer on the fear. Best form of soft control (with immobs, they can fight back, holds are too expensive).
Fear the mobs, fear the boss. If you want to avoid fighting pool for a dark/dark scrapper, I recommend presence pool.
Wont help much against an AV though, tough/weave will help more with that, but in that instance, you can pop inspirations.
-
1
-
-
Saw this post late, but wanted to add some minor feedback to galaxy brain:
1. Excellent job of stating the testing conditions. Even if some disagree, the setup is a good base.
2. Thank you for the SO only, and SO + pool power survival values.
Ignore those who say 'you need not stand ther, but do x,y,z' or ' IO bonus'. Your conditions is a great baseline.
BUT ... I have 2 suggestions to HELP YOU OUT!
1. How was this actually setup? Did you create a custom AE mission to create a testing method? I didn't see anything specific how the test is actually conducted.
2. Some people have great suggestion to test against various enemy groups (e..g Rikti) . While I agree 100% with your initial values, it would also be valuable feedback to see how radiation vs stone (non granite) vs invul against certain missions (such as psi clockwork, or mixed like carnies). In short, this is too much work for you, so if you do #1, allow others to have a comparable setup and test against mission specific mobs. Let some of us, help you, in a baseline versus specific enemy mobs.
overall, great job!
-
2
-
Dark/dark fear concept
in Tanker
Posted
I did this on an ss/dark brute. Get presence pool, and made a huge difference in damage mitigation. I plan on taking it on my dark/ma tank (but not enough levels yet).