leeper48
-
Posts
57 -
Joined
-
Last visited
-
I don't want to get cocky but I haven't come across anything yet that doesn't port over, so I think it should export/print well.
-
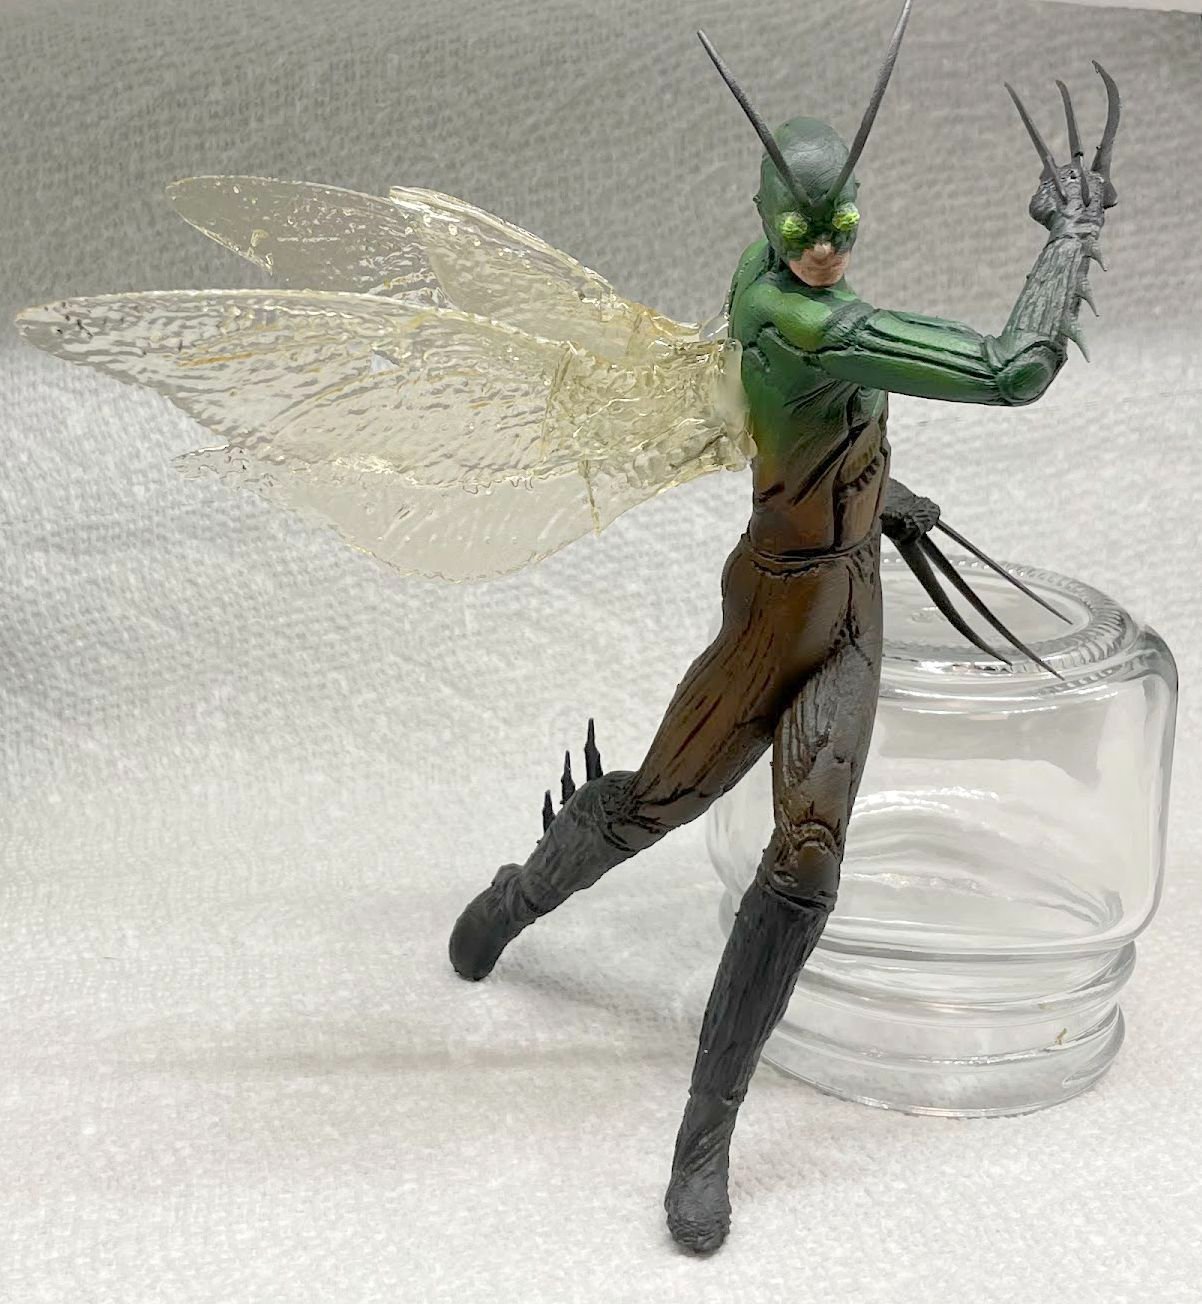
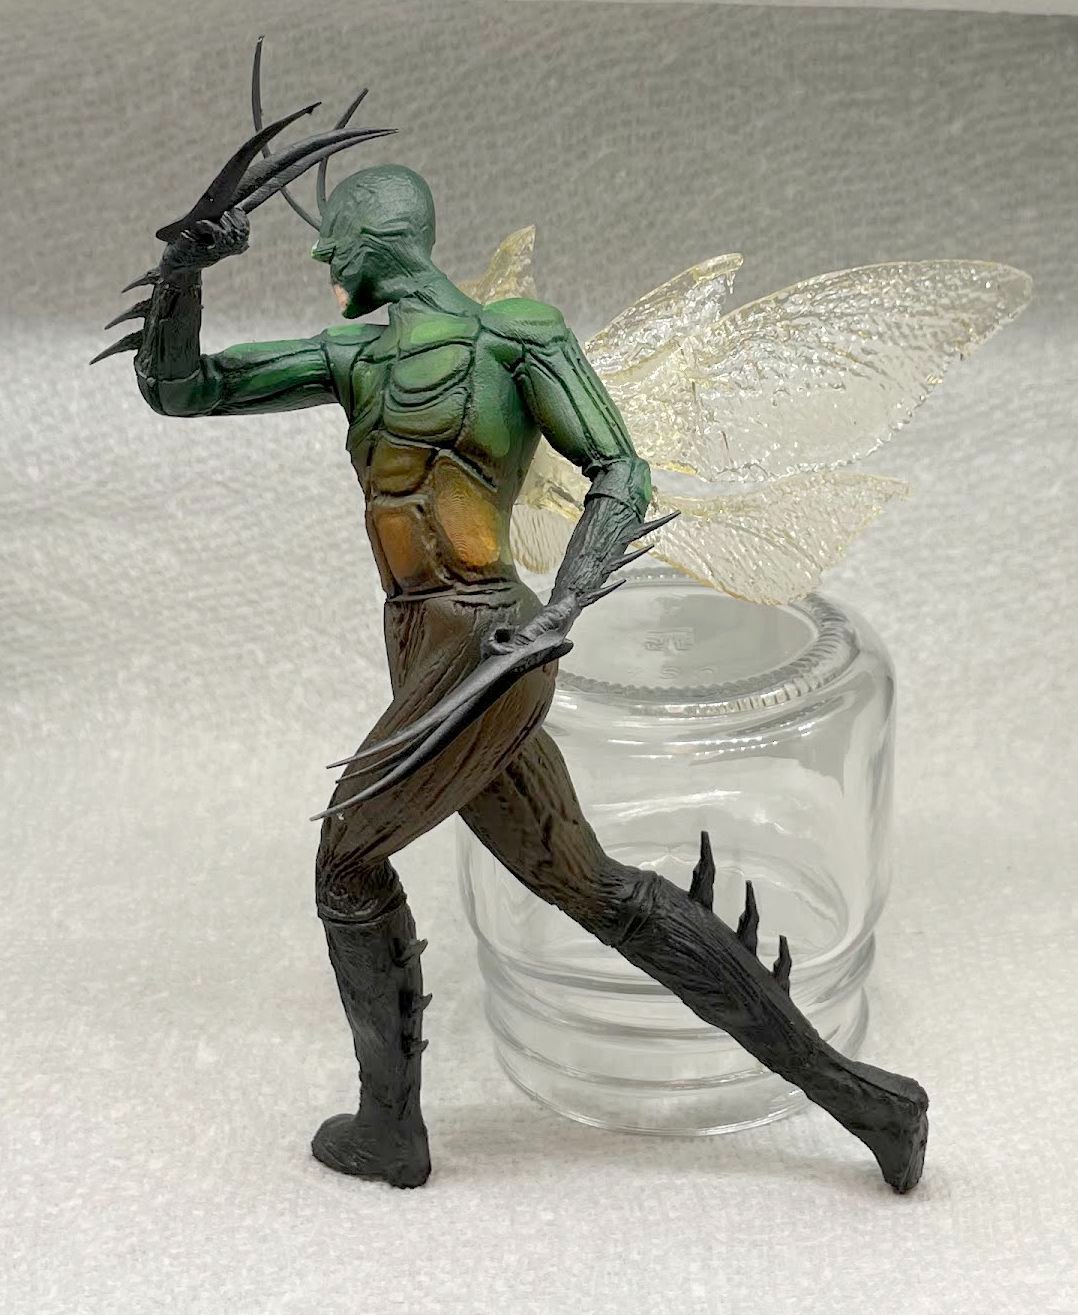
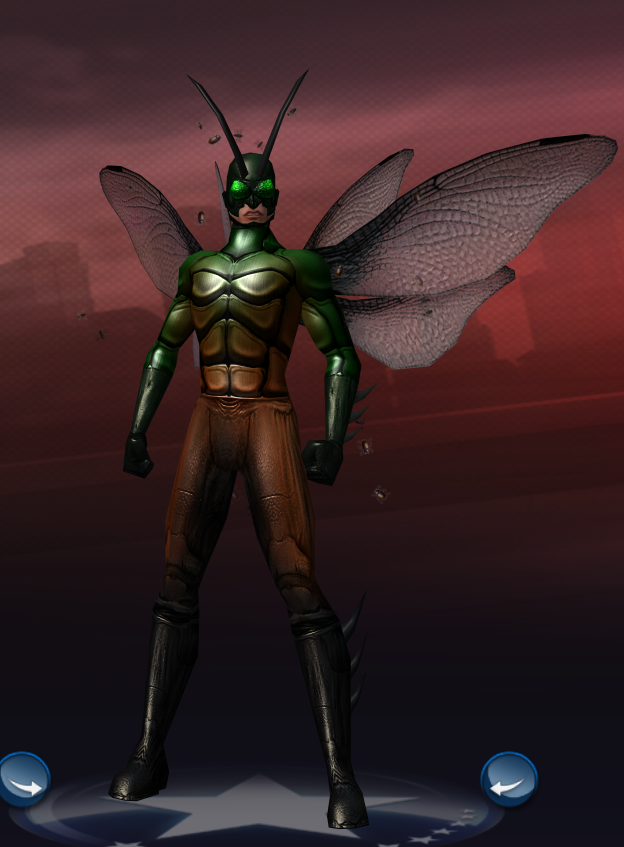
Beetle Man: Level 50 claws/bio Scrapper. Your cordial community bug boy. Printed in gray resin (wings printed in clear) on Anycubic M3 MAX. 1/10 scale (approx 7.3" tall). Bump/displacement textures hand placed.

-
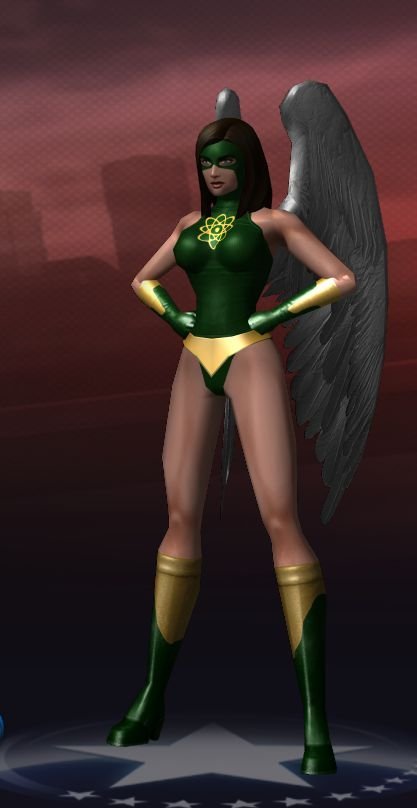
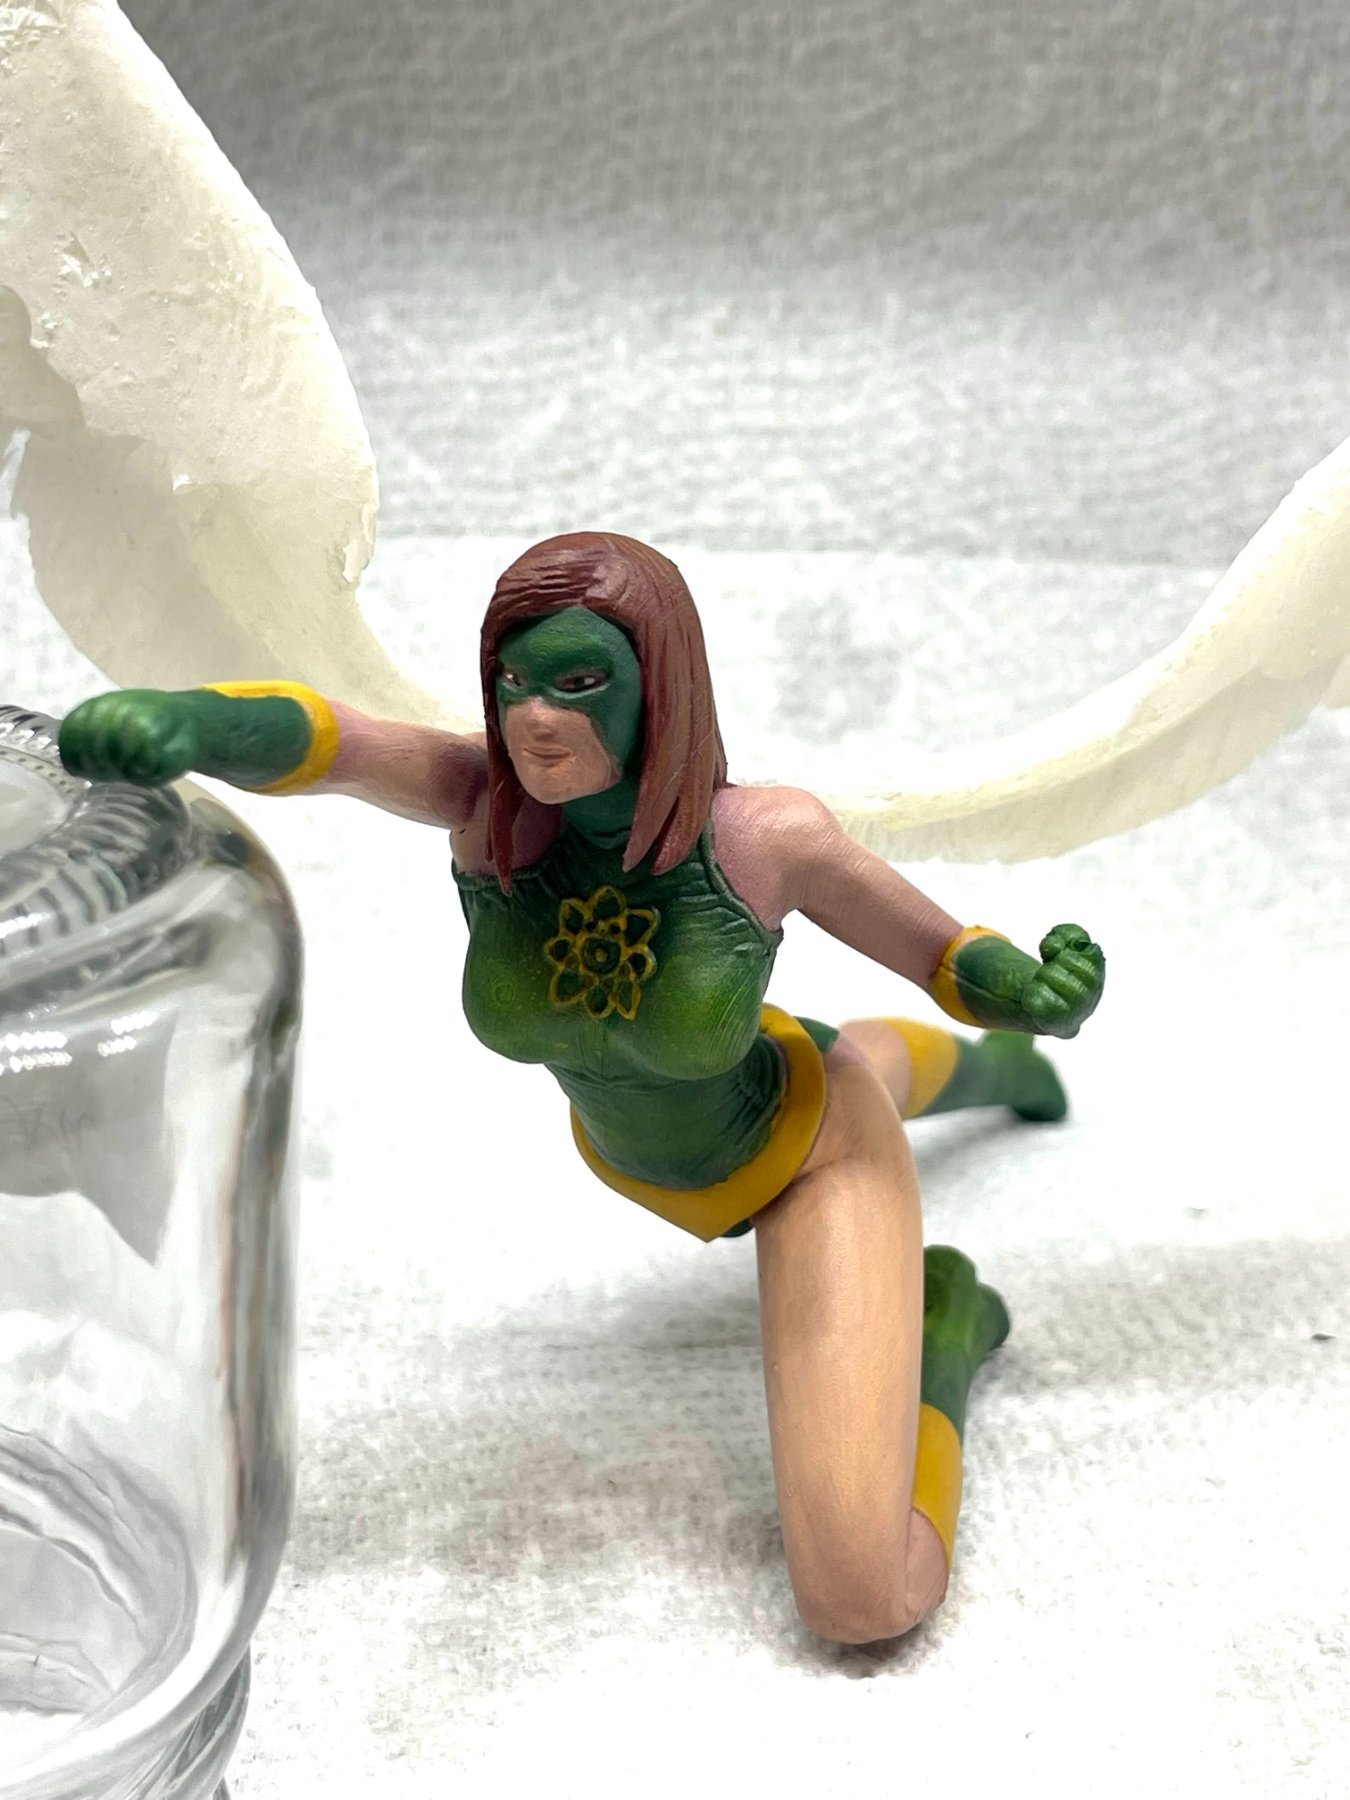
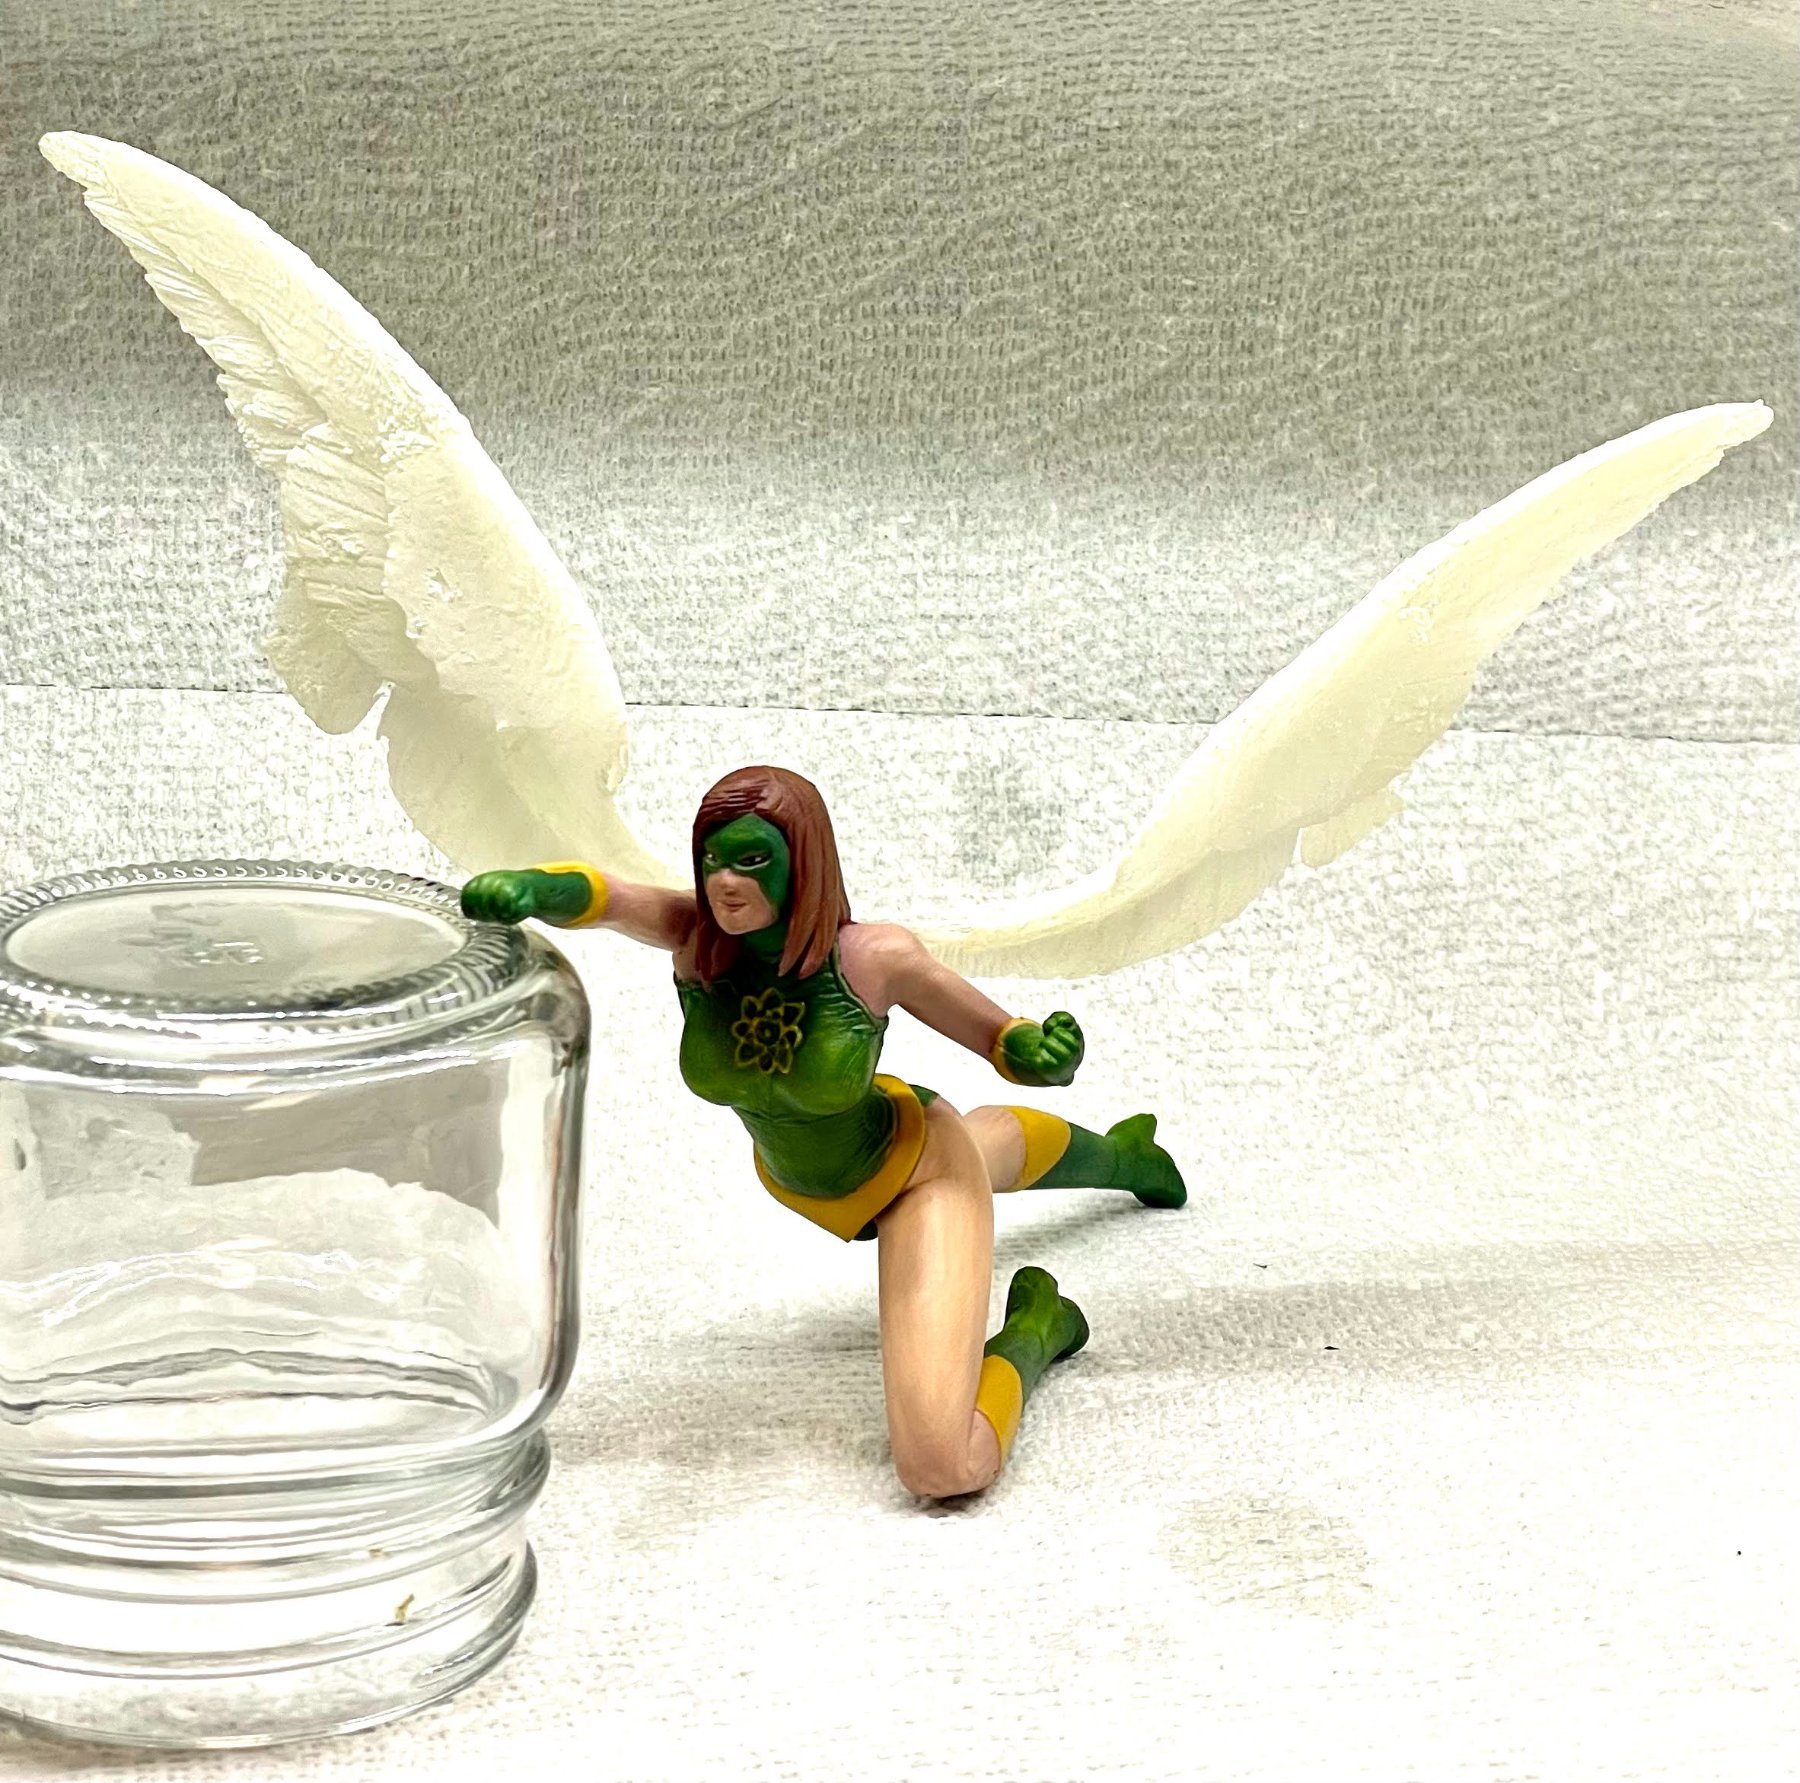
I just finished painting my wife's main. Atomic-Angel: Level 50 rad/rad Sentinel. Printed in gray resin (wings printed in clear with white mist coat) on Anycubic M3 MAX. 1/10 scale (aprox 8" long). Bump/displacement textures hand placed.
-
Filament is a great method to start with. I love my resin but the chemicals, smell, cleaning process, etc is not for everyone. You can get an inexpensive FDM (under $160), print at .1 mm height and get damn good results. I have 3 filament printers. Two large scale and this one https://a.co/d/ip4PCXG This was done on my small filament machine. Ignore the little bits; they flake right off. But if you look closely, the layer lines are very faint. That's the difference between printing standard and fine detail (that said, it takes twice as long, but that's the only real trade-off).
-
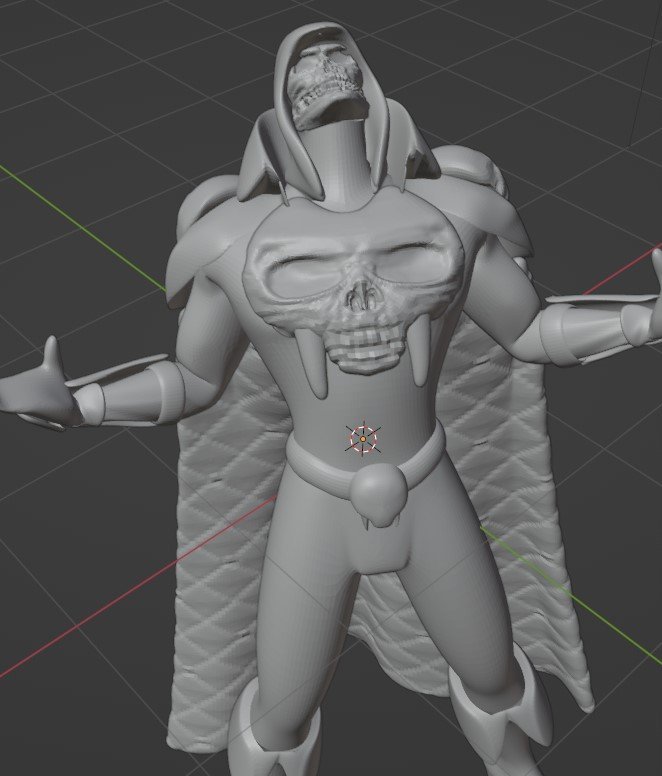
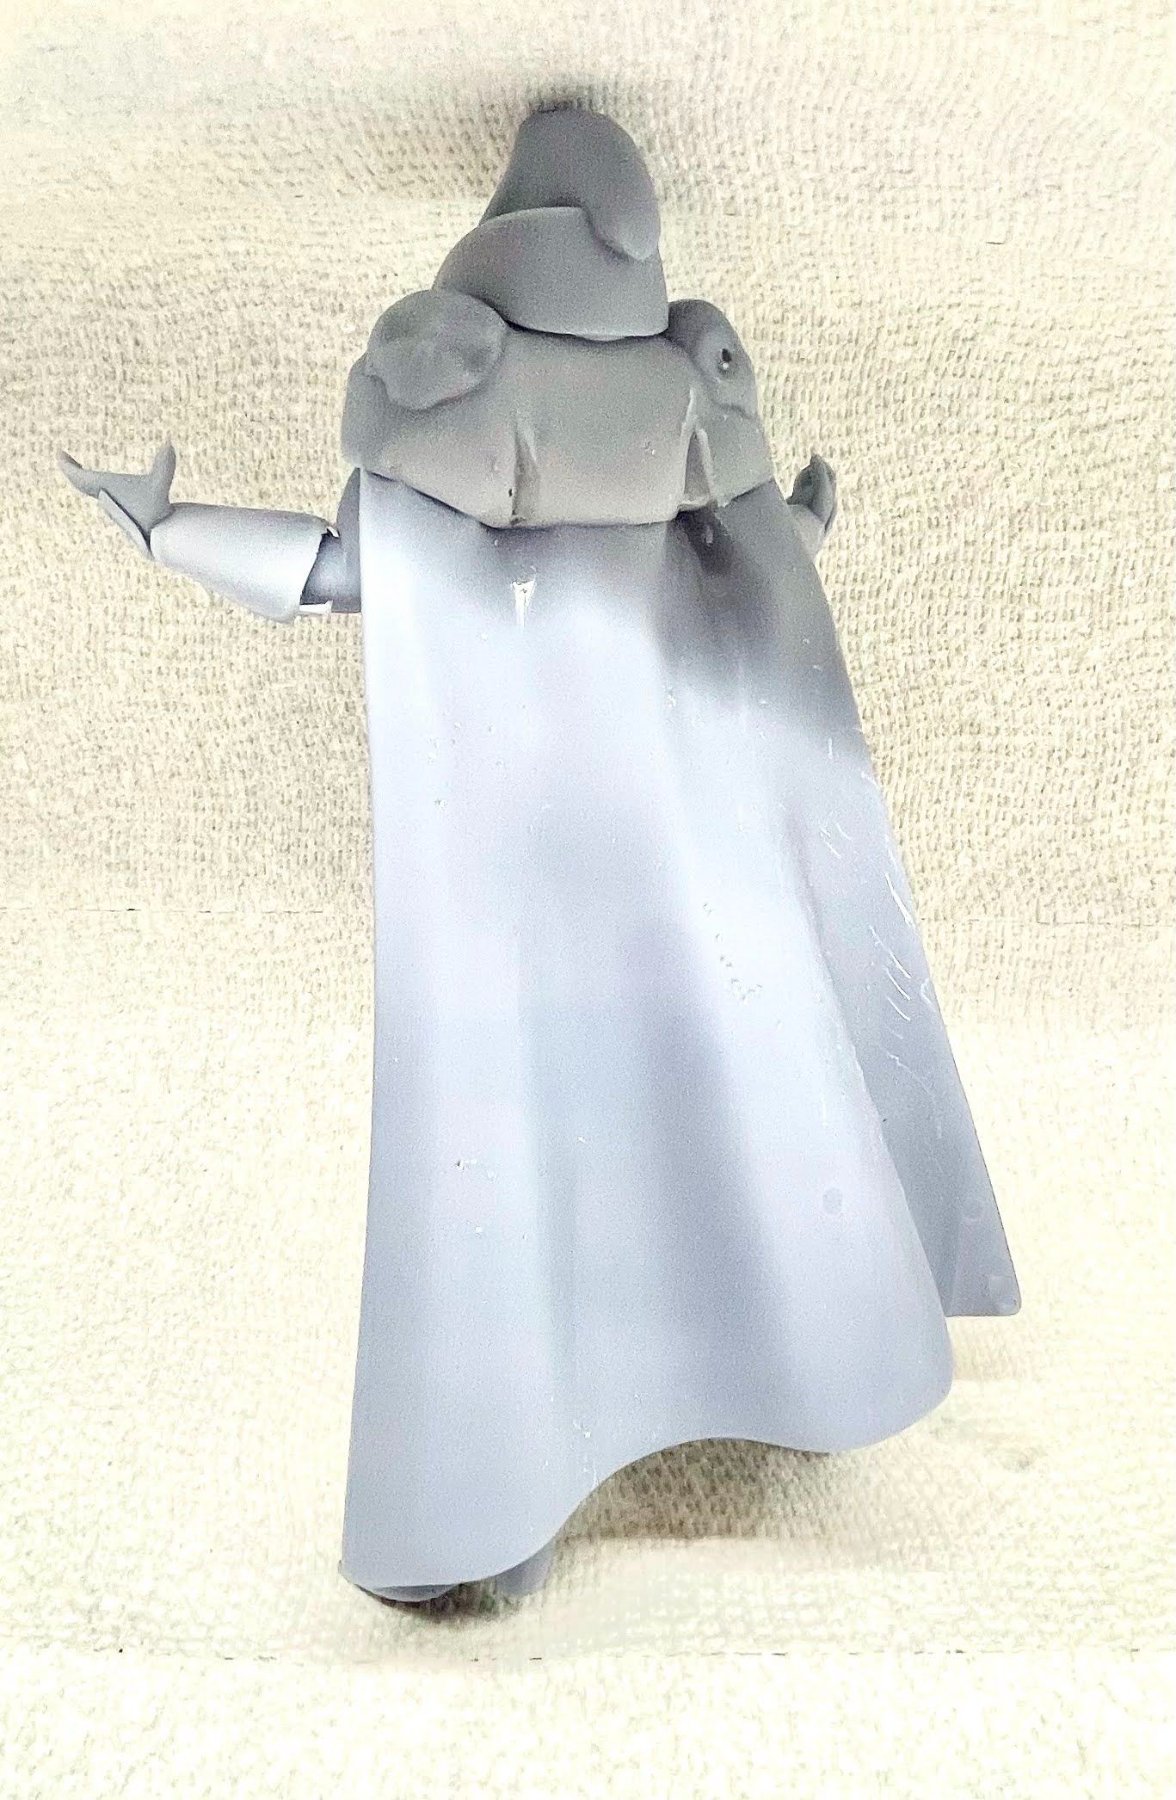
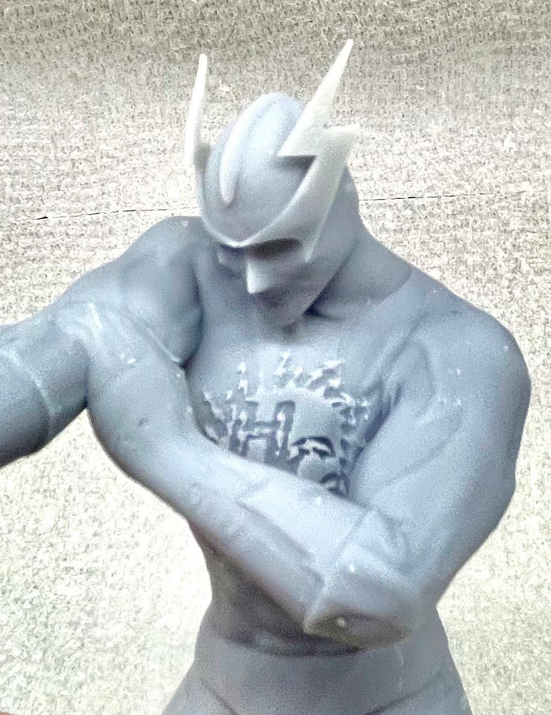
Pretty good now that I've come up with the way to give them "thickness." Anything that is a 2D plane needs a slight extrusion then prints fine (same thing with details like the mask bolts for HC). Hand of Satan: Level 50 necro/dark Master MindPrinted in gray resin on Anycubic M3 MAX. I printed this the past weekend before @brigg inspired me to get the texture maps to work. The image on the right shows a work in progress of applying the skull textures and quilting in the cape in Blender. Many more textures to come. I will reprint it when I am done.
-
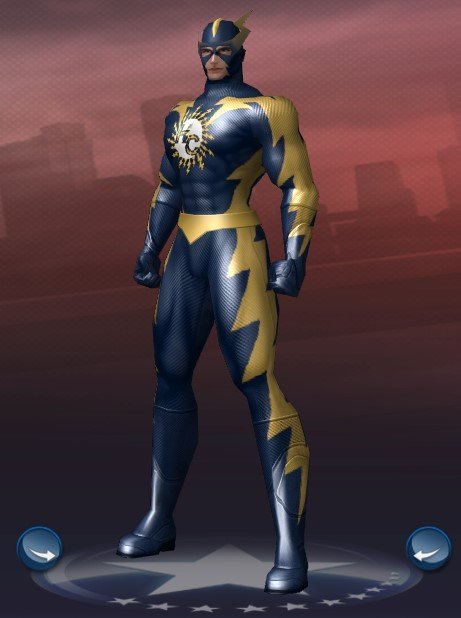
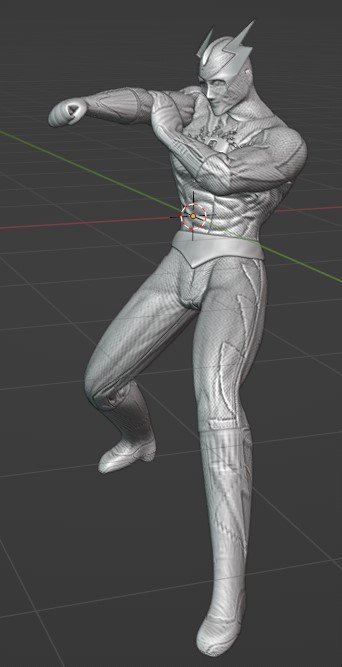
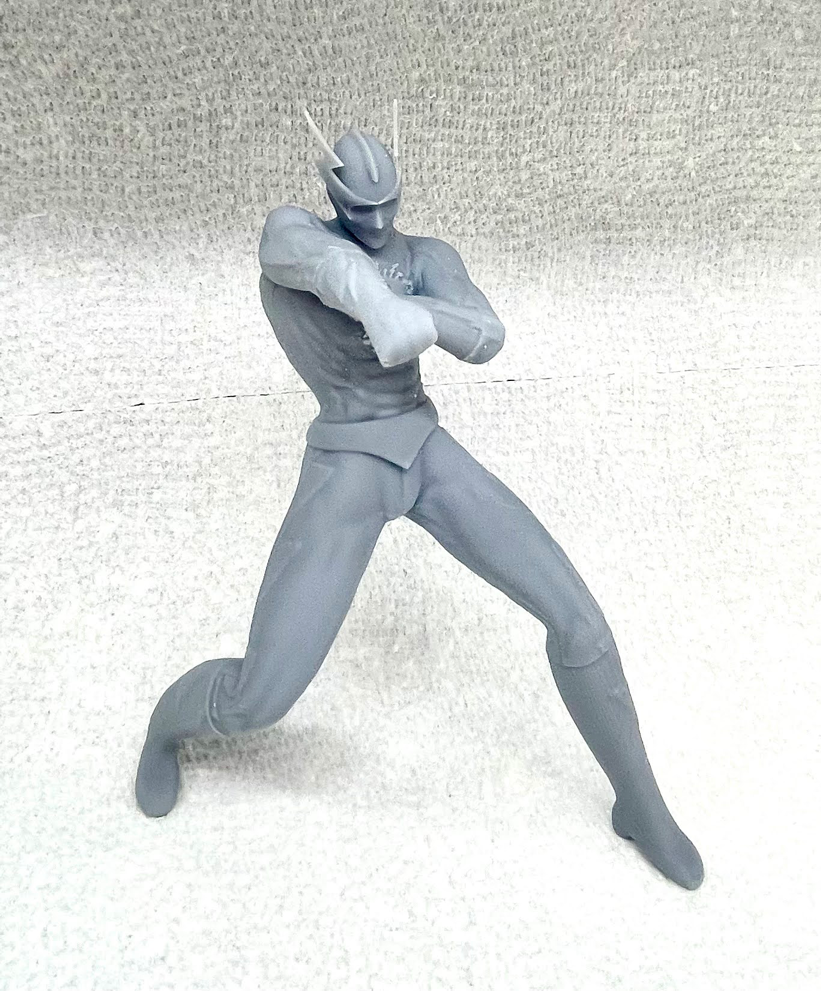
Human Conductor: Level 50 elec/elec BlasterPrinted in gray resin on Anycubic M3 MAX. 1/12 scale (5.4" high). Bump/displacement textures hand placed. Custom emblem with pigg file override. Will paint to match. As this is my main, I'm also printing a 1/6 scale version to showcase the facial and costume details.
-
Check out these links to some instructions/video I made. 3D Printing City of Heroes Characters Instructions and NEW Video Walk-thru I'll have to make another set of instructions/video for the textures. It's more involved than the extraction process.
-
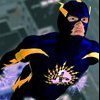
Share pics of your work-in-progress and finished CoX-related 3D prints here. Thermo Nuker: Level 50 rad/fire Brute Printed in gray resin on Anycubic M3 MAX. 1/12 scale (7.4" high). Bump/displacement textures hand placed. Will paint to match.
-
Thank you for your feedback @GM Impervium I completely understand Homecoming distancing itself from personal identity collections, and the last thing I would want to do is jeopardize the HC team. I even want to do anything in my power to avoid getting personal information, as things are these days. If the two people who entered are comfortable reaching out to me separately on Discord at leeper48 I will do the two figures for them. Otherwise, @GM Impervium please feel free to lock this thread. Thank you
-
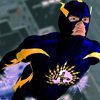
Hey, you Dashing Heroes and Scoundrelous Villains! I'm giving away a free 3D Print of one of your characters. One winner will be chosen at random on 3/2/24 after 6 pm EST. The print will be approximately 5-6" high with whatever power pose or emote you choose. It will be in your choice of either gray, black, or clear resin and include a round base with your character's name. I will ship to your nearest FedEx or UPS facility to keep your identity and address private. To enter, reply to this post and include a screenshot of one of your characters. This is a FREE giveaway. This is to celebrate Homecoming's recent deal with NCSOFT and the recent Page 7 release.
-
Glad you got it to work. I just recently got a couple of resin printers and switched to Lychee myself (it is nice they also added filament printers recently, too). Good luck and be sure to post any pics of prints you make.
-
I hope this helps anyone wanting to capture and print their character. It would be good to have the written instructions handy at the start of the post and pay attention to my text in yellow during the video for important things to turn off when not capturing your character to return things to normal otherwise graphics will be low quality and stability will drop. NEW Video Walk-thru https://youtu.be/vVlmudp2KfU
-
Hi. I just tested in case the latest version broke something but it still worked for me. The screen/UI comes in as a giant plane along with your figure (your character may be almost microscopic in comparison). Try scaling the imported model in Blender down by pressing S then .1 The character should be in the lower left of the giant plane. You'll want to select everything but your character and delete it then doing a zoom all/Frame selecteed should wrap around the character. I hope that helps. If not, send me your OBJ and I'll take a look.
-
The steps look daunting but tried to be thorough. Once you get it installed it goes quick. 10-15 mins from capture to printing is what I average.
-
FYI, I think I may not have pressed save on the last version of the Blender file so use this one, please. Cronus V3.blend