

Cutter
-
Posts
828 -
Joined
-
Last visited
-
Days Won
2
Content Type
Profiles
Forums
Events
Store
Articles
Patch Notes
Posts posted by Cutter
-
-
1 hour ago, Marine X said:
Wouldn't that kind of render the mission itself as completely pointless if that is the only mission objective and they go " Here He Is! ". Just my opinion, but it would always be over in like 30 Seconds. I would think rather than posting a Marker on the Mission Map, maybe have hostage objectives have an Audio Element to help you find them when you are nearby.
Yeah, for VVD it would. Simple to add a glowy maybe? Yeah the audio clue would be awesome but (at least speaking for myself) I usually have my music up and the game sounds way down, so I'd be very unlikely to hear it. Unless you mean audio element in conjunction with some repeating NPC chatter? Could be a little harder to miss some mission text, especially if it recurs.
Or maybe not a pinpoint for the last hostage, but a "here's the general area" marker? Dunno. I have no idea what the code is capable of or not.
-
I'm of the mind that all the "rescue X hostages" missions should have the same technology as glowies, in that if there's only 1 left it should get a map marker. Which would include the missions where there is only 1 hostage (Dr. Calvin, Vivian van Dyne, etc.).
-
 1
1
-
-
Like many I'm sure, these change as whims and interests strike. But based on my recent play...
Savage/Rad Brute. A tiny package of go-go-go all the time. And Savage sfx are so wonderfully visceral.
Energy/Time Blaster. Because BEEF CANNON.
DP/Fire Sentinel. My current project. Nice little change of pace, having fun mixing it up in melee.
-
25 minutes ago, Snarky said:
your build looks real similar to ones i make indeed. I made a couple mods for you to think about. i would definitely drop a psi res out of resist and puit in the kismet if nothing else.
Thanks for the ideas. I had the Aegis unique in there for the status resist more than anything else, but I can certainly see your point about making room for Kismet in here somewhere. As for your slotting of TWG over Weave, is grenade strictly a mule for the Ranged def set bonus? Or would I expect to actually use it? Currently I keep it on one of my trays but can't remember the last time I webbed anyone (which may be a mistake?).
-
2 hours ago, arcane said:
Looks like a @Snarky build so maybe he can weigh in. He is famous for maxing out ranged defense while being completely allergic to procs 🙂 Too far removed from how I’d build it for my input to be useful to you.
I'm open to whatever suggestions are going. As I said, this is a first draft of a build for an AT I've never taken to 50 before.
-
I started this guy way back when Seismic was new, then got distracted by other alts (as is tradition). I just dusted him off last night and he seemed to do OK -- enough anyway that I want to see what I can do to improve. I figure if I'm going to make a serious effort, I should go to the experts for advice. I've never 50'd a blaster (either live or on HC), so I am officially in uncharted territory.
He is currently at L37. I have taken the entire primary and what seems to be the usual minimal picks from the secondary. Looking at other Seismic/* posts here, it seems that either Encase or Shatter is skippable, and Entomb appears to be skipped a lot as well. However, I can't seem to find anything that speaks to this particular pairing, so I don't know if it's correct to skip here when I don't have secondary powers to fill in any attack gaps.
Really the only build goal is to play as close to "always ranged" as possible, meaning I'd like to hit the Ranged Def soft cap & have a smooth attack chain while doing so.
First stab at a build plan is in the spoiler block. It's not quite accurate to current but it gives an idea. Suggestions on how and where to improve are greatly appreciated. I'm not currently on the hover-blaster plan as that limits the ability to use Stalagmite (which I've found to be a solid power and not one I want to drop), and more significantly, hover entirely turns off Seismic Shockwaves. If there's a way to get around those little issues I'd hover in a heartbeat, as is common for the ranged approach I'm going for. I'd rather not hover at ground level tho; that seems too contrary to the plan.
SpoilerThis Hero build was built using Mids Reborn 3.2.17
https://github.com/LoadedCamel/MidsRebornClick this DataLink to open the build!
Turmoil: Level 50 Mutation Blaster
Primary Power Set: Seismic Blast
Secondary Power Set: Devices
Power Pool: Speed
Power Pool: Fighting
Power Pool: Leaping
Power Pool: Medicine
Ancillary Pool: Mace MasteryHero Profile:
Level 1: Encase -- DfnBrr-Acc/Dmg(A), DfnBrr-Dmg/Rchg(3), DfnBrr-Acc/Dmg/Rchg(3), DfnBrr-Acc/Dmg/EndRdx(5), DfnBrr-Acc/Dmg/EndRdx/Rchg(5), DfnBrr-Rchg/+Status Protect(7)
Level 1: Toxic Web Grenade -- Empty(A)
Level 2: Shatter -- Thn-Acc/Dmg(A), Thn-Dmg/EndRdx(7), Thn-Dmg/Rchg(9), Thn-Acc/Dmg/Rchg(9), Thn-Acc/Dmg/EndRdx(11), Thn-Dmg/EndRdx/Rchg(11)
Level 4: Rock Shards -- BlsWrt-Acc/Dmg(A), BlsWrt-Dmg/Rchg(13), BlsWrt-Acc/Dmg/Rchg(13), BlsWrt-Acc/Dmg/EndRdx(15), BlsWrt-Acc/Dmg/EndRdx/Rchg(15), BlsWrt-Rchg/Dam%(17)
Level 6: Entomb -- Thn-Acc/Dmg(A), Thn-Dmg/EndRdx(17), Thn-Dmg/Rchg(19), Thn-Acc/Dmg/Rchg(19), Thn-Acc/Dmg/EndRdx(21), Thn-Dmg/EndRdx/Rchg(21)
Level 8: Seismic Force -- RechRdx-I(A)
Level 10: Targeting Drone -- GssSynFr--Build%(A), AdjTrg-ToHit/EndRdx(23), AdjTrg-ToHit/EndRdx/Rchg(23)
Level 12: Upthrust -- Artl-Acc/Dam(A), Artl-Dam/End(25), Artl-Dam/Rech(25), Artl-Acc/Dam/Rech(27), Artl-Acc/Rech/Rng(27), Artl-End/Rech/Rng(29)
Level 14: Super Speed -- BlsoftheZ-ResKB(A)
Level 16: Kick -- Empty(A)
Level 18: Tombstone -- Thn-Acc/Dmg(A), Thn-Dmg/EndRdx(33), Thn-Dmg/Rchg(33), Thn-Acc/Dmg/Rchg(34), Thn-Acc/Dmg/EndRdx(34), Thn-Dmg/EndRdx/Rchg(34)
Level 20: Field Operative -- Heal-I(A), Heal-I(42), EndMod-I(43), EndMod-I(45)
Level 22: Tough -- StdPrt-ResDam/Def+(A), GldArm-3defTpProc(43), ImpSki-Status(46), Ags-Psi/Status(46), UnbGrd-Max HP%(46)
Level 24: Weave -- LucoftheG-Def/Rchg+(A), RedFrt-Def/EndRdx(42), RedFrt-Def/Rchg(48), RedFrt-Def/EndRdx/Rchg(48), RedFrt-Def(48), RedFrt-EndRdx(50)
Level 26: Stalagmite -- Thn-Acc/Dmg(A), Thn-Dmg/EndRdx(29), Thn-Dmg/Rchg(31), Thn-Acc/Dmg/Rchg(31), Thn-Acc/Dmg/EndRdx(31), Thn-Dmg/EndRdx/Rchg(33)
Level 28: Combat Jumping -- LucoftheG-Def/Rchg+(A)
Level 30: Hasten -- RechRdx-I(A), RechRdx-I(36)
Level 32: Meteor -- Artl-Acc/Dam(A), Artl-Dam/End(36), Artl-Dam/Rech(36), Artl-Acc/Dam/Rech(37), Artl-Acc/Rech/Rng(37), Artl-End/Rech/Rng(37)
Level 35: Scorpion Shield -- LucoftheG-Def/Rchg+(A), ShlWal-ResDam/Re TP(40), Rct-ResDam%(42), ShlWal-Def/EndRdx(43), ShlWal-Def/EndRdx/Rchg(45), ShlWal-Def(45)
Level 38: Gun Drone -- ExpRnf-Acc/Rchg(A), ExpRnf-Acc/Dmg(39), ExpRnf-Dmg/EndRdx(39), ExpRnf-Acc/Dmg/Rchg(39), ExpRnf-EndRdx/Dmg/Rchg(40), ExpRnf-+Res(Pets)(40)
Level 41: Smoke Grenade -- DmpSpr-ToHitDeb/Rchg(A)
Level 44: Injection -- Acc-I(A)
Level 47: Aid Self -- Heal-I(A)
Level 49: Field Medic -- RechRdx-I(A)
Level 1: Defiance
Level 1: Brawl -- Empty(A)
Level 1: Sprint -- Empty(A)
Level 2: Rest -- Empty(A)
Level 1: Swift -- Empty(A)
Level 1: Hurdle -- Empty(A)
Level 1: Health -- Prv-Absorb%(A), Pnc-Heal/+End(50)
Level 1: Stamina -- PrfShf-EndMod(A), PrfShf-End%(50)
Level 1: Seismic Shockwaves
Level 14: Speed Phase
Level 49: Quick Form
------------| Copy & Paste this data into Mids Reborn : Hero Designer to view the build | |-------------------------------------------------------------------| |MxDz;1414;648;1296;HEX;| |78DA6594CB6F125114C6EFC050288F421F94D2F286DA022D1613F7C607465B92A65| |45D3604A63809050243A22B1335716BDCB8526B772EFD1B5CFB7EACFC176AAB75A3| |55C753CE77A58609CC6FE6BB73EE37DF3D5C8A37CEBB37370B6784E239572F773A1| |B67E96C686D47B16B940DBDD91074D8D7BBEDADA65EB7D375080F6CAC951B35AD9A| |2B697A674BAF705D400E96BAAD56B36DE42E96AB35CDE808E76AB359CF955A9A56F| |5F42E0B7AEDBAA1376AEEDEDD8A566ED10D0F15B5AA5ED11B5AF0424BAFE4E48CC5| |7245A3D3D1F5CD297A8F047D5F66E8A41CBDA1306DE2A75588BC2A2C87E02FA6FA1| |BFCC31C3299B7C4BFC3A40F1DE255464E47F3298F043FFF98E978026E339D4FC11D| |E66B2AB6CA97B1AEB189BB04AE3347AE805799BE6BCC37546C93CE3638FBE03C06E| |731384FC07902CE6FA9D82E93D8B32CDE260CE3752CC3CF2C3D717207DC66BEA34A| |97B475596D3D714A056DCCE921D0CE0C399849F2F4485BCF679ED142A2578ADEDEA| |ABE27935169328A6C31648B215B1CD9E2C81647B6BB8471C4B08EA7584C83991873| |01B492B91F4EAA3F4065617AE8142FF16298EF174F2B7CFF03BF0B2A0AC8BE05FC3| |C9876324FBA400F38C2CC7B991F285B50660B225B08D922C81641B608B2C5906D92| |9C67E02C66E09C20310C5109A39949F023D945A55D14FD4AA25F49F42B857EA5D0A| |F14FA75E8A35D2383266037B7CCAB903E60660ACC854BE065E63DAA9A95CEB37BDC| |EC13FBE057F01B73EE00FCCEBC4355F332E8FC73162314342B7F29D9690E1825312| |7C51CDA7C9F8C97A4B884A588ABFDBD6F86D481BDBC3228ADAAFDED2D949EB4EBEC| |CF82A7BE0C4A7BC72445ECF28AE4E3CCFDFF061F70B8FC43E6A763FF50E68B4C7FC| |398CB997E28F32F251DDD9D| |-------------------------------------------------------------------|
-
Man it's been a while since I've been in this thread... got a few new(ish) alts up and running that I'm kinda pleased with.
Dumpster Juice - poison/water defender - poor sad hobo
Methanephetamine - fire/kin controller - powered by cow farts!
Tank and Spank - dark/nrg tanker AND will/street tanker - I was shocked to get the name on one server, never mind two
Tamk amd Spamk - ss/invul brute - he filled out his hero registration in cursive (fun fact: I made this guy before either of the Tank and Spanks, assuming the regular spelling would have been taken, and only checked after someone on a TF asked me about it. One of them is in fact on the same server.)
Lab Grown - time/seismic def - a Crey experiment in rapid gemstone production gone horribly wrong
-
 1
1
-
-
On 6/6/2022 at 12:21 AM, Spaghetti Betty said:
Hello again. I had some extra time and I was curious enough to give this my own spin.
SpoilerThis Hero build was built using Mids Reborn 3.1.2.5
https://github.com/LoadedCamel/MidsRebornClick this DataLink to open the build!
Supermassive: Level 50 Magic Scrapper
Primary Power Set: Stone Melee
Secondary Power Set: Energy Aura
Power Pool: Leaping
Power Pool: Speed
Power Pool: Fighting
Power Pool: Leadership
Ancillary Pool: Body MasteryHero Profile:
Level 1: Stone Mallet -- SprScrStr-Rchg/+Crit(A), SprScrStr-Acc/Dmg(13), SprScrStr-Acc/Dmg/Rchg(13), SprScrStr-Acc/Dmg/EndRdx/Rchg(17), SprScrStr-Dmg/EndRdx/Rchg(19)
Level 1: Kinetic Shield -- ShlWal-Def(A), ShlWal-Def/EndRdx(3), ShlWal-Def/Rchg(5), ShlWal-Def/EndRdx/Rchg(5)
Level 2: Heavy Mallet -- KntCmb-Acc/Dmg(A), KntCmb-Dmg/EndRdx(19), KntCmb-Dmg/Rchg(34), KntCmb-Dmg/EndRdx/Rchg(34), SprBlsCol-Acc/Dmg/EndRdx(37), SprBlsCol-Acc/Dmg(37)
Level 4: Power Shield -- ShlWal-Def(A), ShlWal-Def/EndRdx(7), ShlWal-Def/Rchg(7), ShlWal-Def/EndRdx/Rchg(11)
Level 6: Combat Jumping -- LucoftheG-Def/Rchg+(A)
Level 8: Fault -- Acc-I(A), SprCrtStr-Rchg/+50% Crit(9), FrcFdb-Rechg%(9), Ann-ResDeb%(11)
Level 10: Entropic Aura -- EndRdx-I(A)
Level 12: Build Up -- GssSynFr--Build%(A)
Level 14: Dampening Field -- TtnCtn-ResDam/EndRdx(A), TtnCtn-ResDam/Rchg(15), TtnCtn-ResDam/EndRdx/Rchg(15), TtnCtn-ResDam(17)
Level 16: Super Jump -- WntGif-ResSlow(A)
Level 18: Seismic Smash -- Hct-Dam%(A), Hct-Dmg/EndRdx(39), Hct-Acc/Rchg(40), Hct-Acc/Dmg/Rchg(40), Hct-Dmg/Rchg(40), GhsWdwEmb-Dam%(42)
Level 20: Energy Cloak -- LucoftheG-Def/Rchg+(A), RedFrt-Def(21), RedFrt-Def/EndRdx(21), RedFrt-Def/Rchg(23), RedFrt-Def/EndRdx/Rchg(27), RedFrt-EndRdx(27)
Level 22: Hasten -- RechRdx-I(A), RechRdx-I(23)
Level 24: Energy Protection -- UnbGrd-Max HP%(A), UnbGrd-ResDam(25), UnbGrd-ResDam/EndRdx(25)
Level 26: Boxing -- SprBlsCol-Rchg/HoldProc(A), SprBlsCol-Dmg/EndRdx(34)
Level 28: Energize -- Prv-Absorb%(A), Prv-Heal(29), Prv-Heal/EndRdx(29), Prv-EndRdx/Rchg(31), Prv-Heal/Rchg(31), Prv-Heal/Rchg/EndRdx(31)
Level 30: Tough -- TtnCtn-ResDam/EndRdx(A), TtnCtn-ResDam/Rchg(33), TtnCtn-ResDam/EndRdx/Rchg(33), TtnCtn-ResDam(33)
Level 32: Tremor -- Arm-Dam%(A), Arm-Dmg/EndRdx(42), Arm-Acc/Rchg(42), Arm-Acc/Dmg/Rchg(43), Arm-Dmg/Rchg(43), FrcFdb-Rechg%(43)
Level 35: Energy Drain -- LucoftheG-Def/Rchg+(A), PrfShf-EndMod/Rchg(36), PrfShf-EndMod(36), RedFrt-Def/Rchg(36), RedFrt-Def(37)
Level 38: Weave -- LucoftheG-Def/Rchg+(A), ShlWal-ResDam/Re TP(39), Rct-ResDam%(39), Rct-Def(48), Rct-Def/EndRdx(50)
Level 41: Hurl Boulder -- Apc-Dam%(A), Apc-Dmg/EndRdx(45), Apc-Acc/Rchg(45), Apc-Acc/Dmg/Rchg(45), Apc-Dmg/Rchg(46)
Level 44: Focused Accuracy -- AdjTrg-ToHit/EndRdx(A), AdjTrg-ToHit/EndRdx/Rchg(46), AdjTrg-EndRdx/Rchg(46), AdjTrg-ToHit(48), AdjTrg-ToHit/Rchg(50)
Level 47: Physical Perfection -- PrfShf-End%(A), Mrc-Rcvry+(48)
Level 49: Maneuvers -- LucoftheG-Def/Rchg+(A), LucoftheG-Def(50)
Level 1: Brawl -- Empty(A)
Level 1: Critical Hit
Level 1: Sprint -- Run-I(A)
Level 2: Rest -- Empty(A)
Level 1: Swift -- Run-I(A)
Level 1: Health -- Pnc-Heal/+End(A), NmnCnv-Regen/Rcvry+(3)
Level 1: Hurdle -- Jump-I(A)
Level 1: Stamina -- PrfShf-End%(A)
Level 16: Double Jump
Level 50: Agility Core Paragon
Level 50: Assault Core Embodiment
Level 50: Barrier Core Epiphany
Level 50: Degenerative Radial Flawless Interface
Level 50: Portal Jockey
Level 50: Task Force Commander
Level 50: The Atlas Medallion
Level 50: Freedom Phalanx Reserve
------------Defense numbers are assuming you hit 1 target with Energy Drain. Energize can be used on cooldown to ensure you never have endurance problems during your smashing.
Pinging @Cutter, just in case you haven't seen this yet.
Thanks! I'll have a closer look after work decides to free me. At a quick glance it looks like some stuff I can poach 🙂
-
1
-
-
Claws/Regen Stalker? From what I've read, Stalker Claws is poorly regarded, and Regen is Regen...
-
 1
1
-
-
12 hours ago, Marshal_General said:
I am kind of torn between two versions of this character. It will be a Plant/something most likely.
With:
Spoiler
Without:
Spoiler
I'm a fan of the "with" option as well. I think the CoT skirt grounds the look and adds a little bit of "solidity"(?) to it. Feels more complete to me.
-
1
-
-
I've 50'd Rad Armour with Fire, Ice and Kinetic Melee, and am working on a Savage. Of those I'd recommend Ice or Savage; the former as a more control-y set, the latter for non-stop slashy slashy and bleeds.
-
1
-
-
25 minutes ago, SomeGuy said:
I don't miss it, but each their own. BL is better DMG on paper than Fault, and Fault and BL would take the same set. So, preference. Fault has the benefit of being available when exemped VERY low. I would consider that pretty important. My biggest concern would be doing Fault and Tremor back2back in a rotation and the combined KD of the two scattering the mob. You would definitely have more soft CC with Fault. I know with my Stone/Rad is was easy to drop cause I have Radiation Siphon procced out so it's a darn good AOE at low level. Now that I'm looking at it on paper more, I think I would give it a serious go for Stone/ENA and just drop BL for myself personally.
I've liked having Fault for the soft control, for sure. With /Rad I could absolutely see dropping it because Rad Siphon.
I might have to try out both. Decisions, decisions. Got lots of time to think, and plenty of respecs to burn along the way!
-
22 minutes ago, SomeGuy said:
I almost did this combo but went Stone/Rad instead purely because of concept.
This Hero build was built using Mids Reborn 3.1.2.5
https://github.com/LoadedCamel/MidsReborn
Click this DataLink to open the build!
Level 50 Technology Scrapper
Primary Power Set: Stone Melee
Secondary Power Set: Energy Aura
Power Pool: Leaping
Power Pool: Speed
Power Pool: Fighting
Power Pool: Leadership
Ancillary Pool: Mu Mastery
Hero Profile:
Level 1: Stone Mallet -- CrsImp-Acc/Dmg/EndRdx(A), CrsImp-Acc/Dmg(37), CrsImp-Dmg/EndRdx(37), CrsImp-Dmg/Rchg(40), CrsImp-Dmg/EndRdx/Rchg(43), GldStr-%Dam(43)
Level 1: Kinetic Shield -- ShlWal-Def/EndRdx(A), ShlWal-Def/EndRdx/Rchg(36), ShlWal-Def(37), ShlWal-ResDam/Re TP(48)
Level 2: Heavy Mallet -- SprScrStr-Rchg/+Crit(A), SprScrStr-Acc/Dmg/EndRdx/Rchg(3), SprScrStr-Dmg/Rchg(3), SprScrStr-Acc/Dmg/Rchg(15), SprScrStr-Dmg/EndRdx/Rchg(25), GldStr-%Dam(25)
Level 4: Power Shield -- Rct-ResDam%(A), Rct-Def(5), Rct-Def/EndRdx(5), Rct-EndRdx/Rchg(11), Rct-Def/Rchg(13), Rct-Def/EndRdx/Rchg(13)
Level 6: Build Up -- GssSynFr--Build%(A), RechRdx-I(7), RechRdx-I(7)
Level 8: Dampening Field -- Ags-Psi/Status(A), Ags-ResDam/EndRdx(9), Ags-ResDam(9), Ags-ResDam/Rchg(11)
Level 10: Entropic Aura -- EndRdx-I(A)
Level 12: Combat Jumping -- LucoftheG-Def/Rchg+(A), Ksm-ToHit+(46)
Level 14: Hasten -- RechRdx-I(A), RechRdx-I(15)
Level 16: Energy Protection -- GldArm-3defTpProc(A), GldArm-End/Res(17), GldArm-ResDam(17), StdPrt-ResDam/Def+(23)
Level 18: Seismic Smash -- Hct-Dam%(A), Hct-Acc/Dmg/Rchg(19), Hct-Dmg/Rchg(19), UnbCns-Dam%(21), GldStr-%Dam(21), SprCrtStr-Rchg/+50% Crit(23)
Level 20: Energy Cloak -- LucoftheG-Def/Rchg+(A), LucoftheG-Def(46)
Level 22: Super Jump -- WntGif-ResSlow(A)
Level 24: Boxing -- SprBlsCol-Rchg/HoldProc(A), SprBlsCol-Acc/Dmg(48)
Level 26: Tough -- UnbGrd-Max HP%(A), UnbGrd-ResDam(27), UnbGrd-ResDam/EndRdx(27), UnbGrd-ResDam/EndRdx/Rchg(34)
Level 28: Energize -- Prv-Absorb%(A), Prv-Heal(29), Prv-Heal/EndRdx(29), Prv-EndRdx/Rchg(31), Prv-Heal/Rchg(31), Prv-Heal/Rchg/EndRdx(31)
Level 30: Weave -- LucoftheG-Def/Rchg+(A), ShlWal-Def/EndRdx(34), ShlWal-Def/EndRdx/Rchg(36), ShlWal-Def(36)
Level 32: Tremor -- Arm-Dam%(A), Arm-Dmg/EndRdx(33), Arm-Dmg/Rchg(33), Arm-Acc/Dmg/Rchg(33), Arm-Acc/Rchg(34)
Level 35: Energy Drain -- LucoftheG-Def/Rchg+(A)
Level 38: Zapp -- Apc-Dam%(A), Apc-Dmg/EndRdx(39), Apc-Dmg/Rchg(39), Apc-Acc/Dmg/Rchg(39), Apc-Acc/Rchg(40), GldJvl-Dam%(40)
Level 41: Ball Lightning -- Rgn-Dmg/EndRdx(A), Rgn-Dmg(42), Rgn-Dmg/Rchg(42), Rgn-Acc/Dmg/Rchg(42), Rgn-Acc/Rchg(43)
Level 44: Maneuvers -- ShlWal-Def/EndRdx(A), ShlWal-Def/EndRdx/Rchg(45), ShlWal-Def(45)
Level 47: Assault -- EndRdx-I(A)
Level 49: Overload -- LucoftheG-Def/Rchg+(A)
Level 1: Brawl -- SprBlsCol-Dmg/EndRdx/Acc/Rchg(A), SprBlsCol-Dmg/EndRdx(48)
Level 1: Critical Hit
Level 1: Sprint -- Run-I(A)
Level 2: Rest -- Empty(A)
Level 1: Swift -- Run-I(A)
Level 1: Health -- Pnc-Heal/+End(A), NmnCnv-Regen/Rcvry+(45), NmnCnv-Heal(47)
Level 1: Hurdle -- Jump-I(A)
Level 1: Stamina -- PrfShf-End%(A), PrfShf-EndMod(46), PwrTrns-+Heal(47), PwrTrns-EndMod(49)
Level 49: Quick Form
Level 22: Double Jump
Level 50: Musculature Core Paragon
------------
Thanks, some nifty stuff in there. Epics for ranged goodness is appealing. Do you find you miss Fault, or is that one you never bothered with at all?
-
1 hour ago, Spaghetti Betty said:
Personally, I would go Agility since it boosts the 3 attributes you rely on the most. You can also get away with being a little lean on slotting Energy Drain for End Mod with it. And I don't wanna say you need Hasten (because only bleeding edge builds need Hasten) but it will help a lot. FF procs will help (Fault should get one anyway) but I wouldn't load up your build with them unless you have the slots to spare.
Thanks! I'll see what a new build looks like as I level up and start finding the IO pieces.
-
1
-
-
8 hours ago, Spaghetti Betty said:
Overall, the numbers don't look too bad. Nothing that a good Alpha pick couldn't round out. Here's some things I would do if I built it up:
-High recharge is gonna be king here. Your endurance woes are easily solved by Energy Drain and Energize being on small cooldowns. Keep in mind, Energize gives you a huge End discount for 30 secs upon activation.
-Personally, I would slot Fault with a few procs and that's it. The damage it deals on its own is nothing to write home about and the area it affects is strange. I normally slot it with a FF:+recharge, Annihilation: -res, and Critical Strikes. You're gonna be using it on cooldown anyway.
-Stone Fist is highly skippable, IMO. I would trade it out for Hurl Boulder for more slotting options. You could also forego Body Mastery and pick up Moonbeam, but I think that would mostly depend on if you're ok with your Stone character casting a dark bolt every now and then.
Hope this helps.
Thanks Betty, appreciate the suggestions. Would you suggest Spiritual or Agility Alpha to help with recharge? Or is that better served by taking Hasten and more FF procs & a different Alpha? As for Stone Fist, it's in the build now cause I've leveled through playing and didn't think I would have even a remote chance of a chain without it. Likely will come out of the final product.
-
So there I am, minding my own business, when I see call for a Yin. Already done it on the current guy, so I log to my roster and scroll to the dusty pages. Found this guy, didn't think he had that badge. Sure enough, he's looking for Yin. And off we go. Things went well, picked up a couple levels and I kinda got the scrappering bug back a little. (I played scrappers heavily on live, but have hardly touched them on HC.)
Trained up my levels (31>33 which is a no-brainer). Pulled up Mids to see where I wanted to go next and... what, no build?? This can't be right. Argh. So I put one together based on the powers chosen thus far & where I assumed I want to carry on to. Plugged in slots and what I think are decent IOs to go in them. It looks.... OK? Defenses are good, resists are alright I think, recovery feels a little low and end use a bit on the high side. Plus I'm entirely confident I've missed a bunch of obvious optimizations.
So I'm here, cap in hand, with a first crack at a build and an ask for more experienced scrappers to show me the errors of my ways and turn this guy into a splattering machine.
SpoilerThis Hero build was built using Mids Reborn 3.2.17
https://github.com/LoadedCamel/MidsRebornClick this DataLink to open the build!
Splattering Ram: Level 50 Magic Scrapper
Primary Power Set: Stone Melee
Secondary Power Set: Energy Aura
Power Pool: Leaping
Power Pool: Fighting
Power Pool: Teleportation
Power Pool: Flight
Ancillary Pool: Body MasteryHero Profile:
Level 1: Stone Fist -- Hct-Dmg/Rchg(A), Hct-Dam%(3), Hct-Acc/Dmg/Rchg(3), Hct-Acc/Rchg(5), Hct-Dmg/EndRdx(5)
Level 1: Kinetic Shield -- Rct-Def(A), Rct-Def/EndRdx(25), Rct-EndRdx/Rchg(25), Rct-Def/Rchg(27), Rct-Def/EndRdx/Rchg(43), Rct-ResDam%(45)
Level 2: Stone Mallet -- SprCrtStr-Acc/Dmg(A), SprCrtStr-Dmg/Rchg(7), SprCrtStr-Acc/Dmg/Rchg(7), SprCrtStr-Dmg/EndRdx/Rchg(9), SprCrtStr-Acc/Dmg/EndRdx/Rchg(9), SprCrtStr-Rchg/+50% Crit(11)
Level 4: Heavy Mallet -- SprScrStr-Acc/Dmg(A), SprScrStr-Dmg/Rchg(11), SprScrStr-Acc/Dmg/Rchg(13), SprScrStr-Dmg/EndRdx/Rchg(13), SprScrStr-Acc/Dmg/EndRdx/Rchg(15), SprScrStr-Rchg/+Crit(15)
Level 6: Build Up -- GssSynFr--Build%(A)
Level 8: Fault -- Bmbdmt-Dam(A), Bmbdmt-Acc/Rech/End(17), Bmbdmt-Dam/Rech(17), Bmbdmt-Acc/Dam/Rech(19), Bmbdmt-Acc/Dam/Rech/End(48), Bmbdmt-+FireDmg(48)
Level 10: Power Shield -- LucoftheG-Def/Rchg+(A), ShlWal-ResDam/Re TP(27), ShlWal-Def/EndRdx(29), ShlWal-Def(29), ShlWal-Def/EndRdx/Rchg(43), Ksm-ToHit+(45)
Level 12: Dampening Field -- GldArm-3defTpProc(A), RctArm-ResDam/EndRdx(46), RctArm-ResDam/Rchg(48), RctArm-ResDam/EndRdx/Rchg(50), RctArm-ResDam(50)
Level 14: Entropic Aura -- EndRdx-I(A)
Level 16: Energy Protection -- StdPrt-ResDam/Def+(A), TtnCtn-ResDam(46), TtnCtn-ResDam/Rchg(50)
Level 18: Seismic Smash -- SprBlsCol-Acc/Dmg(A), SprBlsCol-Dmg/EndRdx(19), SprBlsCol-Acc/Dmg/EndRdx(21), SprBlsCol-Acc/Dmg/Rchg(21), SprBlsCol-Dmg/EndRdx/Acc/Rchg(23), SprBlsCol-Rchg/HoldProc(23)
Level 20: Energy Cloak -- LucoftheG-Def/Rchg+(A), GifoftheA-Def/EndRdx(31), GifoftheA-Def/Rchg(31), GifoftheA-Run+(31), GifoftheA-Def/EndRdx/Rchg(34), GifoftheA-Def(43)
Level 22: Super Jump -- WntGif-ResSlow(A)
Level 24: Combat Jumping -- LucoftheG-Def/Rchg+(A)
Level 26: Kick -- Empty(A)
Level 28: Energize -- Prv-Heal(A), Prv-Heal/EndRdx(34), Prv-EndRdx/Rchg(34), Prv-Heal/Rchg(36), Prv-Heal/Rchg/EndRdx(36), Prv-Absorb%(36)
Level 30: Tough -- RctArm-ResDam/EndRdx(A), RctArm-ResDam/Rchg(39), RctArm-ResDam/EndRdx/Rchg(40), RctArm-ResDam(40)
Level 32: Tremor -- Arm-Dmg/Rchg(A), Arm-Acc/Dmg/Rchg(33), Arm-Acc/Rchg(33), Arm-Dmg/EndRdx(33), Arm-Dam%(39)
Level 35: Energy Drain -- LucoftheG-Def/Rchg+(A), SynSck-EndMod/+RunSpeed(37), SynSck-EndMod/Rech(37), SynSck-EndMod(37)
Level 38: Weave -- LucoftheG-Def/Rchg+(A), RedFrt-Def/EndRdx(40), RedFrt-Def/Rchg(42), RedFrt-Def/EndRdx/Rchg(42), RedFrt-Def(42), RedFrt-EndRdx(46)
Level 41: Focused Accuracy -- AdjTrg-ToHit/EndRdx/Rchg(A), AdjTrg-ToHit/EndRdx(45)
Level 44: Physical Perfection -- NmnCnv-Regen/Rcvry+(A)
Level 47: Combat Teleport -- RctRtc-Pcptn(A)
Level 49: Fly -- HypSnc-+Special(A)
Level 1: Brawl -- Empty(A)
Level 1: Critical Hit
Level 1: Sprint -- Empty(A)
Level 2: Rest -- Empty(A)
Level 1: Swift -- Empty(A)
Level 1: Health -- Pnc-Heal/+End(A), Mrc-Rcvry+(39)
Level 1: Hurdle -- Empty(A)
Level 1: Stamina -- PrfShf-End%(A)
Level 22: Double Jump
Level 49: Afterburner
------------| Copy & Paste this data into Mids Reborn : Hero Designer to view the build | |-------------------------------------------------------------------| |MxDz;1410;668;1336;HEX;| |78DA6593DB6E12511486F7C04C2950A080405BDA526A0B2D94B178E729F1D036692| |D49631B6F71A403922010C044DEC263BC32315E98F81E5E797C0DAD3DA9D7755C33| |FFDAA2E984F031FFACE33F9BD2C395916A75EDAA5082371A46B75BDEAE748C76DBE| |C6825A356AF08BA42DBED86D1EB999D7AB33673CBB8EF216D4286954B66C334F5ED| |5EAB69E2F7E4DF472B66D56C764D7DB569766AFDF2B5071D438C6CB55A0D7DD334D| |A542DE0DCACD56BF77A741771EE76A846BBD5E919BD7AABE94740C38E08AFB6EB15| |FD7A6BB75F2E195D1AA73F4683A4ED01F3F4A5D8A30A4B155997104555B8F2CC055| |05D64E698F14192260EDD8E3876C43C06277E80B99FE0D22F70943A2A3259B9A33A| |E290C1BC0B0E5798BBA0CF04C394EC96C9EEF7A8E8FB008E7C647E02839F995FC00| |8256B02C9427B8B5DA2247A6445CF09DA8CFE665A60C4CE239E53982E70888CF0CA| |646F4CC1E237D16E728DB9C146ACB31127143EA50A8D92FDD27AFF793C2C4C9392A| |50E29B09866CE821E4A0A288EF99608D86FD07689C410577285128A53BEA0639C62| |1E8CD1A261396BF8112FF6183CF384F9148C3F633E07BDD4212A93A3BCE8B48A99A| |635A6174C7BC0DC3098A0531F93BEC79258344E62822B8A04577491382E23C72DBA| |848F3A2759D2925F919CFEC6DC03CF7E67EE330F4037D59BE226EE29B636C3D666D| |9DA2C5B9B2083523899969ABA80E331739179897919CC5C01FD34DE2CBF0FF72CAF| |317704D7E6F6997BA04AE3CC4B17E73938EB0317FDCC0033081642E00EADB4C0C9C| |AC22BB45F7A0DBE090891976EE66F232343ED74E9A6FE9222A3343089CB525C8EE0| |1C4FAA425E167D6CDF53EAE03F6E6D9E7EBEA5CAC724298E74E01BA470D4D13F922| |2D2782B990D187E783AFEF83FE905967B971B9C1F4BC407F35B7F00D231CCF9| |-------------------------------------------------------------------|
-
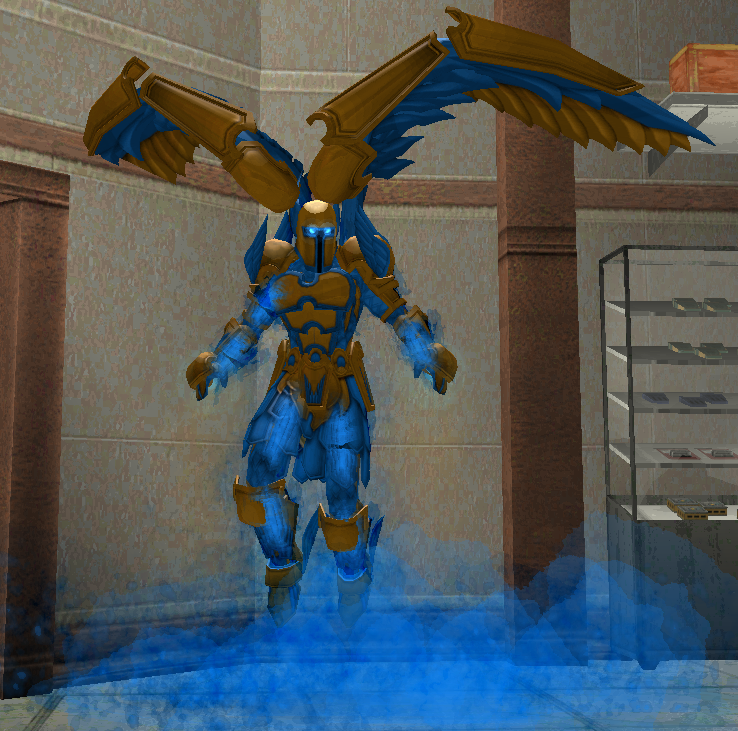
Went with a simple, almost-stock costume for my latest project, Tank and Spank (Dark/Energy Tanker). Switched up the Valkyrie head to a helmet, which works really nicely with the Soul Noir option for the armours. Spooky eyes for an animated armour look.
Then for the first time in a long time, I whipped up a bunch of palette-swapped alternates. Same base gold, with different secondary colours & armours changed to match. Now I have to chase after the remaining costume unlocks!
-
5
-
2
-
-
59 minutes ago, Snarky said:
I have never run Rad before. I was wondering what are the upsides/downsides. Looking for just a middle of the road build. Maybe a touch on the Tank side. (I run a lot of Invul) The numbers for resists seem hard to push and the thing looks (to me) like there are almost no passable powers, so a tight build.
I'm a huge fan of Rad Armour, and find I have to talk myself out of it whenever I roll up a new alt. However, I don't push bleeding edge envelopes like many of the regulars, so I can't speak to its performance at the extremes.
Upsides: solid resist suite, huge absorb/regen clicky, stellar endurance management, scaling +rech, couple good powers for proc bombing.
Downsides: as with any resist-based armour, getting hit means eating all the debuffs. Low native Psi resist could be a concern depending on the content you prefer to run. Prolly others I haven't had the pleasure of encountering.
I haven't run this combo, but easy enough to port my Savage/Rad for an example. Could certainly be optimized more with different slotting. I pushed to hit 46% Melee Def on the original (this quick & dirty port hits 43.5%). She feels tanky enough. Maybe went a little overboard on end management, but I like to be able to go forever. Big "lack" most likely is no Hasten, which is just my preference (I don't take it if I'm not shooting to make it perma or near enough), and could easily be dropped in.
Presented for your consideration.
SpoilerThis Hero build was built using Mids Reborn 3.2.17
https://github.com/LoadedCamel/MidsRebornClick this DataLink to open the build!
Rad Riding Hood: Level 50 Mutation Brute
Primary Power Set: Energy Melee
Secondary Power Set: Radiation Armor
Power Pool: Leaping
Power Pool: Fighting
Power Pool: Teleportation
Ancillary Pool: Energy MasteryHero Profile:
Level 1: Energy Punch -- TchofDth-Acc/Dmg(A), TchofDth-Dmg/EndRdx(3), TchofDth-Dmg/Rchg(7), TchofDth-Acc/Dmg/EndRdx(25), TchofDth-Dmg/EndRdx/Rchg(37), TchofDth-Dam%(42)
Level 1: Alpha Barrier -- UnbGrd-ResDam(A), UnbGrd-ResDam/EndRdx(5), UnbGrd-Rchg/ResDam(15), UnbGrd-ResDam/EndRdx/Rchg(27), StdPrt-ResDam/Def+(40)
Level 2: Bone Smasher -- SprBrtFur-Acc/Dmg(A), SprBrtFur-Dmg/Rchg(3), SprBrtFur-Acc/Dmg/Rchg(11), SprBrtFur-Dmg/EndRdx/Rchg(25), SprBrtFur-Acc/Dmg/EndRdx/Rchg(31), SprBrtFur-Rech/Fury%(42)
Level 4: Proton Armor -- UnbGrd-ResDam(A), UnbGrd-ResDam/EndRdx(5), UnbGrd-Rchg/ResDam(15), UnbGrd-ResDam/EndRdx/Rchg(27), GldArm-3defTpProc(40)
Level 6: Gamma Boost -- PwrTrns-+Heal(A), PwrTrns-EndMod(7)
Level 8: Whirling Hands -- SprUnrFur-Acc/Dmg(A), SprUnrFur-Dmg/Rchg(9), SprUnrFur-Acc/Dmg/Rchg(13), SprUnrFur-Dmg/EndRdx/Rchg(13), SprUnrFur-Acc/Dmg/EndRdx/Rchg(23), SprUnrFur-Rchg/+Regen/+End(31)
Level 10: Fallout Shelter -- UnbGrd-ResDam(A), UnbGrd-ResDam/EndRdx(11), UnbGrd-Rchg/ResDam(21), UnbGrd-ResDam/EndRdx/Rchg(34), UnbGrd-Max HP%(45), UnbGrd-EndRdx/Rchg(50)
Level 12: Build Up -- GssSynFr--Build%(A)
Level 14: Combat Jumping -- LucoftheG-Def/Rchg+(A), Ksm-ToHit+(45), ShlWal-ResDam/Re TP(45), Rct-ResDam%(46)
Level 16: Radiation Therapy -- TchoftheN-%Dam(A), TchoftheN-Heal/HP/Regen/Rchg(17), TchoftheN-Acc/EndRdx/Rchg(17), Erd-%Dam(37), Arm-Dam%(43), Arm-Dmg/Rchg(46)
Level 18: Total Focus -- SprBlsCol-Acc/Dmg(A), SprBlsCol-Dmg/EndRdx(19), SprBlsCol-Acc/Dmg/EndRdx(19), SprBlsCol-Acc/Dmg/Rchg(21), SprBlsCol-Rchg/HoldProc(23), GldStr-%Dam(31)
Level 20: Beta Decay -- AchHee-ResDeb%(A)
Level 22: Kick -- Empty(A)
Level 24: Tough -- UnbGrd-ResDam(A), UnbGrd-ResDam/EndRdx(39), UnbGrd-Rchg/ResDam(39), UnbGrd-ResDam/EndRdx/Rchg(39)
Level 26: Super Jump -- WntGif-ResSlow(A)
Level 28: Particle Shielding -- DctWnd-Rchg(A), DctWnd-Heal/EndRdx(29), DctWnd-EndRdx/Rchg(29), DctWnd-Heal/Rchg(37), DctWnd-Heal/EndRdx/Rchg(43)
Level 30: Weave -- GifoftheA-Def/EndRdx(A), GifoftheA-Def/Rchg(40), GifoftheA-Def/EndRdx/Rchg(42), GifoftheA-Def(43), GifoftheA-Run+(46)
Level 32: Energy Transfer -- Hct-Dmg(A), Hct-Dmg/Rchg(33), Hct-Acc/Dmg/Rchg(33), Hct-Acc/Rchg(33), Hct-Dam%(34), PrfZng-Dam%(34)
Level 35: Ground Zero -- Erd-%Dam(A), Obl-%Dam(36), Obl-Dmg/Rchg(36), PrfZng-Dam%(36), TchofLadG-%Dam(50), ScrDrv-Dam%(50)
Level 38: Superior Conditioning -- PrfShf-End%(A)
Level 41: Physical Perfection -- NmnCnv-Regen/Rcvry+(A)
Level 44: Meltdown -- UnbGrd-ResDam(A), UnbGrd-ResDam/EndRdx(48), UnbGrd-Rchg/ResDam(48), UnbGrd-EndRdx/Rchg(48)
Level 47: Combat Teleport -- RctRtc-Pcptn(A)
Level 49: Taunt -- PrfZng-Dam%(A)
Level 1: Fury
Level 1: Brawl -- Empty(A)
Level 1: Sprint -- Empty(A)
Level 2: Rest -- Empty(A)
Level 2: Swift -- Run-I(A)
Level 2: Hurdle -- Jump-I(A)
Level 2: Health -- Pnc-Heal/+End(A), Mrc-Rcvry+(9)
Level 2: Stamina -- PrfShf-End%(A)
Level 26: Double Jump
Level 50: Spiritual Total Radial Revamp
Level 50: Reactive Partial Core Conversion
Level 50: Barrier Partial Core Invocation
Level 50: Void Judgement
Level 50: Banished Pantheon Total Radial Improved Ally
Level 50: Assault Total Radial Graft
Level 50: Portal Jockey
Level 50: Task Force Commander
Level 50: The Atlas Medallion
Level 50: Freedom Phalanx Reserve
Level 1: Energy Focus
------------| Copy & Paste this data into Mids Reborn : Hero Designer to view the build | |-------------------------------------------------------------------| |MxDz;1570;731;1462;HEX;| |78DA85944B4F135114C7EFB4535A4A4B292DB608E559FA821670E7C2C4071023D43| |4C4B850B1A932E024D069A62581F8257CC4B822F1458C0BE3FB0398B875E7977021| |92A8A80B329ECEFF5C3BC485934C7F39FF7BCF3D8F7BA6C5CD99C0CACADC49A1749| |C59ABD4EBE5D3E64643F315371A95866E54053DA1C5CAF2D0A2BEAC575787CE1AC6| |B297B4B8BDAD5CD4D634AD305BD5CCD52D18092CCC682B5AB5AE15C855B70F2A9F3| |2D70D53044A86B15658D02A353A2D681B73FAEA8D0659DDB675810EA91926A2476D| |6976B3A699FABA5685D83B5BD3AFFF8D59A93734730B59C729B13CBD5E857E9AAF1| |096475C22A455E1BA0CB65D01E34B60F22A982D83CF532D67557C770B31AD0AF507| |D8F9133CFA0B4CC7686742153E8222232A0FB0E87A08FA1F81F1C7E0C01330BB03B| |EA0886E19D1FDBF88C7C0F9AC101E76523CFBAA2DB6ED817E5AF00A4EC71B80E80B| |82814E66083CD2050E84C197944EBBACA59DD3F1733A514E6798D399F80D4EEF834| |DC70E76161DCF5C8840B9045974077B14781E08BB7513F3F0CC7F035F51F8106EC0| |F284E210BBA2CC1898DC75D9CEB91388903F0E06C82D2C730FDF4241DDB79977C0E| |85D2EFC1E179EC1A1AF297244416411794F2746E81229F71E6EA5E8B1E8116E9262| |B29C183728C50D4A718352DCA0186DEE95FEBD7D10DF50A43E79E37D2534A47F9EB| |900268B60EE3CA8D24909E99450157B5AD31E30EB05733E30DF0E76120665430653| |E8D2509A996166C1E171661D7C4B698EC8311AE1968F0AD4307A804DA3BC79FA23F| |3A6C024848518939330769FEF87C48C14331751D83B0A33CE61DCE3DCCF49EEE724| |F77392072C455D28C8130ADBB8A4E6C44D49718A139A535B1FB2D5AF0AF9584D9BA| |E71E15FA9A44A0F92145BFAE26F7DD942C9A3B6DD436206E25787A828C348D7770E| |7F107B873CB81BCD00D6875C6B40AC528416A4F1C9696C3B8D64940C59DAE7A4C37| |83AE2D8B6E477AC549CC635A751721AF6B3936BB5C6FA038F60FF9D| |-------------------------------------------------------------------|
-
1
-
-
I rarely build with Hasten - typically I'll only take it if I can make it perma without sacrifices elsewhere. To my mind, if I can hit 70% global recharge through set bonii and AT powers, that's the equivalent value Hasten gives anyway so it seems good enough.
-
5 hours ago, Major_Decoy said:
On the characters where I want to fly horizontally, I just use the old bind that turns off fly and turns on hover (and visa versa). Just /bind r "powexecname fly $$ powexecname Hover"
1 hour ago, Vanden said:Sounds like something that can be pretty much addressed with binds or macros.
To Fly: “powexectoggleoff Hover$$powexecname Fly”
To Hover: “powexectoggleoff Fly$$powexecname Hover”
I thought of binds, but these don't allow me to run Fly+Hover together with the Fly pose. I prefer to have Hover on for the extra maneuverability during flight.
But I may not have that option, in which case I'll have to either go the bind route, or suck it up & pick a pose.
-
1
-
-
19 minutes ago, El D said:
Because Hover-pose is weird. x.x
Yeah that kinda sums up my experience with fighting against it.
-
I'd really like to Hover vertically and Fly horizontally (even when I have Hover toggled on during Fly).
Is there any way to set things up so Hover (alone) retains the default vertical pose, but Hover+Fly (together) retains Fly's default horizontal pose instead of being overridden by Hover? Costume creator only has "no pose" options for Hover, such that it now has the horizontal pose of Fly. I've tried normal Hover+Fly and used the /em flypose# command, but it has no effect (tho it DOES work when using no pose Hover). And it doesn't matter what order the powers are toggled on either.
Any ideas?
-
1
-
-
Honestly, if they didn't change what they were doing, after being asked, and only on the first mission, it kinda sounds like the TF was going to be a wreck anyway?
-
1
-
1
-
-
I try and squeeze CT into most of my tank and brute builds. Lets me set up where I want so I can manage the spawn aggro a little better. And the +hit is a welcomed bonus.


DP/Fire and making Burn work
in Sentinel
Posted
This Hero build was built using Mids Reborn 3.2.17
https://github.com/LoadedCamel/MidsReborn
Click this DataLink to open the build!
Gun Fire: Level 50 Natural Sentinel
Primary Power Set: Dual Pistols
Secondary Power Set: Fiery Aura
Power Pool: Speed
Power Pool: Leaping
Power Pool: Fighting
Power Pool: Teleportation
Ancillary Pool: Ninja Tool Mastery
Hero Profile:
Level 1: Pistols -- SprOppStr-Acc/Dmg(A), SprOppStr-Dmg/Rchg(3), SprOppStr-Acc/Dmg/Rchg(3), SprOppStr-Acc/Dmg/EndRdx(5), SprOppStr-Acc/Dmg/EndRdx/Rchg(5)
Level 1: Fire Shield -- TtnCtn-ResDam/EndRdx(A), TtnCtn-ResDam/Rchg(7), TtnCtn-ResDam/EndRdx/Rchg(7), TtnCtn-ResDam(9), GldArm-3defTpProc(42)
Level 2: Empty Clips -- Rgn-Dmg(A), Rgn-Dmg/EndRdx(11), Rgn-Dmg/Rchg(13), Rgn-Acc/Dmg/Rchg(13), Rgn-Acc/Rchg(15), FrcFdb-Rechg%(15)
Level 4: Molten Embrace -- EndRdx-I(A)
Level 6: Suppressive Fire -- SprWntBit-Acc/Dmg(A), SprWntBit-Dmg/Rchg(17), SprWntBit-Acc/Dmg/EndRdx(19), GhsWdwEmb-Dam%(19), NrnSht-Dam%(21), UnbCns-Dam%(21)
Level 8: Swap Ammo
Level 10: Super Speed -- WntGif-ResSlow(A)
Level 12: Bullet Rain -- SprSntWar-Acc/Dmg(A), SprSntWar-Dmg/Rchg(23), SprSntWar-Acc/Dmg/Rchg(23), SprSntWar-Acc/Dmg/EndRdx(25), SprSntWar-Acc/Dmg/EndRdx/Rchg(25), SprSntWar-Rchg/+Absorb(27)
Level 14: Healing Flames -- Prv-Heal(A), Prv-Heal/EndRdx(27), Prv-EndRdx/Rchg(29), Prv-Heal/Rchg(29), Prv-Heal/Rchg/EndRdx(31), Prv-Absorb%(31)
Level 16: Plasma Shield -- TtnCtn-ResDam/EndRdx(A), TtnCtn-ResDam(17), TtnCtn-ResDam/Rchg(31), TtnCtn-ResDam/EndRdx/Rchg(33), StdPrt-ResDam/Def+(42)
Level 18: Executioner's Shot -- Apc-Dmg(A), Apc-Dam%(33), Apc-Acc/Dmg/Rchg(34), Apc-Acc/Rchg(34), Apc-Dmg/EndRdx(34), FrcFdb-Rechg%(37)
Level 20: Consume -- SynSck-EndMod(A), SynSck-EndMod/+RunSpeed(36), SynSck-EndMod/Rech(36)
Level 22: Combat Jumping -- Krm-ResKB(A), LucoftheG-Def/Rchg+(33), Rct-ResDam%(36), ShlWal-ResDam/Re TP(37)
Level 24: Kick -- Empty(A)
Level 26: Combat Teleport -- GssSynFr--Build%(A)
Level 28: Burn -- SprAvl-Rchg/KDProc(A), SprAvl-Acc/Dmg/Rchg(39), SprAvl-Acc/Dmg/EndRdx/Rchg(39), SprAvl-Dmg/EndRdx(39), SprAvl-Acc/Dmg/EndRdx(40), SprOppStr-Rchg/+Opportunity(40)
Level 30: Tough -- TtnCtn-ResDam(A), TtnCtn-ResDam/EndRdx(37), TtnCtn-ResDam/Rchg(40), TtnCtn-ResDam/EndRdx/Rchg(42)
Level 32: Hail of Bullets -- Obl-Dmg(A), Obl-Acc/Rchg(43), Obl-Dmg/Rchg(43), Obl-Acc/Dmg/Rchg(43), Obl-Acc/Dmg/EndRdx/Rchg(45), Obl-%Dam(45)
Level 35: Cauterizing Blaze -- Pnc-Heal/+End(A), Pnc-Heal(45)
Level 38: Tashibishi -- Bmbdmt-+FireDmg(A), Bmbdmt-Acc/Rech/End(46), Bmbdmt-Dam/Rech(46), Bmbdmt-Acc/Dam/Rech(46), Bmbdmt-Acc/Dam/Rech/End(48)
Level 41: Hasten -- RechRdx-I(A), RechRdx-I(48)
Level 44: Weave -- LucoftheG-Def/Rchg+(A), Ksm-Def/EndRdx(48), Ksm-Def/EndRdx/Rchg(50), Ksm-ToHit+(50), LucoftheG-Def/EndRdx(50)
Level 47: Temperature Protection -- UnbGrd-Max HP%(A)
Level 49: Rise of the Phoenix -- OvrFrc-Dam/KB(A)
Level 1: Opportunity
Level 1: Brawl -- Empty(A)
Level 1: Sprint -- Clr-Stlth(A)
Level 2: Rest -- Empty(A)
Level 1: Swift -- Run-I(A)
Level 1: Hurdle -- Jump-I(A)
Level 1: Health -- Mrc-Rcvry+(A), NmnCnv-Regen/Rcvry+(9)
Level 1: Stamina -- PrfShf-End%(A), PrfShf-EndMod(11)
Level 10: Speed Phase
Level 8: Chemical Ammunition
Level 8: Cryo Ammunition
Level 8: Incendiary Ammunition
------------
Current project. Sitting at 42 right now and it works enough for me to want to keep pushing and see what I can improve. Plays much differently from my other sentinels which is a huge selling point. The basic idea is leveraging the +def from Hail of Bullets to make it safer to drop a Burn patch (with KD proc), and keeping the bad guys in it longer with Tashibishi.
(As far as keeping the bad guys close, I tried Thunder Strike out of Mu Mastery for the KD, but that glacial animation and unreliable proc didn't do enough. Also looked at Electrifying Fences (seemed the best of the bunch of AoE immobs) but that wasn't reliable enough either. Tashibishi not needing a hit to slow feels like it's the best of the bunch for this approach. Sure do wish that slow was enhanceable tho (per Mids it isn't, maybe that's inaccurate?).)
Anyway to the meat of the post and my dilemma.
I'm at a point in the speculative build process where I'm torn between how best to manage the defensive side of things. Initial proposal is maxing S/L resists & relying on a small purple to cap Melee def under Hail. Alternative is pumping Melee def to a point where I don't have to eat a purple to cap, at the expense of S/L resists.
Stats without Hail active look decent but that tradeoff haunts me.
If I want to push Melee def it's a simple answer to swap Titanium Coating x3 for Unbreakable Guard x3. That loses me 9% S/L resist but gains me 9.39% Melee def, meaning I'm capped with Hail alone. I don't know the math even remotely well enough to know if I would feel that lost resist (all the time) more than I'd feel the increased defense (capped for 10s out of every ~30s).
Given the build goal, is there a clear winner between the two approaches?
And do Incarnate choices skew the decision? I don't have anything in mind right now so looking for suggestions there. Cardiac Alpha with the +def approach blunts some of that 9% S/L loss, whereas Agility really doesn't do much at all to improve defense under capped S/L resists. Barrier seems an obvious choice to shore up holes as well, or perhaps Ageless is better for the DDR? As for Hybrid, I'm pretty sure Melee Radial for the taunt is where I want to be? Tho I can see arguments for the others as well.
Comments and suggestions greatly appreciated!