

Nayland1971
-
Posts
70 -
Joined
-
Last visited
Content Type
Profiles
Forums
Events
Store
Articles
Patch Notes
Posts posted by Nayland1971
-
-
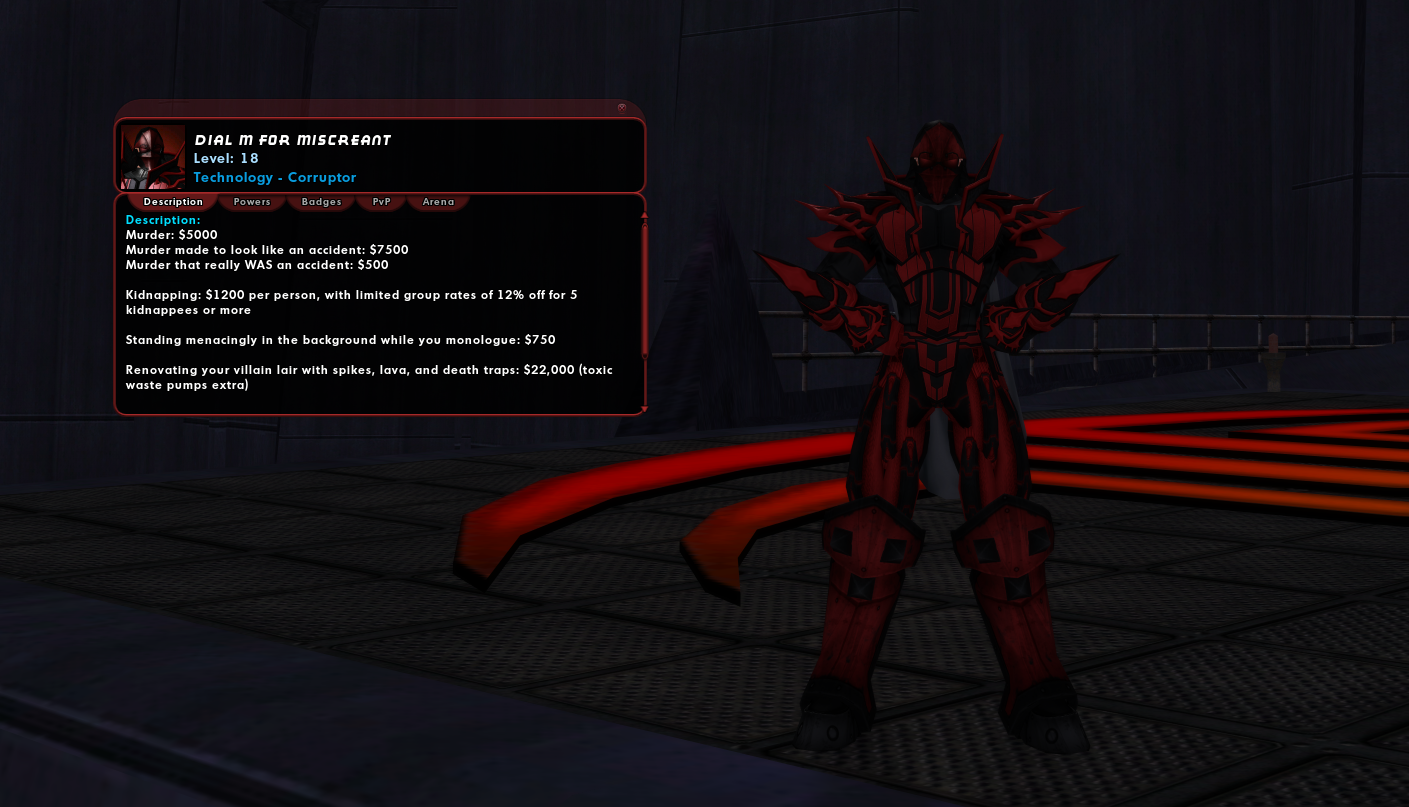
Even if it was an accident, somebody, somewhere benefits. I'm hoping to capitalize on that.
-
Oh, that's a relief. I had a tax guy, and he was pretty good, but Dr. Aeon mutated him into a radioactive crustacean and I've been looking for a replacement ever since.
He's good at guarding the door, though!
-
 1
1
-
-
Answer: Previous to June 11, we honored GroupOn codes, however, we received a special contract from Black Scorpion to raid their offices and kill everyone inside. So we will only honor codes from before June 11!
-
 4
4
-
-
Well it's a volatile, but high-volume market. So let's just say that bodybags are a big (yet non-deductable) expense.
-
-
Yeah, or maybe it's a brand Brigg map! You never know!
-
You don't say.

-
7
-
-
Woops, I didn't notice that you had commented on my updated build. I will tweak it a bit and post the results.
-
Ok here's my update in light of the suggestions! I was able to slot a Winter's Gift and a Force Feedback proc. Increased the recharge of Recov Aura and Regen Aura. I now realize that those Shield Walls in Weave are going to be pricey but oh well. I like how this is turning out!
This Hero build was built using Mids Reborn 3.2.17
https://github.com/LoadedCamel/MidsRebornClick this DataLink to open the build!
Halo Nova: Level 50 Magic Defender
Primary Power Set: Empathy
Secondary Power Set: Energy Blast
Power Pool: Sorcery
Power Pool: Leadership
Power Pool: Fighting
Ancillary Pool: Soul MasteryHero Profile:
Level 1: Healing Aura- (A) Preventive Medicine - Heal
- (3) Preventive Medicine - Heal/Endurance
- (3) Preventive Medicine - Endurance/RechargeTime
- (5) Preventive Medicine - Heal/RechargeTime
- (5) Preventive Medicine - Heal/RechargeTime/Endurance
- (7) Preventive Medicine - Chance for +Absorb
- (A) Superior Defender's Bastion - Accuracy/Damage
- (45) Superior Defender's Bastion - Damage/Recharge
- (46) Superior Defender's Bastion - Damage/Endurance/Recharge
- (46) Superior Defender's Bastion - Accuracy/Damage/Endurance
- (46) Superior Defender's Bastion - Accuracy/Damage/Endurance/Recharge
- (48) Superior Defender's Bastion - Recharge/Chance for Minor PBAoE Heal
- (A) Panacea - Heal
- (7) Panacea - Heal/Endurance/Recharge
- (9) Panacea - Heal/Recharge
- (9) Panacea - Endurance/Recharge
- (11) Panacea - Heal/Endurance
- (A) Decimation - Accuracy/Damage
- (11) Decimation - Damage/Endurance
- (17) Decimation - Damage/Recharge
- (40) Decimation - Accuracy/Endurance/Recharge
- (40) Decimation - Accuracy/Damage/Recharge
- (40) Decimation - Chance of Build Up
- (A) Endurance Reduction IO
- (A) Positron's Blast - Accuracy/Damage
- (43) Positron's Blast - Damage/Endurance
- (43) Positron's Blast - Damage/Recharge
- (43) Positron's Blast - Damage/Range
- (45) Positron's Blast - Chance of Damage(Energy)
- (45) Overwhelming Force - Damage/Chance for Knockdown/Knockback to Knockdown
- (A) Range IO
- (A) Luck of the Gambler - Defense/Increased Global Recharge Speed
- (13) Red Fortune - Defense
- (13) Red Fortune - Defense/Recharge
- (15) Red Fortune - Endurance/Recharge
- (15) Red Fortune - Defense/Endurance
- (17) Red Fortune - Defense/Endurance/Recharge
- (A) Decimation - Accuracy/Damage
- (33) Decimation - Damage/Endurance
- (34) Decimation - Damage/Recharge
- (34) Decimation - Accuracy/Endurance/Recharge
- (48) Decimation - Accuracy/Damage/Recharge
- (50) Sudden Acceleration - Knockback to Knockdown
- (A) Winter's Gift - Slow Resistance (20%)
- (A) Recharge Reduction IO
- (19) Recharge Reduction IO
- (19) Recharge Reduction IO
- (33) Performance Shifter - Chance for +End
- (36) Power Transfer - EndMod
- (36) Power Transfer - Damage/EndMod
- (A) Superior Vigilant Assault - Accuracy/Damage
- (21) Superior Vigilant Assault - Damage/RechargeTime
- (21) Superior Vigilant Assault - Damage/Endurance/RechargeTime
- (34) Superior Vigilant Assault - Accuracy/Damage/Endurance
- (37) Superior Vigilant Assault - Accuracy/Damage/Endurance/RechargeTime
- (37) Superior Vigilant Assault - RechargeTime/PBAoE +Absorb
- (A) Luck of the Gambler - Defense/Increased Global Recharge Speed
- (23) Red Fortune - Defense
- (23) Red Fortune - Endurance/Recharge
- (25) Red Fortune - Defense/Endurance
- (25) Red Fortune - Defense/Endurance/Recharge
- (27) Red Fortune - Endurance
- (A) Empty
- (A) Numina's Convalesence - Heal/Endurance
- (27) Numina's Convalesence - Endurance/Recharge
- (29) Numina's Convalesence - Heal/Recharge
- (29) Recharge Reduction IO
- (31) Recharge Reduction IO
- (31) Recharge Reduction IO
- (A) Gaussian's Synchronized Fire-Control - To Hit Buff
- (33) Gaussian's Synchronized Fire-Control - Chance for Build Up
- (A) Steadfast Protection - Resistance/+Def 3%
- (31) Unbreakable Guard - +Max HP
- (A) Regenerative Tissue - +Regeneration
- (37) Miracle - +Recovery
- (A) Panacea - Heal
- (36) Panacea - Heal/Endurance/Recharge
- (A) Positron's Blast - Accuracy/Damage
- (39) Positron's Blast - Damage/Endurance
- (39) Positron's Blast - Damage/Recharge
- (39) Positron's Blast - Chance of Damage(Energy)
- (48) Positron's Blast - Accuracy/Damage/Endurance
- (50) Force Feedback - Chance for +Recharge
- (A) Luck of the Gambler - Defense/Increased Global Recharge Speed
- (42) Shield Wall - +Res (Teleportation), +5% Res (All)
- (42) Shield Wall - Defense
- (42) Shield Wall - Defense/Endurance
- (A) Aegis - Resistance
- (A) Adjusted Targeting - To Hit Buff
- (50) Adjusted Targeting - To Hit Buff/Recharge
- (A) Aegis - Resistance/Recharge
Level 1: Brawl- (A) Empty
Level 1: Sprint
- (A) Empty
Level 2: Rest
- (A) Empty
Level 1: Swift
- (A) Run Speed IO
Level 1: Hurdle
- (A) Jumping IO
Level 1: Health
- (A) Panacea - +Hit Points/Endurance
Level 1: Stamina
- (A) Performance Shifter - Chance for +End
Level 49: Quick Form
------------| Copy & Paste this data into Mids Reborn : Hero Designer to view the build |
|-------------------------------------------------------------------|
|MxDz;1420;688;1376;HEX;|
|78DA65935B6F125110C7CF96C54AB9159142055A680BA5A5DDB25A5F8DE985D86B6|
|A79D5E01616D80477C902B57C003F8031B1DEA22FBEF86A5B5A4DFC30C6176FD526|
|3EF984D39D3936D44DE0B7E73FFB9F9D993D676D67C1552A656F32C1335F55EAF5F|
|C825A52F5A26ADAD794B2566070396E295523B66E6C2BBDB00AF007F273CD52495A|
|BC5F531A9556E49FBAA9E865B5282DEAAA596EE5E72067C3B7A4575453D51B12BF7|
|16D184655CA196641355B5E6BB1AA2A60AF57B49ADB5A67B572A5A1E9659FB55AD2|
|B7B5BAB6A555B5462BBC58D30AD2BC619ACD5AC330F339A359CDAFC17B2057082A8|
|CC1EF4E0FFC09A7D5B38E9D7DB131268BACE72BF11B52FC4EFC81BC708C6C7799DF|
|A138B5879CDE271E10DBC89943E45D300B64168518651E465E1C2246917D11E4219|
|86CFC8DB65DC038049F22FB9F21C79F135F105F22F360B69399D9E3CCCA7804622F|
|CFD8BB87E2E43EF180D8464E1D113F6139F7C0ECE0191D9318544074F28CCE80608|
|92E0FD189F4B8887DC87E37F23D98DD8CCC6E6A30460DC6A9C1383538430DCA9F45|
|CBFC38C1989797E30D638D5B90D1C7CBF1A5B1C64BE718DBEDB1387A8299467F233|
|F80ECE7667F06C5CB32F12A327E0D39364BBC8EF4C131087073800631408318A001|
|846800211AC0152F5200739006C1821DB858018A19E4F9066FD3F39BC8488E481D0|
|D9DA31FF285C92C84DF60BBB1B7481B04A33C180DC25D149C7F70808F60AAC33C38|
|7C038363CB8235FA222418A1328511DAC5A3B48B3F4230C10B4ED0DE4AD2DE4AD2D|
|E4AD29E9A3944CA0FB126116A4A91D996A2E94DAC60E689656216F9046A4CF32F9F|
|9EC5871F404C12AC03DA11A45798567E8DDC8160863B323276B52E9E1DE84E4464F|
|CEA9CAEE10BACFE2F6D88DC01926049C77D6759189BC6B67E768929147F758971EC|
|E5A44BA48DB902872B43AFE9FC055A91D28E|
|-------------------------------------------------------------------| -
2 hours ago, Doomguide2005 said:
I can't see or use Mids beyond what pops up on this phone (which really sucks for someone who likes building)
1) Why not the full set of Preventative Medicine for the 8.75% recharge and Absorb Proc?
2) Why Devastation vs Decimation?
3) Why stopping at 4 Positron's rather than 5
Yes I'm looking at the recharge bonus for these sets. You got the base for a lot of recharge (or so it appears but I can't see your totals in Mids to see if you're shooting for something else). Mez resistance?
4) I'm sure someone will mention it but no Force Feedback procs? I haven't had a chance to try these in an Empath build but I do wonder if they will effectively reduce recharge significantly in an already high recharge build.
5) I personally wouldn't bother with the single recharge in either Resurrect or Clear Mind and typically go with Endred and Range respectively. Teams won't wait around for a second rez after multiple defeats at the same time high recharge means it will recharge if those deaths are in 'separate' encounters. Likewise CM recharges so fast already you aren't effectively making it any faster on a high recharge build. But both of these are really pretty nit picky thoughts. Probably really doesn't matter what's slotted.
6) Got several powers where you could fairly readily grab slots if you wished to repurpose them ==> AB, Tactics and Regen Aura can all be very effective on 2 or 3 slots in today's game.
7) As a general rule I like to keep my Auras on similar cooldowns. That way if one is recharged they both are. Position myself and fire them off one after the other. No trying to keep track of both.
8). I Can't say I'd never need it/use it but Dark Consumption should be pretty unnecessary if your RA is on a short cooldown. Usually rather than burning a power pick I'll grab Geas of the Kind Ones (or use blue inspires). But I can't see your consumption and recovery either.
9) Slow/recharge debuff resistance. I might be missing it but ideally I'd want some in the build. Having powers turn into dots is not fun.
Thanks @Doomguide2005! To answer your questions:
1) I wanted an absorb proc in Spirit Ward, but I can't have 2 of them in one build, so I swapped it out with the one in Healing Aura. Is there a better way to do this? (or a better power pool to choose?)
2) The bonuses to Devastation seem better, at least on an individual basis. Damage, health, and regen seem like better choices.
3) Because Energy is known for its annoying amount of knockback and I wanted to dampen that a bit. Granted, I was only able to do it with 2 powers, but it's better than nothing.
4) I'm not familiar with Force Feedback procs. Can you elaborate?
5) Good ideas, thanks!
6) I'm open to the idea, but what to do with the extra slots? Put them in attacks?
7) I definitely like this idea, but I think they have different cooldowns, right? I think Recovery might need more enhancers than Regen (I could be wrong)
8) Is there a better Epic to pick, given my goals?
9) Should I be looking at something like this? https://homecoming.wiki/wiki/Category:Sets_that_improve_Slow_Resistance
Thanks again for the tips!
-
Good thing TFs can be soloed now!
-
1
-
-
Great! Many thanks @PLVRIZR!
-
Yes, same - I built this because of a character I had on live, even down to the costume.
-
1
-
-
I mention this because the other day I recalled the accolade one gets for doing the Freedom Phalanx task forces gives you an extra 5% health, if I remember correctly. I thought it would be fun to see if there's anything else like this. Are there any other permanent buffs out there for completing challenges - at least, those that would be of interest to a Tanker?
-
Thanks @Linea, I've seen your builds before and the build that I posted even nabbed some ideas from yours. But I will be eternally confused as to why your builds insist on 6-slotting Boxing and with expensive IOs at that. Are you trying to turn your Defender into a Defapper? Scrafender?
-
Point the First: I have no idea what I'm doing. My thinking on enhancements seems to be frozen from the time when Emmert posted the "rule of three" on the live forums.
Point the Second: Having said that, I did make an effort at doing a build of my own. I'm trying to get a Defender that's geared towards support but can also do half-decent damage. If someone wants to post a build of their own, I would be most appreciative.
Point the Third: Even with a farming brute, I can't really afford the pricey purples and Hami-O's so many of the sets are going to be the Walmart version
This Hero build was built using Mids Reborn 3.2.17
https://github.com/LoadedCamel/MidsRebornClick this DataLink to open the build!
Halo Nova: Level 50 Magic Defender
Primary Power Set: Empathy
Secondary Power Set: Energy Blast
Power Pool: Sorcery
Power Pool: Leadership
Power Pool: Fighting
Ancillary Pool: Dark MasteryHero Profile:
Level 1: Healing Aura- (A) Preventive Medicine - Heal
- (3) Preventive Medicine - Heal/Endurance
- (3) Preventive Medicine - Endurance/RechargeTime
- (5) Preventive Medicine - Heal/RechargeTime
- (5) Preventive Medicine - Heal/RechargeTime/Endurance
- (7) Miracle - +Recovery
Level 1: Power Bolt
- (A) Superior Defender's Bastion - Accuracy/Damage
- (45) Superior Defender's Bastion - Damage/Recharge
- (46) Superior Defender's Bastion - Damage/Endurance/Recharge
- (46) Superior Defender's Bastion - Accuracy/Damage/Endurance
- (46) Superior Defender's Bastion - Accuracy/Damage/Endurance/Recharge
- (48) Superior Defender's Bastion - Recharge/Chance for Minor PBAoE Heal
Level 2: Heal Other
- (A) Panacea - Heal
- (7) Panacea - Heal/Endurance/Recharge
- (9) Panacea - Heal/Recharge
- (9) Panacea - Endurance/Recharge
- (11) Panacea - Heal/Endurance
Level 4: Power Blast
- (A) Devastation - Accuracy/Damage
- (11) Devastation - Damage/Endurance
- (17) Devastation - Damage/Recharge
- (40) Devastation - Accuracy/Damage/Recharge
- (40) Devastation - Accuracy/Damage/Endurance/Recharge
- (40) Devastation - Chance of Hold
Level 6: Resurrect
- (A) Recharge Reduction IO
Level 8: Energy Torrent
- (A) Positron's Blast - Accuracy/Damage
- (43) Positron's Blast - Damage/Endurance
- (43) Positron's Blast - Damage/Recharge
- (43) Positron's Blast - Damage/Range
- (45) Positron's Blast - Chance of Damage(Energy)
- (45) Overwhelming Force - Damage/Chance for Knockdown/Knockback to Knockdown
Level 10: Clear Mind
- (A) Recharge Reduction IO
Level 12: Fortitude
- (A) Luck of the Gambler - Defense/Increased Global Recharge Speed
- (13) Red Fortune - Defense
- (13) Red Fortune - Defense/Recharge
- (15) Red Fortune - Endurance/Recharge
- (15) Red Fortune - Defense/Endurance
- (17) Red Fortune - Defense/Endurance/Recharge
Level 14: Power Burst
- (A) Devastation - Accuracy/Damage
- (33) Devastation - Damage/Endurance
- (34) Devastation - Damage/Recharge
- (34) Devastation - Accuracy/Damage/Recharge
- (48) Devastation - Chance of Hold
- (50) Sudden Acceleration - Knockback to Knockdown
Level 16: Mystic Flight
- (A) Blessing of the Zephyr - Knockback Reduction (4 points)
Level 18: Recovery Aura
- (A) Recharge Reduction IO
- (19) Recharge Reduction IO
- (19) Performance Shifter - Chance for +End
Level 20: Sniper Blast
- (A) Superior Vigilant Assault - Accuracy/Damage
- (21) Superior Vigilant Assault - Damage/RechargeTime
- (21) Superior Vigilant Assault - Damage/Endurance/RechargeTime
- (34) Superior Vigilant Assault - Accuracy/Damage/Endurance
- (37) Superior Vigilant Assault - Accuracy/Damage/Endurance/RechargeTime
- (37) Superior Vigilant Assault - RechargeTime/PBAoE +Absorb
Level 22: Maneuvers
- (A) Luck of the Gambler - Defense/Increased Global Recharge Speed
- (23) Red Fortune - Defense
- (23) Red Fortune - Endurance/Recharge
- (25) Red Fortune - Defense/Endurance
- (25) Red Fortune - Defense/Endurance/Recharge
- (27) Red Fortune - Endurance
Level 24: Boxing
- (A) Empty
Level 26: Regeneration Aura
- (A) Numina's Convalesence - Heal/Endurance
- (27) Numina's Convalesence - Endurance/Recharge
- (29) Numina's Convalesence - Heal/Recharge
- (29) Numina's Convalesence - Heal/Endurance/Recharge
- (31) Numina's Convalesence - +Regeneration/+Recovery
- (31) Recharge Reduction IO
Level 28: Tactics
- (A) Gaussian's Synchronized Fire-Control - To Hit Buff
- (33) Gaussian's Synchronized Fire-Control - To Hit Buff/Recharge
- (33) Gaussian's Synchronized Fire-Control - To Hit Buff/Recharge/Endurance
- (50) Gaussian's Synchronized Fire-Control - Chance for Build Up
Level 30: Tough
- (A) Steadfast Protection - Resistance/+Def 3%
- (31) Unbreakable Guard - +Max HP
Level 32: Spirit Ward
- (A) Preventive Medicine - Chance for +Absorb
Level 35: Adrenalin Boost
- (A) Panacea - Heal
- (36) Panacea - Heal/Endurance/Recharge
- (36) Panacea - Heal/Recharge
- (36) Panacea - Endurance/Recharge
- (37) Panacea - Heal/Endurance
Level 38: Explosive Blast
- (A) Positron's Blast - Accuracy/Damage
- (39) Positron's Blast - Damage/Endurance
- (39) Positron's Blast - Damage/Recharge
- (39) Positron's Blast - Chance of Damage(Energy)
Level 41: Weave
- (A) Luck of the Gambler - Defense/Increased Global Recharge Speed
- (42) Shield Wall - +Res (Teleportation), +5% Res (All)
- (42) Shield Wall - Defense
- (42) Shield Wall - Defense/Endurance
Level 44: Rune of Protection
- (A) Aegis - Resistance
Level 47: Dark Consumption
- (A) Power Transfer - Chance to Heal Self
- (48) Power Transfer - EndMod
Level 49: Dark Embrace
- (A) Unbreakable Guard - Resistance
- (50) Unbreakable Guard - Resistance/Endurance
Level 1: Brawl
- (A) Empty
Level 1: Sprint
- (A) Empty
Level 1: Vigilance
Level 2: Rest| Copy & Paste this data into Mids Reborn : Hero Designer to view the build |
|-------------------------------------------------------------------|
|MxDz;1410;677;1354;HEX;|
|78DA65934B4F13611486BF69A7624B2F542C176969CB1D0A0355DC1B0422D720185|
|79A3AB4D376629D366D2576A73FC198E80F1050B772D5C47FE2C6B8F186B2501357|
|F530E7FD248D93769EF9CE77DE33E79D39B3F460DA9BCDCE5E118AFF6A41AF5452D|
|346D6B03246D9B5A4E7CCB4A0C37D4D2F1463CBC50DBD89562199909ABA9FCD6A33|
|F74A7A355F0BFF8BAEEA56CEC868339651CED5525354B31A9CB3F246D9B0AA9ABCF|
|0AE148B056DAD584E1BE55AC05E2C1A3AC92B79B3E4B3D7B3662E5F35AD5CD05ECD|
|591B66C55C370B66B5169C2999696D5A2FDF4D2D5175AAD0417DC5E87FCB4127E5A|
|4675177894F4E2192AA707C06BF30D5AFE037E69979520CAA62BF41FC9A37477798|
|63BBE01EB8CF1C3F60DE26B102B1AAC45039CA3CDB0D46989E30F380444E7947E77|
|3C19B9BCC962DE6E036F8027CC94C91D805B17025387848C12659B169878323BBE0|
|1EB8CF1C3D043F703B7748EC9615DDA8A853B059566C0E2976D0EB079B997E2FE86|
|1B6F8986F48EC1310FB6030068371188CC3E0388C253FAA369FF40B1190ED04DE3B|
|ECE03A2188A023881ECF493EE3A4B78456D973EB04973B9F042F32E397987D93E06|
|56690863C24C521186E83E13618ED80D10E18BD10602A246E8761D15EA743A4A999|
|4E59AFF33AF25799E135F006B3FB260847AD54AF0B6267D726DB8B6D81DBCCE42BA|
|6939223485622ED7415A14A7FF8E53EA6A719954F337AC4C10C097BE4D4F6606A7B|
|31B5BD98DA5E4C6D1FA6F61D89FA654FFD98B101CCD800666C00B3A5524F4332790|
|84F7378812B0DCF83B3CCA7D46342F69898E4E487B4A7F1875957B4DFFC92C68F99|
|8F6873425A9EF8E9B42D277F71B9B02AE451A7DFC9CB58FC3FB4AC9E7EF6F515555|
|ED3BE62EF1F794EF78518635B3F1A8271BEDFF786E010671E370431A00B23D4366E|
|53FF0B3E6BD0F4|
|-------------------------------------------------------------------| -
Makes sense, thanks for the replies!
-
I vaguely recall back on live, when people first started hitting 50 and doing Hami raids, that the advantage to Hami-O's was that they had multiple attributes in one enhancement - e.g., Accuracy/Damage.
But enhancement sets (i.e. Positron's Blast, Luck of the Gambler, etc.) do all of that and also provide set bonuses. So why bother with Hami-O's at all?
If the answer is that H's are more powerful than sets, then it seems a bit weird that something that has been in the game since launch is so much more powerful than something that was developed later. Usually developers 'amp up' newer content for players who get bored of the old.
-
I've always found the Devouring Earth fascinating, but it seems like one only learns about their backstory through snippets. I saw on a website once a screenshot of Hamidon Pasilma when he was still human and started to wonder if this meant that there was a mission arc that dealt with his history. I don't remember the site, and it could have just been a screenshot someone made with a generic scientist but I'd still be interested in knowing.
-
And then you also get the people who think it's ok to have a discussion about looking for groups in the LFG channel.
-
1
-
-
Not sure yet! I already did level 50 DFB and an all-Canadian radio missions team. I need something interesting! I was thinking of Sizzle Saturday, an all-fire ITF but ehhhhhhh seems too similar.
-
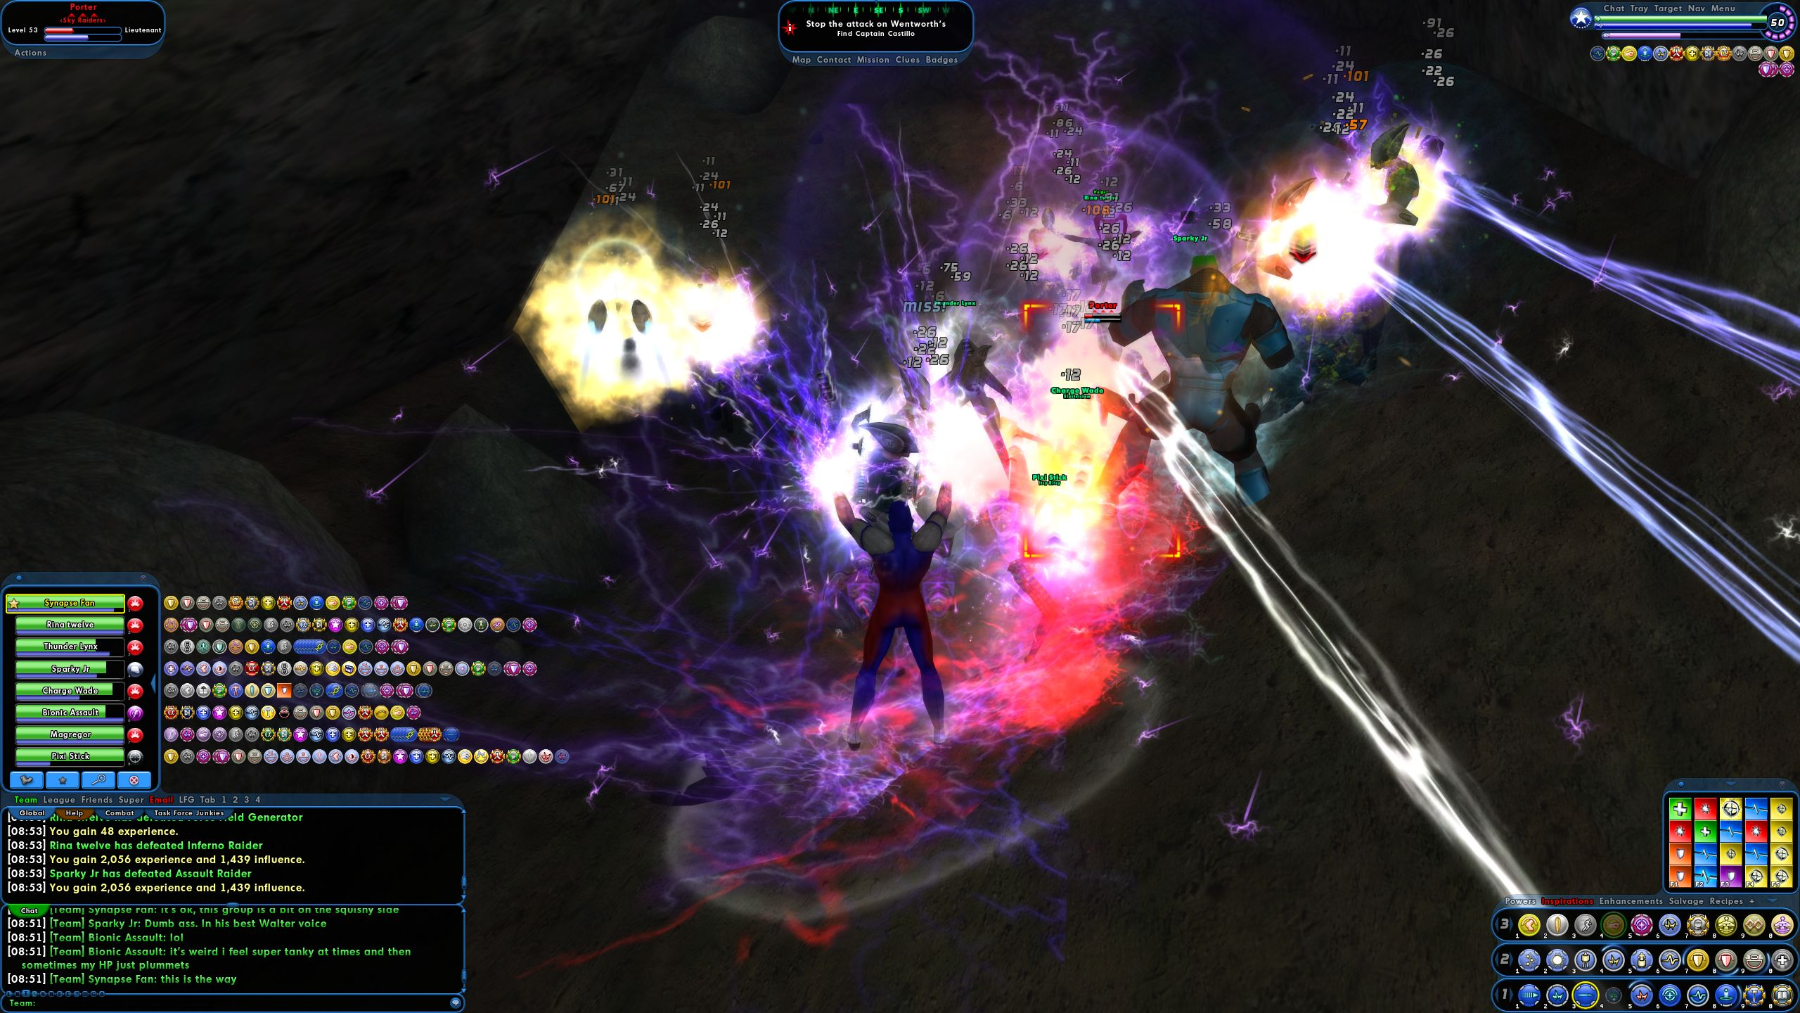
Inspired by the different niche groups I've seen (all-defender ITF! all-monster-based Citadel! all-knockback ITF!), I decided to try my own - Wattage Wednesday! An all-electric KM Market Crash!
I guess I should not have been surprised when most of the respondents were blasters. But that's ok! With a stalker and a brute by our side, we melted faces with great efficiency!
As you can imagine, throughout the encounters, enemy end bars looked like this:
And the screen looked like this. ALL. THE. TIME!
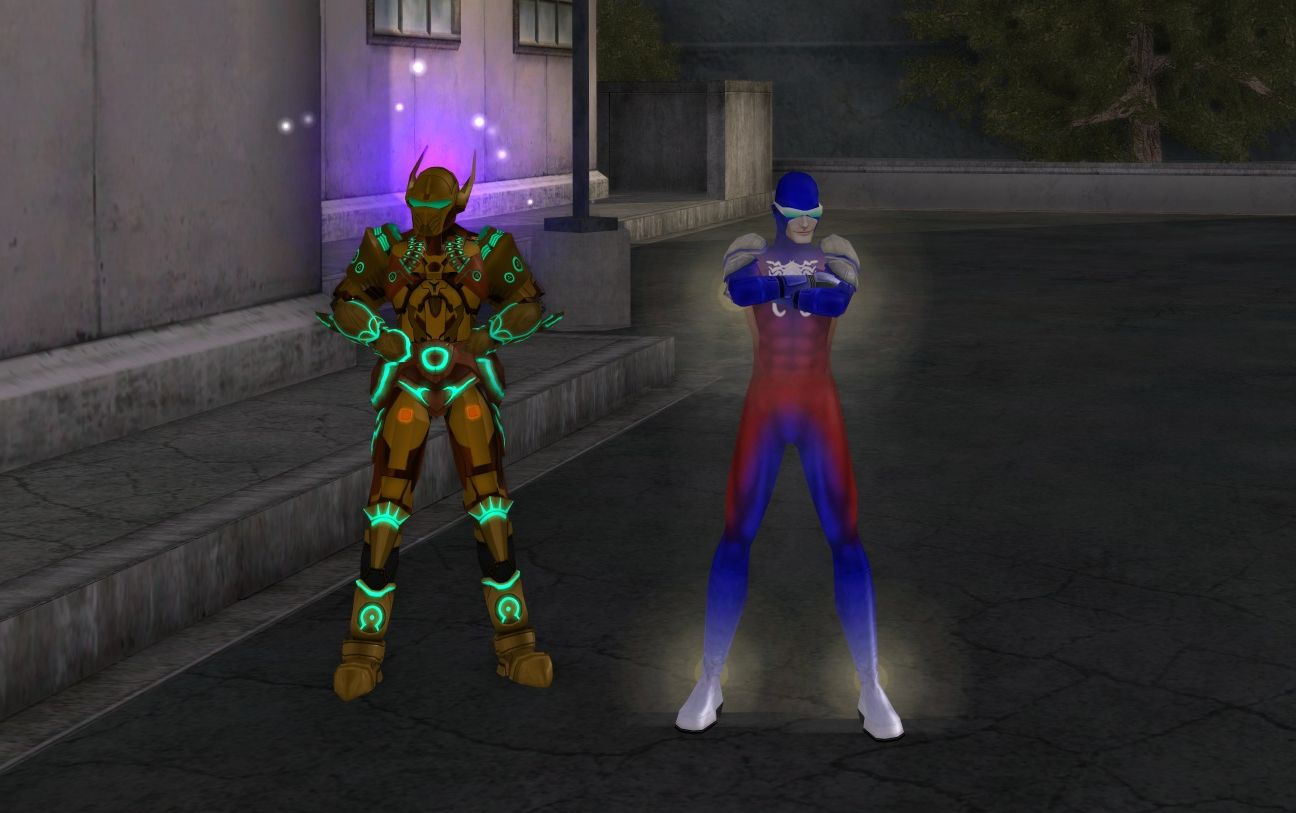
Finally, something super cool happened! I have a Synapse-themed hero, and someone on the team had a Positron-themed hero! It was pretty hilarious:
All in all, it was great fun! Much thanks to Rina twelve, Thunder Lynx, Sparky Jr., Charge Wade, Bionic Assault, Magregor, and Pixi Stick for coming out! Enjoy your merits!
-
 1
1
-
1
-
-
Thanks very much Hyperstrike!
-
I was more interested in it thematically, I didn't really have any idea how it stacked up to other secondaries. So far it seems...not bad, but I don't have much to compare it to either.


Build Help - Rad/Rad 'Debuff King'
in Corruptor
Posted
I'm not really good at creating builds, but I had an idea in my head to make a rad/rad corruptor who focuses on defence debuff. It doesn't matter if the character can't solo or do amazing dps. The main goals are to really apply debuffs and have enough endurance to do so.
I've provided a build, but it's really just me grasping around in the dark. If anyone could provide critiques, or provide their own build, it'd be much appreciated!
This Villain build was built using Mids Reborn 3.2.17
https://github.com/LoadedCamel/MidsReborn
Click this DataLink to open the build!
Isotope Lad: Level 50 Natural Corruptor
Primary Power Set: Radiation Blast
Secondary Power Set: Radiation Emission
Power Pool: Flight
Power Pool: Concealment
Power Pool: Leadership
Power Pool: Fighting
Ancillary Pool: Mu Mastery
Villain Profile:
Level 1: Neutrino Bolt
Level 1: Radiant Aura
Level 2: X-Ray Beam
Level 4: Fly
Level 6: Stealth
Level 8: Accelerate Metabolism
Level 10: Radiation Infection
Level 12: Irradiate
Level 14: Enervating Field
Level 16: Mutation
Level 18: Maneuvers
Level 20: Lingering Radiation
Level 22: Cosmic Burst
Level 24: Tactics
Level 26: Neutron Bomb
Level 28: Choking Cloud
Level 30: Kick
Level 32: Atomic Blast
Level 35: Tough
Level 38: Power Sink
Level 41: Electric Shackles
Level 44: Summon Adept
Level 47: Weave
Level 49: Electron Haze
Level 1: Scourge
Level 1: Brawl
| Copy & Paste this data into Mids Reborn : Hero Designer to view the build |
|-------------------------------------------------------------------|
|MxDz;1419;692;1384;HEX;|
|78DA6594396F135110C79FBD6B4CE238C631B92FE7BE9DB8E390204A48248704452|
|968AD05DBC94A8ED7F2AE23F21DA8682810DF80B3E12C800E1037E22E6920779340|
|6896D9FDCFC341B164FFF6CDF1DECCFFCD7AE6C2A98A4C6672547842E359CD3493E|
|346A150CC5B46C17F46B38A052DAB08210209D3B08C7C3A3AADA5FCB48EFE8B4ACE|
|69B9F9742A36A7A574CDD28D5C728CB6B1DA4A0163C54C668F7B6251374D7A10815|
|9C3C8C626B3FAFC8215769F13B925DDD4CFE959DD5A0EB996E9B4964A17CC053D1F|
|44B413ACE7E6EB27F2FAF958E98C996272864E4D1796EB9CEAE87BC44B3F1EE17C6|
|C553CA2554415071E339F80354F897155D4BD043F784A493EF143718D6D3F992BCC|
|55B0630DEC5C078F7A652E257B5E61C796B760E76BE61BB0E71DF33D182055153E5|
|9288DD83148469F34FAAA3DAEF113C12F6BF4AFA8AEF1E02A730DAC5C070F6D3037|
|C18F94582693CBEEE0ECF2BBCC0760C53DE67DB0F221788C1090920658BAAA67E0E|
|1E7CC17600D4BFA991282B287E080708D5FC81062A3271426A88AA86286A9EB303B|
|953077DD3005491A26C1A6D3E057724738D81B29F3C119005B2AC113544AB5ECBAF|
|A1A325BAE83D11BE0D04DE62D307E1B8C5039B5B2D6DA2B189CBAABE04942BDDCB9|
|BE132247BBC09E6EB0AF87D90BF6F781DF28B15126376E43AFFE1DE62F70F037731|
|71CFA037AA9AC66A96B7303741D255FAB94AED519C1662A87472FCEA318E7915368|
|8776295DBBD3220577ECF270C7A1BB49CB2ECCB5AD745D4466F765E60E1AE9DE028|
|B14DC2BA5EACD6287BE4570899C03D239B0858207B741956A89C9C2637CE7C37CD7|
|C37CF7C309F0389D3E225B1FF98EB313AAFBEAA61CA3DDA40AF9B19DB56D8BE9FDA|
|659B5F4C20A8F6B5A2F2FFD0170D4C67ED3E61E93574CD113DDB07A1655AB6DA872|
|EBBFA04B7C6BAC9C97951335F4DA7309F65FE87EE716|
|-------------------------------------------------------------------|