Cheapshot
-
Posts
37 -
Joined
-
Last visited
Content Type
Profiles
Forums
Events
Store
Articles
Patch Notes
Everything posted by Cheapshot
-
Yeah Combat Jumping is already in the build.
-
Greetings! Returning to the game after a couple years and I got started with my DP/MC blaster. The build seems to do the stuff I want it to, but I hate the stealth. I want to SEE my character the whole time, but running Stealth for the +DEF(all) bonus annoys me. It's not my build and I don't know enough to tweak it without the Concealment pool, and still keep the defense. ANY suggestions or criticisms regarding the build are welcome. Thanks CoH Community! Cheapshot Build plan made with Mids' Reborn v3.7.4 rev. 8 ────────────────────────────── Primary powerset: Dual Pistols Secondary powerset: Martial Combat Pool powerset (#1): Leaping Pool powerset (#2): Fighting Pool powerset (#3): Leadership Pool powerset (#4): Concealment Epic powerset: Mace Mastery ────────────────────────────── Powers taken: Level 1: Dual Wield A: Superior Winter's Bite: Recharge/Chance for -Speed & -Recharge 3: Superior Winter's Bite: Damage/Endurance/Accuracy/RechargeTime 3: Superior Winter's Bite: Accuracy/Damage 5: Superior Winter's Bite: Accuracy/Damage/Endurance 5: Superior Winter's Bite: Accuracy/Damage/Recharge Level 1: Ki Push A: Superior Blistering Cold: Recharge/Chance for Hold 7: Superior Blistering Cold: Damage/Endurance/Accuracy/RechargeTime 7: Superior Blistering Cold: Accuracy/Damage 9: Superior Blistering Cold: Damage/Endurance 9: Superior Blistering Cold: Accuracy/Damage/Endurance Level 2: Empty Clips A: Bombardment: Accuracy/Damage/Recharge/Endurance 11: Bombardment: Chance for Fire Damage 11: Bombardment: Accuracy/Damage/Recharge 13: Positron's Blast: Chance of Damage(Energy) 13: Achilles' Heel: Chance for Res Debuff 15: Touch of Lady Grey: Chance for Negative Damage Level 4: Storm Kick A: Kinetic Combat: Accuracy/Damage 15: Kinetic Combat: Damage/Endurance 17: Kinetic Combat: Damage/Recharge 17: Kinetic Combat: Damage/Endurance/Recharge 19: Touch of Death: Chance of Damage(Negative) 19: Gladiator's Strike: Chance for Smashing Damage Level 6: Swap Ammo Level 8: Reach for the Limit Level 10: Combat Jumping A: Kismet: Accuracy +6% 21: Luck of the Gambler: Defense/Increased Global Recharge Speed 21: Shield Wall: +Res (Teleportation), +5% Res (All) Level 12: Bullet Rain A: Superior Blaster's Wrath: Accuracy/Damage 23: Superior Blaster's Wrath: Damage/Recharge 23: Superior Blaster's Wrath: Accuracy/Damage/Recharge 25: Superior Blaster's Wrath: Accuracy/Damage/Endurance 25: Superior Blaster's Wrath: Accuracy/Damage/Endurance/Recharge 27: Superior Blaster's Wrath: Recharge/Chance for Fire Damage Level 14: Burst of Speed A: Eradication: Chance for Energy Damage 27: Eradication: Damage 29: Eradication: Accuracy/Recharge 29: Avalanche: Recharge/Chance for Knockdown 31: Obliteration: Chance for Smashing Damage 31: Fury of the Gladiator: Chance for Res Debuff Level 16: Dragon's Tail A: Obliteration: Damage 31: Obliteration: Accuracy/Recharge 33: Obliteration: Damage/Recharge 33: Obliteration: Accuracy/Damage/Recharge 33: Obliteration: Accuracy/Damage/Endurance/Recharge 34: Obliteration: Chance for Smashing Damage Level 18: Executioner's Shot A: Superior Defiant Barrage: Accuracy/Damage 34: Superior Defiant Barrage: Damage/RechargeTime 34: Superior Defiant Barrage: Accuracy/Damage/RechargeTime 36: Superior Defiant Barrage: Accuracy/Damage/Endurance 36: Superior Defiant Barrage: Accuracy/Damage/Endurance/RechargeTime 36: Superior Defiant Barrage: RechargeTime/+Status Level 20: Reaction Time A: Preemptive Optimization: Accuracy/Recharge 37: Preemptive Optimization: EndMod/Endurance 37: Preemptive Optimization: EndMod/Recharge 37: Preemptive Optimization: EndMod/Accuracy/Endurance 39: Preemptive Optimization: EndMod/Accuracy/Recharge 39: Preemptive Optimization: EndMod/Endurance/Recharge Level 22: Boxing (Empty) Level 24: Tough A: Steadfast Protection: Resistance/+Def 3% 39: Gladiator's Armor: TP Protection +3% Def (All) 40: Unbreakable Guard: Resistance/Endurance/RechargeTime 40: Unbreakable Guard: Resistance 40: Unbreakable Guard: Resistance/Endurance 42: Unbreakable Guard: RechargeTime/Resistance Level 26: Weave A: Luck of the Gambler: Defense/Increased Global Recharge Speed 42: Luck of the Gambler: Defense 42: Luck of the Gambler: Defense/Endurance Level 28: Inner Will A: Preventive Medicine: Chance for +Absorb 43: Preventive Medicine: Heal/RechargeTime Level 30: Maneuvers A: Luck of the Gambler: Defense/Increased Global Recharge Speed 43: Luck of the Gambler: Defense 43: Luck of the Gambler: Defense/Endurance Level 32: Hail of Bullets A: Armageddon: Chance for Fire Damage 45: Armageddon: Damage/Endurance 45: Armageddon: Damage 45: Armageddon: Damage/Recharge/Accuracy 46: Armageddon: Recharge/Accuracy 46: Eradication: Chance for Energy Damage Level 35: Tactics A: Cytoskeleton Exposure Level 38: Eagles Claw A: Hecatomb: Chance of Damage(Negative) 46: Hecatomb: Damage/Endurance 47: Hecatomb: Damage 47: Hecatomb: Damage/Recharge/Accuracy 48: Hecatomb: Recharge/Accuracy 48: Touch of Death: Chance of Damage(Negative) Level 41: Scorpion Shield A: Luck of the Gambler: Defense/Increased Global Recharge Speed 48: Luck of the Gambler: Defense 49: Luck of the Gambler: Defense/Endurance Level 44: Vengeance A: Luck of the Gambler: Defense/Increased Global Recharge Speed Level 47: Stealth A: Karma: Knockback Protection Level 49: Infiltration A: Reactive Defenses: Scaling Resist Damage ────────────────────────────── Inherents: Level 1: Defiance Level 1: Brawl (Empty) Level 1: Sprint (Empty) Level 2: Rest (Empty) Level 2: Swift A: Invention: Run Speed Level 2: Hurdle A: Invention: Jumping Level 2: Health A: Panacea: +Hit Points/Endurance Level 2: Stamina A: Performance Shifter: Chance for +End Level 6: Chemical Ammunition Level 6: Cryo Ammunition Level 6: Incendiary Ammunition
-
Wow! Thanks for the advice! This is exactly what I was looking for.
-
I have a nice theme for my Rad/SR scrapper, but I've never played either set. Was wondering if there were any experienced players out there that might help me avoid any early pitfalls. Would slotting Radiation Siphon for healing be silly? Do people skip Practiced Brawler? Are these two sets a bad combination? Thanks for any help!
-
I never knew! All this time I assumed blasters were just ranged DPS. After getting the proper sets, they can wade in for massive melee damage! Has anyone started a blapper builds discussion? Can someone point me in the right direction please?
-
That did the trick, thanks!
-
Has anyone ever checked for a name and saw that it was available, then created a character only to find that now for some reason the name is taken? Is this a glitch or did someone just happen to grab the name a second later?
-
Hey thanks for the build. Certainly will look into it.
-
Has anyone out there cornered a solid Dual Pistols/Martial Combat build? I'm level 45 right now and I mostly solo. I'm being picky here, but I have managed to not take any of the melee powers – favoring all of the ranged attacks from DP except suppressive fire. From Martial I have taken only Ki Push, Reach for the Limit, Reaction Time, and Inner Will. I have found that Reaction Time a must-have power. Running many defensive toggles for survivability such as Tough, Weave, Combat Jumping, Acrobatics, and all the Leadership toggles. With Reaction Time (slotted up with End Mods), I get all the endurance I could want. I also took Munitions Mastery to pick up Body Armor. No travel power desired, as this is a themed natural toon. And I'm sure stealth is a go-to, but I like seeing my awesome costume! (told you I was being picky) I'm happy with how things are going so far running at +0/x5or6, but I'm looking for an end game build with set bonuses that will help push my character forward in the same direction. Any help is GREATLY appreciated.
-
Do you use all of the water attacks, or are some of them mules?
-
I too am working on a Water/Will Sent and I am a terrible build creator so I tend to rely on the experts. I am sort of wondering how this build would work if stealth was removed? Any ideas on what could replace it?
-
I'm not looking for a build, in fact I am practicing my own build-making skills with an Electric/Atomic concept, but I don't really know a whole lot about the sets. I'm looking for some savvy advice from seasoned electric primary and atomic secondary blaster players. I'd like to know what the good picks are for each set, and what the bad picks to avoid. Thanks so much for your time!
-
Wow! Thanks for your input! Are there standard builds for TW/Bio or do they vary?
-
Was curious if TW/Bio was a better set on Scrappers or Brutes? What's the general consensus? Are there pros and cons to both, or does one outshine the other?
-
Looking for a super awesome Mercenaries/Thugs build with loads of cool factor. I've got a theme going where my character is using mind control to make the soldiers perform acts of kindness, so I'm not sure what a good secondary would be (I was thinking a recolored-to-purple Pain Domination or Empathy would work). Any help is very appreciated.
-
 What's a "permanent costume power"?
 -
Why hasn't anyone responded to this I wonder? Something wrong with Psi/MM?
-
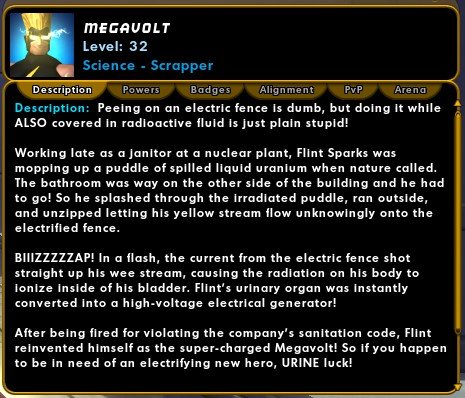
Thanks for all of the input! Here's Megavolt's bio for those of you who might be interested in the level of my immaturity. Based on that bio this character really could be any AT. Blaster, Brute, Stalker, Scrapper, Defender, etc. Electricity is all over the place! I tried the Elec/Shield scrapper combo, but I really missed the constant AoE goodness. Should I stick with scrapper? Reroll as a Blaster? Join the millions of satisfied Brute players?

-
Thematically, I love two things in this game: Scrappin' and shockin'! I have a fantastically awesome backstory for my hero involving pee and an electric fence at a nuclear power plant and the costume I made is exactly what I want. So now the big question is, can I make Elec/Elec a thing? Looking for veteran build makers who can help me create a great all-around build that won't leave me winded and with lots of AoE action. Is it possible? Can someone rise to the challenge?
-
Aha! It's the ally in the mission! Adding that allows you to raise the difficulty of the mission packs.
-
Here's the part I don't get. I'm trying to make my own outdoor map with mob packs that stay put. But when I load it up with my own custom characters I can't seem to get the groups as big as the ones in the outdoor comic con mission. In the video, when you add patrols you set the difficulty of the patrol to hard to maximize the size/exp gain from that patrol. But if you don't use patrols (you just want static groups), how do you maximize the size/exp of the groups? My custom group has 23 minions, 8 lieutenants, and 4 bosses. Is this an acceptable number? As I said, I am trying to emulate Brigg's outdoor city block farm. No patrols, just big packs of mobs you can jump in between. One 'pack' in his farm contains 20 mobs with multiple bosses, LTs, and even an elite boss. Yet one 'pack' in my outdoor farm (same map) contains around 12 mobs, 3 of which are LTs and one is a boss. These packs seems to be spread out a little more than in Brigg's outdoor farm too. Can't figure out what I'm doing wrong.
-
Couldn't find one either, so I messaged Brigg and he was nice enough to make a video. Here's the link!
-
I'm interested in building my own fire farm, and I'm wondering if there is a guide out there somewhere that details the 'how to' part of it.
-
Option #1 worked. You are a life saver!
-
I'm having a recent problem with keymapping for some reason. It's like the game is ignoring my input on newer characters, yet the same keybinds work on my older characters. All I'm doing is going to options, and remapping a button like I always do. In options it's changed, but when I actually push the button it's as if it's still on default.