
Sovera
-
Posts
4782 -
Joined
-
Last visited
-
Days Won
2
Content Type
Profiles
Forums
Events
Store
Articles
Patch Notes
Posts posted by Sovera
-
-
Only a regular Elec/Fire, so it's meant for the whole game and not just farm. You might be luckier over the Guides section of the forums under the Farm Fresh thread.
-
16 minutes ago, 00Troy00 said:
Is it actually possible to solo a TF or AV? Never heard of that.
Pretty much all. Some are pretty difficult like Market Crash, Lady Grey, Lord Recluse and a few others, but where there are no special mechanics things can be whittled down. The normal ones we do under level 50 have no special requirements.
-
Went into the ITF +1x8 at 46 anyway. Due to DDR being downscaled I only had 40% instead of the 51% Mids promised, but regardless it did not seem to do a thing. I was debuffed into the red in seconds according to luck of the draw though I did notice that even a small purple seemed to stem the flood for a while which means that, yeah, it was doing something, just not enough.
The defense needs a bit of a buffer for the DDR to do its thing but this is as far as the Brute will go without dipping into Martial Arts, in which case might as well go Tanker since they get Dragon's Tail at 20 and better defense values. At least Brimstone comes at 26 to help the Tanker damage a bit.
As my first character with DDR I had unreasonably high expectations but if I am to be debuffed into the red I might as well continue with Fire and the approach of killing everything before it kills me.
That said surviving wasn't difficult: just keep an eye on defense and once it dips into the red float a bit higher up in the air. In less than ten seconds the defense went back to normal, dive back in. Or try using Granite for those moments, but retoggling everything seems like a pain so I'd rather float out of the way.
Barrier as a panic button also ought to fix the DDR issue and may handily replace Granite.
-
Since it's a new toy and I'm putting it through its paces I've soloed Numina. Nothing special except the Devouring Earth at the end. No deaths but it was close and I quickly got into the habit of going in, dropping Atom smasher and then get the heck out of dodge, break line of sight, then kill them. Any attempt at face tanking would be instant death I reckon, no fancy regen or heals would have made a difference.
The AV did not require Daggers despite being tagged as GM.
I'm still without Tough or Weave though, and still shy of level 50 so I'm not really interested in soloing the ITF (at just +1 until I incarnate) just yet. The endurance is not getting better and I'm dreading adding Tough and Weave at bare minimum in there. My initial thoughts that 3 Performance Shifters procs plus Panaceia would be enough were vastly optimistic. So far all of those plus 3.50 EPS and without Tough/Weave/Focused Accuracy nearly drain my endurance in a fight (not the final slotting on attacks though).
With accolades and Musculature it will shoot to 4.39 though, but I will also go from 1.79 to 2.67 with those three toggles. Living off Recovery Serums does not seem appealing so Cardiac is looming ahead.
-
 1
1
-
-
Silly Idea
in Brute
30 minutes ago, Gruntius said:Why is Spring Attack terrible?

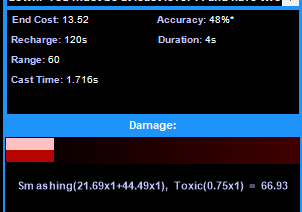
120 seconds recharge for 67 damage.
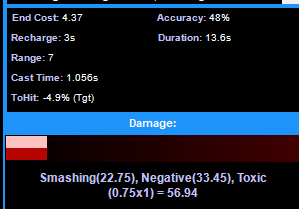
Shadow Punch recharges in 3 seconds and does 57 damage.
I know it's an AoE, but, still.
-
1
-
-
Silly Idea
in Brute
Street Justice has no powers, it's literally kicking and punching. So there is no rationale, you're kicking and punching, be it from StJ or Fighting Pool. Now Psi and Ice are powers, we get FX each time one is used.
Upside of Street Justice is also the very fast recharge.
Spring Attack is frankly terrible. You're glossing over Air Superiority in Fly though. It recharges fast and is a nice CC.
You can't perma Rune of Protection, and Field Medic is just terrible. I squeezed it in many builds and tried to make it work, but it's a 4 second interruptible animation, so two slots are dedicated to interrupt reduction which still isn't enough if you're standing on fire.
As someone who has lost their powers I don't see you using Hover or even Combat Jumping, but Athletic Run and Sprint is all you're going to need (though, y'know, running faster than a car seems pretty super powered still).
For a secondary I don't recall how FX intrusive Bio is but it's what I'd suggest. You get the anti-CC toggle, regen&recovery, and a S/L res toggle by level 4.
-
And since I was pondering a Dark version I checked the damage difference.
One Rad rotation: Devastating Blow (2.9 seconds, 775 damage), Radioactive Smash (1.7 animation, 303 damage), Radiation Siphon (2.4 animation, 434 damage), Radioactive Smash (1.7 animation, 303 damage) = 8.7 seconds for 1815 damage.
One Dark Melee rotation with 1 person in Soul Drain: Siphon Life (2.1 animation, 436 damage), Shadow Punch (1 second animation, 174 damage), Smite (1.2 animation, 275 damage), Shadow Punch (1 second animation, 174 damage) = 5.3 seconds for 1.059. That gives time for another Siphon Life and Shadow Punch (2.1 + 1 = 3.1. 3.1 + 5.3 = 8.4, bringing damage to in-the-time-a-single-Rad-ST-loop-happens for DM to do 1669. Round it to 1700.
Neither calculation is perfect. Rad Melee has Irradiated Ground ticking all the time and Dark Melee can and probably will get more than a single target in Soul Drain.
Now Midnight Grasp is much better damage than Shadow Punch but comes super late. That means leveling and exemplaring with just two attacks. But for the sake of argument: Midnight Grasp (2.3 animation for 650 damage), Smite (1.2 animation, 275 damage), Siphon Life (2.1 animation, 436 damage), Smite (1.2 animation, 275 damage) = 6.8 seconds for 1636 damage. That still gives time for one more Midnight Grasp so 8.1. I could squeak in a Smite and just run over a bit but I won't. That leaves damage at 2.286.
Again, lets not forget Irradiated Ground hits decently hard and is passively ticking in the background.
The Midnight Grasp also does not clutter the start where trying to cram all the powers at once is pretty difficult. Even so I could only squeeze in Earth's Embrace at level 30. Trying to squeeze Shadow Punch would force me to push back... something. I'm not sure what. I don't want to push Rooted back. Someone who does not take Fly can put Rooted at level 24.
I'll leave the MG build here. The free slot in Soul Drain is for Gaussian but I didn't put it in so it wouldn't skew my numbers:
SpoilerThis Villain build was built using Mids Reborn 3.1.2.5
https://github.com/LoadedCamel/MidsRebornClick this DataLink to open the build!
Level 50 Magic Brute
Primary Power Set: Dark Melee
Secondary Power Set: Stone Armor
Power Pool: Flight
Power Pool: Speed
Power Pool: Fighting
Ancillary Pool: Energy MasteryVillain Profile:
Level 1: Smite -- TchofDth-Acc/Dmg(A), TchofDth-Dam%(17), TchofDth-Dmg/Rchg(19), TchofDth-Acc/Dmg/EndRdx(5), TchofDth-Dmg/EndRdx/Rchg(5), TchofDth-Dmg/EndRdx(7)
Level 1: Rock Armor -- Rct-ResDam%(A), Rct-Def/EndRdx(7), LucoftheG-Def/Rchg+(9)
Level 2: Shadow Maul -- SprBrtFur-Acc/Dmg(A), SprBrtFur-Dmg/Rchg(3), SprBrtFur-Acc/Dmg/Rchg(3), SprBrtFur-Dmg/EndRdx/Rchg(19), SprBrtFur-Acc/Dmg/EndRdx/Rchg(21), SprBrtFur-Rech/Fury%(45)
Level 4: Stone Skin -- ShlWal-Def/EndRdx(A), ShlWal-Def/Rchg(13), ShlWal-Def(13), ShlWal-Def/EndRdx/Rchg(15), TtnCtn-ResDam/EndRdx(15), TtnCtn-ResDam(17)
Level 6: Hover -- LucoftheG-Def/Rchg+(A)
Level 8: Siphon Life -- TchofDth-Dam%(A), OvrFrc-Acc/Dmg/End/Rech(21), OvrFrc-Dmg/End/Rech(23), OvrFrc-Acc/Dmg/End(23), OvrFrc-Dam/KB(25), OvrFrc-Acc/Dmg(25)
Level 10: Mud Pots -- SprUnrFur-Acc/Dmg(A), SprUnrFur-Dmg/Rchg(27), SprUnrFur-Acc/Dmg/Rchg(27), SprUnrFur-Dmg/EndRdx/Rchg(29), SprUnrFur-Acc/Dmg/EndRdx/Rchg(29), SprUnrFur-Rchg/+Regen/+End(31)
Level 12: Touch of Fear -- Arm-Dmg/EndRdx(A), Arm-Acc/Rchg(31), Arm-Acc/Dmg/Rchg(31), Arm-Dmg/Rchg(37), Arm-Dam%(42)
Level 14: Hasten -- RechRdx-I(A), RechRdx-I(33)
Level 16: Rooted -- Prv-Heal(A), Prv-Heal/EndRdx(33), Prv-EndRdx/Rchg(33), Prv-Heal/Rchg(34), Prv-Heal/Rchg/EndRdx(34), Prv-Absorb%(34)
Level 18: Dark Consumption -- SynSck-EndMod(A), SynSck-Dam/Rech(36), SynSck-EndMod/Rech(36), SynSck-Dam/Rech/Acc(36), SynSck-Dam/Acc/End(37), SynSck-EndMod/+RunSpeed(37)
Level 20: Crystal Armor -- LucoftheG-Def/Rchg+(A), Rct-Def(39), Rct-Def/EndRdx(39)
Level 22: Fly -- WntGif-ResSlow(A)
Level 24: Evasive Maneuvers -- LucoftheG-Def/Rchg+(A)
Level 26: Soul Drain -- Erd-Acc/Dmg/Rchg(A), Erd-Acc/Rchg(40), Erd-Dmg/Rchg(40), RechRdx-I(42), Empty(42)
Level 28: Minerals -- Rct-Def(A), Rct-Def/EndRdx(40)
Level 30: Earth's Embrace -- Pnc-Heal/EndRedux(A), Pnc-EndRdx/Rchg(39), Pnc-Heal/Rchg(43), Pnc-Heal/EndRedux/Rchg(46), Pnc-Heal(46)
Level 32: Midnight Grasp -- TchofDth-Dam%(A), Hct-Dmg/Rchg(43), Hct-Acc/Dmg/Rchg(43), Hct-Acc/Rchg(45), Hct-Dmg/EndRdx(45), Hct-Dam%(48)
Level 35: Brimstone Armor -- GldArm-3defTpProc(A), EndRdx-I(46)
Level 38: Focused Accuracy -- EndRdx-I(A)
Level 41: Physical Perfection -- PrfShf-End%(A)
Level 44: Boxing -- Empty(A)
Level 47: Tough -- RctArm-ResDam/EndRdx/Rchg(A), RctArm-ResDam(47), RctArm-ResDam/EndRdx(48), StdPrt-ResDam/Def+(48)
Level 49: Weave -- LucoftheG-Def/Rchg+(A), Rct-Def(49), Rct-Def/EndRdx(49)
Level 1: Fury
Level 1: Brawl -- Empty(A)
Level 1: Sprint -- Empty(A)
Level 2: Rest -- Empty(A)
Level 1: Swift -- Empty(A)
Level 1: Hurdle -- Empty(A)
Level 1: Health -- Pnc-Heal/+End(A), Mrc-Rcvry+(9), NmnCnv-Regen/Rcvry+(11)
Level 1: Stamina -- PrfShf-End%(A), PrfShf-EndMod(11)
Level 50: Musculature Radial Paragon
Level 50: Born In Battle
Level 50: High Pain Threshold
Level 50: Invader
Level 50: Marshal
Level 22: Afterburner
-------------
1
-
-
It's not perfect but here's a version with Granite.
SpoilerThis Villain build was built using Mids Reborn 3.1.2.5
https://github.com/LoadedCamel/MidsRebornClick this DataLink to open the build!
Level 50 Magic Brute
Primary Power Set: Radiation Melee
Secondary Power Set: Stone Armor
Power Pool: Flight
Power Pool: Speed
Power Pool: Fighting
Ancillary Pool: Energy MasteryVillain Profile:
Level 1: Radioactive Smash -- TchofDth-Acc/Dmg(A), TchofDth-Dam%(3), TchofDth-Dmg/Rchg(3), TchofDth-Acc/Dmg/EndRdx(5), TchofDth-Dmg/EndRdx/Rchg(5), FrcFdb-Rechg%(7)
Level 1: Rock Armor -- Rct-ResDam%(A), Rct-Def/EndRdx(7), LucoftheG-Def/Rchg+(9)
Level 2: Stone Skin -- ShlWal-Def/EndRdx(A), ShlWal-Def/Rchg(13), ShlWal-Def(13), ShlWal-Def/EndRdx/Rchg(15), TtnCtn-ResDam(15), TtnCtn-ResDam/EndRdx(17)
Level 4: Earth's Embrace -- Pnc-Heal/EndRedux(A), Pnc-EndRdx/Rchg(17), Pnc-Heal/Rchg(19), Pnc-Heal/EndRedux/Rchg(19), Pnc-Heal(21)
Level 6: Hover -- LucoftheG-Def/Rchg+(A)
Level 8: Radiation Siphon -- OvrFrc-End/Rech(A), OvrFrc-Dam/KB(21), OvrFrc-Acc/Dmg/End(23), OvrFrc-Dmg/End/Rech(23), OvrFrc-Acc/Dmg/End/Rech(25), TchofDth-Dam%(25)
Level 10: Mud Pots -- SprUnrFur-Acc/Dmg(A), SprUnrFur-Dmg/Rchg(27), SprUnrFur-Acc/Dmg/Rchg(27), SprUnrFur-Dmg/EndRdx/Rchg(29), SprUnrFur-Acc/Dmg/EndRdx/Rchg(29), SprUnrFur-Rchg/+Regen/+End(31)
Level 12: Fusion -- RechRdx-I(A), RechRdx-I(31), GssSynFr--Build%(31)
Level 14: Hasten -- RechRdx-I(A), RechRdx-I(33)
Level 16: Rooted -- Prv-Heal(A), Prv-Heal/EndRdx(33), Prv-EndRdx/Rchg(33), Prv-Heal/Rchg(34), Prv-Heal/Rchg/EndRdx(34), Prv-Absorb%(34)
Level 18: Irradiated Ground -- Erd-Dmg(A), Erd-Acc/Dmg/EndRdx/Rchg(36), Erd-%Dam(36), TchofLadG-%Dam(36), Arm-Dam%(37), Obl-%Dam(37)
Level 20: Crystal Armor -- LucoftheG-Def/Rchg+(A), PrfShf-End%(37), Rct-Def(39), Rct-Def/EndRdx(39), PrfShf-EndMod(39)
Level 22: Fly -- WntGif-ResSlow(A)
Level 24: Evasive Maneuvers -- LucoftheG-Def/Rchg+(A)
Level 26: Devastating Blow -- Hct-Dam%(A), Hct-Dmg/Rchg(40), Hct-Acc/Dmg/Rchg(40), Hct-Acc/Rchg(42), Hct-Dmg/EndRdx(42), TchofDth-Dam%(42)
Level 28: Minerals -- RedFrt-Def(A), RedFrt-Def/EndRdx(40)
Level 30: Boxing -- Empty(A)
Level 32: Atom Smasher -- SprBrtFur-Rech/Fury%(A), SprBrtFur-Acc/Dmg(43), SprBrtFur-Dmg/Rchg(43), SprBrtFur-Acc/Dmg/Rchg(45), SprBrtFur-Dmg/EndRdx/Rchg(45), SprBrtFur-Acc/Dmg/EndRdx/Rchg(45)
Level 35: Brimstone Armor -- GldArm-3defTpProc(A), EndRdx-I(46)
Level 38: Granite Armor -- UnbGrd-ResDam(A), UnbGrd-ResDam/EndRdx(43), UnbGrd-ResDam/EndRdx/Rchg(46), UnbGrd-Max HP%(46)
Level 41: Focused Accuracy -- EndRdx-I(A)
Level 44: Physical Perfection -- PrfShf-End%(A)
Level 47: Tough -- RctArm-ResDam/EndRdx/Rchg(A), RctArm-ResDam(47), RctArm-ResDam/EndRdx(48), StdPrt-ResDam/Def+(48)
Level 49: Weave -- ShlWal-Def/EndRdx(A), ShlWal-ResDam/Re TP(49), ShlWal-Def(49), ShlWal-Def/EndRdx/Rchg(49)
Level 1: Fury
Level 1: Brawl -- Empty(A)
Level 1: Sprint -- Empty(A)
Level 2: Rest -- Empty(A)
Level 1: Swift -- Empty(A)
Level 1: Hurdle -- Empty(A)
Level 1: Health -- Pnc-Heal/+End(A), Mrc-Rcvry+(9), NmnCnv-Regen/Rcvry+(11)
Level 1: Stamina -- PrfShf-End%(A), PrfShf-EndMod(11)
Level 50: Musculature Radial Paragon
Level 50: Born In Battle
Level 50: High Pain Threshold
Level 50: Invader
Level 50: Marshal
Level 22: Afterburner
-------------
1
-
-
Update:
Soloed Moonfire and Citadel, nothing special to report, same ol'. I'm not the first one to think it but Atom Smasher feels superfluous. Hit the boss, by the time ti's dead so are most minions from the double auras. But it does have its use to hurry things along when we don't want to be debuffed or be hit.
Manticore. Manticore was painful. Four deaths. The revamped Crey hurt. Granted that my amplifiers had run out and I had 38% defense with no Tough or Weave in yet.
I had not noticed on the Fire/Stone Melee Tanker but the new rad PPs debuff resistances instead of defenses and they were pretty much responsible for all deaths as I wandered around with 16% resists to energy. The -res debuff seems to have some weird interactions in my opinion. My defenses show as untouched, but my -res plummets into the red, and suddenly I'm dead. If mobs were not hitting me before why are they hitting and killing me in a few seconds once resistances are on the red? It's the Shepherds all over again.
Strange.
Regardless all things that were a bother for the Fire Tanker were ignored by the Stone Armor. No confuse shenanigans, no blinds, Stone Armor handled all of that. I kept leveling and adding slots and was back to 40% defenses and up to 28% resists to E/N by the end of Manticore. Unlike the Fire/Stone Tanker I had no need to get Envenomed Daggers and killed both AVs without inspirations either defensive or offensive (but Stone is pure Smash and Rad is Smash, then chunky Energy and some Toxic so a more exotic spread).
Not bad considering it's a leveling build still and has no damage procs in Radioactive Smash and only one in Devastating Blow.
The praises to Radiation have been sung and its downsides are common fodder in the forums, but one thing I seldom see mentioned is how well tailored the devs made the ST rotation. It's just too pat for me to believe it was random coincidence. Devastating, Smash, Siphon, Smash, loop, is something that starts early, is forgiving, and is simple.
It's the opposite of StJ and EM whose awkward recharges force piano play and long rotations to not have gaps while waiting for the big hitters to return.
Thoughts:
Having a panic button in Granite might have saved those deaths. The easier answer would be removing Combat Jumping and then rearrange the slotting to find 2%. 2% to psi, E/N/S/L might be a case of completely reconstructing the build though. Or take Atom Smasher out for Granite, but Atom Smasher has its uses not least being a perfect mule to six slot Brute's Fury. In any other attack it would eat one or two damage procs.
Dark Melee/Stone might just be the superior variant to this. Dark Consumption would fix the endurance handily (I counted, I currently have 9 toggles. End game build has 12. No wonder endurance can't keep up), Touch of Fear - Shadow Maul - Touch of Fear is decent AoE, the ST is ok without being super but without being Elec Melee bad, and it comes with the small heal. The ST from Rad Melee is going to be handily better though.
-
1
-
-
You have Ice Patch, you don't need more KB IMO, and yeah, there's that risk too.
-
1
-
-
8 hours ago, Yomo Kimyata said:
Parry is a great power, even with a typed defense build. But it's for safety, not DPS.
In theory, you could get 30%+ melee defense every 1.5-2 seconds, that stacks, for 10 seconds. It's bonkers to keep 100% melee defense up constantly!
I don't think it stacks for Tankers though.
-
I'll wait and see what the devs would do with the rest of the set, but IMO once Burn is 'fixed' then Fiery Embrace won't be enough to carry Fire Armor.
-
A aNemu said. Shield is melee, ranged, aoe. Parry is also melee. I suggest taking it while you level to shore up your defenses.
I also think that you can work it in and change slotting dedicated to melee defense into something else though wirhout looking at Mids I do not know how useful this approach would be.
-
10 minutes ago, Gobbledygook said:
Thx for the lvl'ing build and info in general.
When I mentioned AV soloing it was in regards to the ones at the end of the TFs.
I've never seen it mentioned about rad melee doing that.
It's making me think of dusting my Rad/Fa brute off for more than just farming.
Also giving my thoughts on an Rad/Inv Scrapper or Brute.
Pretty much anything can solo an AV at the end of a TF. The one that would most likely be a stop over is... whatchamacallit, I forgot the name, but the last one at Manticore's TF. That's because he's literally a tank with the resists that go with it. My Fire/Stone Melee Tanker was progressing so slowly I gave up and went to get Daggers from the P2W vendor.
In Yin I could see the chunks of HP being taken from the AV. Every hit was a noticeable bit of HP off.
Now, if it's really top tier? I dunno, I remember that 1:45 time on a pylon, but it had three -res sources which play -very- well with pylons. 1:45 isn't super amazeballs either (but it's top tier good) and it was combined with Bio. I'll give it a try on the Brute just to compare and also to check the times with and without Brimstone.
It's not going to be 1:45 though. Scrappers do more damage and this gal is neither with three -res sources nor Bio.
-
 1
1
-
-
5 hours ago, Gobbledygook said:
Am I the only one impressed that Rad Melee is soloing AV's?
It was on a Bio, but my Scrapper Rad did the pylon in 1:45. I'll grant it had three sources of -res though.
2 hours ago, Gobbledygook said:I second this
5 hours ago, Glowman said:Sounds fun! I would be interested in a leveling build!
Added to the OP, and say hello to Willow for me 😄 -
1 hour ago, Diantane said:
The main reason I like having a tank on my team is their ability to protect the team by taunting the bad guys away from us. Sure they can taunt just by hitting something, but that’s a lot weaker than taunt. If I’m taking a lot of damage then I know that “built-in” taunt isn’t working. If they maxed out their defenses like they should have, this would be easy for them. I’ve noticed that most (if not all) tanks are no longer training taunt as they want an extra attack power. Well we don’t look at a tank for DPS. Why would they even consider this?
When I start a new tank, the first attack I train is taunt. Training defensive powers have priority as it is the primary. I have a job to do and it’s not DPS. The scrappers, stalkers, blasters, etc. have that job. Since attacks on a tank are their secondary, they won’t do much good anyway. It’s like a defender training a lot of blasts up front and slotting them for damage. It makes no sense because they will be far weaker than a blaster or other offensive primaries. My defender blasts are slotted with debuffs.
Looking forward to seeing “real” tanks on CoH in the future.
Welcome back, Dian. As someone without levels 50 and who has no special experiencea with Tankers you should consider playing how you see fit instead of trying to tell others how to.
It comes off a lot as someone who plays soccer the weekends trying to explain to Ronaldo how do do it.
-
 5
5
-
5
-
-
1 hour ago, StriderIV said:
Nice Sovera! Do you think Stone Armor might work best on a Brute, since Earth’s Embrace can push their HP so high?
I also see you skip Granite! No need for it?
Stone Armor does 'fix' some of the squishyness a Brute has. Part of it is the lower HP noticed in things like Market Crash with the -HP debuff the last boss applies, Stone now has a lot of bells and whistles between recharge, perception, recovery and the faster HP buff.
I also ran out of powers to take Granite but it is a good one slot wonder (+5 defense in there imo). Someone not taking Fly can squeeze it in.
-
17 minutes ago, Erratic1 said:
You complaining that a Brute did content faster than a Tanker? 🤨
MUH FIRE ARMOR!!
A-ahem, I mean...
Not complaining. I'm just what the heck at, y'know, having pitted Fire Armor and Burn and all offense (Fiery Embrace and inspirations) against uber defensive Stone Armor, and Stone Armor won 😄
Okay, okay, the strength of Tanker builds is being able to reach end game and then be able to make tight builds with plenty of procs and such. So it is not fair to compare two leveling builds slotted similarly instead of two end-game builds tweaked to their AT's strength.
-
5 minutes ago, ninja surprise said:
Why should anyone need to work around you so you can add 20 DPS to your own imaginary DPS meter? Why should you be the only one who gets to defeat mobs?
I had three recent experiences that made me think about this thread again:
1) I rolled a new Katana/SR Scrapper, since I don't remember ever playing Katana and wanted to give it a spin. Because making alts and playing the game is fun! I joined a DFB and it turned out I was the only melee toon. There were at least two Controllers (Elec and Dark) and I don't remember what the others were. Controllers were immobilizing stuff before it clumped, and I had to move around to stab things, the horror! But we still cruised right through it and joked around in chat and had a good time. XP and levels were had by all.
2) Joined a Yin on my Grav/Kin controller. It was at good team of mixed ATs and we ran at +2, finishing in just over 30 minutes. Not bad for a defeat-all where we weren't hurrying. Oh and we got delayed by a bug where one person couldn't exit a mission and had to log out and back in. The most frustrating thing was that the "must punch everything" melee ATs kept charging the Super Stunners just before they were defeated, triggering the rez. Melee was definitely slowing the team down by making us defeat the same mobs twice.
3) Joined a Ape/Mage on my Grav/Kin controller. We were cruising through the missions, doing well. When we got to Battle Maiden I was being careful to not use immobilizes so that she could get out of the blue patches... and then I noticed we didn't have ANY melee ATs on the team. All Controllers, Corrupters, Defenders, and Blasters. We did just fine without any tanks or brutes slowing us down. It was a lot of fun and the big AVs went down faster than I've seen when it was mostly melee ATs.
Melee isn't needed, so why use it? Ranged ATs can defeat more mobs faster; melee only slows the team down by having to chase every single mob instead of using control to stop the runners and defeat everything all at once.
@Sovera I respect you and have learned from the builds you post. It might help to remember that although your Tank is immune to mez and damage, other ATs aren't. If there's any squishies on the team, they benefit from controls. Especially if there's debuffers or controllers in the enemy spawn that can mez the squishy teammates, it is beneficial to hold, fear, or stun them, even if it means a melee toon has to move a few feet to attack it.
It just seems like a silly argument. "Game is too easy because I'm invincible and nothing can hurt me." "Game is too frustrating because other players make it so my burn patch can't defeat everything at once." "Game takes too long when someone else gets to defeat something instead of me."
Maybe try chatting with players, get to know them, and learn to enjoy their company, instead of only focusing on making it end as quickly as possible?
Or heck, spin up your own private server and roll-back the aggro cap so you can solo entire maps like the old days.
You're making a big thing, plus rolling with assumptions, on a topic I'm not particularly sanguine about. Nothing that you have said so far has struck me as original or something I have not encountered or even personally played instead of watching others do it.
C'mon, am I Diantane or something?
Do I go around making false claims or proclaiming my opinion as gospel? I say it as I see it. It ranks as pet peeves, not something that makes me come to the forums to rant on. My post history is available, I don't think I have ranted about mass immobilizes or even knockbacks. I do grumble when someone has made a topic about it and I pitch in. Even this thread was not one I started, yet others feel like I do, obviously.
The bottom line is still the same: enemies don't wander away from the tank (if the tank goes first). A Blaster can nuke with full impunity because once agroed the mobs are sticking with the tank. Mass CCs are useful for when things get dicey: tank dies, two spawns are agroed, ambush comes from behind. Mass CC is not useful when things are steamrolled.
Now please, Ninja, I bear you no ill will since we can have an argument without it, but do stop trying to make it look like I'm a lunatic who has just first set foot on the game and has not touched a Controller.
-
I'm seriously disgusted at this. Damn thing soloed Posi 1 and 2 at 0x8, with Posi 2 finishing in 45 minutes. That was faster than my Fire Armor/Stone Melee who has Burn and did it in 46 minutes and that I had made a thread giving an impressed nod.
Then I tried Yin since it left that super low level zone where Fury is OP and at +1x8 it was still soloed in 43 minutes. Again, faster than the Fire/Stone who now had access to Tremor on top of Burn.
But as further insult I was blinking at the speed I was going through mobs and decided that despite not yet having Earth's Embrace/Rooted slotted to stop using inspirations to not skew things, so unlike the Tanker I was not stuffed in purples and reds and whatever else dropped. The only moment I used inspirations was to tackle Yin who debuffed me faster than my downleveled DDR could stop so a medium purple to tackle her and the ambush at the same time.
Even so 43 minutes. And super safe (no inspirations used after all). The upside of a Tanker having more HP gets shut down by Earth's Embrace pushing HP to 3k something once at max level. Not capped but a fat bonus that needs to be ablated.
For all of the spreadsheet and talks the chunks taken out of the AV (without benefit of reds, Fiery Embrace, Burn, or Brimstone) makes my Tanker green with envy, and Brutes who are supposed to be squishier simply are not with Stone Armor being strong as it is.
Despite having slotted all but one of the recovery uniques as well as having slotted both IOs in Stamina and Crystal Armor the endurance keeps on going down (currently 3.26 EPS) and there is still Brimstone, Tough, Weave, and Focused Accuracy to come so it's a tad worrying for someone used to Consume.
For now I use Recovery Serums once my blue bar dips under 20% and it's always available by the time it has returned to 20%. Considering how cheap Recovery Serums are and how it's just the leveling phase I'll carry on doing it and then see how the build behaves at max level with accolades and Musculature 33%.
I'll drop the build here though I don't know how correct it is because of Mids being currently borked. I know the HP bonus, recovery, and stats in many attacks are simply not working or doing double than what they ought, but the IO bonuses seem to be working so I pushed for the usual goals and will revisit when Mids has been fixed.Should be fixed, but may need a manual download. I got mine from their Discord.
SpoilerThis Villain build was built using Mids Reborn 3.1.2.5
https://github.com/LoadedCamel/MidsRebornClick this DataLink to open the build!
Level 50 Magic Brute
Primary Power Set: Radiation Melee
Secondary Power Set: Stone Armor
Power Pool: Flight
Power Pool: Speed
Power Pool: Leaping
Power Pool: Fighting
Ancillary Pool: Energy MasteryVillain Profile:
Level 1: Radioactive Smash -- TchofDth-Acc/Dmg(A), TchofDth-Dam%(3), TchofDth-Dmg/Rchg(3), TchofDth-Acc/Dmg/EndRdx(5), TchofDth-Dmg/EndRdx/Rchg(5), FrcFdb-Rechg%(7)
Level 1: Rock Armor -- Rct-ResDam%(A), Rct-Def/EndRdx(7), LucoftheG-Def/Rchg+(9)
Level 2: Stone Skin -- ShlWal-Def/EndRdx(A), ShlWal-Def/Rchg(13), ShlWal-Def(13), ShlWal-Def/EndRdx/Rchg(15), TtnCtn-ResDam(15), TtnCtn-ResDam/EndRdx(17)
Level 4: Earth's Embrace -- Pnc-Heal/EndRedux(A), Pnc-EndRdx/Rchg(17), Pnc-Heal/Rchg(19), Pnc-Heal/EndRedux/Rchg(19), Pnc-Heal(21)
Level 6: Hover -- LucoftheG-Def/Rchg+(A)
Level 8: Radiation Siphon -- OvrFrc-End/Rech(A), OvrFrc-Dam/KB(21), OvrFrc-Acc/Dmg/End(23), OvrFrc-Dmg/End/Rech(23), OvrFrc-Acc/Dmg/End/Rech(25), TchofDth-Dam%(25)
Level 10: Mud Pots -- SprUnrFur-Acc/Dmg(A), SprUnrFur-Dmg/Rchg(27), SprUnrFur-Acc/Dmg/Rchg(27), SprUnrFur-Dmg/EndRdx/Rchg(29), SprUnrFur-Acc/Dmg/EndRdx/Rchg(29), SprUnrFur-Rchg/+Regen/+End(31)
Level 12: Fusion -- RechRdx-I(A), RechRdx-I(31), GssSynFr--Build%(31)
Level 14: Hasten -- RechRdx-I(A), RechRdx-I(33)
Level 16: Rooted -- Prv-Heal(A), Prv-Heal/EndRdx(33), Prv-EndRdx/Rchg(33), Prv-Heal/Rchg(34), Prv-Heal/Rchg/EndRdx(34), Prv-Absorb%(34)
Level 18: Irradiated Ground -- Erd-Dmg(A), Erd-Acc/Dmg/EndRdx/Rchg(36), Erd-%Dam(36), TchofLadG-%Dam(36), Arm-Dam%(37), Obl-%Dam(37)
Level 20: Crystal Armor -- LucoftheG-Def/Rchg+(A), PrfShf-End%(37), Rct-Def(39), Rct-Def/EndRdx(39), PrfShf-EndMod(39)
Level 22: Fly -- WntGif-ResSlow(A)
Level 24: Evasive Maneuvers -- LucoftheG-Def/Rchg+(A)
Level 26: Devastating Blow -- Hct-Dam%(A), Hct-Dmg/Rchg(40), Hct-Acc/Dmg/Rchg(40), Hct-Acc/Rchg(42), Hct-Dmg/EndRdx(42), TchofDth-Dam%(42)
Level 28: Minerals -- HO:Cyto(A)
Level 30: Combat Jumping -- LucoftheG-Def/Rchg+(A)
Level 32: Atom Smasher -- SprBrtFur-Rech/Fury%(A), SprBrtFur-Acc/Dmg(43), SprBrtFur-Dmg/Rchg(43), SprBrtFur-Acc/Dmg/Rchg(45), SprBrtFur-Dmg/EndRdx/Rchg(45), SprBrtFur-Acc/Dmg/EndRdx/Rchg(45)
Level 35: Brimstone Armor -- TtnCtn-ResDam/Rchg(A), TtnCtn-ResDam/EndRdx(46), TtnCtn-ResDam(46), TtnCtn-ResDam/EndRdx/Rchg(46), GldArm-3defTpProc(47), StdPrt-ResDam/Def+(47)
Level 38: Focused Accuracy -- EndRdx-I(A)
Level 41: Physical Perfection -- PrfShf-End%(A)
Level 44: Boxing -- Empty(A)
Level 47: Tough -- TtnCtn-ResDam/EndRdx(A), TtnCtn-ResDam(47), TtnCtn-ResDam/Rchg(48), TtnCtn-ResDam/EndRdx/Rchg(48)
Level 49: Weave -- ShlWal-Def/EndRdx(A), ShlWal-ResDam/Re TP(49), ShlWal-Def(49), ShlWal-Def/EndRdx/Rchg(49)
Level 1: Fury
Level 1: Brawl -- Empty(A)
Level 1: Sprint -- Empty(A)
Level 2: Rest -- Empty(A)
Level 1: Swift -- Empty(A)
Level 1: Hurdle -- Empty(A)
Level 1: Health -- Pnc-Heal/+End(A), Mrc-Rcvry+(9), NmnCnv-Regen/Rcvry+(11)
Level 1: Stamina -- PrfShf-End%(A), PrfShf-EndMod(11)
Level 50: Musculature Radial Paragon
Level 50: Born In Battle
Level 50: High Pain Threshold
Level 50: Invader
Level 50: Marshal
Level 22: Afterburner
------------Different build replacing Devastating Blow for Contaminated Strike. No, no, contain your sneering, there is MATH!
Spoiler- Devastating Blow (2.9 animation time and 781 damage), Radioactive Smash (1.7 and 332 damage), Radiation Siphon (2.4 and 476 damage), Radioactive Smash (1.7 and 332 damage) = 8.7 seconds and 1885 damage.
- Radiation Siphon (2.4 animation time and 494 damage), Radioactive Smash (1.7 and 330 damage), Contaminated Strike (1.05 and 175 damage). This leaves a 0.08 second gap (+5 all but the proc in Radiation Siphon and it becomes a 0.5 gap 😄) before Radiation Siphon is up again. So the rotation takes 5.15 seconds to do for 999 damage. Since we are comparing the in-the-time-it-takes-to-do-a-Devastating-Blow-rotation this leaves enough time to add another Siphon (5.15 + 2.4 = 7.55) and another Radioactive Smash (7.55 + 1.7 = 9.25). This is cheating because it passes the rotation of Devastating Blow by half a second so it can be quibbled but it's a simple rotation. Which means Radiation Siphon, Radioactive Smash, Contaminated Strike, Radiation Siphon, Radioactive Smash, is half a second longer than the time it would take to do a Devastating Blow rotation.
Which amounts to 1824 damage... which makes a 3% damage loss and no 2.9 animation times in the rotation. It makes for friendlier leveling and exemplaring as well.
Caveats:
- The damage will be slightly different from build to build since a proc more or less will slightly alter the numbers. I'm comparing two builds instead of just swapping the slotting since Unrelenting Fury will go well in Contaminated Strike.
- Enough recharge is needed to eschew a second Contaminated Strike which would bring the damage down.
This Villain build was built using Mids Reborn 3.1.2.5
https://github.com/LoadedCamel/MidsRebornClick this DataLink to open the build!
Level 50 Magic Brute
Primary Power Set: Radiation Melee
Secondary Power Set: Stone Armor
Power Pool: Flight
Power Pool: Speed
Power Pool: Leaping
Power Pool: Fighting
Ancillary Pool: Energy MasteryVillain Profile:
Level 1: Contaminated Strike -- SprUnrFur-Acc/Dmg(A), SprUnrFur-Dmg/Rchg(3), SprUnrFur-Acc/Dmg/Rchg(3), SprUnrFur-Dmg/EndRdx/Rchg(19), SprUnrFur-Acc/Dmg/EndRdx/Rchg(21), SprUnrFur-Rchg/+Regen/+End(42)
Level 1: Rock Armor -- Rct-ResDam%(A), Rct-Def/EndRdx(7), LucoftheG-Def/Rchg+(9)
Level 2: Radioactive Smash -- TchofDth-Acc/Dmg(A), TchofDth-Dam%(17), TchofDth-Dmg/EndRdx(19), TchofDth-Acc/Dmg/EndRdx(5), TchofDth-Dmg/EndRdx/Rchg(5), FrcFdb-Rechg%(7)
Level 4: Hover -- LucoftheG-Def/Rchg+(A)
Level 6: Stone Skin -- Rct-Def/EndRdx(A), Rct-Def(13), LucoftheG-Def/Rchg+(13), RctArm-ResDam(15), RctArm-ResDam/Rchg(15), RctArm-ResDam/EndRdx(17)
Level 8: Radiation Siphon -- Hct-Dam%(A), Hct-Dmg/Rchg(21), Hct-Acc/Dmg/Rchg(23), Hct-Acc/Rchg(23), Hct-Dmg/EndRdx(25), TchofDth-Dam%(25)
Level 10: Mud Pots -- SprBrtFur-Acc/Dmg(A), SprBrtFur-Dmg/Rchg(27), SprBrtFur-Acc/Dmg/Rchg(27), SprBrtFur-Dmg/EndRdx/Rchg(29), SprBrtFur-Acc/Dmg/EndRdx/Rchg(29), SprBrtFur-Rech/Fury%(31)
Level 12: Fusion -- AdjTrg-ToHit/Rchg(A), AdjTrg-EndRdx/Rchg(31), GssSynFr--Build%(31), AdjTrg-Rchg(34)
Level 14: Hasten -- RechRdx-I(A), RechRdx-I(33)
Level 16: Rooted -- Pnc-Heal/+End(A), Pnc-Heal/EndRedux(33), Pnc-EndRdx/Rchg(33), Pnc-Heal(34), Pnc-Heal/EndRedux/Rchg(34)
Level 18: Irradiated Ground -- FuroftheG-ResDeb%(A), AchHee-ResDeb%(36), Erd-%Dam(36), Mlt-Acc/EndRdx(36), Arm-Dam%(37), TchofLadG-%Dam(37)
Level 20: Crystal Armor -- ShlWal-Def/EndRdx/Rchg(A), PrfShf-End%(37), ShlWal-Def/Rchg(39), ShlWal-Def/EndRdx(39), PrfShf-EndMod(46), ShlWal-Def(46)
Level 22: Fly -- WntGif-ResSlow(A)
Level 24: Evasive Maneuvers -- LucoftheG-Def/Rchg+(A)
Level 26: Earth's Embrace -- Prv-Heal/Rchg/EndRdx(A), Prv-Heal/Rchg(40), Prv-EndRdx/Rchg(40), Prv-Heal/EndRdx(42), Prv-Heal(42), Prv-Absorb%(40)
Level 28: Minerals -- HO:Cyto(A)
Level 30: Combat Jumping -- LucoftheG-Def/Rchg+(A)
Level 32: Atom Smasher -- Erd-Acc/Dmg/EndRdx/Rchg(A), Erd-Acc/Dmg/Rchg(43), Erd-%Dam(43), ScrDrv-Acc/Dmg/EndRdx(45), ScrDrv-Dmg/Rchg(45), ScrDrv-Dmg/EndRdx(45)
Level 35: Brimstone Armor -- RctArm-ResDam(A), RctArm-ResDam/EndRdx(46)
Level 38: Focused Accuracy -- AdjTrg-EndRdx/Rchg(A), AdjTrg-ToHit(39), AdjTrg-ToHit/EndRdx/Rchg(43)
Level 41: Physical Perfection -- PrfShf-End%(A)
Level 44: Boxing -- Empty(A)
Level 47: Tough -- UnbGrd-Max HP%(A), UnbGrd-ResDam(47), GldArm-3defTpProc(47), UnbGrd-ResDam/EndRdx(48), StdPrt-ResDam/Def+(48)
Level 49: Weave -- ShlWal-Def/EndRdx(A), ShlWal-ResDam/Re TP(49), ShlWal-Def(49), ShlWal-Def/EndRdx/Rchg(49)
Level 1: Fury
Level 1: Brawl -- Empty(A)
Level 1: Sprint -- Empty(A)
Level 2: Rest -- Empty(A)
Level 1: Swift -- Empty(A)
Level 1: Hurdle -- Empty(A)
Level 1: Health -- NmnCnv-Regen/Rcvry+(A), Mrc-Rcvry+(9)
Level 1: Stamina -- PrfShf-End%(A), PrfShf-EndMod(11)
Level 50: Musculature Radial Paragon
Level 50: Born In Battle
Level 50: High Pain Threshold
Level 50: Invader
Level 50: Marshal
Level 22: Afterburner
------------If there's interest I'll whip a leveling build.Leveling build:
SpoilerThis is what I leveled with. I might be smarter to take Contaminated Strike since I had big gaps (but Irradiated Ground kept killing things for me) where I'd go Radioactive Smash, Radiation Siphon, inherent power (in my case Mutagen), gap, start over. This gets a lot better as soon as we reach Synapse and about disappears at Yin where all the LotGs plus Minerals plus Devastating Blow tightens the attack loop.
I did not bother putting the slots in order but right away gave two slots to Stone Skin for the two defense uniques, then slotted Irradiated Ground ASAP, same as both my attacks, then made sure I had three slots in my shields for LotG + the two Defense Endurance.
Crystal Armor took precedence in slotting the moment I got it since both Posis are chockful of energy and negative attacks, then life is electrocution in Synapse and Yin. The endurance disappearing never goes away so I also early slotted Crystal for the endurance recovery and slotted Health/Stamina as well. Even so do buy Recovery Serums is my advice.
During leveling we mostly fight +1 so accuracy is a bit skimped and Focused Accuracy is not turned on, but, the new Crey are a bit of a pain and having it when we get blinded by the revamped mobs was something I was very thankful for.
The +5% Shield Wall goes into Hover the moment we get Hover and are level 7, then either use a second slot to mule a LotG or just swap it for a LotG once having Weave. It's just leveling so there is no real wrong answer.
Slotting things is a game of balancing when can I put the things in. For example Hasten needs its three level 25 generic IOS, but generic IOS open at 22, so I don't go rushing slots there if I need to wait for 22 to slot anything in there. Same as the three slots for the defense toggles with the LotG only being able to fit at 22 and the Reactive Defenses at 17.
The leveling build has six free slots. This is simply to represent the leveling experience and the early slotting. Once comfortable and the minimum slotting is in place and more slots are coming in just transition to the complete build adding the things that were left out and that serve to pad the resistances (last slot in Mud Pots, Scaling Resist in Rock Armor, four slotting Brimstone, etc etc, go according to whim).
SpoilerThis Villain build was built using Mids Reborn 3.1.2.5
https://github.com/LoadedCamel/MidsRebornClick this DataLink to open the build!
Level 50 Magic Brute
Primary Power Set: Radiation Melee
Secondary Power Set: Stone Armor
Power Pool: Flight
Power Pool: Speed
Power Pool: Leaping
Power Pool: Fighting
Ancillary Pool: Energy MasteryVillain Profile:
Level 1: Radioactive Smash -- BrtFur-Rchg/Fury(A), BrtFur-Dmg/Rchg(3), BrtFur-Acc/Dmg/Rchg(3), BrtFur-Dmg/EndRdx/Rchg(5), BrtFur-Acc/Dmg/EndRdx/Rchg(5), FrcFdb-Rechg%(7)
Level 1: Rock Armor -- Rct-Def(A), Rct-Def/EndRdx(7), LucoftheG-Def/Rchg+(9), Rct-ResDam%(31)
Level 2: Stone Skin -- StdPrt-ResDam/Def+(A), GldArm-3defTpProc(13), Rct-Def(13), Rct-Def/EndRdx(15)
Level 4: Earth's Embrace -- Pnc-Heal/EndRedux(A), Pnc-EndRdx/Rchg(17), Pnc-Heal/Rchg(19), Pnc-Heal/EndRedux/Rchg(19), Pnc-Heal(21)
Level 6: Hover -- LucoftheG-Def/Rchg+(A)
Level 8: Radiation Siphon -- OvrFrc-End/Rech(A), OvrFrc-Dam/KB(21), OvrFrc-Acc/Dmg/End(23), OvrFrc-Dmg/End/Rech(23), OvrFrc-Acc/Dmg/End/Rech(25), TchofDth-Dam%(25)
Level 10: Mud Pots -- UnrFur-Acc/Dmg(A), UnrFur-Rchg/+Regen/+End(27), UnrFur-Acc/Dmg/Rchg(27), UnrFur-Dmg/EndRdx/Rchg(29), UnrFur-Acc/Dmg/EndRdx/Rchg(29)
Level 12: Fusion -- RechRdx-I(A), RechRdx-I(15), RechRdx-I(31), GssSynFr--Build%(31)
Level 14: Hasten -- RechRdx-I(A), RechRdx-I(17), RechRdx-I(33)
Level 16: Rooted -- Prv-Heal(A), Prv-Heal/EndRdx(33), Prv-EndRdx/Rchg(33), Prv-Heal/Rchg(34), Prv-Heal/Rchg/EndRdx(34), Prv-Absorb%(34)
Level 18: Irradiated Ground -- Erd-Dmg(A), Erd-Acc/Dmg/EndRdx/Rchg(36), Erd-%Dam(36), TchofLadG-%Dam(36), ScrDrv-Dam%(37), Obl-%Dam(37)
Level 20: Crystal Armor -- LucoftheG-Def/Rchg+(A), PrfShf-End%(37), Rct-Def(39), Rct-Def/EndRdx(39), PrfShf-EndMod(39)
Level 22: Fly -- WntGif-ResSlow(A)
Level 24: Evasive Maneuvers -- LucoftheG-Def/Rchg+(A)
Level 26: Devastating Blow -- TchofDth-Acc/Dmg(A), TchofDth-Dmg/EndRdx(40), TchofDth-Dmg/Rchg(40), TchofDth-Acc/Dmg/EndRdx(42), TchofDth-Dmg/EndRdx/Rchg(42), TchofDth-Dam%(42)
Level 28: Minerals -- EndRdx-I(A)
Level 30: Combat Jumping -- LucoftheG-Def/Rchg+(A)
Level 32: Atom Smasher -- Obl-Dmg(A), Obl-%Dam(43), Obl-Dmg/Rchg(43), Obl-Acc/Dmg/Rchg(45), Obl-Acc/Dmg/EndRdx/Rchg(45)
Level 35: Brimstone Armor -- TtnCtn-ResDam/EndRdx(A)
Level 38: Focused Accuracy -- EndRdx-I(A)
Level 41: Physical Perfection -- PrfShf-End%(A)
Level 44: Boxing -- Empty(A)
Level 47: Tough -- TtnCtn-ResDam/EndRdx(A), TtnCtn-ResDam(47), TtnCtn-ResDam/Rchg(48), TtnCtn-ResDam/EndRdx/Rchg(48)
Level 49: Weave -- ShlWal-Def/EndRdx(A), ShlWal-Def(50), ShlWal-Def/Rchg(50), ShlWal-Def/EndRdx/Rchg(50)
Level 1: Fury
Level 1: Brawl -- Empty(A)
Level 1: Sprint -- Empty(A)
Level 2: Rest -- Empty(A)
Level 1: Swift -- Empty(A)
Level 1: Hurdle -- Empty(A)
Level 1: Health -- Pnc-Heal/+End(A), Mrc-Rcvry+(9), NmnCnv-Regen/Rcvry+(11)
Level 1: Stamina -- PrfShf-End%(A), PrfShf-EndMod(11)
Level 50: Musculature Radial Paragon
Level 50: Born In Battle
Level 50: High Pain Threshold
Level 50: Invader
Level 50: Marshal
Level 22: Afterburner
-------------
1
-
-
1 hour ago, Meta Brawler said:
Example with current build (melee soft cap def, dmg type soft cap def)
Enemy Attack: Punch (melee, smash)- Has to beat two defense checks to hit Me. My melee defense and my smash defense. Both are high so little chance to hit.
Enemy Attack: Gunshots (ranged, lethal) - With low range def, the attack has higher chance to beat this def check, but even if it does it also has to beat my lethal def check to do dmg.
The logic is sound but as @InvaderStych it is not how it works. There are not two rolls for each attack, just one against the one that is higher. If it's melee then it rolls against melee, but if it's Smash then it rolls against Smash.
There is value in adding more of what you have highest in terms of buffering defense debuffing. Stone has a decent defense debuffing resistance but not enough to be considered immune to it. Also a small part of the content is not softcapped with just 45%.
-
1
-
-
I'd aim for more resists as long as above softcap. This is a good enough approach for 98% of the game. When the slowly expanding difficulty options catch up to the rest of the game it will be common to bring buffers and then the middle-of-the-road approach will benefit more than over-the-cap-so-buffs-do-nothing.
IMO.
-
1
-
-
Not add them, but swap them for something. Preventive Medicine in Rooted would give 2.5% S/L. Can be done in Earth's Embrace as well. Or just try to give the full Preventive Medicine in Rooted and five Panaceia in Earth's Embrace.
-
The new Mids is out though you might need to download it from the site instead of the auto updated. It seems currently bugged in a few ways though so perhaps hold off.
I confess I've been tempted by this combo.... but no agro aura... I've played Stalkers before and it was the deal breaker so I know it will be for me.
But the combo sounds good.
Looking at the build now you do sacrifice a bit more than I am comfy with. I'd really throw all those 'chance for heal' procs into Rooted or Earth's Embrace. You have two 1.5% S/L resists past the limit of 5 so change for something else, perhaps LotG for regen instead. I'd throw a FF proc into Shockwave to help Hasten too.
You seem a bit worried about F/C defenses and resists. Before Aeon I would say it's not really something to worry about but nowadays I don't know if fire or cold are important for that specific TF. Otherwise I'd also throw a FF proc into Focus.
-
1
-
Rad/Stone build and compilation of Stone Armor builds.
in Brute
Posted
Interestingly enough Rad Melee skews things enough that when I tried a Rad/Fire Burn only shaved 5 minutes off Yin, and that with guzzling inspirations.
It makes me rhink of what other less damage oriented combos I could try with Rad. Maybe even rad/rad.