
Jawbreaker
-
Posts
595 -
Joined
-
Last visited
-
Days Won
10
Content Type
Profiles
Forums
Events
Store
Articles
Patch Notes
Posts posted by Jawbreaker
-
-
On 4/25/2023 at 7:09 PM, Techwright said:
That whole picture is an in-game billboard? I'm drawing a blank as to where it is. I recognize the icon logo, of course.
Yep. Outside Icon in Steel

-
 1
1
-
-
On 4/24/2023 at 5:51 AM, Karens Sister said:
That's really cool. Is that print on demand?
Yep! I've branched out with my company a little and have started doing some COH stuff as a personal project and making them available for anyone who wants one
-
3 hours ago, High_Beam said:
There is a very 80's Patrick Nagel look about the character on that cup that is making me slightly tingly.
Probably why it's my favorite billboard
-
Gotta get juiced up before spending hours standing in Icon. My favorite billboard in Paragon. I can make these available for purchase if there's enough interest
https://imgur.com/a/r1VM5Rz-
 6
6
-
 1
1
-
1
-
-
35 minutes ago, Astralock said:
There's Aid Other, certainly. But, even better is the tier 4 Rebirth Core Destiny. Go start a level 50 Ouroboros Flashback story arc, go to Mercy Island near Kalinda, find the large group of Arachnos troops, and put that Rebirth Core Destiny on auto. Go AFK for about fifteen hours. Profit.
Note that it has to be Rebirth Core. Rebirth Radial won't do it.
Oh well that sounds easy enough. Thank you
-
1
-
-
How do you go about unlocking the healing badges on, say, melee characters? Is Aid Other the best option?
-
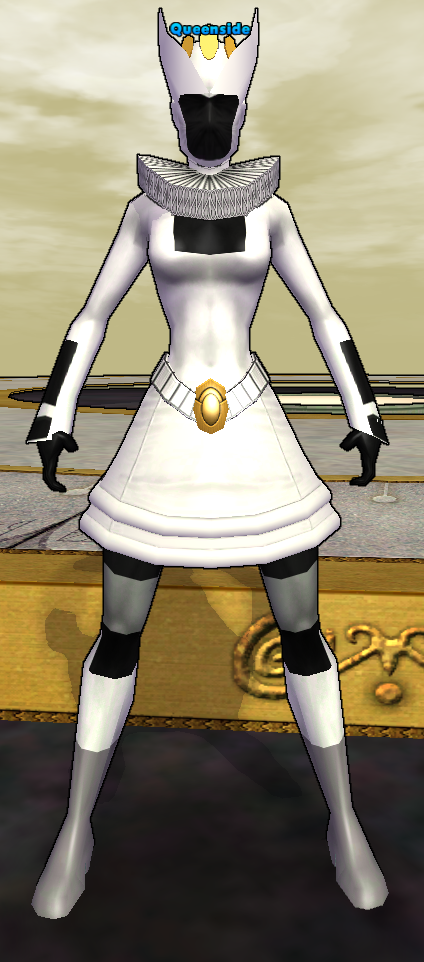
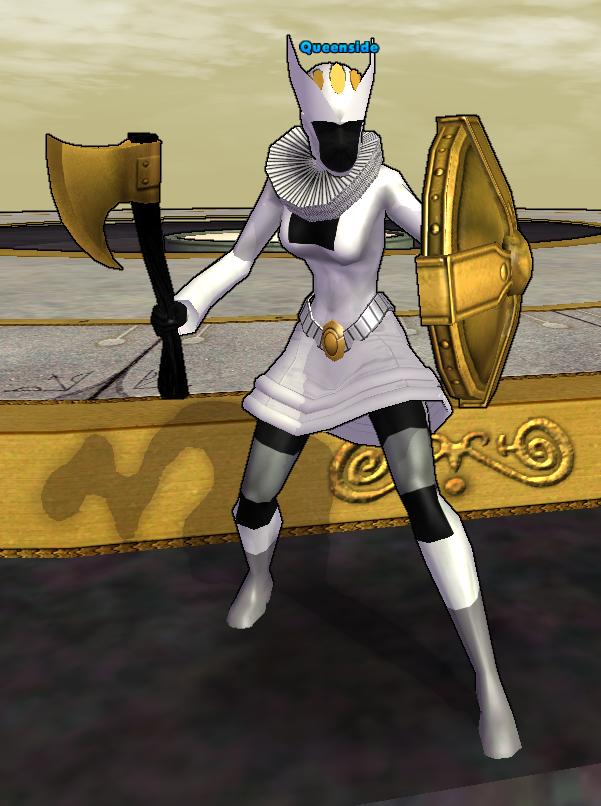
6 hours ago, Yellowjacket said:
Edit: changed up the weapons, celestial axe and tech knight shield were too large for this character
Plus a couple from The Vault:
That's an outstanding costume
-
1
-
-
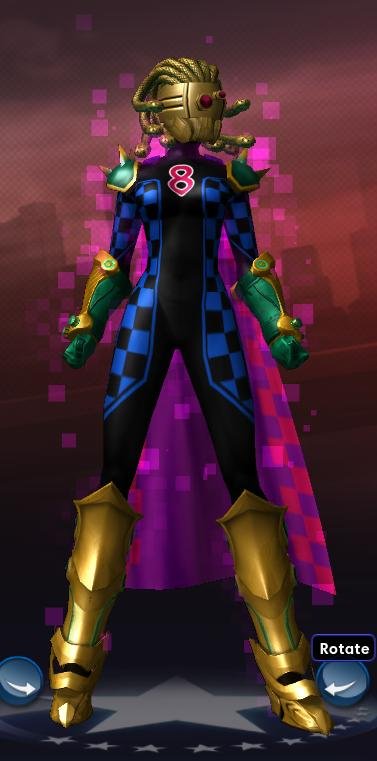
3 hours ago, Clave Dark 5 said:
This isn't her first costume slot, but I made this one less than 24 hours ago and have already had two people whisper me that they liked it a lot, so here's 8-Bit Oracle, a Sonic/Time Corr. Must be the colors? I do kinda like how they came out.
Very cool use of the Medusa hair!
-
1
-
-
Very simple design but the effect is a lot of fun to play
Shadowlight, dark/fire tank
-
10
-
2
-
-
Cobra Chimera. Still unsure if she'll be DP/NIN blaster or DB/NIN stalker
-
10
-
1
-
3
-
-
8 hours ago, Gr33n said:
That's excellent
-
1
-
-
6 hours ago, biostem said:
I wish we could get a variant without the 2 fans toward the top...
That too
-
1
-
-
2 hours ago, RikOz said:
Is that jetpack a temp power? (assuming so, since you're also wearing the Warp thingy on your back)
The Gold Bricker jetpack is available, with customizable color, in the CC:
Yeah I liked the effect of the extra discs, and honestly forgot that the GB backpack existed lol
-
1
-
-
Was working on this guy but I've shelved him in the hopes that some day I can get the same golden color in the CC as the color on the GB jetpack.
-
2
-
1
-
3
-
-
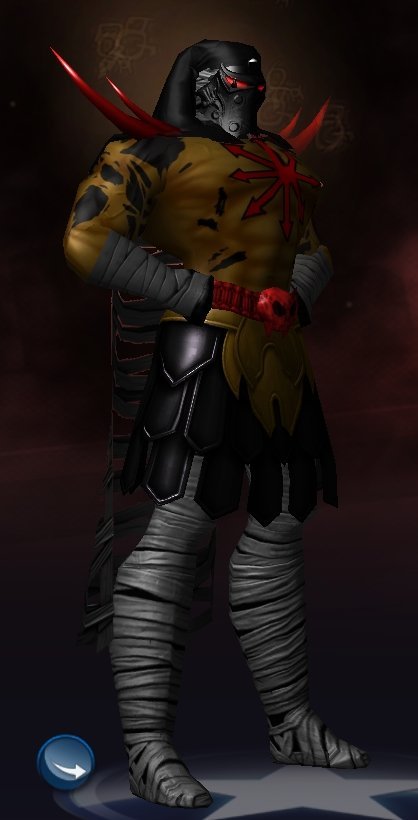
9 hours ago, Fire Chief said:
I've done this one a few different ways and I think I found his calling my Broooot dark/inv...The master of Chaos...Tohubohu
great use of the wraps!
-
1
-
-
Can someone tell me what the customizable shaders mod does? I assumed it was for the CC but didn't notice any difference or new options.
-
5 hours ago, Wimbochismo said:
I recently made one and she's about 35 right now. I've been churning out a bunch of controller builds lately. I'd say FF is A tier if not higher for 'trollers.
Mainly this is due to minimal slotting requirements, power picks if you choose, and Dispersion Bubble. DB fully slotted gives around 12 def all. Thats 12 less def you personally don't have to allocate to hit 45 of your defense type if you wanted to. This opens you up to chase after recharge and procs.
In addition to DB, the targeted bubbles do 11 defense out of the gate. With 1 LoTG thats 13, if you also take Maneuvers thats around 4. Most people have the last 16 defense by accident to hit 45.
Personal FF, Deflection, Insulation 1 slot LoTG.
If Repulsion Bolt was 8 secs recharge like it was before I'd say to proc it like a hold. It would've been great as a procced out part of an attack chain. It doesn't need any accuracy. As it is, 1 or 2 slot wonder with KB/KD and FF recharge. I only use it on hard targets for the -res.
Damping Bubble is fun to have.
Force Bomb is great with dmg procs and FF recharge. It can essentially become another procced out aoe nuke to start an aoe chain.
Mind gives you a Procced Dominate+Levitate+Mes single target attack chain out of the box if you choose. Confuse is Confuse. I skip Mass Hypnosis and Telekinesis. Terrify can be procced and is great for an aoe attack. Mass Confuse is great. Total Dom take it or leave it.
Take an epic pool for moar single target dps/aoe dps etc. Sadly Mind doesn't have a good way to set up aoe containment. Force Bomb's low chance to disorient is about it, or Total Dom. But at least you get the -res!
Overall it's been crazy fun. Get DB slotted with endreds and def as soon as you get it. Slot your attacks with accuracy + procs like crazy around level 20. You turn into a dice rolling blaster that escorts your unkillable group through TF's.
TLDR: Force Field elevates Mind to a wicked good time.
Here's what I run:
This Hero build was built using Mids Reborn 3.4.7
https://github.com/LoadedCamel/MidsRebornClick this DataLink to open the build!
Level 50 Magic Controller
Primary Power Set: Mind Control
Secondary Power Set: Force Field
Power Pool: Leaping
Power Pool: Speed
Power Pool: Leadership
Power Pool: Teleportation
Ancillary Pool: Fire MasteryHero Profile:
Level 1: Mesmerize- (A) Decimation - Accuracy/Damage
- (9) Decimation - Damage/Endurance
- (11) Decimation - Damage/Recharge
- (11) Decimation - Accuracy/Endurance/Recharge
- (34) Decimation - Accuracy/Damage/Recharge
Level 1: Personal Force Field
- (A) Luck of the Gambler - Defense/Increased Global Recharge Speed
Level 2: Dominate
- (A) Gladiator's Javelin - Accuracy/Damage
- (5) Gladiator's Javelin - Chance of Damage(Toxic)
- (5) Ghost Widow's Embrace - Chance of Damage(Psionic)
- (7) Gladiator's Net - Chance of Damage(Lethal)
- (7) Neuronic Shutdown - Chance of Damage(Psionic)
- (9) Apocalypse - Chance of Damage(Negative)
Level 4: Levitate
- (A) Thunderstrike - Accuracy/Damage
- (36) Thunderstrike - Damage/Endurance
- (36) Thunderstrike - Damage/Recharge
- (37) Thunderstrike - Accuracy/Damage/Recharge
- (37) Thunderstrike - Accuracy/Damage/Endurance
- (37) Thunderstrike - Damage/Endurance/Recharge
Level 6: Deflection Shield
- (A) Luck of the Gambler - Defense/Increased Global Recharge Speed
Level 8: Repulsion Bolt
- (A) Overwhelming Force - Damage/Chance for Knockdown/Knockback to Knockdown
- (43) Force Feedback - Chance for +Recharge
Level 10: Insulation Shield
- (A) Luck of the Gambler - Defense/Increased Global Recharge Speed
Level 12: Confuse
- (A) Coercive Persuasion - Confused
- (13) Coercive Persuasion - Confused/Recharge
- (13) Coercive Persuasion - Confused/Recharge/Accuracy
- (17) Coercive Persuasion - Recharge/Accuracy
- (19) Coercive Persuasion - Confused/Endurance
- (19) Coercive Persuasion - Contagious Confusion
Level 14: Combat Jumping
- (A) Luck of the Gambler - Defense/Increased Global Recharge Speed
- (15) Gift of the Ancients - Defense/Endurance
- (15) Gift of the Ancients - Defense
Level 16: Hasten
- (A) Recharge Reduction IO
- (17) Recharge Reduction IO
Level 18: Maneuvers
- (A) Luck of the Gambler - Defense/Increased Global Recharge Speed
- (31) Gift of the Ancients - Defense/Endurance
- (31) Gift of the Ancients - Defense
Level 20: Dispersion Bubble
- (A) Reactive Defenses - Defense
- (21) Reactive Defenses - Defense/Endurance
- (21) Reactive Defenses - Endurance/RechargeTime
- (23) Reactive Defenses - Defense/RechargeTime
- (23) Reactive Defenses - Defense/Endurance/RechargeTime
- (25) Reactive Defenses - Scaling Resist Damage
Level 22: Terrify
- (A) Positron's Blast - Accuracy/Damage
- (25) Positron's Blast - Chance of Damage(Energy)
- (27) Javelin Volley - Accuracy/Damage
- (29) Javelin Volley - Chance of Damage(Lethal)
- (29) Bombardment - Chance for Fire Damage
- (31) Superior Overpowering Presence - RechargeTime/Energy Font
Level 24: Tactics
- (A) Adjusted Targeting - To Hit Buff
- (46) Adjusted Targeting - To Hit Buff/Recharge
- (48) Adjusted Targeting - To Hit Buff/Endurance/Recharge
- (50) Adjusted Targeting - Endurance/Recharge
- (50) Adjusted Targeting - To Hit Buff/Endurance
Level 26: Mass Confusion
- (A) Superior Will of the Controller - Accuracy/Control Duration
- (27) Superior Will of the Controller - Control Duration/Recharge
- (33) Superior Will of the Controller - Endurance/Recharge
- (33) Superior Will of the Controller - Accuracy/Control Duration/Endurance
- (34) Superior Will of the Controller - Accuracy/Control Duration/Endurance/Recharge
- (34) Superior Will of the Controller - Recharge/Chance for Psionic Damage
Level 28: Force Bomb
- (A) Positron's Blast - Accuracy/Damage
- (40) Positron's Blast - Accuracy/Damage/Endurance
- (43) Bombardment - Chance for Fire Damage
- (48) Positron's Blast - Chance of Damage(Energy)
- (48) Force Feedback - Chance for +Recharge
Level 30: Teleport
- (A) Blessing of the Zephyr - Run Speed, Jump, Flight Speed, Range
- (33) Blessing of the Zephyr - Knockback Reduction (4 points)
Level 32: Total Domination
- (A) Accuracy IO
Level 35: Fire Ball
- (A) Artillery - Accuracy/Damage
- (39) Artillery - Damage/Endurance
- (39) Artillery - Damage/Recharge
- (39) Artillery - Accuracy/Damage/Recharge
- (40) Artillery - Accuracy/Recharge/Range
- (40) Artillery - Endurance/Recharge/Range
Level 38: Fire Shield
- (A) Gladiator's Armor - TP Protection +3% Def (All)
- (42) Steadfast Protection - Resistance/+Def 3%
- (42) Reactive Armor - Resistance/Endurance
- (42) Reactive Armor - Resistance
- (43) Reactive Armor - Endurance
Level 41: Combat Teleport
- (A) Adjusted Targeting - To Hit Buff/Endurance
Level 44: Consume
- (A) Power Transfer - EndMod
- (45) Power Transfer - Damage/Recharge
- (36) Power Transfer - Chance to Heal Self
- (45) Power Transfer - Damage/EndMod
- (45) Power Transfer - Damage/Accuracy/Endurance
- (46) Power Transfer - Damage/Accuracy/Recharge/Endurance
Level 47: Damping Bubble
- (A) Shield Wall - +Res (Teleportation), +5% Res (All)
Level 49: Fold Space
- (A) Accuracy IO
Level 1: Containment
Level 1: Brawl| Copy & Paste this data into Mids Reborn : Hero Designer to view the build |
|-------------------------------------------------------------------|
|MxDz;1623;717;1434;HEX;|
|78DA7594C96E13411086FFF1CCC459491C938DC4591C1227247112246EEC590E604|
|B91409C00338A276124635B6323C103F0025CC222B289258B04481CE021E0051017|
|1E802C04B89AF2D4146E881869A6BFEEAEFEBBAABA7A92F7A6EB3F7D4C9C87D6349|
|5B10A85D4542E5B7473998CED9A496BD19947F909D2DB539911A378D2C9A6A5D3A9|
|CC5FBCBBB0109FCDB9F3766AD6B13369D4CFE5C83C615B7927BB58EB75AEE46D3BD|
|D28E369DB2DDC76F2CD5EFFAA9DB1F339B768159D5C36349377E6E3B38E6BA79256|
|A168BBF7DBC99B5E7A3734FA6890A764004BD4C60C54E311432D1E0B3C61E8C3538|
|6D39595DE6A7A5B6868D2C016359AA26B6A18D6BD1903A30277D8B60A33BA0F168D|
|44CA7B4F06BC914DEAEBAA8C8E67F066FAB12CB0C2701CAB026B02EB0C6748C2546|
|4608A9F67A909561C2D69417C65674EE001FB708E666BD4C535B2789B9A3AD5BB3A|
|5CE735F5B8217093A109298666DC12B0185AA9341A149940836C700486E625FA08A|
|A19A264DBA8D86A8D1881BF810F213209A9722191EB16B96E91BB404D588D208C1D|
|0EFF287605F6185AB12FF09DA11D070C6F343EF83F322D7807DFE403C3319C62DB2|
|E440502A6EF161D7919C2E4799B5A8C6D58E6148D6185611CAB0C9358135867784B|
|2B3B54273AF052F7F77EC5D08B0D814D863E6C096C334C914467E54A948C4E89258|
|6F7F04BC3F77C5CA21B976289510811F57C22F81CF0B7FCC2F09AA67BD47AEA2107|
|BD99E7E441548D200A9D371A8421600A5499BE5741816A86172433A0A671002739B|
|6612FBD91327473010C7B1BC6CA31F5330C520443EA9D1E920497B33952F95B94CC|
|11ECF1C18D62DFF02FE32F193910F861F847F893619A04E2EA06715C66F7F456604|
|2CDCC8464A65C20EA6FAAD4651CFAF394E841E2F0780D7B3F67A80A34A3F18A6FB5|
|7F4B8BD2CE7FC677FF1927F53E763F804B9CC2315CE30BB777D8F661C0B75D92F2E|
|DE51013616AD4107F0394CAC953|
|-------------------------------------------------------------------|- (A) Empty
Level 1: Sprint- (A) Celerity - +Stealth
Level 2: Rest- (A) Empty
Level 1: Swift- (A) Empty
Level 1: Hurdle- (A) Empty
Level 1: Health- (A) Panacea - +Hit Points/Endurance
- (3) Miracle - +Recovery
- (46) Numina's Convalesence - +Regeneration/+Recovery
Level 1: Stamina- (A) Performance Shifter - EndMod
- (3) Performance Shifter - Chance for +End
- (50) Endurance Modification IO
Level 50: Musculature Radial Paragon
------------Awesome, thank you Wimboschismo this sounds like a fun combo. Can't wait to get her rolling!
-
Mainly because of a name I grabbed I'm thinking of this combo as a good one for locking down mobs on a team setting. Anyone have any experience with this build? I don't ever remember seeing this combo in game
-
I just want to use the CC to make henchmen304
2220
-
46 minutes ago, Six-Six said:
levelling up, I usually stick to SOs and some nifty procs. This is because attuned IOs level with you, so when you're at low level, their benefits are also very low. IO sets only begin to surpass SOs around level 35. So until then, I slot henchmen with the +def and +res uniques and maybe some other damaging procs
Soldiers, I have Call to Arms +def L10, Acc SO, Achilles Heel -res L15, Shield Breaker +lethal, Sovereign Right +res L25, Dmg SO, in that order.
Spec Ops, I have Neuronic +Psi dmg, Razzle +immobilize, Cloud Senses +neg, trap of the hunter +lethal, Dark Watcher -recharge, and Analyse Weakness -to hit.Commando, I just have Edict +def and Expedient +res, Acc SO and Dmg SO
*I tend to prioritise acc over dmg because no matter how much damage you got, it won't do squat when it doesn't hit.
this is just levelling up. I usually reorganise slotting once I unlock Patron Pool Powers.
FF doesn't have heal, and the only other heal power you can get from that pair is Medicine's Aid Other. It's not as bad as you'd think once you get used to it. The Medic's heal is not as reliable as I'd like as it rarely fires when you need it most. So in the absence of heal, I find it really helpful to bubble up. FF's def is really helpful in keeping your mercs alive. That and Leadership pool. You'll notice I put Analyse Weakness -to hit. For me, -to hit translates to added def/res.
hope that helps your cause.Big help, thank you @Six-Six! Now to find which of my toons currently has all my influence lol
-
1
-
-
Hey all. I have a lowbie MM/FF and am wondering if I should just be slotting for damage on the way up or is it worth it to slot the soldiers with heals for the medic, or holds/Def Debuff on the Spec Ops. I assume the Commando should get as much damage as possible?
-
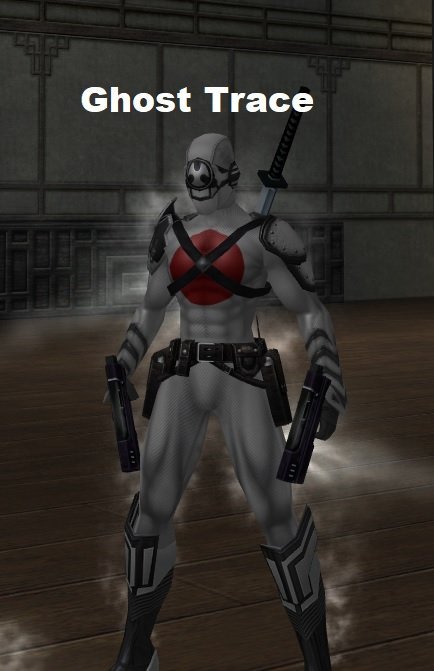
Ice/Ice Stalker
-
12
-
1
-
 1
1
-
6
-
-
Thanks to @Mjolnerd for releasing Chessboard. I was looking for a good name for a master strategist MM.
Mercs/FF
-
13
-
2
-
6
-
-
2 hours ago, Grimm2 said:
I don't think anyone yet mentioned the Theft of Essence +end proc slotted in Dark Regen. I've heard that helps immensely, turning Dark Regen into a neutral or net positive end cost.
On it! Thank you


CoH memes, anyone?
in Art & Multimedia
Posted