Frozen Burn
-
Posts
1243 -
Joined
-
Last visited
-
Days Won
6
Content Type
Profiles
Forums
Events
Store
Articles
Patch Notes
Everything posted by Frozen Burn
-
Proposed Changes for Mind Control
Frozen Burn replied to Frozen Burn's topic in Suggestions & Feedback
Agreed, the Assaults are where you pull your bulk damage from. However, with most control sets, there are those blasted AOE immobs that provide damage and for Controllers, needed Containment damage - Mind Control doesn't get anything to provide that. I am NOT saying I want an AOE imob in Mind Control - God no! I like Mind Control because it DOESN'T have the AOE immob (which most people do not know how to properly use anyway). But Mind Control doesn't get that extra damage benefit like other sets. And that is not comparing anything broken. I don't think Bonfire is broken with the KB-to-KD proc. It actually fixes it. Bonfire had / has very little use with out the proc and only draws aggro to the caster who typically dies from that. Situational use when near a corner wall, too. Now Bonfire is actually useful. ...but that is all for another argument thread. 🙂 That's a good idea. I like narrowing the cone and doubling the recharge. However, even at capping it to 10 foes, with the Contagious Confusion proc, they could still potentially get it affect as many foes as it does now. I think it would have to be more like 5 foes max. And yes, of course, it would spawn more discussion / arguments and Planties would disparage and scream "DOOM" - but that shouldn't stop us from changing and fixing it. 🙂 -
Homecoming Up for Best Rogue Server of 2021
Frozen Burn replied to Apparition's topic in General Discussion
So, ummm.... FYI.... MOP has already cast their vote and declared Homecoming the winner: And the MassivelyOP staff pick for the Best MMO Rogue Server of 2021 is… CITY OF HEROES: HOMECOMING The poll is just a "Reader's Poll," FYI. So don't think that your vote will sway MOP (like I did). But YAY! We are winning in the eye of the public too! -
Proposed Changes for Mind Control
Frozen Burn replied to Frozen Burn's topic in Suggestions & Feedback
I hear you and understand. But tweaks and buffs for Mind Control would not make Mind Doms OP - it would put them more in line with other high damage Doms. My Fire/Fire Dom literally melts mobs way faster than my Mind/Psy... but that's Fire... but even my Dark/Psy Dom kills faster than my Mind/Psy Dom. So a bit of a buff to Mind Control would help the Mind/Psy Dom be more like other Doms and it would GREATLY help Mind Controllers come up a peg or two. -
How are Earth/ or /Earth for that matter?
Frozen Burn replied to Duck-Smokes-Quack's topic in Blaster
I have only played Seismic Blast. I made a Seismic/Martial blaster (GREAT combo, especially if you like playing in the middle of mobs). I have yet to play /Earth Manipulation. I love Seismic blast! It's a lot of fun. It does smashing damage and since smashing is resisted by a lot of mobs (not all, obviously), the overall damage output seems average. There is lots of knockdown, which is great. The animations are mostly the "alternate" animations for other blast sets - while they generally aren't my first choice, they do not bother me with this set and they seem to fit. I love the cone's animation when you have Seismic Shockwaves going - punching a rock and the exploding shards hit your foes and knock them down. It's great! 🙂 People above have mentioned the timing of a few powers.... Upthrust (ranged AOE)... You punch the ground and send a shockwave (that you can see) going on the ground from where you punched to your target and then a huge rocks thrust up from the ground to damage your foes and knock them down. It's a great animation. However, the damage (and aggro, thankfully!) is timed with the actual damage of the rocks being thrust up (as it should be). So, the further away your target is, the longer it takes for the damage to occur and thusly, the closer they are, the less time it takes (melee range is almost instantaneously). Most people view this delay as bad, but it's actually useful - you can then queue up other attacks to hit at the same time to have a more devastating alpha strike. In attack-chain combat, I notice no issue in any delay, but being /Martial, I'm in the middle of the mob anyway. Meteor (Nuke)... People love or hate it. I am on the side of loving it. 🙂 Yes, there is a delay upon casting it before the meteor comes to smash the mob and scatter them across the map (literally - the KB is unreal - and I LOVE it). But again, with the delay, you can queue up other attacks to time the damage to hit before or on the Meteor strike. You can get a full Sniper Shot off in time as well, if you choose. If you've used Build Up or Aim (as you should), most things die outright so the KB isn't an issue. Any survivors are easily picked off. Yes, people have reported mobs being knocked through a wall on a kill all and they had to reset. I've played a lot of content so far with mine, lots of cave maps, sewers, and etc and have not run into this once yet. So I think it is a rare occurrence. And even Nova (Energy Blast) or Storm powers still to this day knock things through walls. So again, I don't think it's an issue with the power - just a couple maps (that you may not even encounter) that have holes in their walls. In summary... I like the set. It plays well. Does decent damage despite being smashing damage. And it's just fun. ...all in my opinion, anyway. 🙂 -
Proposed Changes for Mind Control
Frozen Burn replied to Frozen Burn's topic in Suggestions & Feedback
Yes, a Mind Dom can do amazing things. I know, I have one. Yes, there are great things about about the set that make it unique (2 AOE hard controls and 2 AOE soft controls, like you said) and that is why I like it. However, even as a Dom, it still seems to under-damage compared to other Doms, like Fire, Plant, Grav, Electric, and Dark. Plant Control came mid-game during live, if I recall, and if it hasn't had it's turn at balancing - then this is part of what this thread is to highlight. Mind Control hasn't had it's day in the sun for balancing and tweaking - so it's past time to get these 2 sets tweaked and aligned. Exactly - that's my point. Either be fair and align Mass Confusion with it, or change up Seeds of Confusion. So how about offering up a practical suggested solution to the problem? If SoC shouldn't be T5 and 60s base recharge, what do you think it should be? First, vet levels don't say how good a toon is or how great the power sets are... it just means that the player has played that toon a LOT (and I know you are referencing Number Six who does great things with their toon). 🙂 I too play a Mind/Psy Assault Dom and yes, you can do amazing things, especially since you have the damage set to go with it. Doms are basically blasters with control - a very deadly combo. But as I mentioned above, it kills a little slower compared to other Doms. And yes, controllers with Mind Control suffer - which is what I am aiming to highlight with this thread. The changes I am proposing: align the AOE confuse power with Plant (and get that OP set balanced), and add in pet for extra damage for controllers - these are not game breaking changes. I think we all can see the need for balancing and alignment between Mind and Plant. -
Post your holiday costume designs here
Frozen Burn replied to Techwright's topic in Art & Multimedia
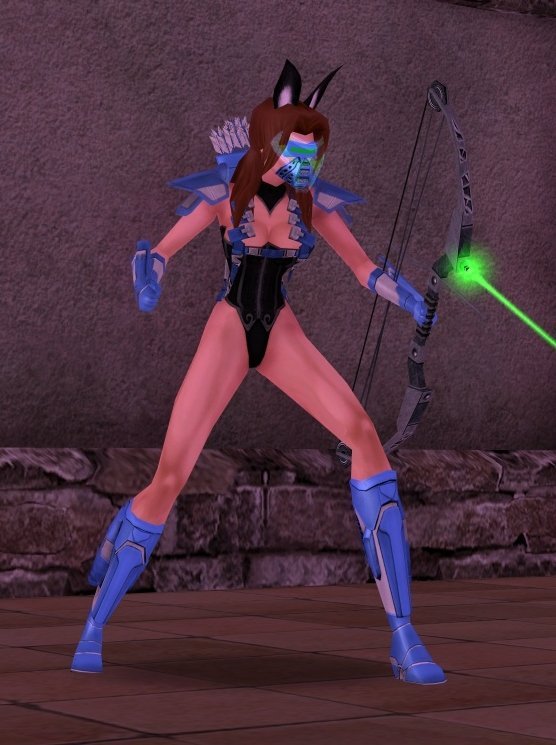
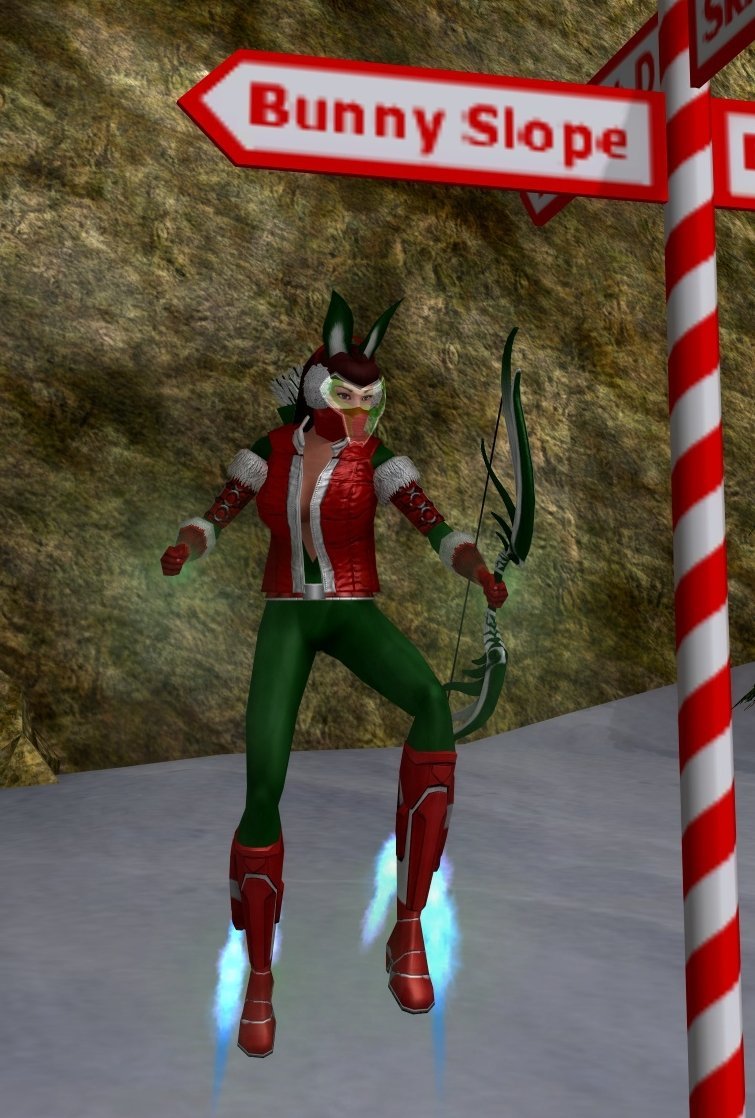
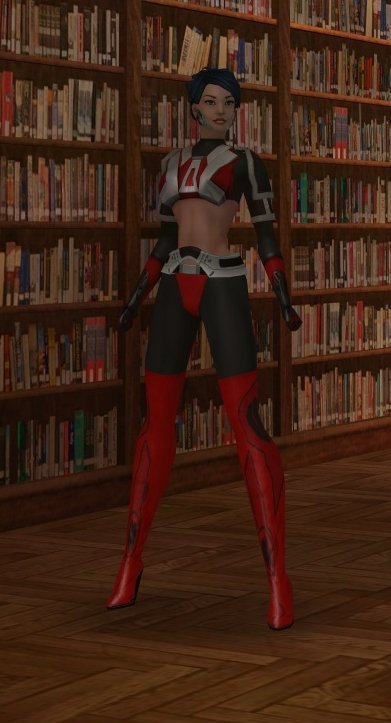
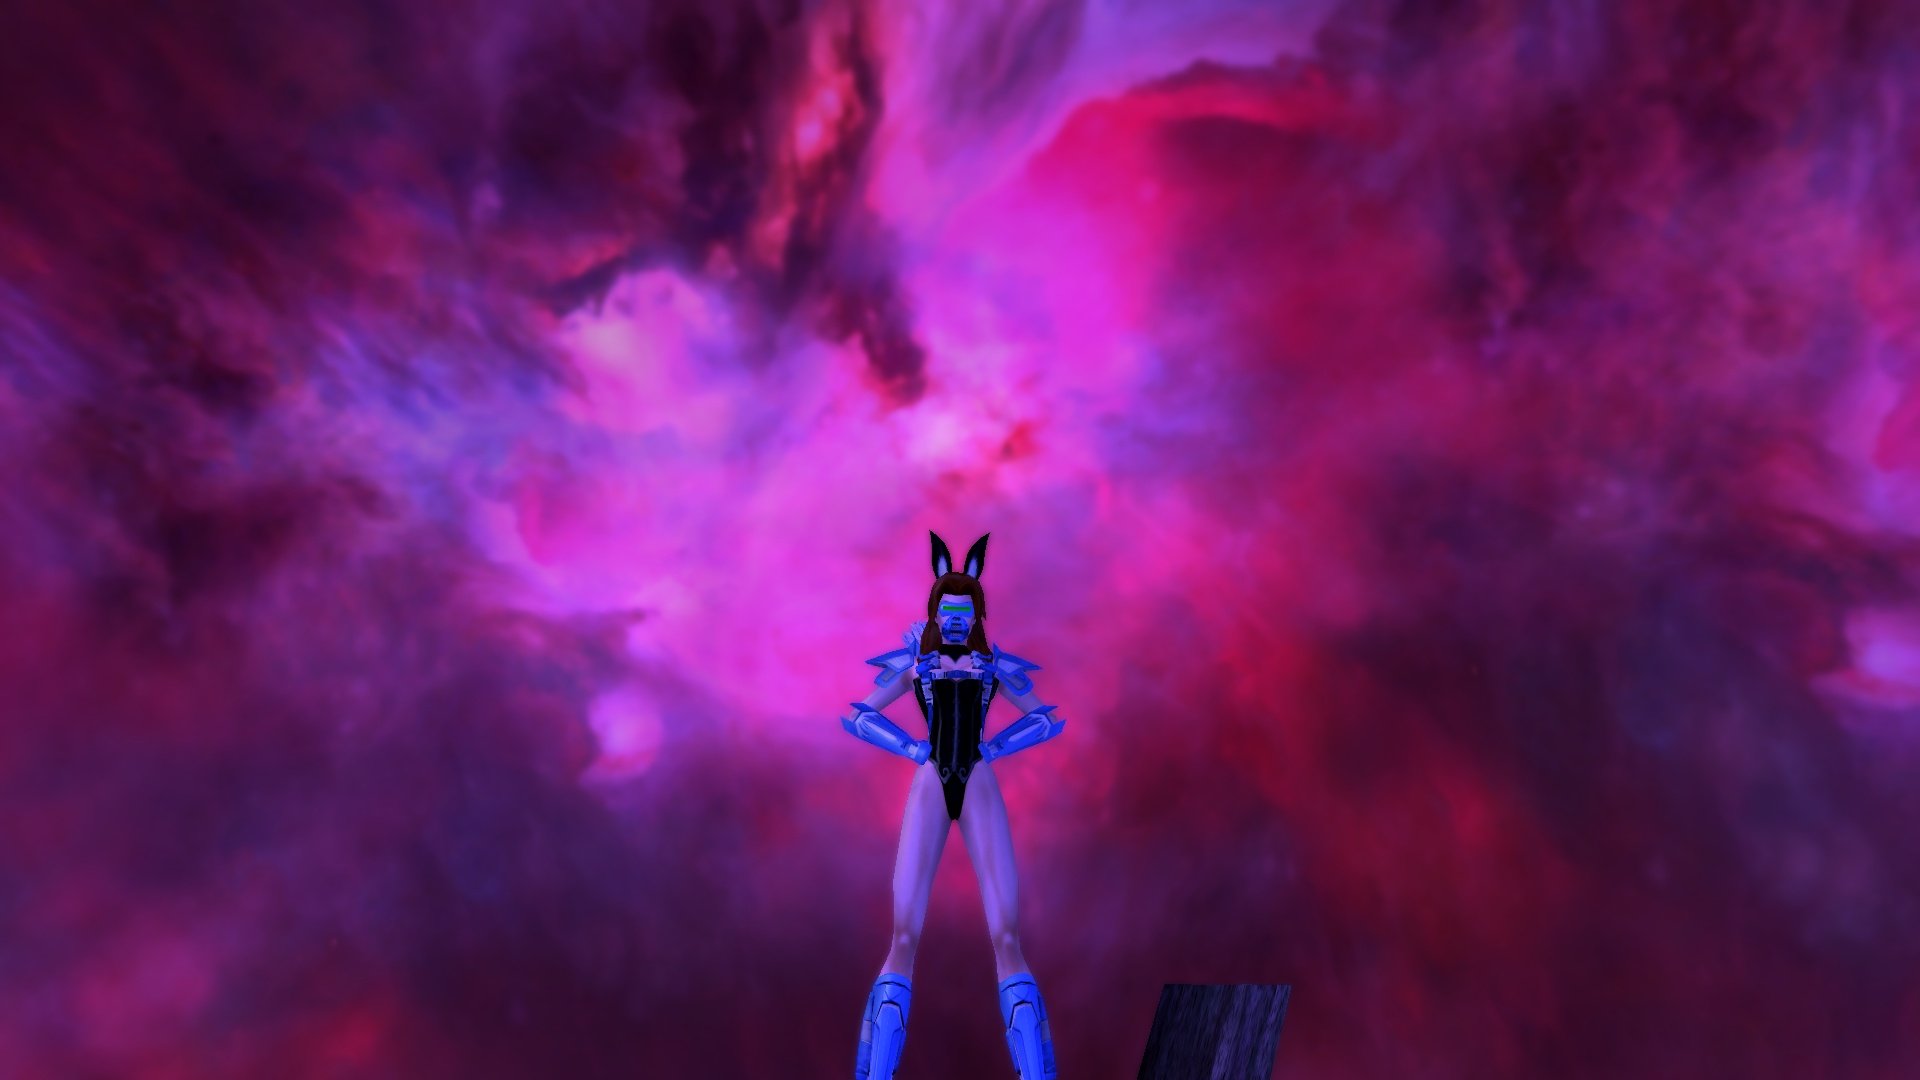
I haven't made many end-of-year Holiday costumes or toons. But I did think that my character Kelly Kane, Former Paragon Playmate of the Year who turned heroine, aka Techno-Bunny, should have a holiday outfit. (Archery/Devices/Munitions Blaster) She has many outfits, but here is her main outfit and her holiday "snow-bunny" outfit. 🙂 And shameless plug.... I have 3 AE story arcs about you the player helping her to become a hero and fight the temptation of crossing lines. Just search for me (@Frozen Burn) or "Kelly Kane" - would love to hear constructive comments.
-
Proposed Changes for Mind Control
Frozen Burn replied to Frozen Burn's topic in Suggestions & Feedback
@Mezmera and @... Yes, I do spend time on the forums, and yes I did do a search and nothing came up on this topic when I searched. There was a million other threads that mentioned "mind" or mentioned "control" but none that I saw that mentioned the Mind Control Powerset. The others must have been buried. 😛 @Mezmera, you are right in that Seeds of Confusion far exceeds what a T5 power should do. But also, Mass Confusion at T9 with 4x the longer recharge is FAR too weak for what a T9 should be compared to what other sets get in the way of their pets (damage, buffs, debuffs, mezzes, and etc). Mass Confusion is a great power but it's not T9 worthy and needs a shorter recharge, imo. And thanks for the invite to team with your Dom, but I also have a Mind Control Dom and love it and know exactly what it can do. And I've played Mind Control on a Controller as well - they don't get a damage set to help get through mobs - soloing is can be quite painful like trying to solo an Ice Controller. Mind Control is just lacking that extra little "oomph" most other control sets have and then there is the blatant bias with Seeds of Confusion. So if we leave Mass Confusion at T9 and the 240s recharge, then Seeds of Confusion needs to seriously be reworked and moved to T9 with a long recharge (which I would be ok with this scenario). But that would cause the pet to be dropped from the set and another power needed to replace the empty T5 slot. I doubt this will ever happen. So we are left with an imbalance between the 2 sets and it should be fixed. Why should Plant Controllers get to have a mass confusion power at T5 and 60s base recharge and Mind Controllers have to suffer and wait until T9 and only get a base recharge of 240s? If my suggestions above were so horrible, how do others propose to fix this issue? Even if you bump up the recharge on SoC, the recharge on MC needs to come down to match - but then still you have the problem of one set getting the same power at lvl 8 vs the other at lvl 32. And fixing that issue involves tinkering with typical T9 pets - one set loses it or the other set gains it. I hear all you others who don't think MC needs a pet or doesn't want the set to be like the others. MC is already not like the others and adding a pet at T9 won't make it "just like the others." And not only would a pet help add damage for controllers, I think it'd be cool to have one of Penny's storms. But I still would be ok without a pet as long as a viable and fair solution to Seeds of Confusion and Mass Confusion can be made. -
I haven't seen a thread on this and I'm surprised since Mind Control seems to be the 1 control set from the original game opening sets that hasn't been updated much and it could really use some tweaking to bring it up-to-date and inline with other sets that clearly outshine it. I'm not looking for a complete overhaul as I like that it's different from other control sets. However, there is one HUGE glaring problem with Mind Control and that is Mass Confusion and lack of a pet and thusly being a low damage output set (compared to other controllers - except Ice which has probably the lowest damage output - but this thread is about Mind Control). 🙂 Mass Confusion - it's Tier 9, with 240s base recharge. Plant Control gets this same power (Seeds of Confusion) at Tier 5 and with a base 60s recharge. How is that right?! Not having a Pet - Mind Control is the only control set without a pet. Back in the day, if I recall correctly, the devs argued "the foes are your pets because you confuse them with Mass Confusion." Well, that has obviously changed over the years and they blew their argument when they created Plant Control and gave them "mass confusion" at Tier 5 and a pet at Tier 9. So, how about: eliminating Mesmerize (Tier 1 single target sleep - which is basically useless), making Levitate Tier 1, Dominate (the hold) at Tier 2 (which is inline with all other control sets), Confuse and Mass Hypnosis at T3 and T4, then put Mass Confusion at T5 with a 60s recharge to be inline with Plant Control, and then at T9 for the pet, we can get Penny Yin's Psychic Storm pet (with whatever balanced powers you devs see fit). Another option would be to eliminate Telekinesis to put Mass Confusion earlier in the set with a 60s recharge and add the pet. I think a lot of people skip Telekinesis as it is extremely situational and difficult to use / master. (I like TK, but like I said, it is very situational.) If it is kept in the set, it would also need to be reworked for easier use. (I'd love to hear other's thoughts about how to do that.) But I think the changes to Mass Confusion to bring it in earlier with a quicker recharge and adding a pet will help the set, help players do a little more damage other than just Levitate (which is a fun power!).
-
Homecoming Pitch for changes to the Force Field Powerset
Frozen Burn replied to ironjoe's topic in Suggestions & Feedback
I think the FF set is pretty fine the way it is. I don't see it as, nor have I heard of anyone saying, it is a subpar set and needs "fixing." It is a superb set providing great buffs for a team. Yes, it's all defense, but that's ok as many people build for defense set bonuses and these shields put them way over the cap completely protecting them. Resists already come from SONIC and THERMAL - so no need to add any here. I do think some TWEAKS can be useful as you suggested: Detention field being a Hold vs an Untouchable; Repulsion Bomb could use an animation tightening; and Force bubble, I'm on the fence about shrinking the bubble size - some more powerful enemies (especially some EBs) can work their way to you pretty close through the repel and if the bubble is smaller, you'd be toast since the bubble draws a lot of aggro. However, I'd be fine with no changes at all either. It's a great set as is. -
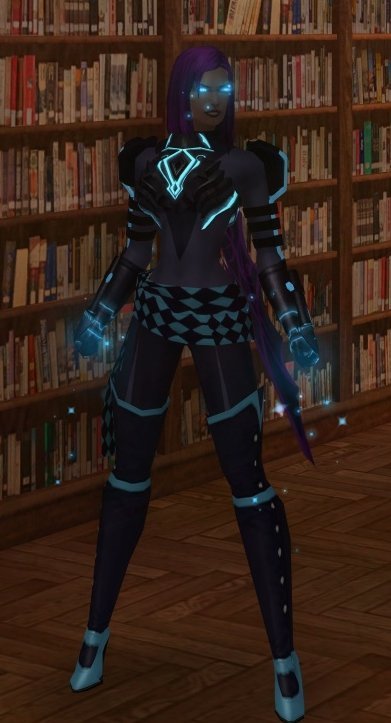
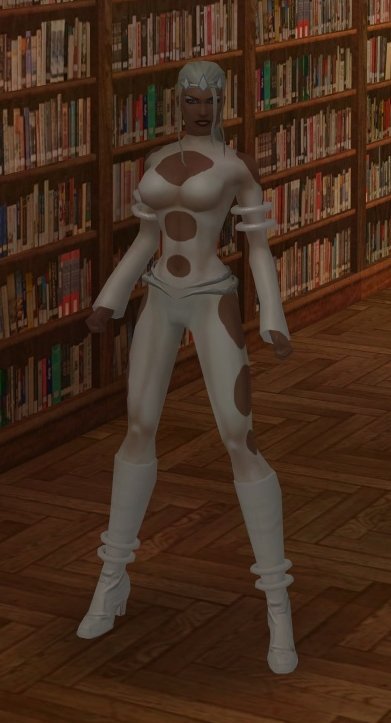
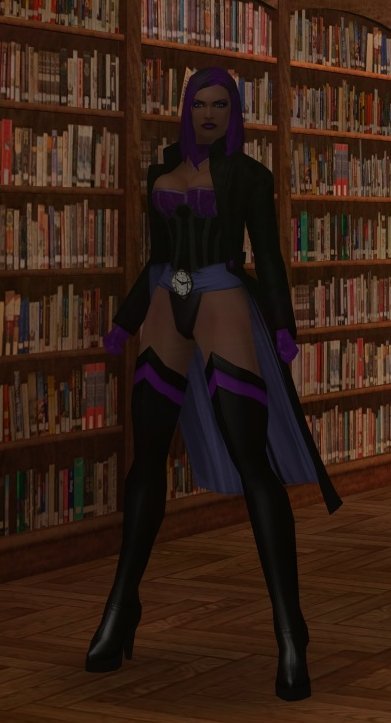
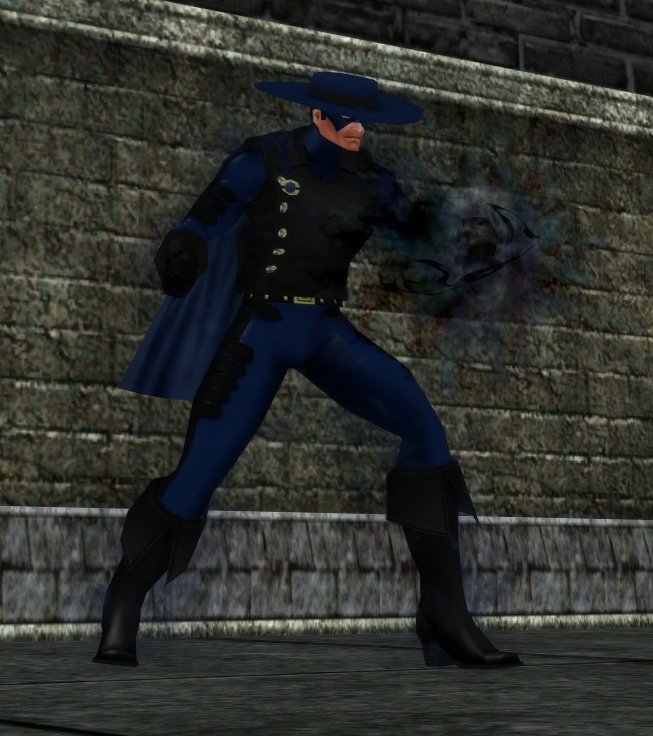
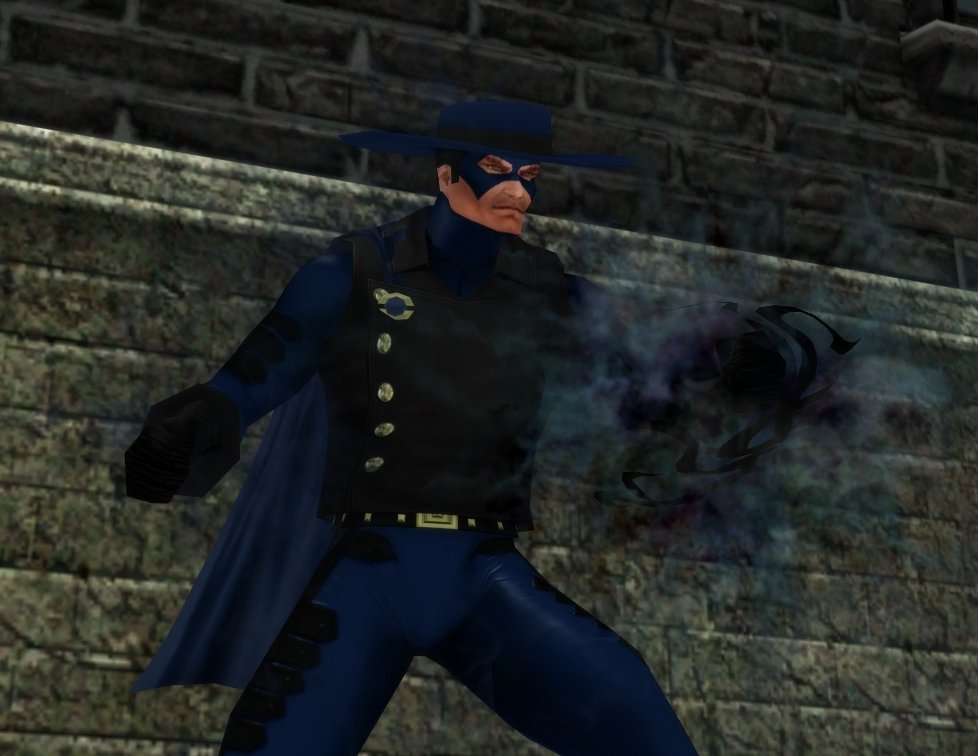
Here's another one of my favorite toons... The Librarian Archivist (Psi/Temporal/Psi Blaster) Basically, her story is that she's an introverted book-worm, studied at Croatoa Annex in Library Sciences and became an Archivist for the Paragon Public Library. She works a lot with Azuria of MAGI and in reading all the magic books, scrolls, and meeting mystics, shamans, and gurus all over the world, she developed her own magical psychic abilities and able to manipulate time a bit. She can also alter her appearance to make others think they're "seeing" someone else - typically another powerful psychic person (like Aurora, Sister Psyche, or etc) to help strike fear into her opponents - or to just blend in. Little original creation on my part here however, the challenge was recreating some signature costumes / looks without having access to the correct pieces.... Her Professional and Casual day looks.... Praetorian Aurora Borealis (this one is pretty spot on replication) 🙂 Primal Aurora Borealis (the rings, belt and tiara aren't exact, but close!) Sister Psyche Mother Mayhem (All the pieces for mommy are unique, so hard duplicate. The biggest differences are not having her head band and that belt with pointy star that pokes her belly) 😄 A Seer.... Penny Yin (Penny also has pretty much all unique pieces, but I think I made a good effort to replicate.) 🙂 Malaise... Countess Crey (we don't have access to her unique hair, dress, and gloves, but I think this is decent effort)
-
All those uncommon and rare recipes that drop... craft some or all of those and sell or convert them into something that sells - or outright use some! 😄
-
A max level character has never been my goal
Frozen Burn replied to Diantane's topic in General Discussion
Well, this explains all the nay-saying and ridiculous comments you make in other posts about ATs and powersets. You never fully experience what an AT, powers, or your characters can do because you don't fully develop them. As pointed out above by @Luminara, mid-30s you're still fighting to get enough slots to get your powers workable and the 40's you're just coming into your own and still developing. But I will agree with you about the content and the journey your character takes. I also am not a fan of grinding or farming - it's just not my thing. I love the content of this game and I like taking characters through different paths of the content from lvl 1 up through lvl 50 and the incarnate. And as for content - there is a LOT of great storying telling at 50 and post-50 with the incarnates that you are COMPLETELY missing out on. My goal is not to get to 50, but rather to fully develop my character and their potential by using the story content. It is very possible to fully develop your character into a post-lvl 50 incarnate on story content alone without grinding. You tout yourself as an "expert" on the forums about powers and ATs you have little knowledge of - and are failing at that. Now you are touting yourself as being solely concerned about content and not the end goal - well, you're failing at that too since you've not experienced half the content in the game because you refuse to get to lvl 50? How about stop posting and just experience the game. You continue to do things only halfway - COMMIT to fully developing your characters, COMMIT to all the powers and AT you choose, and COMMIT to doing all the content before speaking up and down-talking things. -
You are correct, the Annihilator badge is still required for Marshal and seems to be missing from Errants' list above. Good catch!
-
Ooops, right - thank you! Corrected above.
-
Yeah, unfortunately, until Mids gets updated, it's difficult to give specific examples. However, as Meknomancer said, you can use other powersets + some imagination to help get you close.... So in Mids, use Archery for your primary - it has the same type of powers (Single Target, Cone, Ranged AOE, Stun, etc) in the same tiers as Seismic. Obviously, damage numbers, recharges rates, and etc will be different, but you can at least plan out the powers to take and when, how many slots to give them, and what sets to put into those powers. As for /Earth, unfortunately there is no blaster secondary with the exact same types of powers in the same tiers. However, Sonic does come close: Power Tier /Earth /Sonic T1 Immob KB T2 Single Target Melee Single Targe Melee T3 PBAOE Sleep Single Target Hold T4 Build Up Build Up T5 PBAOE Dmg PBAOE Dmg T6 Toggle: +Recov, +Regen Toggle: +Recov, +Absorb T7 Toggle: +Acc Toggle: Foe -Res T8 Ranged AOE Stun Cone Stun T9 Single Target Melee Single Target Melee Your T1 (immob vs KB), T3 (sleep vs Hold), and T7 (+Acc vs -Res) will obviously be slotted with different sets, but the rest of /Sonic could be slotted similar to /Earth. Good luck and have fun!
-
Basically, the Talons of Vengeance corrupt others and transform them into more of themselves. For instance, in Master Midnight's arc in First Ward, you will see how the Talons corrupted the Carnival War and they became the Carnival of Vengeance. Similar to DA arcs where the Talons corrupt the Knives of Artemis into being the Knives of Vengeance.
-
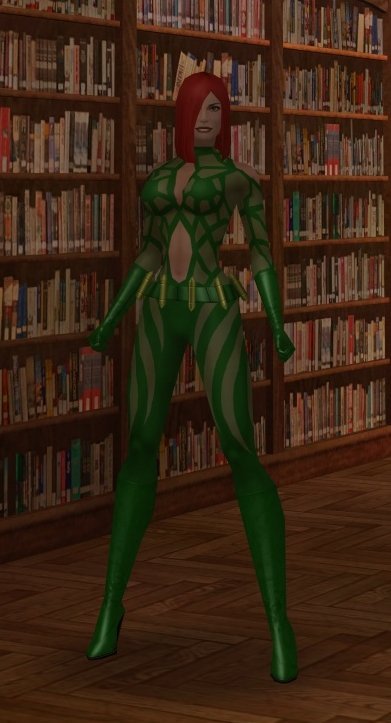
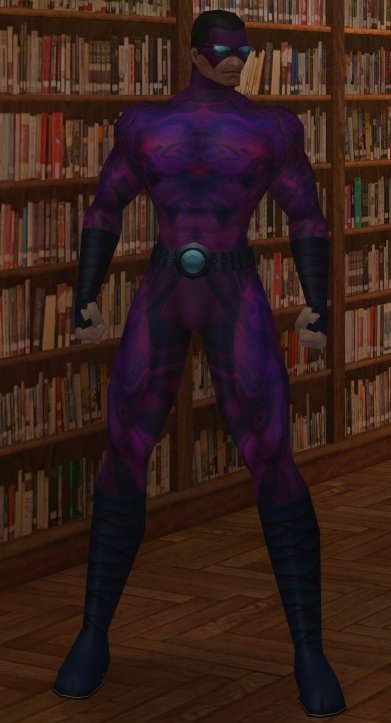
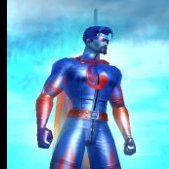
Sable Spectre (Dark Melee/Shield Scrapper) Lurking in the darkness of night and the shadows of day, that’s where you’ll find me; prowling; searching; hunting. For what, I don’t know. But I need it; whatever it is. It calls me; wants me to find it. And I have a need to find it; I don’t know why; but I must. It’s tough to find something when you don’t know what you’re looking for. What is it? An object? A person? Maybe. Maybe a memory? …A memory.... I have memories... I think they’re memories. They’re just flashes; incoherent, detached, and dark. They flip by like drawings on pages of a stop-animation book. They’re all I have left of my life. I think they’re of my life. What else could they be? They haunt me; plague me; follow me like a ghost in the night; a spectre. Over and over they play like the old serials from decades ago. At least I assume it’s been decades; the world now is nothing like what it is in my memories. Things look different. But somehow, people seem the same; cruel; uncaring; unjust. Yeah, there are exceptions; there always are; innocents; good people. But I don’t know them. Maybe at one time I did; but not now. Everywhere I turn, there’s still mayhem; corruption; murder; death. Death? Wait; I know that feeling. I think I was dead once. I don’t know how I died, but I remember feeling cold with darkness surrounding me. I don’t know for how long either. But something brought me back; back to life. I remember waking; still surrounded in darkness; like a black veil covering me that I could see through. I can’t remember. Why can’t I remember? If I died, I should know how. I should know why. If I was brought back, I should know who I first saw. Maybe it never happened. ...No. That’s not right; it did happen; I can feel that it happened. I was dead; and now I’m not. But something is different; something new; something unlike how I am in my memories; at least I think it’s me in the images that flash through my mind. I have new abilities; powers; dark powers; powers that allow me to do things that I couldn’t before. The darkness surges through me; urges me to use it. It’s as if it has a will of its own and guides my instincts and actions. It makes me strong, fierce, and vicious; like a sable hunting its prey at night. Oddly, the darkness lets me see the world more clearly; especially at night, and in the shadows. It lets me see into the hearts of men. It pushes me to strike out against the evil ones; to bring them down. The darkness makes me feel good when I do; almost too good; like a junkie getting his fix. Is that what I’m searching for; the satisfaction of bringing down the corrupt and unjust? No, that can’t be it; no matter how many I bring down, it’s not enough to satisfy the craving. No, the darkness is leading me to something; I have to find it; can’t stop if I tried; just like I can’t get this thing off my arm. Yeah, there’s something attached to my arm now; a device of some sort. I don’t know what it is exactly; who made it; or who put it there. I awoke from the dead and it was there. I can’t remove it; but not sure I really want to; it activates when enemies are near. T he dark power courses through it and shields me; protects me. It lets me know who to trust and who not to. If it activates and you’re near, there’s a good chance you’ve done something evil and I’ll be coming for you; unless there’s a lowlife standing behind you. Whatever the case, when this shield activates; you’d better run and pray it’s not you I’m coming for; I won’t stop; can’t stop; the darkness won’t let me.
- 8154 replies
-
- 14
-

-

-
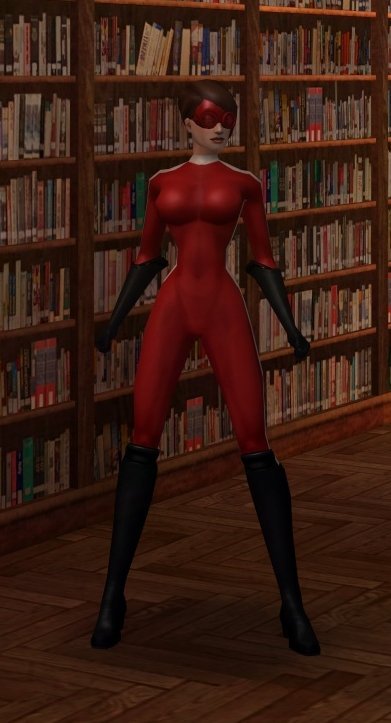
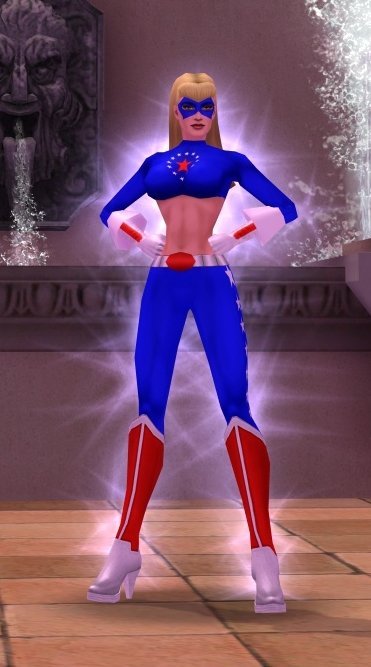
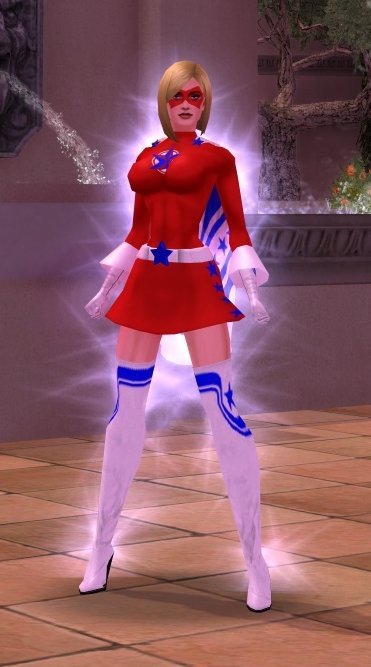
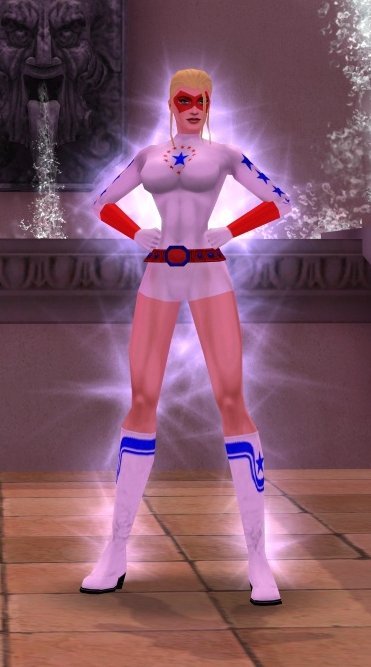
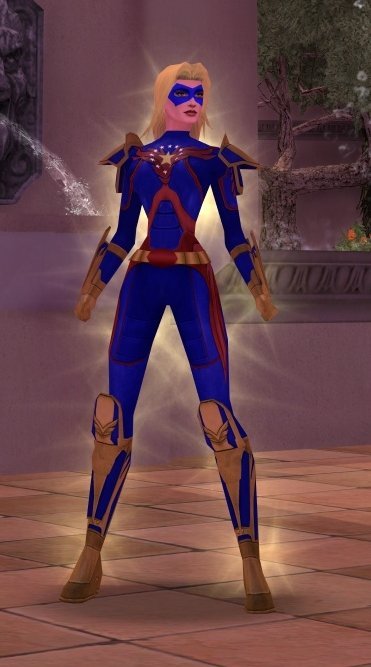
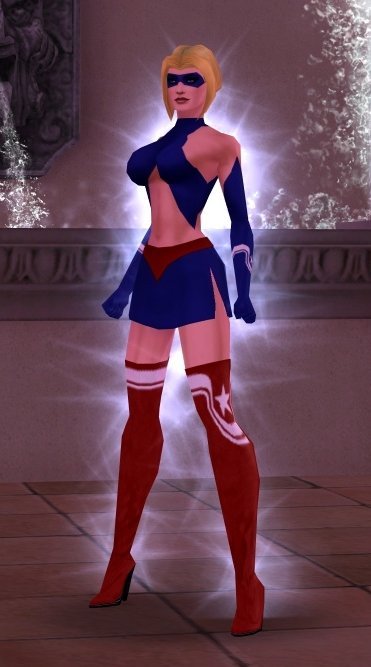
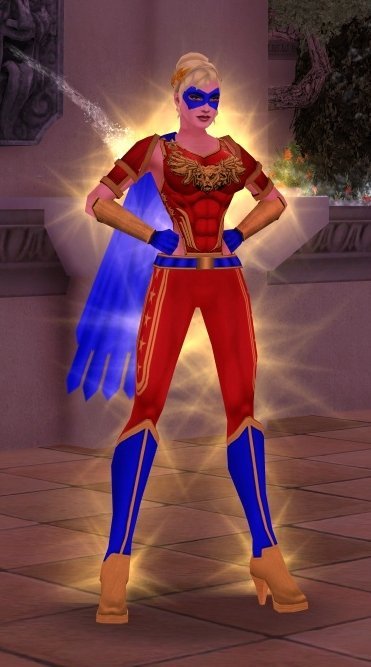
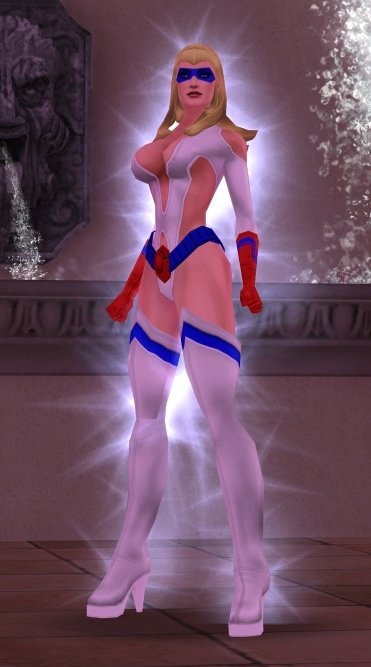
This is "Victorious Star" - my patriotic themed character. Energy/Martial Combat Blaster. Classic "Armored" look.... For her Martial Arts tournaments.... Many young Superheroes still have to go to school.... Retro Armored look and for fighting those nasty Romans.... Her glam comic book look....
- 8154 replies
-
- 13
-
-

-
-
Seimic/Earth more of a utility/controller than a high DPS blaster
Frozen Burn replied to Diantane's topic in Blaster
I think you've completely misread or mis-understood what the powers do... and I'm not sure how. This is a very blastery set and does decent DPS. THere is moderate control like there is in other sets. You say there are only 2 single targets attacks, but there 5: Encase (it is NOT a hold), Shatter, Entomb, Tombstone, and even Stalagmite (which is a stun) does "extreme" damage when you have Seismic Shockwaves going. Then you have 3 AOEs and Aim - like most other blaster sets. Very little "control" there excpet for the KD that you get with some powers and the 1 Stun. Also, Tombstone works in combat without being interrupted and does high damage - it should be a part of your attack chain like any blaster set's snipe. If you're constantly being interrupted out of combat and not being able to "snipe," then you need to learn to not draw aggro to yourself prior to winding it up. As far as /Earth goes... Yes, you get a PBAOE sleep and targeted AOE Stun - those are your only 2 more "controllery" type powers. Most blaster secondaries have "control" powers - it's what helps you survive (even though many skip them). Other powers in the set do provide control too, but they are more Attacks as they do damage, like: Stone Prison (mod dmg, + immob), Heavy Mallet (high dmg + KB), Tremor (Light dmg + KB), Seismic Smash (Extreme dmg + hold). If you cannot find how to make a blaster do damage with these 2 sets, then you aren't building or playing your blasters right. I saw your other post about a Will Power tanker who was having trouble and you basically told him can't "fix a bad AT" or the WP set. I really think you don't understand much about the game, the sets, and how things work. Perhaps you need more time playing and really learning the ATs and how the various powersets work before nay-saying things? -
Melee Radial Embodiment & Annoying Fleeing Mobs
Frozen Burn replied to zrgallardo's topic in Blaster
I thought the devs took away the "flee / fear" from Burn? Ice Storm definitely make them want to run. I am an Ice/Fire/Fire Blaster and have melee radial hybrid, and don't really notice any effectiveness of the taunt - even on other blasters that I have the power on. When solo... they're all focused on me anyway - but usually flopping in my Bonfire (with KB-to-KD proc) or Blizzard. When teamed, it's not enough to overcome a tanker's / brute's taunt. -
In addition to all the great suggestions above and going down the obvious route with powers and sets that provide Defense or Resistance.... Many don't think about mitigating incoming damage outright by using your crowd control powers: holds, sleeps, stuns, KB/KDs, and etc. Effective use and stacking of these powers can be more powerful and make your blaster extremely survivable. My main and namesake (Frozen Burn) is an Ice/Fire/Fire blaster without leadership, without fighting pool, and lives and survives in melee with only 6-11% defenses and 10-50% resistances. Most people would see the build in Mids and scoff and think "no way" but the crowd control + the damage output (especially the AOEs) make it one of my heartiest blasters. Playing a Blaster is all about using what you have at your disposal to dish out the damage and then survive (including using inspirations - many scoff at or discount using them too) ...and then yes, leveraging power choices, pool powers, and epics - and even incarnates, to round out your build. FB's build, if you're curious.... https://www.midsreborn.com/builds/download.php?uc=1491&c=704&a=1408&f=HEX&dc=78DA8594594F135114C7EF74A694522A947D15CA2245E8400571232141C554AC56F1D59002231DADD3A64C417049FC0A9A68A22C26EE3EF8E4F6757CD318D4448D1A97F1CC9C7F697D7212F8DDFB3FEB9CB9B7B18B87CA9F1DB9362624FFC1546261617A9CFE9B5AB634963313A69E36043D81896C7A4533DAC77359A33D64684BBD1E521BE03A7D2A61CC6B736A7456E3E860DE3095CB64D259539DD0B3DA742C61E8995CCA491A881A492DAB19A69A5FF8E2E9744A9D48E9F349B3CC594F65346D2EE02CA3C6A2BEA0CFE829DD5CAE7294D35A4AB3533BD9AA0E67F4598A4D5CB0ABD895971BA8BF5EFA8B8AFC63C9E21E21A208D74366C97D66C303E662C157885182228BA30409F1D27FE2270932FB2AF273C5D19417E04B66F92BE6B6D7CC25F27623C67D96F3549E03E7993549668FCE8C113C1CE3F22425472B4D81E799CB64F522AF5770AD320974A11719BD284C1F25F5E1FD7D9D5CEB18C10FCDDFC7DA0AA1025A05B413F62941BD80EA72B4AA01B09F5933C8AC0BDB2C1197C8BBDA19AEE5AEBECEB6E04D66D70D66EF3B99F91E7CCBECA05E6B3956AA757AF08A3AD04FB67AB6C9F5B53C8FAE498EEBF94E72AB22C29F791FA76D2366D9885936E920667A99ACCDCE29B0DCCD3FB9AF965FE06FE6F63FA005DA2781EA1CB7CB6156AD7BD87692766DACB9DB6E731FED77C055708D195C0737985728AA0373EED8CBF93AF781FBC10398E128F32A797763CEDDABFCAD77AC81EBE006B3E72E3332263BDFE81121845E43BB38DFCE217018DCCD0C8F30236FB8D727843ED4EDFBC15AFF17F02BF88D39607F309AD7C030EF1F1354CC4D1D219408F194B4416883387741257F412DAB4529BABF4D38BF053B5D08EE2FAE6CDD692121CF661969F093C2C279F70FC55A88FD3E1634490AA2F74DE6A782CD25DDC24C70AE2338CFD6BFCF5071CB615170F1566EFD965871CA1BC13B9E295A278AD63345EBBF8AB9EA5B
-
Seismic Blast's Meteor: how are you utilizing it?
Frozen Burn replied to Techwright's topic in General Discussion
Ok, Now that I have Meteor and have played with it for a while, yes, it's like OLD Rain of Arrows (before animation tightening) and have to "think ahead a bit." But still, it's manageable. I absolutely LOVE this power. And I love the massive KB even on indoor maps. With BU and/or Aim powers or some reds... things die, so the KB is a non-issue. If anything does survive, they're easily picked off. I am Seismic/MA and have inherent BU, so for my attack chain, I'll hit Seismic Force (aka Aim) that has the Gaussian proc in it which almost always goes off, launch meteor, then launch Upthrust, then do Burst of Speed (TP into mob) and it all hits at once for one HUGE alpha strike. Not much survives, if anything. Other times, it is AIM, Meteor, Upthurst, Rock Shards. -
Mezzing is part of the trade off you get for being a blaster. 🙂 Carry break frees. Set bonuses help too, but they only reduce the duration of the mez, not protect you from it. You shouldn't have any trouble with immobs since you have Combat Jumping - if you do, then they are stacking a lot of them on you. And since you have Jumping pool, you can pick up Acrobatics for hold/KB protection. Don't forget your T1 and T2 primary and T1 Secondary can still be used while mezzed - they've saved my life many of times while mezzed. Once you're incarnate, you can get Clarion Core Destiny for perma mez protection. Till then... carry break frees. 😄
-
Blasters are supposed to be the most powered AT. Eons ago, the highest was Scrappers because they're were in melee and didn't have defenses as high as tankers. But that was switched because blasters have many secondaries that cause them to go into melee and they didn't have the defenses to survive - so Devs made squishie blasters the highest powered. This is correct and as it should be. Highest damage / no inherent defense. Yes, SOME blasters (not all) can get capped defenses with sets and special builds, but not all can (and this can be said about any AT). So it still stands that Blasters should reign king on damage. I agree with you, Meknomancer - Tankers are now overpowered for what they are / provide. Unfortunately, it started with the Brutes whose defenses weren't as good as tankers, but the AT was the "tanker" for villains. The Brutes got beefed up back during live and with any AT being able to be hero or villain side, there was little or no need to roll a Tank, because a Brute could "Tank" and do more damage - they really made Tanks a useless AT, sadly. So I was pleased that Tanks got a rightful buff to damage - they sorely needed it as soloing was painful - but they went too far with it. IMO, both Brutes and Tanks need a slight tweaking... Brutes need lessening on the defenses, and Tanks need lessening on the offense (but both still better than what they were previously) - just need a better balance to keep the ATs separate and unique and balanced with other ATs.
-
Seismic Blast's Meteor: how are you utilizing it?
Frozen Burn replied to Techwright's topic in General Discussion
I don't have Meteor yet - close to it, though! So I appreciate your comments and "warnings" here. I will say that I do really like the delay in damage from Upthrust so that it's timed with the animation. I know it's different from other powersets - part of the reason I like it - but I also like that I can cast Upthrust and then port into the middle of the mob and do other AOEs right as Upthrust hits. Bopper's comments on timing Upthrust with the delay of Meteor sounds like it would be right on par with what I'm doing. However, as you've mentioned, that may be different when teamed. I suspect, I'll have to play a little like my Archery/Dev blaster and "think ahead" of the mobs and Tanks/Brutes herding. I would have to cast Rain of Arrows where I thought the mobs will be herded so that I could time the damage hitting correctly. Many-a-times I've staked dead corpses to the ground with Rain of Arrows because I didn't cast soon enough. (Adding in Trip Mines / Timebomb ahead of the herd only added more foresight needed.) 🙂 Anyway, looking forward to trying Meteor out and may have more comments later on after trying it out.