BGSacho
-
Posts
116 -
Joined
-
Last visited
Content Type
Profiles
Forums
Events
Store
Articles
Patch Notes
Everything posted by BGSacho
-
It's weird that the GKs are performing so poorly - do you happen to have a combat log for that fight? Taking their theoretical DPS into account, the GKs should output about 50% more dps on the pylon than the zombies. You have degen interface, which is maybe slightly more damage for the zombies, but the results shouldn't be this disproportionate. The problem with SA on T1s is twofold: 1) The effect scales down. It's 60%-80%-100% depending on the pet tier. 2) The purple patch is brutal on T1 dps. even if they do more damage to +0s, they'll be quickly outpaced by T2s(and maybe even a good T3) vs higher levels As long as your pet has enough skills to rotate through, it will maintain almost constant SA uptime - this doesn't depend on the number of pets. All of this means that SA is probably best placed in T2 or T3 pets, depending on the AT.
-
Here are some other builds that are min-maxed in a similar manner, to provide you with access to good defense, high dps and good AV killing potential. As you can see, they both have notable weaknesses. The grass is just not that much greener. Bots/Time - Time has many strengths, but its biggest issue is its lack of -regen. Here come bots, providing all you need. The bots generally lack ST damage, but do great AoE. /Time is a fairly hands-off set which allows you to rotate 2 MM attacks(thanks to the copious +recharge of /time), bolstering your single target DPS. With bots + farsight, you can softcap without having to take power boost, which means you can also take a res shield, bringing you to a fairly ridiculous softcap def + softcap res. Even then though, bots/time is more of a steady "I'll kill it eventually" build than the absurd dps the other variations can dish out. Thugs/Traps - Thugs/Traps is the ultimate house of cards. When everything goes right, it's positively insane. Unfortunately, you're juggling a bunch of extra pets, small auras(20ft and 30ft) and generally have tons of ways for critical failure. But let's ignore that for now and focus on the strengths. Thugs are fairly self-sufficient, but they lack -regen(poison trap, check), and struggle to softcap their defenses on their own(FFG - check), and they have low res(welp, you can't have it all). They have absolutely brutal dps, with enforcers tricked out in procs demolishing the AoE dps charts(backed up by the arsonist!), and the Bruiser of course is just a ST monster. Thanks to their superior slotting options, they're not too far from Demons in terms of -res - you can slot achilles heel into enforcers and mortar, and annihilation into caltrops/mortar. The seeker drones are a neat gimmick to help you set up your area of doom, and the FFG provides some reasonable mez protection(although not the most important thing for MM - knockback). What this set really lacks is a reliable heal - triage beacon is just too slow on pets(and has a STUPID recharge for some reason), and taking medicine strains your power picks. Still, when everything goes right, Thugs/Traps is probably the highest performing set in terms of pure DPS output. Thugs/Dark - it mostly plays like Demons/Dark, with slight differences in how you put together the build Demons/Thermal - really really tanky demons(90% res!) and a smattering of everything else(heals, -regen, -res, etc..). The lack of slotting options on multiple powers make it a bit ehh. And a few more builds that are even more skewed to a particular strength, but with more glaring weaknesses: Thugs/Storm - pure raw DPS. Thugs have reasonable defenses to kinda-sorta survive on their own. Works better than Demons/Storm, counterintuitively(you'd think -res + storm damage = good!), just because the thugs are more survivable on their own. Subpar healing, no -regen. Bots/Traps - Trades healing/+recharge from /Time to capitalize on gadgetry from Traps. You pick two spots - Spot A is your circle of friendship, and Spot B is the pit of doom, and Bots/Traps allows you to maximize the love and happiness radiating from the circle, and the pain and sorrow in the pit. Ninja/Time - lulzy ST dps with fairly robust defenses. Struggles with AoE, lacks -regen.
-
In my opinion, Demon/Dark is one of the most min-maxiest choices you can make, in terms of overall "viability" of your character. It's not the top dog in any particular area(except maybe debuffing enemies), but it consistently ranks n2 in almost every category, meaning you have a very well-rounded character able to handle anything that comes at them. Here are the reasons why. I'll start with why each set is an individual powerhouse, and then why the combination is incredibly synergistic. Demons Theres no question that Demons is a top-tier primary set. They do amazing damage, they're sturdy, they have utility, -res, a variety of damage types, they make everyone ears's bleed with their shrieks of joy. Here are some highlights of why Demons is a min-maxers' top choice: - Damage. Demons and Thugs are the overall top-tier MM dps sets. Other sets(ninjas in ST, bots in aoe) can beat them in particular scenarios, but in overall gameplay, both Thugs and Demons do extremely well. They also provide their damage in smash, fire, cold and toxic varieties, giving you options vs certain tankier mobs(especially high s/l res ones). - Resilience - Demons are very robust on their own, especially to burst damage. They'll be sporting 75-80% s/l res(yes, pets can go up to 90%) plus a bunch of misc resistances. MM pets are very prone to dying to burst damage going through defense, even if you have good healing, and Demons are the toughest pets in that regard. - Utility. You've got a pretty decent amount of -res - in regular combat, you're usually looking at 40-50% -res. They also sport a +22% s/l(and a little bit of others) shield to the MM, which makes slotting much more relaxed - you can drop fighting and still easily achieve 75% res, for example. The Ember Demon has some OK heals, but they're mostly irrelevant when combined with /Dark. The demons also sport a hefty amount of -recharge, thanks to the Prince and the Cold Demonling - Speaking of the Prince, he's a champ. Challenging the Bruiser for the N1 spot in pet DPS, he also provides a spammable hold(which does damage!), a massive -recharge debuff and even an aoe sleep. He also has a reasonable amount of baseline def(although he sacrifices some of the innate res that the other demon pets have), which means he can also be reasonably softcapped. - The Gargoyle is no slouch either. He competes with Jounin(!!) in terms of ST damage(although the ember demon is a let down there), and is a slight runner-up to Enforcers(!!) in terms of AoE damage. He's also very sturdy(80% s/l res), so your frontline(you, garg and prince) is fairly resistant to gibs. - The demonlings are the baseline highest dps T1 pets, but their lack of procs kind of puts them behind Punks or even Soldiers. Still, their well-rounded kit of ST and aoe damage, plus their high survivability makes them great pets. - The demon primary attacks are really good. Lash can be slotted with procs and Force Feedback(FF) for a roughly +15% recharge bonus if spammed dutifully. It also provides ~10% -res on top of everything else you have. Crack Whip is "nice" but the end cost can be rough. The attacks are also very stylish, which means you're not just minmaxing stats, but also looks 😁 Dark is also a powerhouse. It's a set that has a single throwaway power(Black Hole), two good-in-every-other-set-but-mediocre-in-dark(Fearsome Stare, Petrifying Gaze), and a bunch of powers that are absolutely OP. Each one of the core /Dark powers usually provides a combination of effects "normal" sets will see spread out over several powers. It's just that good. Dark provides copious amounts of debuffs, healing, -res, a resurrect, an OK defensive power, and an extra OP pet. - Twilight Grasp - yeah, this one's just insane. It heals(more than Time's heal), at a lower recharge and endurance cost(you can actually make it cost practically 0 endurance if you slot theft of essence). But that's just the beginning. It also provides *stackable* -hit, -dmg and -regen. You can comfortably stack it 3 times if you're casting it regularly, and the Dark Servant provides another 3 casts(which have higher stats than yours, since he gets Defender scaling, of course). It's just brutal. - Tar Patch is one of the best -res powers - 30% on a long duration and fairly short CD, allowing you to sometimes stack 2 on top of each other. It also happens to be a slow(sure, why not?). It's also very easy on the slotting - just throw 2 -recharge reduction basic IOs and you're good to go. - Darkest Night is a strong debuff to neuter boss mobs, doubly so because your Dark Servant will also cast it. - Howling Twilight is an aoe stun and fear which also debuffs -regen massively, and happens to res people as well. Yeah, most sets get these as individual effects, but not /Dark. The combined power of your + the Dark Servant's debuffs is staggering. We're talking about 2 holds, fear, stun, layered with a thick sauce of -150% hit(!) and -90% damage(!!). At those values, even +4 AVs start to take notice. Dark also allows some pretty rad slotting options - Shadow Fall gives you a place to slot the +3% def IOs if you have nowhere else, opening up some build options. Fearsome Stare and Dark Servant both accept Siphon Insight, which allows you to super-stack +s/l def(and some global accuracy to save you slots elsewhere). Three of the key powers don't really need much slotting - Tar Patch, Howling Twilight and Darkest Night can operate well with just 2-3 slots of basic IOs. What happens when you add Demons and Dark together? Well, let's mix and see: Demons have two primary weaknesses in terms of resilience - low def, and res holes. Dark plugs the res holes really nicely(buffing most of their resistances to ~50%). There's no powerset that can reasonably softcap the demons, but thanks to /Dark's debuffs, you can effectively softcap them in many situations. For the rest of the situations, there's tankerminding. Speaking of tankerminding, Demons/Dark is an amazing set for it. You have extra res from the demons, opening up possibilities of not taking fighting and still sporting 75% s/l res. Dark provides middling def but great set bonuses, allowing you to either softcap s/l def with scorpion shield, or get to the 32.5% purple insp breakpoint, while also relying mostly on your ridiculous debuffs to keep you alive. You're also gifted with multiple heals to handle incoming damage, and the demons are resilient enough to take stray hits and live. Dark's one hole in terms of debuffs is -recharge, which Demons provide ample amounts of. This means that with Demons/Dark, you're debuffing every stat your enemies have. It's almost like you're fighting lower level mobs(and thanks to the -res, they'll die as fast too!) Demons/Dark does have its weaknesses. Most MM builds are a house of cards and Demons/Dark doubly so. If your line of debuffs fails you, you have fairly middling defenses. Without constant support, it doesn't matter that the demons have high res, they'll still die because of their lack of -def. Knockback will be the bane of your existence(and you will love and praise and cherish Clarion Core). Overall, I would call Demons/Dark an incredibly min-maxed combo, in terms of being able to excel in every situation. You won't have the best tools for each individual case, but the builds that do usually make up for it by having significant weaknesses in other areas. Demons/Dark is just good at everything. BTW, petition to swap Dark Miasma for Darkness Affinity, so you can have softcapped def + 90% res demons running around next to a softcap def + 75% res MM. Yes please.
- 47 replies
-
- 14
-

-

-

-
I don't have experience with Necro/Dark per se, but my favourite MM secondary is /Dark, and I play a lot of Thugs/Dark and Demons/Dark In order to really figure out how you want to slot a build, you need to analyze its strengths and weaknesses. First, let's start with the bad stuff: - Necro theoretical DPS is a bit on the low end due to the lich - Necro pets are very fragile on their own, and Dark has limited buffing power - The purple patch(https://paragonwiki.com/wiki/Purple_Patch) significantly inhibits debuffs, and so does AV resistance. - Dark has a high(but mitigatable) end consumption Here's what you're getting out of your MM: - If you can keep your pets alive, you will do more dps than most supports, even as a Necro - Dark contains two strong, spammable mezzes - Terrified, and a very high mag Hold(you + lich + dark servant == 9+ mag!) - Dark has a staggering amount of -hit, -damage, and a decent amount of -regen - Dark has an amazing heal(Twilight Grasp) - Dark has a res(Howling Twilight) - You can combo Howling Twilight's stun with the epic pool Oppressive Gloom to pull a third mez out of your hat(4mag stun for 15+ seconds) - Dark provides a very strong, stackable -res debuff(Tar Patch) Here is how much -hit you can stack as Necro/Dark: Grave Knights: ~5% x 2(they will fairly reliably cast either dark blast or gloom, even when meleeing) Lich: ~5%(Dark Blast) + ~5%(Torrent) + ~5%(Tentacles + Life Drain, since they have a high recharge), + ~12%(Fearsome Stare) Dark Servant: 30%(Chill of the Night) + 15%(Darkest Night) + 10-15%(Twilight Grasp stacks) + 5%(Tentacles) You: ~5%(Gloom) + 7.5-10.25%(Twilight Grasp stacks) + 11.25%(Darkest Night) + 11.25%(Fearsome Stare) This gives you a total of ~135% single target -hit, and roughly ~85% aoe. Even just applying the radial intuition incarnate, this gives you ~160% single target and ~100% aoe. With the purple patch, that's still enough to completely floor the hit chance of any minions. You'd also be applying about 15-20% -hit to a +4 AV, which is OK, roughly in line with how much defense buff-oriented secondaries give. But that's not all, you also stack -damage: You: 15-22.5%(Twilight Grasp), 22.5%(Darkest Night) Dark Servant: 20-30%(Twilight Grasp), 30% (Darkest Night) This gives you a pretty potent ~90-100% -damage, which will absolutely wreck the damage of anything. You combine this massive -hit and -damage debuffing(not to mention the casual mezzes flying around) with one of the best heals in the game - Twilight Grasp...and you have TWO copies of it! Your buffed Twilight Grasp will heal roughly 400 hp, and your Dark Servant's (likely unbuffed) one for about 200 hp, at a very low endurance cost and recharge(8 seconds!). This means that as long as you're in control of the situation(and everyone is huddled around you to get the heal), very few things will really threaten you in any way. Besides these already significant debuffs, /Dark sports a decent -regen to counter AVs. Between you and the Dark Servant spamming Twilight Grasp, you will have roughly -250% regen stacked. You can also cast Howling Twilight for another -500% regen for 30 seconds, but it's unlikely you'd be able to perma it, so you can view your -regen as roughly -500% combined over a long fight With the following in mind, here's a basic outline of a build, which slots your pets and takes the key Dark powers. The focus of slotting is on getting high -hit in key powers, introducing as many endurance recharging gimmicks as possible and slotting all the amazing recharge options available to MMs. The pet slotting is a bit subjective - I personally think MM pets don't need recharge slotted(you already have a lot of global recharge and shouldn't really need to keep recasting them), and that damage/utility procs are more effective than the stats IOs can give you. Villain Plan by Mids' Reborn : Hero Designer 2.6.0.7 https://github.com/ImaginaryDevelopment/imaginary-hero-designer Click this DataLink to open the build! Level 50 Magic Mastermind Primary Power Set: Necromancy Secondary Power Set: Dark Miasma Power Pool: Speed Power Pool: Leadership Villain Profile: Level 1: Zombie Horde -- SprMarofS-Acc/EndRdx(A), SprMarofS-EndRdx/+Resist/+Regen(5), CmmoftheM-Acc/Dmg(5), SprCmmoft-Dmg/EndRdx(7), ExpRnf-+Res(Pets)(7), OvrFrc-Dam/KB(9) Level 1: Twilight Grasp -- TchoftheN-Heal(A), TchoftheN-Acc/Heal(42), TchoftheN-Acc/EndRdx/Heal/HP/Regen(42), ThfofEss-+End%(43), Pnc-Heal/+End(43) Level 2: Tar Patch -- RechRdx-I(A), RechRdx-I(42) Level 4: Gloom -- Apc-Dam%(A), Apc-Dmg/EndRdx(9), Thn-Acc/Dmg/EndRdx(31), GldJvl-Dam%(33), GldJvl-Acc/Dmg(33), CldSns-%Dam(33) Level 6: Enchant Undead -- EndRdx-I(A) Level 8: Darkest Night -- DarWtcDsp-ToHitDeb(A), DarWtcDsp-ToHitDeb/EndRdx(43) Level 10: Howling Twilight -- RechRdx-I(A), RechRdx-I(11), EndRdx-I(11) Level 12: Grave Knight -- SprMarofS-Acc/Dmg/EndRdx(A), SprMarofS-Dmg/EndRdx(13), SlbAll-Build%(13), ShlBrk-%Dam(15), TchofLadG-%Dam(15), AchHee-ResDeb%(17) Level 14: Hasten -- RechRdx-I(A), RechRdx-I(17) Level 16: Shadow Fall -- LucoftheG-Def/Rchg+(A), RedFrt-Def/EndRdx(19), RedFrt-Def(19), GldArm-3defTpProc(21), GldArm-End/Res(21), GldArm-ResDam(23) Level 18: Soul Extraction -- SprCmmoft-Rchg/PetAoEDef(A), SprCmmoft-Acc/Dmg/EndRdx/Rchg(36), SprCmmoft-Dmg/EndRdx/Rchg(37), SprCmmoft-Acc/Dmg/Rchg(37), EdcoftheM-PetDef(37), SvrRgh-PetResDam(40) Level 20: Fearsome Stare -- SphIns-ToHitDeb(A), SphIns-Acc/ToHitDeb(34), SphIns-ToHitDeb/EndRdx/Rchg(34), SphIns-Acc/Rchg(34), SphIns-Acc/EndRdx/Rchg(36), CldSns-%Dam(36) Level 22: Maneuvers -- LucoftheG-Def/Rchg+(A), Rct-ResDam%(23), Rct-Def(25), Rct-Def/EndRdx(31) Level 24: Tactics -- AdjTrg-ToHit(A), AdjTrg-ToHit/EndRdx(25) Level 26: Lich -- SprMarofS-Dmg(A), SprMarofS-Acc/Dmg(27), CldSns-ToHitDeb(27), CldSns-ToHitDeb/EndRdx/Rchg(29), CldSns-Acc/EndRdx/Rchg(29), CldSns-%Dam(31) Level 28: Petrifying Gaze -- UnbCns-Acc/Hold/Rchg(A), UnbCns-Dam%(45), Acc-I(45), GldNet-Dam%(45), GhsWdwEmb-Dam%(46), NrnSht-Dam%(46) Level 30: [Empty] Level 32: Dark Empowerment -- EndRdx-I(A) Level 35: [Empty] Level 38: Dark Servant -- SphIns-ToHitDeb(A), SphIns-Acc/ToHitDeb(39), SphIns-Acc/Rchg(39), SphIns-Acc/EndRdx/Rchg(39), SphIns-ToHitDeb/EndRdx/Rchg(40), CldSns-%Dam(40) Level 41: [Empty] Level 44: [Empty] Level 47: [Empty] Level 49: [Empty] Level 1: Brawl -- Empty(A) Level 1: Prestige Power Dash -- Empty(A) Level 1: Prestige Power Slide -- Empty(A) Level 1: Prestige Power Quick -- Empty(A) Level 1: Prestige Power Rush -- Empty(A) Level 1: Prestige Power Surge -- Empty(A) Level 1: Sprint -- Empty(A) Level 1: Supremacy Level 2: Rest -- Empty(A) Level 4: Ninja Run Level 2: Swift -- Empty(A) Level 2: Health -- Mrc-Rcvry+(A), NmnCnv-Regen/Rcvry+(3) Level 2: Hurdle -- Empty(A) Level 2: Stamina -- PrfShf-End%(A), PrfShf-EndMod(3) Level 1: Zombie Level 12: Grave Knight Level 26: Lich Level 50: Intuition Radial Paragon ------------ The rest depends on what you want to do with your support build. You can go the tanking route by taking Fighting, an epic Armor and Provoke, or take more support skills(Fly/Hover, epic holds, etc) to round out your kit with useful set bonuses. Some of the slotting choices are fairly optional if you're struggling for slots: - Panacea in TG(not as effective as Theft) - Damage proc in Fearsome Stare(overall not a huge increase in dps) - Slotting Petrifying Gaze(you might want to skip this power and slot an epic hold instead)
-
Thanks! I think we already know from the previous set of pylon runs that MMs score extremely well on pylon runs. My goal this time is to evaluate different build choices against each other, so I'm going for straight up actual dps for each skill. There's also some variance between the timings because the combat initiation part is different - e.g. demons/dark can leisurely walk up to the pylon with the pets and start whacking it, but with thugs/traps I'm a bit more careful since the pets are very fragile. This is also intentional, as I want to capture the differences in comfort that each build provides - it's all fun and games to do 1k dps with a zero defenses build, but it'd be super frustrating to play if every mistake leads to dead pets. As a comparison, demons/dark took me 5 tries to get 3 kills(I didn't post 2 of them because I messed up the rotations pretty badly), while thugs/traps took maybe 15 tries to get 4 viable runs. It's just so easy for the pylon to wipe the floor with your pets while all the moving parts of thugs/traps are coming into place - comparatively, the demons have just enough survavibility on their own to survive dropping auras, and twilight grasp immediately recovers any non-fatal mistakes.
-
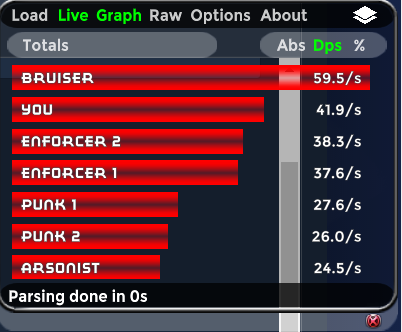
Demons/Dark This build is so leisurely compared to thugs/traps. Nothing ever dies because you're spamming a 400 heal every couple of seconds, all the demons have 50% res to everything(80% res s/l!), and dark floors damage and hit chance of enemies. Run(with some combat analyzer now!) Log: Total: Damage[30698.35] Time[84.0] DPS[365.46]: Cold Demonling: Damage[3145.53 / 37.45 dps / 10.2%] Impeded Swiftness: [ 1047.44 / 12.47 dps / 33.3%] Uses[0] Ice Blast: [ 827.39 / 9.85 dps / 26.3%] Uses[8] Ice Bolt: [ 705.65 / 8.40 dps / 22.4%] Uses[13] Frost Breath: [ 351.56 / 4.19 dps / 11.2%] Uses[4] Degenerative Interface: [ 213.49 / 2.54 dps / 6.8%] Uses[0] Dark Servant: Damage[1069.65 / 12.73 dps / 3.5%] Cloud Senses: [ 761.54 / 9.07 dps / 71.2%] Uses[0] Chill of the Night: [ 155.47 / 1.85 dps / 14.5%] Uses[0] Tenebrous Tentacles: [ 152.64 / 1.82 dps / 14.3%] Uses[5] Demon Prince: Damage[6030.58 / 71.79 dps / 19.6%] Impeded Swiftness: [ 1663.34 / 19.80 dps / 27.6%] Uses[0] Ice Blast: [ 1280.43 / 15.24 dps / 21.2%] Uses[7] Ice Slash: [ 1086.83 / 12.94 dps / 18.0%] Uses[4] Ice Sword: [ 909.38 / 10.83 dps / 15.1%] Uses[4] Block of Ice: [ 675.47 / 8.04 dps / 11.2%] Uses[6] Degenerative Interface: [ 209.13 / 2.49 dps / 3.5%] Uses[0] Frozen Aura: [ 206.00 / 2.45 dps / 3.4%] Uses[2] Ember Demon: Damage[2608.22 / 31.05 dps / 8.5%] Fire Blast: [ 1486.18 / 17.69 dps / 57.0%] Uses[13] Fire Ball: [ 467.12 / 5.56 dps / 17.9%] Uses[4] Fire Breath: [ 437.35 / 5.21 dps / 16.8%] Uses[4] Degenerative Interface: [ 217.57 / 2.59 dps / 8.3%] Uses[0] Fiery Demonling: Damage[1384.43 / 16.48 dps / 4.5%] Fire Blast: [ 594.16 / 7.07 dps / 42.9%] Uses[7] Flares: [ 593.67 / 7.07 dps / 42.9%] Uses[14] Degenerative Interface: [ 196.60 / 2.34 dps / 14.2%] Uses[0] Hellfire Demonling: Damage[1280.26 / 15.24 dps / 4.2%] Corruption: [ 588.02 / 7.00 dps / 45.9%] Uses[11] Hellfire: [ 304.30 / 3.62 dps / 23.8%] Uses[4] Hellfire Breath: [ 304.22 / 3.62 dps / 23.8%] Uses[4] Degenerative Interface: [ 83.72 / 1.00 dps / 6.5%] Uses[0] Hellfire Gargoyle: Damage[4537.07 / 54.01 dps / 14.8%] Hellfire Smash: [ 1210.52 / 14.41 dps / 26.7%] Uses[5] Claw Rake: [ 881.40 / 10.49 dps / 19.4%] Uses[9] Hellfire Aura: [ 531.57 / 6.33 dps / 11.7%] Uses[0] Claw Slash: [ 516.30 / 6.15 dps / 11.4%] Uses[4] Corruption: [ 496.28 / 5.91 dps / 10.9%] Uses[5] Degenerative Interface: [ 474.56 / 5.65 dps / 10.5%] Uses[0] Breath of Hellfire: [ 254.28 / 3.03 dps / 5.6%] Uses[2] Hellfire Burst: [ 172.16 / 2.05 dps / 3.8%] Uses[1] Living Hellfire: Damage[4375.42 / 52.09 dps / 14.3%] Claw Rake: [ 3524.96 / 41.96 dps / 80.6%] Uses[44] Degenerative Interface: [ 850.46 / 10.12 dps / 19.4%] Uses[0] You: Damage[6267.19 / 74.61 dps / 20.4%] Lash: [ 1410.94 / 16.80 dps / 22.5%] Uses[10] Arcane Bolt: [ 1277.16 / 15.20 dps / 20.4%] Uses[10] Apocalypse: [ 1013.53 / 12.07 dps / 16.2%] Uses[0] Hecatomb: [ 856.65 / 10.20 dps / 13.7%] Uses[0] Gladiator's Javelin: [ 658.95 / 7.84 dps / 10.5%] Uses[0] Explosive Strike: [ 586.85 / 6.99 dps / 9.4%] Uses[0] Degenerative Interface: [ 334.88 / 3.99 dps / 5.3%] Uses[0] Gladiator's Strike: [ 111.92 / 1.33 dps / 1.8%] Uses[0] Howling Twilight: [ 16.31 / 0.19 dps / 0.3%] Uses[1] The big letdowns here are the demonlings compared to punks - they just rely too much on their melee attacks to do damage, so the new MM changes really hurt them if they're not micromanaged properly. Lash and Arcane Bolt just do slightly less damage than the cross punch/dual wield combo(no surprise there based on mids theorycrafting). The Hellfire Gargoyle outperforms enforcers, but the ember demon drags him back to overall below their level. The prince is actually competing with the brute, which is making me question my soulbound allegiance placement choice, but most of his damage comes from the one proc that he spams like crazy(imagine if there were 2 slow procs...drool) The most shocking result for me is Living Hellfire. When I last ran similar builds, Living Hellfire was outperforming Gang War *significantly*. Now, I see them basically matching each other, and that's with Gang War on a secondary that struggles to keep the whole posse alive. I honestly don't know what to think about that.
-
It's time to Howling Twilight this thread! I'm back with a hastily scrapped together log parser and some slightly modified builds. But first, a message from my sponsor, Cross Punch. Cross Punch is the best thing since sliced bread! Cross Punch is what's been missing in your life. When you take both synergies(Kick and Boxing), here is what Cross Punch can do for YOU: - DPS. In Mids I see up to 50 dps from it with 4 damage procs, and I've had similar results vs a Pylon. Really not a shabby dmg increase for any MM. Let's conservatively round it down to 40. - Force Feedback! With a reasonable 100% global recharge and constant usage, you're expected to get 20% recharge out of it, let's assume 15% with realistic usage. - Bonus Recharge! +10% per target. Most of the time you'll be hitting a single target, but there are rare and juicy cases where you punch 5 mobs clumped up on top of each other and get +50% recharge straight up. Conservatively, using cross punch on cooldown yields 25% recharge. No longer do you have to microoptimize recharge to reach breakpoints, just punch your cooldowns back! - Fury of the Gladiator. Almost constant uptime of -20% res is a noticable damage boost. Most sets can pull off roughly -50% res, so an extra -20% res proc ends up being a ~13% damage boost, let's round it down to 10%. - +10% hit per target. This is a bit of a /whatever, unless you've got a build with lots of low accuracy skills and pre-punch your accuracy to be able to land them. So to recap, Cross Punch is: - 40+ dps(easily 10% of your overall dps) - 25% recharge - 10% overall damage increase If you're taking fighting, taking Cross Punch is a no-brainer - there's no way you can spend 5 slots and get this much utility out of them. Now back to pylon runs. The methodology I use to calculate DPS/Combat time is to that I start my timer the moment I activate Hasten(which is the last buff I activate before going in), and the moment the Pylon dies ends my timer. Here's a bog standard run of Thugs/Traps with Gang War, no Hybrid Assault Radial. First, the build: Thugs/Traps Run N1: Log analysis: Total: Damage[24235.81] Time[76.0] DPS[318.89]: Acid Mortar: Damage[388.06 / 5.11 dps / 1.6%] Acid Mortar: [ 239.74 / 3.15 dps / 61.8%] Uses[13] Degenerative Interface: [ 148.32 / 1.95 dps / 38.2%] Uses[0] Arsonist: Damage[1462.46 / 19.24 dps / 6.0%] Molotov Cocktail: [ 518.58 / 6.82 dps / 35.5%] Uses[4] Spit Fire: [ 331.56 / 4.36 dps / 22.7%] Uses[3] Degenerative Interface: [ 235.39 / 3.10 dps / 16.1%] Uses[0] Fire Bomb: [ 228.90 / 3.01 dps / 15.7%] Uses[2] Brawl: [ 148.03 / 1.95 dps / 10.1%] Uses[2] Bruiser: Damage[3916.97 / 51.54 dps / 16.2%] Haymaker: [ 700.21 / 9.21 dps / 17.9%] Uses[2] Hurl: [ 678.19 / 8.92 dps / 17.3%] Uses[3] Explosive Strike: [ 609.84 / 8.02 dps / 15.6%] Uses[0] Knockout Blow: [ 526.16 / 6.92 dps / 13.4%] Uses[1] Jab: [ 507.58 / 6.68 dps / 13.0%] Uses[4] Punch: [ 429.17 / 5.65 dps / 11.0%] Uses[2] Degenerative Interface: [ 296.64 / 3.90 dps / 7.6%] Uses[0] Foot Stomp: [ 169.18 / 2.23 dps / 4.3%] Uses[1] Burn: Damage[503.27 / 6.62 dps / 2.1%] Fire: [ 435.81 / 5.73 dps / 86.6%] Uses[2] Degenerative Interface: [ 67.46 / 0.89 dps / 13.4%] Uses[0] Enforcer 1: Damage[2833.39 / 37.28 dps / 11.7%] Shield Breaker: [ 589.47 / 7.76 dps / 20.8%] Uses[0] Dual UZIs: [ 436.80 / 5.75 dps / 15.4%] Uses[2] UZI Burst: [ 352.73 / 4.64 dps / 12.4%] Uses[3] Degenerative Interface: [ 331.64 / 4.36 dps / 11.7%] Uses[0] UZI Heavy Burst: [ 288.30 / 3.79 dps / 10.2%] Uses[2] Brawl: [ 264.56 / 3.48 dps / 9.3%] Uses[3] Touch of Lady Grey: [ 220.34 / 2.90 dps / 7.8%] Uses[0] UZI Cone Blast: [ 187.67 / 2.47 dps / 6.6%] Uses[2] Blast Clip: [ 161.88 / 2.13 dps / 5.7%] Uses[2] Enforcer 2: Damage[2679.36 / 35.25 dps / 11.1%] UZI Burst: [ 441.69 / 5.81 dps / 16.5%] Uses[4] Shield Breaker: [ 422.08 / 5.55 dps / 15.8%] Uses[0] Degenerative Interface: [ 375.36 / 4.94 dps / 14.0%] Uses[0] UZI Heavy Burst: [ 294.54 / 3.88 dps / 11.0%] Uses[2] UZI Cone Blast: [ 289.32 / 3.81 dps / 10.8%] Uses[2] Dual UZIs: [ 286.20 / 3.77 dps / 10.7%] Uses[1] Brawl: [ 280.03 / 3.68 dps / 10.5%] Uses[3] Touch of Lady Grey: [ 201.74 / 2.65 dps / 7.5%] Uses[0] Blast Clip: [ 88.40 / 1.16 dps / 3.3%] Uses[1] Posse: Damage[3018.40 / 39.72 dps / 12.5%] Degenerative Interface: [ 1125.73 / 14.81 dps / 37.3%] Uses[0] Automatic Pistol: [ 482.22 / 6.34 dps / 16.0%] Uses[9] Revolver: [ 394.48 / 5.19 dps / 13.1%] Uses[8] Baseball Bat: [ 325.15 / 4.28 dps / 10.8%] Uses[4] Pipe: [ 242.14 / 3.19 dps / 8.0%] Uses[4] Sledgehammer: [ 230.78 / 3.04 dps / 7.6%] Uses[2] Rock: [ 130.26 / 1.71 dps / 4.3%] Uses[3] Fireman Axe: [ 87.64 / 1.15 dps / 2.9%] Uses[1] Punk 1: Damage[1821.51 / 23.97 dps / 7.5%] Dual Wield: [ 569.94 / 7.50 dps / 31.3%] Uses[6] Explosive Strike: [ 420.85 / 5.54 dps / 23.1%] Uses[0] Pistols: [ 417.18 / 5.49 dps / 22.9%] Uses[5] Empty Clips: [ 253.92 / 3.34 dps / 13.9%] Uses[3] Degenerative Interface: [ 159.62 / 2.10 dps / 8.8%] Uses[0] Punk 2: Damage[2147.23 / 28.25 dps / 8.9%] Pistols: [ 664.59 / 8.74 dps / 31.0%] Uses[9] Dual Wield: [ 473.16 / 6.23 dps / 22.0%] Uses[4] Explosive Strike: [ 420.85 / 5.54 dps / 19.6%] Uses[0] Degenerative Interface: [ 324.39 / 4.27 dps / 15.1%] Uses[0] Empty Clips: [ 264.24 / 3.48 dps / 12.3%] Uses[3] Seeker Drone: Damage[100.74 / 1.33 dps / 0.4%] FlashPulse: [ 100.74 / 1.33 dps / 100.0%] Uses[4] You: Damage[5364.42 / 70.58 dps / 22.1%] Cross Punch: [ 1116.38 / 14.69 dps / 20.8%] Uses[10] Explosive Strike: [ 949.90 / 12.50 dps / 17.7%] Uses[0] Dual Wield: [ 852.15 / 11.21 dps / 15.9%] Uses[7] Obliteration: [ 678.71 / 8.93 dps / 12.7%] Uses[0] Apocalypse: [ 614.66 / 8.09 dps / 11.5%] Uses[0] Scirocco's Dervish: [ 453.43 / 5.97 dps / 8.5%] Uses[0] Degenerative Interface: [ 316.10 / 4.16 dps / 5.9%] Uses[0] Armageddon: [ 291.26 / 3.83 dps / 5.4%] Uses[0] Gladiator's Javelin: [ 91.83 / 1.21 dps / 1.7%] Uses[0] Some interesting notes: - Gang War's damage mostly comes from the interface(and Hybrid Radial Assault). Even then, it's less damage than the T1s or what you can contribute with your own attacks. - Traps is very tricky at the start of a fight, you have so much to set up and all it takes is one knockback to push everyone out of aura range and get them killed. You have to think of your minions as disposable when playing traps. - Cross Punch/Dual Wield are awesome, but they drain endurance mightily fast. You should look for every possibility to scrounge up more endurance in your build if you want to use them, or just settle for using 1 attack. - The bruiser acts a bit iffy on Beta atm - he will sometimes decide to not get into melee range and just chuck hurls, vastly decreasing his dps. 2nd run with lots of knockbacks: 2nd run logs analysis: Total: Damage[28083.16] Time[80.0] DPS[351.04]: Acid Mortar: Damage[563.21 / 7.04 dps / 2.0%] Degenerative Interface: [ 347.20 / 4.34 dps / 61.6%] Uses[0] Acid Mortar: [ 216.01 / 2.70 dps / 38.4%] Uses[14] Arsonist: Damage[2124.61 / 26.56 dps / 7.6%] Molotov Cocktail: [ 739.03 / 9.24 dps / 34.8%] Uses[8] Spit Fire: [ 452.73 / 5.66 dps / 21.3%] Uses[3] Fire Bomb: [ 405.47 / 5.07 dps / 19.1%] Uses[4] Degenerative Interface: [ 319.39 / 3.99 dps / 15.0%] Uses[0] Brawl: [ 207.99 / 2.60 dps / 9.8%] Uses[3] Bruiser: Damage[3979.99 / 49.75 dps / 14.2%] Knockout Blow: [ 1027.80 / 12.85 dps / 25.8%] Uses[2] Haymaker: [ 712.95 / 8.91 dps / 17.9%] Uses[3] Hurl: [ 536.70 / 6.71 dps / 13.5%] Uses[2] Explosive Strike: [ 477.81 / 5.97 dps / 12.0%] Uses[0] Punch: [ 446.35 / 5.58 dps / 11.2%] Uses[3] Degenerative Interface: [ 318.24 / 3.98 dps / 8.0%] Uses[0] Foot Stomp: [ 290.10 / 3.63 dps / 7.3%] Uses[1] Jab: [ 170.04 / 2.13 dps / 4.3%] Uses[1] Burn: Damage[844.02 / 10.55 dps / 3.0%] Fire: [ 743.61 / 9.30 dps / 88.1%] Uses[3] Degenerative Interface: [ 100.41 / 1.26 dps / 11.9%] Uses[0] Enforcer 1: Damage[3541.57 / 44.27 dps / 12.6%] Touch of Lady Grey: [ 648.14 / 8.10 dps / 18.3%] Uses[0] Shield Breaker: [ 648.13 / 8.10 dps / 18.3%] Uses[0] UZI Burst: [ 541.41 / 6.77 dps / 15.3%] Uses[6] UZI Heavy Burst: [ 433.33 / 5.42 dps / 12.2%] Uses[4] Dual UZIs: [ 425.62 / 5.32 dps / 12.0%] Uses[2] UZI Cone Blast: [ 277.80 / 3.47 dps / 7.8%] Uses[2] Degenerative Interface: [ 263.37 / 3.29 dps / 7.4%] Uses[0] Brawl: [ 166.00 / 2.08 dps / 4.7%] Uses[2] Blast Clip: [ 137.77 / 1.72 dps / 3.9%] Uses[2] Enforcer 2: Damage[3423.36 / 42.79 dps / 12.2%] Touch of Lady Grey: [ 552.27 / 6.90 dps / 16.1%] Uses[0] UZI Heavy Burst: [ 545.16 / 6.81 dps / 15.9%] Uses[4] Dual UZIs: [ 459.60 / 5.74 dps / 13.4%] Uses[2] UZI Cone Blast: [ 411.48 / 5.14 dps / 12.0%] Uses[3] UZI Burst: [ 390.99 / 4.89 dps / 11.4%] Uses[5] Degenerative Interface: [ 386.31 / 4.83 dps / 11.3%] Uses[0] Shield Breaker: [ 373.43 / 4.67 dps / 10.9%] Uses[0] Brawl: [ 157.16 / 1.96 dps / 4.6%] Uses[2] Blast Clip: [ 146.96 / 1.84 dps / 4.3%] Uses[2] Posse: Damage[3401.95 / 42.52 dps / 12.1%] Degenerative Interface: [ 750.36 / 9.38 dps / 22.1%] Uses[0] Knife: [ 661.42 / 8.27 dps / 19.4%] Uses[13] Brawl: [ 414.41 / 5.18 dps / 12.2%] Uses[9] Fireman Axe: [ 368.37 / 4.60 dps / 10.8%] Uses[4] Baseball Bat: [ 367.03 / 4.59 dps / 10.8%] Uses[5] Revolver: [ 239.61 / 3.00 dps / 7.0%] Uses[6] Sledgehammer: [ 209.50 / 2.62 dps / 6.2%] Uses[2] Rock: [ 181.04 / 2.26 dps / 5.3%] Uses[6] Pipe: [ 164.49 / 2.06 dps / 4.8%] Uses[3] Automatic Pistol: [ 45.72 / 0.57 dps / 1.3%] Uses[1] Punk 1: Damage[2534.03 / 31.68 dps / 9.0%] Pistols: [ 654.22 / 8.18 dps / 25.8%] Uses[9] Degenerative Interface: [ 608.58 / 7.61 dps / 24.0%] Uses[0] Dual Wield: [ 510.40 / 6.38 dps / 20.1%] Uses[5] Empty Clips: [ 370.24 / 4.63 dps / 14.6%] Uses[5] Brawl: [ 207.99 / 2.60 dps / 8.2%] Uses[3] Explosive Strike: [ 182.60 / 2.28 dps / 7.2%] Uses[0] Punk 2: Damage[743.01 / 9.29 dps / 2.6%] Pistol: [ 606.81 / 7.59 dps / 81.7%] Uses[9] Degenerative Interface: [ 136.20 / 1.70 dps / 18.3%] Uses[0] Seeker Drone: Damage[83.82 / 1.05 dps / 0.3%] FlashPulse: [ 83.82 / 1.05 dps / 100.0%] Uses[4] You: Damage[6843.59 / 85.54 dps / 24.4%] Cross Punch: [ 1123.05 / 14.04 dps / 16.4%] Uses[11] Dual Wield: [ 1096.56 / 13.71 dps / 16.0%] Uses[9] Explosive Strike: [ 1013.00 / 12.66 dps / 14.8%] Uses[0] Armageddon: [ 935.88 / 11.70 dps / 13.7%] Uses[0] Apocalypse: [ 809.52 / 10.12 dps / 11.8%] Uses[0] Degenerative Interface: [ 562.73 / 7.03 dps / 8.2%] Uses[0] Obliteration: [ 519.42 / 6.49 dps / 7.6%] Uses[0] Scirocco's Dervish: [ 507.94 / 6.35 dps / 7.4%] Uses[0] Gladiator's Javelin: [ 275.49 / 3.44 dps / 4.0%] Uses[0] 3rd run, this time in frustration I'm using clarion to limit the ping-ponging of all the pets. This was by far the cleanest run: Log analysis: Total: Damage[27305.87] Time[68.0] DPS[401.56]: Acid Mortar: Damage[492.15 / 7.24 dps / 1.8%] Degenerative Interface: [ 318.46 / 4.68 dps / 64.7%] Uses[0] Acid Mortar: [ 173.69 / 2.55 dps / 35.3%] Uses[12] Arsonist: Damage[1720.11 / 25.30 dps / 6.3%] Molotov Cocktail: [ 642.06 / 9.44 dps / 37.3%] Uses[7] Spit Fire: [ 320.88 / 4.72 dps / 18.7%] Uses[3] Fire Bomb: [ 308.81 / 4.54 dps / 18.0%] Uses[3] Degenerative Interface: [ 233.41 / 3.43 dps / 13.6%] Uses[0] Brawl: [ 214.95 / 3.16 dps / 12.5%] Uses[3] Bruiser: Damage[5550.55 / 81.63 dps / 20.3%] Knockout Blow: [ 1000.55 / 14.71 dps / 18.0%] Uses[2] Haymaker: [ 902.39 / 13.27 dps / 16.3%] Uses[4] Explosive Strike: [ 799.21 / 11.75 dps / 14.4%] Uses[0] Hurl: [ 741.93 / 10.91 dps / 13.4%] Uses[3] Punch: [ 631.74 / 9.29 dps / 11.4%] Uses[4] Jab: [ 586.98 / 8.63 dps / 10.6%] Uses[4] Degenerative Interface: [ 466.96 / 6.87 dps / 8.4%] Uses[0] Foot Stomp: [ 420.79 / 6.19 dps / 7.6%] Uses[2] Burn: Damage[550.65 / 8.10 dps / 2.0%] Fire: [ 523.41 / 7.70 dps / 95.1%] Uses[2] Degenerative Interface: [ 27.24 / 0.40 dps / 4.9%] Uses[0] Enforcer 1: Damage[2756.98 / 40.54 dps / 10.1%] Shield Breaker: [ 472.15 / 6.94 dps / 17.1%] Uses[0] Dual UZIs: [ 460.31 / 6.77 dps / 16.7%] Uses[2] UZI Burst: [ 390.18 / 5.74 dps / 14.2%] Uses[3] UZI Heavy Burst: [ 376.15 / 5.53 dps / 13.6%] Uses[2] Touch of Lady Grey: [ 373.43 / 5.49 dps / 13.5%] Uses[0] UZI Cone Blast: [ 294.54 / 4.33 dps / 10.7%] Uses[2] Brawl: [ 174.19 / 2.56 dps / 6.3%] Uses[2] Degenerative Interface: [ 142.55 / 2.10 dps / 5.2%] Uses[0] Blast Clip: [ 73.48 / 1.08 dps / 2.7%] Uses[1] Enforcer 2: Damage[2373.78 / 34.91 dps / 8.7%] UZI Heavy Burst: [ 411.48 / 6.05 dps / 17.3%] Uses[3] Shield Breaker: [ 361.98 / 5.32 dps / 15.2%] Uses[0] UZI Burst: [ 319.47 / 4.70 dps / 13.5%] Uses[3] Degenerative Interface: [ 315.85 / 4.64 dps / 13.3%] Uses[0] UZI Cone Blast: [ 277.80 / 4.09 dps / 11.7%] Uses[1] Touch of Lady Grey: [ 263.26 / 3.87 dps / 11.1%] Uses[0] Dual UZIs: [ 224.74 / 3.31 dps / 9.5%] Uses[1] Brawl: [ 125.72 / 1.85 dps / 5.3%] Uses[2] Blast Clip: [ 73.48 / 1.08 dps / 3.1%] Uses[1] Posse: Damage[3562.71 / 52.39 dps / 13.0%] Degenerative Interface: [ 858.22 / 12.62 dps / 24.1%] Uses[0] Knife: [ 617.92 / 9.09 dps / 17.3%] Uses[11] Brawl: [ 402.49 / 5.92 dps / 11.3%] Uses[11] Baseball Bat: [ 369.23 / 5.43 dps / 10.4%] Uses[5] Fireman Axe: [ 364.27 / 5.36 dps / 10.2%] Uses[4] Automatic Pistol: [ 283.60 / 4.17 dps / 8.0%] Uses[6] Revolver: [ 232.01 / 3.41 dps / 6.5%] Uses[6] Rock: [ 178.83 / 2.63 dps / 5.0%] Uses[6] Pipe: [ 164.49 / 2.42 dps / 4.6%] Uses[3] Sledgehammer: [ 91.65 / 1.35 dps / 2.6%] Uses[1] Punk 1: Damage[2278.05 / 33.50 dps / 8.3%] Pistols: [ 574.63 / 8.45 dps / 25.2%] Uses[9] Degenerative Interface: [ 518.78 / 7.63 dps / 22.8%] Uses[0] Dual Wield: [ 497.40 / 7.31 dps / 21.8%] Uses[5] Explosive Strike: [ 342.38 / 5.04 dps / 15.0%] Uses[0] Brawl: [ 199.42 / 2.93 dps / 8.8%] Uses[3] Empty Clips: [ 145.44 / 2.14 dps / 6.4%] Uses[2] Punk 2: Damage[2307.27 / 33.93 dps / 8.4%] Pistols: [ 569.58 / 8.38 dps / 24.7%] Uses[9] Dual Wield: [ 485.08 / 7.13 dps / 21.0%] Uses[6] Degenerative Interface: [ 482.70 / 7.10 dps / 20.9%] Uses[0] Explosive Strike: [ 342.38 / 5.04 dps / 14.8%] Uses[0] Empty Clips: [ 238.77 / 3.51 dps / 10.3%] Uses[3] Brawl: [ 188.76 / 2.78 dps / 8.2%] Uses[3] Seeker Drone: Damage[83.82 / 1.23 dps / 0.3%] FlashPulse: [ 83.82 / 1.23 dps / 100.0%] Uses[4] You: Damage[5629.80 / 82.79 dps / 20.6%] Cross Punch: [ 995.40 / 14.64 dps / 17.7%] Uses[11] Dual Wield: [ 975.82 / 14.35 dps / 17.3%] Uses[9] Armageddon: [ 912.33 / 13.42 dps / 16.2%] Uses[0] Explosive Strike: [ 645.69 / 9.50 dps / 11.5%] Uses[0] Apocalypse: [ 599.65 / 8.82 dps / 10.7%] Uses[0] Gladiator's Javelin: [ 454.85 / 6.69 dps / 8.1%] Uses[0] Degenerative Interface: [ 453.47 / 6.67 dps / 8.1%] Uses[0] Obliteration: [ 340.06 / 5.00 dps / 6.0%] Uses[0] Scirocco's Dervish: [ 252.53 / 3.71 dps / 4.5%] Uses[0] Bonus, 4th run, with Hybrid Assault Radial and a little bit of analyzer. In this run I really botched my rotation, and even then it blew the "perfect" 3rd run out of the water. Total: Damage[27463.24] Time[63.0] DPS[435.92]: Acid Mortar: Damage[100.55 / 1.60 dps / 0.4%] Acid Mortar: [ 74.87 / 1.19 dps / 74.5%] Uses[5] Degenerative Interface: [ 25.68 / 0.41 dps / 25.5%] Uses[0] Arsonist: Damage[1828.39 / 29.02 dps / 6.7%] Doublehit: [ 722.55 / 11.47 dps / 39.5%] Uses[0] Molotov Cocktail: [ 399.73 / 6.34 dps / 21.9%] Uses[4] Degenerative Interface: [ 231.42 / 3.67 dps / 12.7%] Uses[0] Spit Fire: [ 194.73 / 3.09 dps / 10.7%] Uses[2] Brawl: [ 189.69 / 3.01 dps / 10.4%] Uses[2] Fire Bomb: [ 90.27 / 1.43 dps / 4.9%] Uses[1] Bruiser: Damage[5487.41 / 87.10 dps / 20.0%] Doublehit: [ 1005.10 / 15.95 dps / 18.3%] Uses[0] Knockout Blow: [ 885.15 / 14.05 dps / 16.1%] Uses[2] Punch: [ 877.61 / 13.93 dps / 16.0%] Uses[6] Explosive Strike: [ 700.19 / 11.11 dps / 12.8%] Uses[0] Hurl: [ 687.18 / 10.91 dps / 12.5%] Uses[3] Haymaker: [ 471.26 / 7.48 dps / 8.6%] Uses[2] Degenerative Interface: [ 352.65 / 5.60 dps / 6.4%] Uses[0] Jab: [ 291.25 / 4.62 dps / 5.3%] Uses[3] Foot Stomp: [ 217.02 / 3.44 dps / 4.0%] Uses[1] Burn: Damage[215.56 / 3.42 dps / 0.8%] Fire: [ 179.36 / 2.85 dps / 83.2%] Uses[1] Degenerative Interface: [ 35.73 / 0.57 dps / 16.6%] Uses[0] Doublehit: [ 0.47 / 0.01 dps / 0.2%] Uses[0] Enforcer 1: Damage[3162.17 / 50.19 dps / 11.5%] Doublehit: [ 855.10 / 13.57 dps / 27.0%] Uses[0] Shield Breaker: [ 492.17 / 7.81 dps / 15.6%] Uses[0] UZI Burst: [ 373.77 / 5.93 dps / 11.8%] Uses[5] UZI Heavy Burst: [ 348.04 / 5.52 dps / 11.0%] Uses[2] Touch of Lady Grey: [ 251.81 / 4.00 dps / 8.0%] Uses[0] Dual UZIs: [ 224.74 / 3.57 dps / 7.1%] Uses[1] Degenerative Interface: [ 208.28 / 3.31 dps / 6.6%] Uses[0] Brawl: [ 157.16 / 2.49 dps / 5.0%] Uses[2] Blast Clip: [ 128.58 / 2.04 dps / 4.1%] Uses[1] UZI Cone Blast: [ 122.52 / 1.94 dps / 3.9%] Uses[1] Enforcer 2: Damage[3363.24 / 53.38 dps / 12.2%] Doublehit: [ 750.41 / 11.91 dps / 22.3%] Uses[0] Shield Breaker: [ 492.17 / 7.81 dps / 14.6%] Uses[0] UZI Heavy Burst: [ 481.72 / 7.65 dps / 14.3%] Uses[4] Touch of Lady Grey: [ 412.05 / 6.54 dps / 12.3%] Uses[0] UZI Burst: [ 282.84 / 4.49 dps / 8.4%] Uses[4] UZI Cone Blast: [ 250.62 / 3.98 dps / 7.5%] Uses[2] Dual UZIs: [ 214.78 / 3.41 dps / 6.4%] Uses[1] Degenerative Interface: [ 192.91 / 3.06 dps / 5.7%] Uses[0] Brawl: [ 157.16 / 2.49 dps / 4.7%] Uses[2] Blast Clip: [ 128.58 / 2.04 dps / 3.8%] Uses[2] Posse: Damage[3731.06 / 59.22 dps / 13.6%] Doublehit: [ 1178.49 / 18.71 dps / 31.6%] Uses[0] Degenerative Interface: [ 769.26 / 12.21 dps / 20.6%] Uses[0] Brawl: [ 435.97 / 6.92 dps / 11.7%] Uses[13] Knife: [ 370.29 / 5.88 dps / 9.9%] Uses[9] Sledgehammer: [ 288.05 / 4.57 dps / 7.7%] Uses[3] Revolver: [ 205.72 / 3.27 dps / 5.5%] Uses[6] Fireman Axe: [ 175.28 / 2.78 dps / 4.7%] Uses[2] Rock: [ 155.40 / 2.47 dps / 4.2%] Uses[6] Pipe: [ 106.88 / 1.70 dps / 2.9%] Uses[2] Automatic Pistol: [ 45.72 / 0.73 dps / 1.2%] Uses[1] Punk 1: Damage[2386.25 / 37.88 dps / 8.7%] Doublehit: [ 779.71 / 12.38 dps / 32.7%] Uses[0] Degenerative Interface: [ 410.10 / 6.51 dps / 17.2%] Uses[0] Pistols: [ 355.64 / 5.65 dps / 14.9%] Uses[6] Dual Wield: [ 309.38 / 4.91 dps / 13.0%] Uses[4] Empty Clips: [ 268.23 / 4.26 dps / 11.2%] Uses[4] Brawl: [ 183.30 / 2.91 dps / 7.7%] Uses[3] Explosive Strike: [ 79.89 / 1.27 dps / 3.3%] Uses[0] Punk 2: Damage[2548.72 / 40.46 dps / 9.3%] Doublehit: [ 754.09 / 11.97 dps / 29.6%] Uses[0] Pistols: [ 466.62 / 7.41 dps / 18.3%] Uses[8] Degenerative Interface: [ 449.28 / 7.13 dps / 17.6%] Uses[0] Dual Wield: [ 304.05 / 4.83 dps / 11.9%] Uses[4] Explosive Strike: [ 239.67 / 3.80 dps / 9.4%] Uses[0] Brawl: [ 190.86 / 3.03 dps / 7.5%] Uses[3] Empty Clips: [ 144.15 / 2.29 dps / 5.7%] Uses[2] Seeker Drone: Damage[38.68 / 0.61 dps / 0.1%] FlashPulse: [ 38.68 / 0.61 dps / 100.0%] Uses[2] You: Damage[4601.21 / 73.04 dps / 16.8%] Doublehit: [ 670.47 / 10.64 dps / 14.6%] Uses[0] Cross Punch: [ 626.51 / 9.94 dps / 13.6%] Uses[7] Armageddon: [ 599.65 / 9.52 dps / 13.0%] Uses[0] Dual Wield: [ 570.04 / 9.05 dps / 12.4%] Uses[6] Explosive Strike: [ 482.10 / 7.65 dps / 10.5%] Uses[0] Obliteration: [ 482.10 / 7.65 dps / 10.5%] Uses[0] Apocalypse: [ 342.66 / 5.44 dps / 7.4%] Uses[0] Gladiator's Javelin: [ 321.40 / 5.10 dps / 7.0%] Uses[0] Scirocco's Dervish: [ 321.40 / 5.10 dps / 7.0%] Uses[0] Degenerative Interface: [ 184.88 / 2.93 dps / 4.0%] Uses[0] Here's my key takeaways from the runs: - MM attacks matter! Especially primaries which struggle with ST DPS like bots can massively benefit from using personal attacks to augment their damage. - A 75% interface is really important(10% overall dps) - Slotting for -res procs and damage procs is also very important(the procs produce 15-30% of the pet DPS, and the -res ones obviously boost overall dps) - Hybrid Radial Assault is a BS damage increase and can be used when you really need to pump that oomph. The best part is, it's mostly independent of pet DPS - as long as your pets are attacking stuff, Hybrid Radial Assault will provide the same damage Overall, if you add Hybrid Radial Assault, a good interface and use personal attacks, the difference between bots and top-tier contenders should shrink a lot.
-
No No There's lots of ways. MMs are on paper one of the highest dps ATs in the game. Check out the Pylon thread in this forum for some example builds and ideas how to push your DPS high. The five pillars of MM dps are, in order of importance: - Make sure your pets don't die(softcap defenses, use the pet auras, stack debuffs on dangerous enemies) - Stack as many procs on your pets as possible(e.g. interface, hybrid radial assault, touch of lady grey and so on - whatever your pets can carry) - Optimize your build to include as many -res procs as possible(achilles heel, annihilation, fury of the gladiator, and so on) - Get as close to damage cap on your pets as possible(+dmg alpha, good slotting to maximize damage%) - Get 1-2 useful MM attacks into your rotation(lash, dual wield, cross punch, trip mine, knockout blow, /storm's antics...)
-
Looking for input on "Exotic" slotting for Call Enforcers.
BGSacho replied to Seroster01's topic in Mastermind
Depends what you mean. First, let's recap the mechanics: 1. You need to summon pets while you have Hybrid Assault on for them to benefit, but 2. If a pet has benefitted from Hybrid Assault before, it does not need to be resummoned the next time you use it You can think of it as if the pet gets a hidden "flag" - "can benefit from HA" if it is summoned while hybrid assault is on, and doesn't lose that flag until it dies. Then, whenever you use hybrid assault, the pets that have that "flag" will benefit from it. Here are some considerations on whether to use HA: First, when would you actually want to use HA? It's a toggle, and a bit of a hassle to use, so you only really want it if you are doing well in most content but struggle to push your DPS past a certain breakpoint in very specific cases(e.g. soloing AVs). If all your pets are dying all the time, then it's just much better to focus on your survivability than trying to micromanage HA. If some of your pets die fairly regularly(e.g. T1s), it can be a toss-up. If your pets are dying in those high-intensity situations you want HA for, and another hybrid might keep them alive, then I wouldn't use HA. If the pets would die regardless of the Hybrid pick(e.g. ridicilous burst + streakbreaker), then you might as well take HA to boost the dps of the rest of your pets. An extra pet summon(Hell on Earth, Gang War, Soul Extraction, Dark Servant) is a strong sway towards HA, since it means more procs. I am not actually sure if HA works on pseudopets like Tornado/Lightning Storm. -
Looking for input on "Exotic" slotting for Call Enforcers.
BGSacho replied to Seroster01's topic in Mastermind
A maxed out interface can be almost up to 10-15% of your total damage. It's important to take the 75% chance to trigger a DoT, since the interface DoT is an "rng DoT" - if you've seen in some skill descriptions, it would say "80% chance for 4 ticks of X damage", the interface DoT is the same way, and that chance is checked for each tick(i.e. the first tick has 75% chance to proc, the second 56.25% - 75%*75% - and so on..). Check out this post(although some of the conclusions I drew there are outdated). If you pause the videos there at any point you'd see how many degenerative interface procs are flying off. Similarly, the Hybrid Assault incarnate(provided you summon your pets after enabling it) will act like a super-powered purple proc for each attack by your pets, massively boosting their dps. -
Street Level - Fisticuffs Melee Mastermind. Thugs/Time
BGSacho replied to SmalltalkJava's topic in Mastermind
I had a very similar idea of a punchy MM when building Thugs/Time. I ended up using dual wield + cross punch instead of boxing/kicking because it just outperforms them significantly. With FF in both attacks and cross punch's recharge you have an absolutely ridiculous recharge...unfortunately not much you can use it on. Derp. The punchiness feel is real though, you are right there in the thick of things laying down the pain. I really like it. Villain Plan by Mids' Reborn : Hero Designer 2.6.0.4 https://github.com/ImaginaryDevelopment/imaginary-hero-designer Click this DataLink to open the build! Level 50 Magic Mastermind Primary Power Set: Thugs Secondary Power Set: Time Manipulation Power Pool: Leadership Power Pool: Fighting Power Pool: Leaping Ancillary Pool: Mu Mastery Villain Profile: Level 1: Call Thugs -- SprMarofS-Acc/Dmg/EndRdx(A), SprMarofS-Acc/EndRdx(3), SprCmmoft-Acc/Dmg(3), CaltoArm-+Def(Pets)(5), ExpStr-Dam%(5), OvrFrc-Dam/KB(7) Level 1: Time Crawl -- PcnoftheT-Acc/EndRdx(A), PcnoftheT--Rchg%(7) Level 2: Dual Wield -- GldJvl-Acc/Dmg(A), Apc-Dmg/EndRdx(9), Apc-Dam%(9), ExpStr-Dam%(11), GldJvl-Dam%(11), FrcFdb-Rechg%(13) Level 4: Temporal Mending -- Prv-Absorb%(A), Prv-Heal(15), Prv-Heal/EndRdx(17), Prv-EndRdx/Rchg(17), Prv-Heal/Rchg(19), Prv-Heal/Rchg/EndRdx(19) Level 6: Time's Juncture -- DarWtcDsp-ToHitDeb(A), DarWtcDsp-ToHitdeb/Rchg/EndRdx(21), DarWtcDsp-ToHitDeb/EndRdx(21), DarWtcDsp-Slow%(23) Level 8: Equip Thugs -- EndRdx-I(A) Level 10: Maneuvers -- LucoftheG-Def/Rchg+(A), RedFrt-Def(23), RedFrt-Def/EndRdx(25), ShlWal-ResDam/Re TP(50) Level 12: Call Enforcer -- SprMarofS-Dmg(A), SprMarofS-Acc/Dmg(25), HO:Cyto(27), TchofLadG-%Dam(27), AchHee-ResDeb%(29), ShlBrk-%Dam(29) Level 14: Tactics -- GssSynFr--ToHit(A), GssSynFr--ToHit/EndRdx(31) Level 16: Distortion Field -- Lck-%Hold(A) Level 18: Gang War -- SprCmmoft-Dmg/EndRdx/Rchg(A), SprCmmoft-Rchg/PetAoEDef(31), SprCmmoft-Acc/Dmg/Rchg(33), SprCmmoft-Acc/Dmg/EndRdx/Rchg(33), EdcoftheM-PetDef(33), SvrRgh-PetResDam(34) Level 20: Boxing -- EndRdx-I(A) Level 22: Tough -- StdPrt-ResDam/Def+(A), StdPrt-ResKB(34), GldArm-3defTpProc(34) Level 24: Weave -- LucoftheG-Def/Rchg+(A), RedFrt-Def/EndRdx(36), RedFrt-Def(36) Level 26: Cross Punch -- Arm-Dmg(A), Arm-Dmg/EndRdx(36), Arm-Dam%(37), Obl-%Dam(37), FuroftheG-ResDeb%(37), FrcFdb-Rechg%(39) Level 28: Call Bruiser -- SprMarofS-Dmg/EndRdx(A), SprMarofS-EndRdx/+Resist/+Regen(39), SprCmmoft-Dmg/EndRdx(39), SlbAll-Acc/Dmg/Rchg(40), SlbAll-Build%(40), ExpStr-Dam%(40) Level 30: Farsight -- Rct-Def/EndRdx(A), Rct-EndRdx/Rchg(31), Rct-ResDam%(42), Rct-Def(42), Rct-Def/Rchg(42), Rct-Def/EndRdx/Rchg(43) Level 32: Upgrade Equipment -- EndRdx-I(A) Level 35: Slowed Response -- ShlBrk-Acc/EndRdx/Rchg(A), ShlBrk-DefDeb/EndRdx/Rchg(43), ShlBrk-Acc/Rchg(43), ShlBrk-Acc/DefDeb(45) Level 38: Chrono Shift -- RechRdx-I(A), RechRdx-I(45) Level 41: Combat Jumping -- LucoftheG-Def/Rchg+(A), BlsoftheZ-Travel/EndRdx(45), BlsoftheZ-Travel(46), BlsoftheZ-ResKB(46) Level 44: Charged Armor -- UnbGrd-Max HP%(A), UnbGrd-ResDam(46), UnbGrd-ResDam/EndRdx(48), UnbGrd-ResDam/EndRdx/Rchg(48) Level 47: Electrifying Fences -- EnfOpr-Acc/Immob(A), EnfOpr-Immob/Rng(48), EnfOpr-Acc/EndRdx(50), EnfOpr-EndRdx/Immob(50) Level 49: Kick -- EndRdx-I(A) Level 1: Brawl -- Empty(A) Level 1: Prestige Power Dash -- Empty(A) Level 1: Prestige Power Slide -- Empty(A) Level 1: Prestige Power Quick -- Empty(A) Level 1: Prestige Power Rush -- Empty(A) Level 1: Prestige Power Surge -- Empty(A) Level 1: Sprint -- Empty(A) Level 1: Supremacy Level 2: Rest -- Empty(A) Level 4: Ninja Run Level 2: Swift -- Empty(A) Level 2: Health -- Pnc-Heal/+End(A), Mrc-Rcvry+(13) Level 2: Hurdle -- Empty(A) Level 2: Stamina -- PrfShf-End%(A), PrfShf-EndMod(15) Level 50: Clarion Radial Epiphany Level 50: Musculature Radial Paragon ------------ -
Here's my attempt. It's closer to s/l softcap but not really there. It sports more recharge(thanks to splitting up mark of sup and using +FF on lash), slightly less end(but a higher end discount, so it should work out better in the...end), higher KB protection(getting KBed out of your pets' range will make them lose a bunch of auras...), less s/l res. I also reslotted your pets completely, I don't believe blood mandate is useful(providing positionals which you don't have much of). The empty slots you can do whatever with. I like slotting the ember shield because it brings the demon closer to res cap, which is 90. Technically, the easy way to achieve softcap would be to take fighting. I personally don't think it's that important as demon/thermal. Villain Plan by Mids' Reborn : Hero Designer 2.6.0.4 https://github.com/ImaginaryDevelopment/imaginary-hero-designer Click this DataLink to open the build! Demon-Thermal: Level 50 Magic Mastermind Primary Power Set: Demon Summoning Secondary Power Set: Thermal Radiation Power Pool: Flight Power Pool: Leadership Power Pool: Speed Ancillary Pool: Mace Mastery Villain Profile: Level 1: Summon Demonlings -- ExpRnf-Acc/Dmg(A), ExpRnf-Dmg/EndRdx(3), ExpRnf-+Res(Pets)(3), ExpRnf-Acc/Dmg/Rchg(5), Empty(5), Empty(7) Level 1: Warmth -- Pnc-Heal/EndRedux(A), Pnc-EndRdx/Rchg(7), Pnc-Heal/Rchg(9), Pnc-Heal/EndRedux/Rchg(9), Pnc-Heal(11), Pnc-Heal/+End(11) Level 2: Fire Shield -- UnbGrd-ResDam(A), UnbGrd-ResDam/EndRdx(13), UnbGrd-ResDam/EndRdx/Rchg(13), UnbGrd-Rchg/ResDam(15) Level 4: Lash -- HO:Nucle(A), Mk'Bit-Dam%(17), Hct-Dam%(19), TchofDth-Dam%(19), ExpStr-Dam%(21), FrcFdb-Rechg%(21) Level 6: Enchant Demon -- EndRdx-I(A) Level 8: Cauterize -- Prv-Heal(A), Prv-Heal/EndRdx(23), Prv-EndRdx/Rchg(23), Prv-Heal/Rchg(25), Prv-Heal/Rchg/EndRdx(25), Prv-Absorb%(27) Level 10: Plasma Shield -- UnbGrd-ResDam(A), UnbGrd-ResDam/EndRdx(27), UnbGrd-ResDam/EndRdx/Rchg(29), UnbGrd-Max HP%(29), GldArm-3defTpProc(48) Level 12: Summon Demons -- ResDam-I(A), ResDam-I(31), SprMarofS-Acc/Dmg/EndRdx(31), SprMarofS-Acc/Dmg(31), SlbAll-Build%(33), SlbAll-Dmg/EndRdx(33) Level 14: Fly -- BlsoftheZ-ResKB(A) Level 16: Power of the Phoenix -- RechRdx-I(A) Level 18: Hell on Earth -- SprCmmoft-Acc/Dmg/Rchg(A), SprCmmoft-Dmg/EndRdx/Rchg(33), SprCmmoft-Acc/Dmg/EndRdx/Rchg(34), SprCmmoft-Rchg/PetAoEDef(34), SvrRgh-PetResDam(34), EdcoftheM-PetDef(36) Level 20: Thaw -- StdPrt-ResDam/Def+(A), StdPrt-ResKB(36) Level 22: Maneuvers -- LucoftheG-Def/Rchg+(A), LucoftheG-Def(36), LucoftheG-Def/EndRdx(37) Level 24: Tactics -- AdjTrg-ToHit/EndRdx(A), AdjTrg-ToHit(37), AdjTrg-ToHit/EndRdx/Rchg(40), AdjTrg-EndRdx/Rchg(50) Level 26: Summon Demon Prince -- SprMarofS-Dmg(A), SprMarofS-Dmg/EndRdx(37), SprMarofS-Acc/EndRdx(39), SprMarofS-EndRdx/+Resist/+Regen(39), Empty(39), ImpSwf-Dam%(40) Level 28: Forge -- RechRdx-I(A) Level 30: Hover -- LucoftheG-Def/Rchg+(A), LucoftheG-Def/EndRdx(48) Level 32: Abyssal Empowerment -- EndRdx-I(A) Level 35: Heat Exhaustion -- Acc-I(A), RechRdx-I(40), RechRdx-I(42) Level 38: Melt Armor -- AnlWkn-Acc/Rchg/EndRdx(A), AnlWkn-Acc/Rchg(42), RechRdx-I(42), AchHee-ResDeb%(43) Level 41: Scorpion Shield -- LucoftheG-Def/EndRdx(A), LucoftheG-Def/EndRdx/Rchg(43), LucoftheG-Def(43), LucoftheG-Def/Rchg+(45) Level 44: Web Envelope -- EnfOpr-Acc/Rchg(A), EnfOpr-EndRdx/Immob(45), EnfOpr-Acc/EndRdx(45), EnfOpr-Immob/Rng(46), EnfOpr-Acc/Immob/Rchg(46), EnfOpr-Acc/Immob(46) Level 47: Power Boost -- RechRdx-I(A), RechRdx-I(48) Level 49: Hasten -- RechRdx-I(A), RechRdx-I(50) Level 1: Brawl -- Empty(A) Level 1: Prestige Power Dash -- Empty(A) Level 1: Prestige Power Slide -- Empty(A) Level 1: Prestige Power Quick -- Empty(A) Level 1: Prestige Power Rush -- Empty(A) Level 1: Prestige Power Surge -- Empty(A) Level 1: Sprint -- Clr-Stlth(A) Level 1: Supremacy Level 2: Rest -- Empty(A) Level 4: Ninja Run Level 2: Swift -- Run-I(A) Level 2: Health -- Mrc-Rcvry+(A), NmnCnv-Regen/Rcvry+(15) Level 2: Hurdle -- Jump-I(A) Level 2: Stamina -- PrfShf-EndMod(A), PrfShf-End%(17), EndMod-I(50) ------------
-
I ran your log through my experimental log parser, and here's what I got: Jounin : 19684.129999999994 Genin : 22061.18999999999 Caltrops : 291.77000000000015 Oni : 5814.840000000007 Rain of Fire : 643.2500000000006 Unbreakable Constraint : 443.32 (Minor trivia - shield breaker accounts for 3800 of the jounin's damage, explosive strike i 1000 of the genin's) The log looks very weird. There's several instances of this: 2019-10-01 23:42:02 Jounin: You reduce your targets damage resistance temporarily 2019-10-01 23:42:02 Jounin: You reduce your targets damage resistance temporarily 2019-10-01 23:42:02 Jounin: You reduce your targets damage resistance temporarily 2019-10-01 23:42:02 Jounin: You reduce your targets damage resistance temporarily 2019-10-01 23:42:02 Jounin: You reduce your targets damage resistance temporarily 2019-10-01 23:42:02 Jounin: You reduce your targets damage resistance temporarily 2019-10-01 23:42:02 Jounin: You reduce your targets damage resistance temporarily 2019-10-01 23:42:02 Jounin: You reduce your targets damage resistance temporarily Almost feels like a bug? Luckily the -res proc doesn't stack, so it wouldn't have impacted the damage count. I wonder why the Oni/Jounin did so little damage, perhaps the parser is wrong? However, if I take your completion time(~3 minutes) with the pylon's regen(~100 hps) and starting HP(~30k), the math roughly lines up(you did roughly ~50k dmg vs the pylon's 48k-ish HP). The values I would have expected are something like: Genin 20k, Jounin 25k, Oni 12k I'll try to fiddle with the parser and review your log. That's some very odd results!
-
You should be able to get more out of your MM attacks if you proc them out as well. Unfortunately, Ninja attacks have some of the worst proc options. Adding some -res procs would help even more. Here's my thugs/time unfinished build which makes heavy usage of procs. I'll try to finish it and test it without incarnates on Pineapple soon. Villain Plan by Mids' Reborn : Hero Designer 2.6.0.4 https://github.com/ImaginaryDevelopment/imaginary-hero-designer Click this DataLink to open the build! Level 50 Magic Mastermind Primary Power Set: Thugs Secondary Power Set: Time Manipulation Power Pool: Leadership Power Pool: Fighting Power Pool: Leaping Ancillary Pool: Mu Mastery Villain Profile: Level 1: Call Thugs -- SprMarofS-Acc/Dmg/EndRdx(A), SprMarofS-Acc/EndRdx(3), SprCmmoft-Acc/Dmg(3), CaltoArm-+Def(Pets)(5), ExpStr-Dam%(5), OvrFrc-Dam/KB(7) Level 1: Time Crawl -- PcnoftheT-Acc/EndRdx(A), PcnoftheT--Rchg%(7) Level 2: Dual Wield -- GldJvl-Acc/Dmg(A), Apc-Dmg/EndRdx(9), Apc-Dam%(9), ExpStr-Dam%(11), GldJvl-Dam%(11), FrcFdb-Rechg%(13) Level 4: Temporal Mending -- Prv-Absorb%(A), Prv-Heal(15), Prv-Heal/EndRdx(17), Prv-EndRdx/Rchg(17), Prv-Heal/Rchg(19), Prv-Heal/Rchg/EndRdx(19) Level 6: Time's Juncture -- DarWtcDsp-ToHitDeb(A), DarWtcDsp-ToHitdeb/Rchg/EndRdx(21), DarWtcDsp-ToHitDeb/EndRdx(21), DarWtcDsp-Slow%(23) Level 8: Equip Thugs -- EndRdx-I(A) Level 10: Maneuvers -- LucoftheG-Def/Rchg+(A), RedFrt-Def(23), RedFrt-Def/EndRdx(25) Level 12: Call Enforcer -- SprMarofS-Dmg(A), SprMarofS-Acc/Dmg(25), HO:Cyto(27), TchofLadG-%Dam(27), AchHee-ResDeb%(29), Empty(29) Level 14: Tactics -- GssSynFr--ToHit(A), GssSynFr--ToHit/EndRdx(31) Level 16: Distortion Field -- Lck-%Hold(A), RechRdx-I(31) Level 18: Gang War -- SprCmmoft-Dmg/EndRdx/Rchg(A), SprCmmoft-Rchg/PetAoEDef(31), SprCmmoft-Acc/Dmg/Rchg(33), SprCmmoft-Acc/Dmg/EndRdx/Rchg(33), EdcoftheM-PetDef(33), SvrRgh-PetResDam(34) Level 20: Boxing -- EndRdx-I(A) Level 22: Tough -- StdPrt-ResDam/Def+(A), StdPrt-ResKB(34), GldArm-3defTpProc(34) Level 24: Weave -- LucoftheG-Def/Rchg+(A), RedFrt-Def/EndRdx(36), RedFrt-Def(36) Level 26: Cross Punch -- Arm-Dmg(A), Arm-Dmg/EndRdx(36), Arm-Dam%(37), Obl-%Dam(37), FuroftheG-ResDeb%(37), FrcFdb-Rechg%(39) Level 28: Call Bruiser -- SprMarofS-Dmg/EndRdx(A), SprMarofS-EndRdx/+Resist/+Regen(39), SprCmmoft-Dmg/EndRdx(39), SlbAll-Acc/Dmg/Rchg(40), SlbAll-Build%(40), ExpStr-Dam%(40) Level 30: Farsight -- LucoftheG-Def/Rchg+(A), Rct-ResDam%(42), Rct-Def(42), Rct-Def/Rchg(42), Rct-Def/EndRdx/Rchg(43) Level 32: Upgrade Equipment -- EndRdx-I(A) Level 35: Slowed Response -- ShlBrk-Acc/EndRdx/Rchg(A), ShlBrk-DefDeb/EndRdx/Rchg(43), ShlBrk-Acc/Rchg(43), ShlBrk-Acc/DefDeb(45) Level 38: Chrono Shift -- RechRdx-I(A), RechRdx-I(45) Level 41: Combat Jumping -- LucoftheG-Def/Rchg+(A), BlsoftheZ-Travel/EndRdx(45), BlsoftheZ-Travel(46), BlsoftheZ-ResKB(46) Level 44: Charged Armor -- UnbGrd-Max HP%(A), UnbGrd-ResDam(46), UnbGrd-ResDam/EndRdx(48), UnbGrd-ResDam/EndRdx/Rchg(48) Level 47: Electrifying Fences -- Empty(A), Empty(48), Empty(50), Empty(50), Empty(50) Level 49: Kick -- EndRdx-I(A) Level 1: Brawl -- Empty(A) Level 1: Prestige Power Dash -- Empty(A) Level 1: Prestige Power Slide -- Empty(A) Level 1: Prestige Power Quick -- Empty(A) Level 1: Prestige Power Rush -- Empty(A) Level 1: Prestige Power Surge -- Empty(A) Level 1: Sprint -- Empty(A) Level 1: Supremacy Level 2: Rest -- Empty(A) Level 4: Ninja Run Level 2: Swift -- Empty(A) Level 2: Health -- Pnc-Heal/+End(A), Mrc-Rcvry+(13) Level 2: Hurdle -- Empty(A) Level 2: Stamina -- PrfShf-End%(A), PrfShf-EndMod(15) Level 50: Clarion Radial Epiphany Level 50: Musculature Radial Paragon ------------
-
Brawl is the highest DPA attack for *all* mercs, by a very wide margin(x3 for Spec Ops/Soldiers, x2 for Commando). It's no wonder the AI tries to sneak it in. Improving the garbage damage on their other attacks will probably make them more reluctant to use brawl. As a comparison, punks and enforcers rarely use brawl, which is only roughly 1.5 times better than their other attacks.
-
Reasons why /dark synergizes really well with demons: 1) Really, really strong heals. Defcapped T1 pets have a particular but fairly common failure state - they run out of range of one of your auras(or get knocked away from you), then take a big alpha and die. Demons mitigate this by having strong resistances even if they get pushed out of the fiddly small auras. The downside is that they take more damage overall, which /dark's incredibly strong healing can usually handle. It's hard to overstate how strong twilight grasp is - it's one of the highest AoE heals available(beating out most single target heals), at one of the lowest cooldowns and endurance costs. It also debuffs -hit, -dmg and -regen. It's bonkers. 2) Strong -dmg. An obvious complement to the concept of damage smoothing, the combo of resistance + -dmg + heals is what really makes damage bearable. /Dark can bring a strong -20%(-50% with dark servant) AoE damage reduction, and an absolutely ludicrous -100% damage on a single target. 3) Strong -hit. Resistances are nice, but you still don't wanna get hit at least by mooks. /Dark, even in its neutered MM state, can stack -30% hit in an AoE(darkest night/fearsome stare), not to mention dark servant's 50%+ extra -tohit. 4) Plugging resistance holes. Shadow Fall will perfectly slot into the gaping resistance holes of demons, bringing them(alongside pet auras) to a reasonable 50%. 5) Strong -res/-regen for hard targets. /Dark boasts some of the best -res(90s cd, -30%) and A-tier -regen(-500% with roughly 50% uptime, and roughly -250% stackable from twilight grasp, which brings you to an average -500%, on the level of cold and thermal). 6) A /dark MM can softcap s/l def and cap s/l/e resistances, making them a great tankermind. Due to options 1-5), you don't have to spend all your time tanking for your pets, you can instead strategically taunt dangerous targets. ... 7) It's fun to play. /Thermal and /Time are solid choices, but they're both fairly hands-off. Since /Dark relies heavily on debuffing, you want to be pushing all those buttons. Reasons why /dark isn't optimal for demons: 1) It doesn't help the pets hardcap res. This is a drawback compared to nature and thermal - you're effectively taking double damage when hit compared to them(but /dark gets hit a lot less often when it layers debuffs, and also keep in mind the gaping energy resist hole). 2) Dark is endurance hungry on an already endurance hungry AT. 3) Dark is very active, which means you can't make optimal use out of the excellent primary attacks. 4) Dark is a stack of cards, on top of the stack of cards that MM's pet herding already is. When things go wrong, they go very wrong. This is especially bad for demons because they have the longest recast/rebuff times, for some reason. 5) Missing Twilight Grasp twice in a row is infuriating.
-
Yeah I don't know what to say about that; I've kinda stopped using SNBR because of the unreported damage events. I'm working on a tool to measure DPS on my own but it's currently in a very crude stage. I'll redo the tests at some point to give better numbers. From my current log parses 20-30 DPS is normal for a T1 pet(without doublehit), so I have no idea how yours are pulling off that much - even with doublestacked SA and 2 procs the medic shouldn't be that high.
-
Oh hey, numbers! I've been cataloguing the MM pets in an excel sheet to evaluate their performance. You can see it here: https://docs.google.com/spreadsheets/d/1j6MiqD6aMXagyq6b-FNwbgOOBikjbU42-NYNQWeBksM/edit?usp=sharing Some grains of salt to take: - The pets never reach their theoretical DPS - this is clearly exemplified by the DPS tab where I fitted actual DPS rotations I saw the pets do. - Pets don't do well with really low CD powers(and mercs are "blessed" with these) - they just won't rotate them optimally - Pets don't do well with really high CD powers - they're prone to use them in bad situations(before a fight, at the end of a fight, AoEs on single targets, overkill, etc..) Looking at the powers, in my mind, the mercs's theme is roughly like this: Long animation time rifle bursts, lethal dmg, -def. Training and discipline. Good equipment(medkits, sniper rifles, rockets, grenades..). Their main drawback is very subpar damage values on most of their attacks. Let's compare numbers for say Punks vs Soldiers: Punks - 2 fast-animating attacks with a ~50% fill rate(fill rate is how much of their available time must be spent to cycle the attacks), for a total of ~470 DPM. A cone with roughly ~120 DPM. Soldiers - 3 slow-animating attacks with a total ~80% fill rate(!! very likely they won't use their powers effectively), for a total of ~470 DPM. No AOE Suggestions: - increase recharge of Assault Rifle Burst to 6 seconds - increase damage of all powers by 50%(!) End result: Soldiers end up as middle-of-the-pack(Ninjas>Demons>Beasts>Zombies>Buffed Mercs/Thugs>Bots>Current Mercs) single target ranged DPS, whose main utility is the -def they can stack. Medic vs Arsonist: Medic is really low on the DPS, but they make it up with some really nice utility(heal, mez protection). The SMG Heavy Burst they get gives them a decent Fill %. Their damage is atrocious. Suggestions: - boost the damage of SMG Heavy Burst and Frag Grenade by 50%. End result: This brings them halfway to Alpha Wolves(another "buff" pet), with some AoE capability. Spec Ops vs Enforcers: Enforcers are beasts. They not only do insane AoE damage(~420 DPM), their ST totals up to ~900 DPM! Their fill % is close to 100% with one really fast attack(Uzi Burst), so their realistic DPS is a bit below that potential. Spec Ops are meh. They don't do any AoE damage, their ST chain adds up to ~630 DPM, and to boot they ALSO have a low-cd power which they're unlikely to make great use of. Their shtick is a lot of utility(immob, stun, hold, -dmg). Suggestions: - SCAR Burst - up to 4 sec recharge, 40% more damage - SCAR Heavy Burst - 40% more damage - SCAR Snipe - 100% more damage End Result: This brings Spec Ops damage in line with enforcers. The snipe becomes an actual high damage ability(used to do LESS than a cone from enforcers..). The tradeoffs between the two are auras + aoe(enforcers) vs lockdown utility(spec ops) Commando vs Assault Bot It's difficult to compare the commando and the bruiser straight up, because they have different roles. The commando is closer to the assault bot in this regard - having to pick up the AoE slack from the first two tiers. Of course, nothing the Commando really does will measure up to the bullshit that is incendiary swarm missiles, but we can at least try to nudge him in that direction. Suggestions: - Burst - up to 6 s cd, 50% increased damage. - Full Auto - chance for last damage tick 10% -> 80%. Lower CD 60->30 - M30 Grenade - increase CD 12->16. 100% more damage. - LRM Rocket - lower CD 240 -> 120. 50% more damage. End result: Only a slight overall dmg increase(10%). AoE is more bursty, but overall DPM is not amazing(~700 DPM). For a comparison, AssBot is ~480 without burn patch, ~750 with(and this is without units taking damage from overlapping burn patches). The increased CD on burst reduces fill pressure. You can see the end result of my suggestions in my sheet - Mercs vs Buffed Mercs. The end results are nothing spectacular, but they would bring Mercs more in line with what other sets have. That needs to be coupled with a change to Serum(which is just meh for Mercs...it's actually way more useful for Thugs!). Here's a sample suggestion to make Serum more useful for the Mercs theme: Dig In! - 30 radius around MM - 25% res to all(-psi) - 10 KB protection - 100 immobilize(or whatever they put in to force you to stay put) - +25% Damage - +7.5% Hit - 30s duration, 240s recharge - affects MM pets only
-
Yup - I'm using a 0.051 update that the author posted a while back, maybe that helps. Anyway, here's another ~1:20 run, this time I can provide SNBR, build, and analysis. Here is the build(Hero Designer). Keep in mind, the build is in the "experimental" phase at the moment, I wouldn't call it complete and settled. The interfaces used are: Alpha Musculature Radial, Hybrid Assauld Radial, Destiny Clarion Radial, Interface Degenerative Radial And the video: SNBR overall DPS(keep in mind that SNBR doesn't process some damage events, e.g. Doublehit from Hybrid Assault Radial): The major difference from my previous builds is the very high personal DPS. Usually I would be down just below the Punks. The combo of dual wield + cross punch is great on paper - with both of them having force feedback and decent procs, the dps is (visibly) high. However, there seems to be a redraw issue with using cross punch - I can't quite tell but it seems like the redraw really slows down the normally fast dual wield. Earlier in this thread I wrote that degenerative's dot was pretty minor. I was wrong. Switching from Core to Radial has turned my Interface into a core part of my DPS. It deals 10% of the bruiser's dmg, 15% of the enforcers', and 20%! of the punk's. I think this is due to the way "chance to hit" dots work. Each tick of the dot if it fails to hit, it will sputter out and not even try more ticks. The Degenerative Core is a 25% chance, so it would very rarely proc more than 1 dot tick. The Degenerative Radial at 75% gives you a respectable chance. I'm not sure if it also has a higher chance of proccing in the first place, but the end result is that the damage on the Radial vastly outperforms the Core. The bruiser's DPS can vary quite a bit depending on when he uses knockout blow. In this run, he only used 2 haymakers and knockout blows. Sometimes he'll get locked into a jab/punch rotation, sometimes he'll decide to hurl in melee range...I think his dps can go all the way up to 80 if he is smart with his skills. Here's a sample Knockout Blow and why it's important that he uses more of them: Bruiser: Bruiser pulverizes Rikti Pylon with their Knockout Blow for 642.12 points of smashing damage! Bruiser: You hold Rikti Pylon with your Knockout Blow! Bruiser: You have knocked Rikti Pylon off their feet with your Knockout Blow! Bruiser: Rikti Pylon takes 97.57 points of bonus Smashing damage! Bruiser: Your Doublehit hits for 253.99 points of Energy damage! Bruiser: Your Degenerative Interface poisons Rikti Pylon for 14.55 points of toxic damage! The enforcers are usually very solid, and hover between 35 dps and 45 dps. Procs make up 30-40% of their DPS. My build manages to squeeze in both -Def Procs *and* Achilles Heel into their slotting, admittedly sacrificing some other stats. Luckily, thugs have boatloads of accuracy - Their powers have an innate 1.1 accuracy modifier, and between my tactics and the enforcers' you're looking at +15% tohit. The punks will usually perform well(I think this is them slightly overperforming), but they're the most likely ones to be gibbed. It takes a lot of auras to softcap your pets, many of which have small ranges - the enforcers have a 30 radius, 2 of the MM auras have 20...it's easy for your pets to wander out of aura range and get whacked by a hit that they can't take. This very much encourages blobbing together on top of your minions. No posse this attempt - they're honestly not a huge damage boost(even though I have slotted them for accuracy and damage...) - they'll usually do around 30 DPS. They just don't have enough attacks to cycle through. What saves them from complete mediocrity is the combination of interface + doublehit, which is probably 70% of their DPS, if not more. More runs to come: - Not forgetting to use Gang War! - Sneaking in Electrifying Fences for even more -res! - Replacing Dual Wield with Kick?! - Runs with demons/dark to contrast the dps of the primaries! - A demons/cold?! Stay tuned! BONUS! A ~65 second kill:

-
I've been tweaking a Thugs/Dark build and I can finally show some results. This first run is a showcase of the power of dark's debuffs - you can see the pylon at various points being at close to 0% regen, 35% hit(through 87% debuff resistance!), -90% damage... I'll try to include a screenshot of SNBR with the next run.
-
Human-form PB: my single target DPS is awful
BGSacho replied to Extor Prime's topic in Peacebringer & Warshade
What about tri-form warshades? PROs: High DPA attacks - Gravity Well(74 DPA), Black Dwarf Mire(60 DPA), Dwarf Smite, Nova Eye. Proc monsters - Gravity Well, Gravitic Emanations(!), Black Dwarf Drain(!) can be slotted with procs to achieve decent DPA Essences can achieve higher sustained DPS than photon seekers CONs: Not as much +dmg% vs 1 mob(~40% vs ~70%, assuming you slot build up into sunless mire, which is more questionable than inner light) RS is more DPS than gravity well due to its low recharge Black Dwarf Mire is high DPA but low DPS Photon Seekers are obviously better than no essences Inner Light frontloads a lot of its +dmg%, which allows you to use it with high DPA attacks. Mires just provided a steady +dmg%. What would a rotation look like? Black Dwarf Mire -> Gravity Well -> Smite -> Nova Eye -> Nova Blast This gives you a baseline of ~52 DPS, lower than a human-form PB, but not significantly so. This chain can be optimized to not use Smite(or Nova Blast) with high recharge, but I prefer the lower recharge version and slotting more procs into my powers instead. -
Human-form PB: my single target DPS is awful
BGSacho replied to Extor Prime's topic in Peacebringer & Warshade
(I use DPA to mean "Damage per animation second". DPA = Damage / cast time for a given skill) The two big questions are: Do you have enough high DPA attacks to form an attack chain? The highest ST DPA attacks for a human PB are, in order(with unslotted DPA given) Photon Seekers - 122 DPA Radiant Strike - 70 DPA Quasar - 56 DPA Incandescent Strike - 50 DPA Gleaming Blast - 38 DPA Glinting Eye - 24 DPA An attack chain with your build's recharge levels should look roughly like this: RS -> IS -> RS -> GB -> GE (You can replace GB/GE with Photon Seekers and Quasar when they're off CD for significant dmg boosts) This attack chain achieves an unslotted DPS of 56, let's round it down to 50 for slightly easier math / to account for casting Inner Light. With dmg enhancement(100%), musculature(~30%), inner light(~70%), you're looking at 200% dmg for close to 150 dps. Things you can do to improve your DPS: Damage procs. RS gives you roughly 6 DPS per non-purple proc, IS and GB ~2.5 each. You can slot RS as 5-slot hecatomb + any other proc, IS with 5-slot crushing impact(from your RS) + a dmg proc, and GB with 5-slot apocalypse(with the dmg proc) + one more dmg proc - this slotting should give you ~20 dps more than your current setup. -Res procs. PBs can easily slot achilles heel - that's a significant dmg boost if you can fit it into the rotation, e.g. in GB and GE. Cross Punch? I haven't tested it thoroughy, but Cross Punch with Boxing + Kicking is almost surely higher DPA than GE(I think it deals roughly the same damage as smite). Being able to replace GE with a "smite-like" skill would net you another ~15 DPS. Between these suggestions and the usage of Quasar/Photon Seekers into the build(especially just after inner light), you should be able to break 200 DPS. The lack of high DPA attacks to flesh out the rotation really hurts PB ST dps - falling back to GB/GE is painful. To put these numbers into some perspective - stj stalkers form an attack chain of 80-100 DPA skills, at least a third of which will be crits. If you can find a way to fit more higher DPA skills into your attack chain, that would be the solution for more DPS. As an aside - damage scale isn't really relevant, since the different forms don't really share the same skills. For example, human form blast is the same DPA as nova form blast, and radiant strike is higher DPA than dwarf smite. Here's some form DPAs for PBs: Nova Blast - 38 DPA Nova Eye - 41 DPA Dwarf Smite - 42 DPA Nova Form of course has the extra benefit of +45% dmg. With the numbers used earlier, we can compare human blast(73 dmg + 200% dmg = 219) vs Nova Blast(66 dmg + 245% dmg = 230) - the damage isn't hugely different. -
I agree with this assessment 😁 The slotting for jounin is brutal - they deal good dmg so you want to cap out their dmg, you also want an achilles heel proc, and they're the only ones really worth adding lady grey/siege breakers procs to. I struggled heavily slotting enforcers, and those don't have a looming threat of having to carry pet auras. Slotting procs into MM attacks isn't that bad, as long as your secondary (like /time) allows you to cycle through them reliably(unlike /dark or /traps). It's probably more worth it to slot a proc than boost the damage of an attack - some napkin math tells me that cycling aimed shot yields ~6 dps whereas without any global recharge you expect a 3.5 ppm at around 80 dmg proc to produce ~4.5 dps, so you'd be better off slotting a proc than a dmg IO. If you can 1) spare the skill slot and 2) spare the cast time, then it's not a bad addition to your build. Unfortunately "ranged damage" contains some of the worst sets for what MMs want, as you went over them. At least you can slot in something like explosive strike into dual wield. Necromancy gets some of the best in this regard - gloom has by far the highest DPA of all MM skills, and has a nice secondary effect to boot, AND its recharge is long enough that you're not stuck spamming it all the time to get the benefit out of procs. I would probably frankenslot that with a variety of procs, or maybe even go for a 5 siphon insight + 1 cloud senses, because siphon insight's set bonuses are sick.
-
Hurl is now under Upgrade Equipment, along with his highest dmg power - knockout blow, so you can't really avoid putting it on the bruiser.
-
Check out https://forums.homecomingservers.com/index.php/topic,4276.0.html