The Beta Account Center is temporarily unavailable
×


Voltak
-
Posts
1088 -
Joined
-
Last visited
-
Days Won
1
Content Type
Profiles
Forums
Events
Store
Articles
Patch Notes
Everything posted by Voltak
-
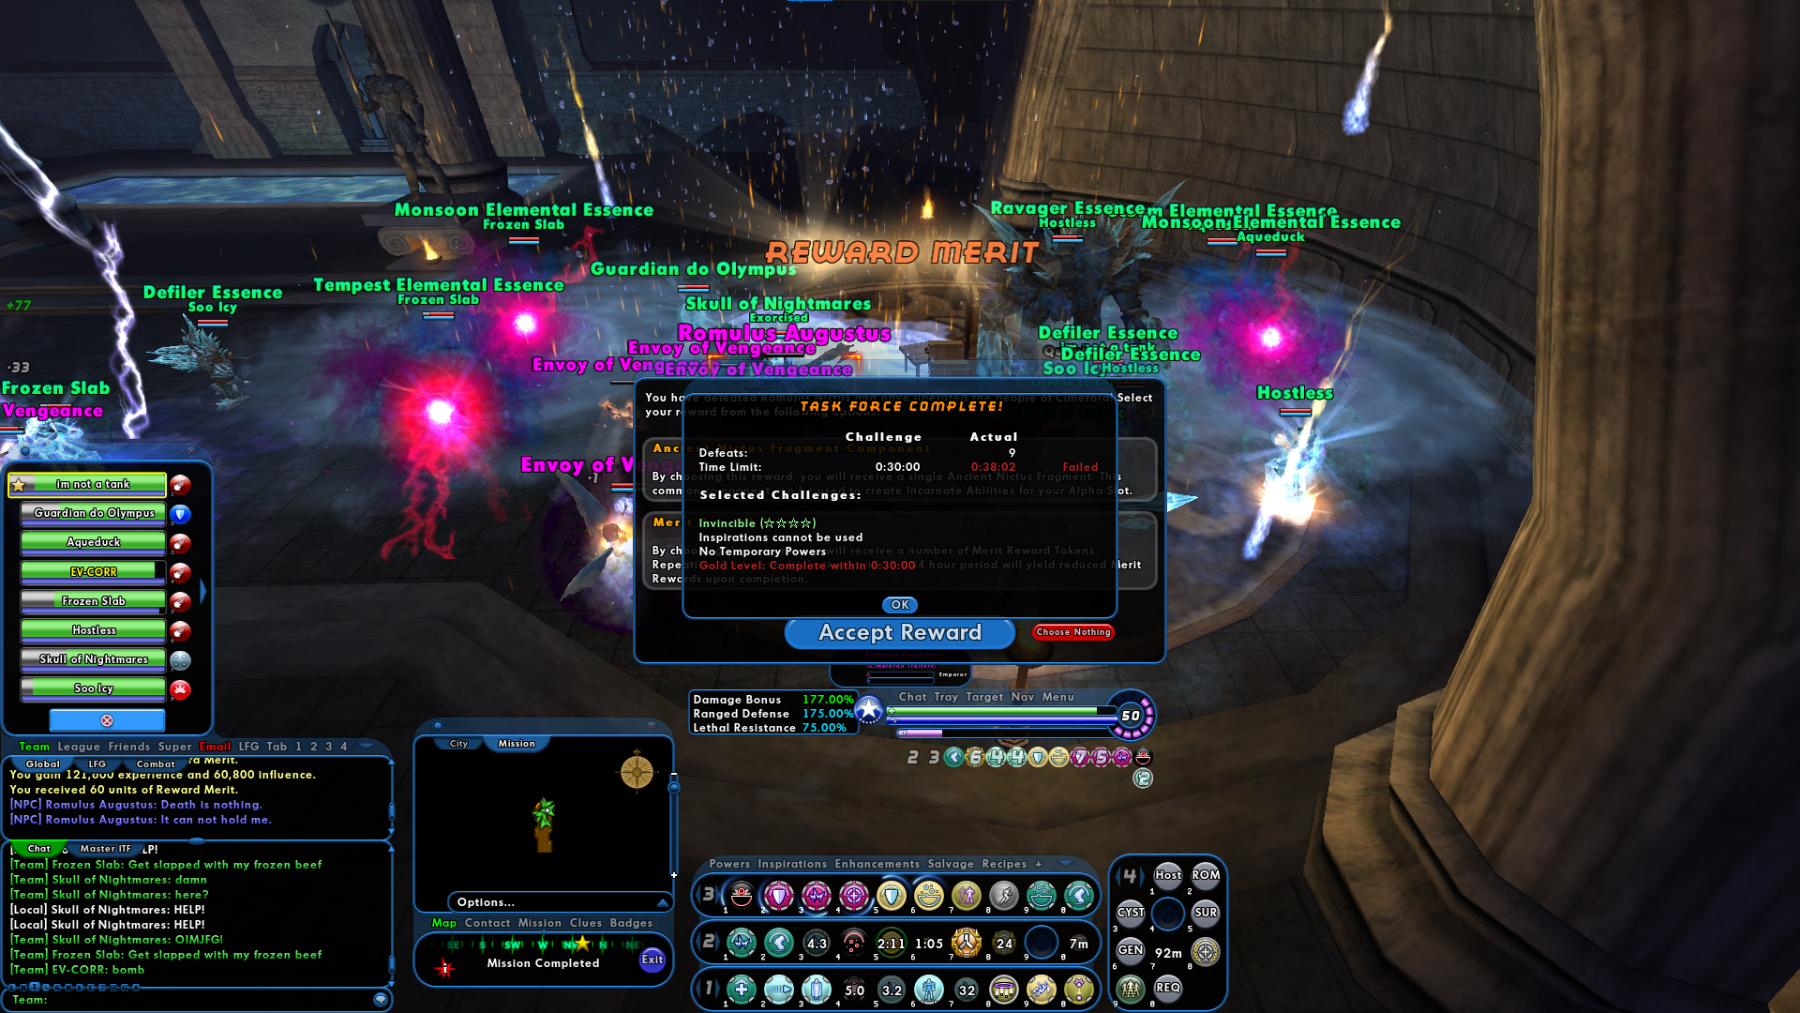
 4*ITF 38:02 9deaths : Tank - BioTW@Skull, Blaster IceTime@Raw, Corrs - WaterCold@Acre IceKin@EV IceCold@Rev IceCold@seductive FireCold@SIM, Def NatureSonic@Voltak
-
Yes, I would and I have. It's good
-
OH MY GOD LMAO NO inspirations and no deaths allowed, otherwise it is way too easy
-
Build has been updated
-
Same way it was in other games where competition is on a more serious level. Diablo 3 Rankings - greater rift clearings in teams Guild Wars , to include PvP WoW (raids) In CoH, a team of strong players, voice communications, strong builds, and power sets that are uniform or in harmony with your planned strategy ... all those things together are very important factors for any speed run at the most difficult settings. The power sets will be picked according to the strategy which was already agreed upon by players doing w/e it is. The bottom line is that a "dream team" is only picked AFTER you know what strategy and tactics you are going to be using. That's what you sort out first, ONLY THEN you figure out what power sets you pick. Experience talking here
-
I run Incandescence on my Nature Defender The boosts to the heals are out of this world it also helps the MM tremendously to reposition pets It helps a lot in Part 2 Same thing in Part 4 when it's time to regroup or rez and so on
-
(Mostly) Canon Night Widow Build -- Be the baddie!
Voltak replied to Stealthrider's topic in Arachnos Soldier & Widow
Cool posts and all, really, kudos. But... you did not solo "even the difficult ones". You said, let it be known that they can but you did not. Nothing negative here from me. But to cheer you on, don't give up. Try to finish them, try to not use temp powers, since those can dramatically shift the burden from the build to the temp powers. Keep us posted. -
Jumping in to add that Widows, especially Fortunatas, need to be included in some of these lists. The buffs they bring to the team, the low resistance to Psy dmg (or no resistance in some cases) all over the ITF, and their extremely high level of defenses with scaling resistances are a very good help to almost any team make up. Hybrid builds are extremely potent in ST dmg as well.
-
A few notes Even with some of the defense from Mask Presence gone, you have 77.7% defense to range in this build. That's excellent for the ITF 4 Star. Your Vengeance should be perma (assuming a dead team mate body is available) Please remember to use Vengeance any time someone dies, you or a defender should be the ones using this since the both of you have the highest number modifiers for this power. If your endurance issues are going to be covered in the team, switch to Musculature Alpha for dmg or Nerve Core for added defense boosts for your self and the whole team. I don't recommend agility because it will interfere with proc rates. Your default is Cardiac Core Destiny -- Barrier or Rebirth (preference for Barrier for META 4 star runs as long as your healing is covered by teammates) Hybrid - Assault Radial Without using Aim, you should be sitting at 65% dmg buff (or so) in this build. With accolades, you should be at 1606 Hitpoints. Special notes You should be providing 28% Defense buffs to yourself and the team. You are providing 30% dmg buff You are providing more than enough To Hit buffs for your team. PSY dmg rocks in the ITF. It is the least resisted dmg. One single defense shield on you and you are going to be near or over 100% defense. HOVER/ FLY is your best defense. But don't worry, if you are ever caught in melee range, just remember your melee defenses are even higher than your range defenses. The problem is all defense debuffs in the ITF are coming from melee attacks, so be extremely careful. Cimerorans are like piranhas. They can quickly chew your defenses to the red zone if they get in melee range. This Hero build was built using Mids Reborn 3.0.4.7 https://github.com/Reborn-Team/MidsReborn Click this DataLink to open the build! Mentalizta PVE: Level 50 Science Arachnos Widow Primary Power Set: Fortunata Training Secondary Power Set: Fortunata Teamwork Power Pool: Flight Power Pool: Speed Power Pool: Leadership Power Pool: Fighting Hero Profile: Level 1: Telekinetic Blast -- SprSpdBit-Acc/Dmg/EndRdx/Rchg(A), SprSpdBit-Acc/Dmg(3), ExpStr-Dam%(3), SprSpdBit-Acc/Dmg/Rchg(5), GldJvl-Dam%(5), SprSpdBit-Rchg/Global Toxic(7) Level 1: Combat Training: Defensive -- RedFrt-EndRdx/Rchg(A), RedFrt-EndRdx(7), RedFrt-Def(9), RedFrt-Def/EndRdx/Rchg(9), RedFrt-Def/EndRdx(11), RedFrt-Def/Rchg(11) Level 2: Subdue -- GldJvl-Dam%(A), Apc-Dam%(13), Apc-Dmg/Rchg(13), Apc-Acc/Dmg/Rchg(15), Apc-Dmg/EndRdx(15), Apc-Dmg(17) Level 4: Combat Training: Offensive -- Acc-I(A) Level 6: Aim -- GssSynFr--Build%(A), GssSynFr--ToHit(17), GssSynFr--ToHit/Rchg(21), GssSynFr--ToHit/Rchg/EndRdx(21), GssSynFr--Rchg/EndRdx(23), GssSynFr--ToHit/EndRdx(48) Level 8: Tactical Training: Maneuvers -- RedFrt-Def/EndRdx(A), RedFrt-Def/Rchg(23), RedFrt-EndRdx/Rchg(25), RedFrt-Def/EndRdx/Rchg(25), RedFrt-Def(27), RedFrt-EndRdx(27) Level 10: Indomitable Will -- GldArm-3defTpProc(A), StdPrt-ResDam/Def+(29) Level 12: Dominate -- GhsWdwEmb-Dam%(A), GldJvl-Dam%(31), Thn-Acc/Dmg/Rchg(31), Thn-Acc/Dmg/EndRdx(33), Thn-Dmg/EndRdx/Rchg(33), UnbCns-Dam%(33) Level 14: Hover -- LucoftheG-Def/Rchg+(A), ShlWal-ResDam/Re TP(29) Level 16: Tactical Training: Assault -- EndRdx-I(A) Level 18: Fly -- BlsoftheZ-Travel/EndRdx(A) Level 20: Tactical Training: Leadership -- AdjTrg-ToHit/EndRdx/Rchg(A), AdjTrg-ToHit/EndRdx(43), AdjTrg-EndRdx/Rchg(43), AdjTrg-ToHit/Rchg(43), AdjTrg-ToHit(46) Level 22: Foresight -- RedFrt-Def/EndRdx(A), RedFrt-Def/Rchg(34), RedFrt-Def(34), RedFrt-EndRdx/Rchg(34), RedFrt-EndRdx(36), RedFrt-Def/EndRdx/Rchg(36) Level 24: Mask Presence -- LucoftheG-Def/Rchg+(A), LucoftheG-Def/EndRdx(40), LucoftheG-Def/EndRdx/Rchg(45) Level 26: Mind Link -- RedFrt-Def/EndRdx(A), RedFrt-Def/Rchg(36), RedFrt-EndRdx/Rchg(37), RedFrt-Def/EndRdx/Rchg(37), RedFrt-Def(37), RedFrt-EndRdx(39) Level 28: Hasten -- RechRdx-I(A), RechRdx-I(31) Level 30: Maneuvers -- LucoftheG-Def/EndRdx(A), LucoftheG-Def/Rchg+(46), LucoftheG-Def/EndRdx/Rchg(48) Level 32: Psychic Wail -- SprDmnofA-Acc/Dmg(A), SprDmnofA-Dmg/Rchg(39), SprDmnofA-Acc/Dmg/Rchg(39), SprDmnofA-Dmg/EndRdx/Rchg(40), SprDmnofA-Acc/Dmg/EndRdx/Rchg(40) Level 35: Confuse -- CrcPrs-Conf%(A), CrcPrs-Conf(42), CrcPrs-Acc/Conf/Rchg(42), CrcPrs-Conf/Rchg(45), CrcPrs-Conf/EndRdx(45), CrcPrs-Acc/Rchg(46) Level 38: Assault -- EndRdx-I(A) Level 41: Boxing -- Empty(A) Level 44: Tough -- UnbGrd-ResDam/EndRdx/Rchg(A), UnbGrd-ResDam(50), UnbGrd-ResDam/EndRdx(50), UnbGrd-EndRdx/Rchg(50) Level 47: Weave -- LucoftheG-Def/Rchg+(A) Level 49: Tactical Training: Vengeance -- LucoftheG-Def/Rchg+(A) Level 1: Conditioning | Hidden Level 1: Brawl -- Empty(A) Level 1: Sprint -- Empty(A) Level 2: Rest -- Heal-I(A) Level 2: Swift -- Run-I(A) Level 2: Hurdle -- Jump-I(A) Level 2: Health -- Prv-Absorb%(A), Mrc-Rcvry+(19), NmnCnv-EndRdx/Rchg(48) Level 2: Stamina -- PrfShf-End%(A), PrfShf-EndMod(19), PrfShf-EndMod/Acc(42) Level 50: Born In Battle Level 50: Demonic Aura Level 50: Elusive Mind Level 50: Force of Nature Level 50: High Pain Threshold Level 50: Invader Level 50: Marshal Level 50: Megalomaniac Level 50: Task Force Commander Level 50: Freedom Phalanx Reserve Level 50: Cardiac Core Paragon ------------ ------------ BELOW ARE THE NEW ITF (ADVANCED settings) VIDEOS
-
Check this same Forum section I will have the builds and the vids in one place
-
ITF 4 STAR -- OVER 100 Deaths, the dark side of 4 Star ITF.
Voltak replied to Voltak's topic in General Discussion
Please check the Arachnos, VEATS section. -
The only reason to take Soul Mastery over Dark Mastery is because of PB. If you can take soul drain from Dark and you do not want PB, then go dark mastery
-
ITF 4 STAR -- OVER 100 Deaths, the dark side of 4 Star ITF.
Voltak replied to Voltak's topic in General Discussion
If you invite me to AEON I will join with my Fort. I have not made an AEON video yet. I want to. -
ITF 4 STAR -- OVER 100 Deaths, the dark side of 4 Star ITF.
Voltak replied to Voltak's topic in General Discussion
Snarky, I totally feel this. On the one hand I love a good challenge, and I tend to steer away from easy content. On the other hand, some things in this TF make me think -- "Ok, this was not needed, that was not needed, that other one, not needed to make a good challenge. " The 801 series and my own AE challenges are very challenging but you can do those with a myriad of team combinations and the average team to complete those are FAR FAR less than this TF. I really think I can relate with what you said. -
Once you get practice and learn, one thing, among others, you will notice is that there is a sweet spot right above your enemies' heads. You can cast soul drain being in the middle of them but just above their heads, so, mid group but above. You will soul drain as many as you can drain while on the ground. You will still be at range but still close enough to hit with SD.
-
Given the teams for 4 star ITF, there is no "pigeon hole" themselves into Clarion. You can get status protection from a myriad of sources given the myriad of team make up/support options. I have 2 destinies already, and I plant to have a 3rd. But Fubar is making a point in addition to the others. I think if you are going hover/range, your range defense should be the highest.
-
Forget it. Don't even consider it. Move to something more useful for the team
-
41 mins, right? I am not knocking it down, brother. Just saying a hover corr can cast soul drain as well , just takes a little bit more skill or practice to get the distance down right. Flying is more difficult than on the ground running. That is the disadvantage of flying, the mechanics, the controls are not as easy as running.
-
Hello, I have my build posted. If I am not mistaken, it is in one of the post I made doing ITF runs before the new ITF came out.
-
Since this is a build for the very easy content of the game, I will say that it's hard to mess up a build, or I can say that you can make anything work in very easy mode. I can jump in when the OP wants a build for the hardest content of the game. Yeah, Fubar plays a ground game, and I don't as a corruptor. I can do the heals and everything he talks about while hovering. It's a matter of getting your distance measurement or feel right. It's a matter of skill to be able to be that close but also far enough to still benefit of the range defense number. But, hey, anything FUbar and other Expert Dark Miasma players recommend, I would value greatly. I am not the only Dark Miasma Expert, not by a long a long shot.
-
I don't only want to publish the excellent results. More often than not, in the City of Heroes game, the results are way sub-optimal for average teams, average skills, and average builds. This is one such video of when things that can go wrong, will go wrong. It is important to also note that this is the average result especially in Pick UP Groups. This team had many PUG members. So, it's our first time playing together. My advice -- keep a positive attitude. This is just a game. Have fun.
-
Buffs, team buffs. Ageless , SB, energizing circuit. I almost never solo. From 18 secs, down to about 12
-
The buffs don't last five seconds with the exception of the buff that works like the Force Feedback recharge + proc, except it works 100% of the time. It's better than the FF proc because it is guaranteed , it affects more than one player, it gives a big endurance boost. FF proc affects only one person and it is a chance only. So, yeah, it's clearly better. That recharge boost last 4-5 seconds and it works every time it is cast. It's a pretty sweet buff.After 5-6 seconds it is recharged and ready to be used again. If you want or need endurance boost. Not super important like the AbsorbsThat's the only one that lasts so short. You don't have to use it every time it is recharged. So out of all the powers Elec Affinity has , you pick one power to say that the buffs last for 5 secs? Where there is only one that last 5 secs and it is not like it's mandatory to use if it is recharged all the time, bro.
-
The Fortunata ( a Widow specialized in range Psi dmg) is a very useful character for the ITF. It's very high in all kinds of positional defenses. It dishes out the least resisted dmg in the ITF. It provides some serious buffs to the team. I go over this in the video. We had no tank. I was leading the contact with the enemies is most cases. We took 1 hour and 31 minutes to complete. Half the team only had T2 incarnates.
-
Down time is only 12 seconds on my Defender. Again, the boost lasts 10 seconds. The down time is 12 seconds for me. Absolutely worth it.