

SmalltalkJava
-
Posts
830 -
Joined
-
Last visited
Content Type
Profiles
Forums
Events
Store
Articles
Patch Notes
Posts posted by SmalltalkJava
-
-
Nice. I'd like to get more resists. I'm just not sure where to take it from here.
-
The percent chance on overwhelming force is in regards to causing a knockdown for skills that don't have it. Like if you slotted it in Brawl. It would give brawl a proc chance to KD. However for skills it is in it always turns KB into KD.
-
 1
1
-
-
Without looking at the build you can usually replace a hami with a set piece that does the same thing or at least gets close. Usually like an acc/dam or damage/end io from a set. It gets you close usually
-
2
-
-
30 minutes ago, cohRock said:
said, I'm still concerned about the efficacy of Overwhelming Force:Chance for Knockback to Knockdown. Can it be relied on to at least usually avoid knockback in a long-recharge power?
It will always work. It's not actually a proc in the normal sense. It turns the KB to KD on the skill it's slotted on.
-
1
-
-
I've been playing around with Dual Pistols and SR on the test server for the last few days. Trying to find a Dual Pistols and SR build that I enjoyed. One of the problems that plagues me is finding a streamlined attack rotation. Finding those is just something that I'm not good at. Luckily @nihilii solved the base line starting point for me with his DP/Regen build that was posted in the Pylon Damage Thread that used: Executioner's Shot -> Suppressive Fire -> Pistols. I started out porting that build to DP/SR and it worked, but without ageless it ran out of endurance rather quickly. So then it occurred to me that I could swap Pistols for Duel Wield to take advantage of Defensive Opportunity. Luckily after some rework and multiple builds, I was able to get it in a position where I could go without using blues and not rely on ageless. As a matter of fact, I like my builds to run without incarnates just to see how they run naturally. I was able to use Executioner's Shot -> Suppressive Fire -> Duel Wield. And if I messed up, then I could just reverse it. So it was really forgiving. And it doesn't need Incarnates.
I was able to take down a pylon without incarnates and without inspirations. It took a while but I did it. I also spent some time running a few PI missions at +3x8 and also the PI portal mission. They all went pretty well. I ran some Dark Astoria missions and f' those Assassins. Regardless, I found this build to be fun and smooth.
Things I like about it
- Perma Hasten
- Soft Capped to positional defenses, without Hover running, turn on Hover for another percent or two if you need it.
- 24.33 Second recharge on Hail of Bullets nuke.
- 4.79 second recharge on Bullet Rain aoe.
- When your endurance starts to get down, then that is about the time Defensive Opportunity comes online and right back up it fills.
- S/L Resists at 30.49 E/N/F/C are at 17.75
- Victory Rush for use to help out teammates that might have endurance problems
- Easy 3 attack rotation for single targets.
It's not a world breaker, but it was relaxing and fun.
Here is a short video of it in action
The Build
Ps. in the build. Evasion, Tactics, Focus Senses, and Agile have alternate slot options. They are ones that I was flipping back and forth with as I was trying things out in game. I was looking at Hasten recharge time, resists, and defenses. Trying to find sweet spots.
SpoilerThis Hero build was built using Mids Reborn 3.0.5.6
https://github.com/Reborn-Team/MidsRebornDP - SR FINAL TEST 2: Level 50 Magic Sentinel
Primary Power Set: Dual Pistols
Secondary Power Set: Super Reflexes
Power Pool: Flight
Power Pool: Fighting
Power Pool: Speed
Power Pool: LeadershipHero Profile:
------------
Level 1: Dual Wield
(A) Thunderstrike - Damage/Endurance
(3) Force Feedback - Chance for +Recharge
(3) Gladiator's Javelin - Chance of Damage(Toxic)
(5) Explosive Strike - Chance for Smashing Damage
(5) Impeded Swiftness - Chance of Damage(Smashing)
(7) Decimation - Chance of Build Up
Level 1: Focused Fighting
(A) Reactive Defenses - Defense
(7) Reactive Defenses - Defense/Endurance
Level 2: Focused Senses
(A) Luck of the Gambler - Defense/Increased Global Recharge Speed
(9) Red Fortune - Defense
(9) Red Fortune - Defense/Endurance
(11) Red Fortune - Defense/Recharge
(11) Red Fortune - Endurance
(13) Red Fortune - Defense/Endurance/Recharge
Level 4: Agile
(A) Kismet - Accuracy +6%
(15) Kismet - Defense/Endurance
(17) Shield Wall - Defense
(17) Shield Wall - +Res (Teleportation), +5% Res (All)
(19) Shield Wall - Defense/Endurance
(19) Shield Wall - Defense/Endurance/Recharge
Level 6: Suppressive Fire
(A) Unbreakable Constraint - Chance for Smashing Damage
(21) Gladiator's Javelin - Chance of Damage(Toxic)
(21) Ghost Widow's Embrace - Chance of Damage(Psionic)
(23) Neuronic Shutdown - Chance of Damage(Psionic)
(23) Gladiator's Net - Chance of Damage(Lethal)
(25) Thunderstrike - Damage/Endurance
Level 8: Swap Ammo
Level 10: Master Brawler
(A) Panacea - Heal/Endurance
(25) Panacea - Endurance/Recharge
(27) Panacea - Heal/Recharge
(27) Panacea - Heal/Endurance/Recharge
(29) Panacea - Heal
(29) Panacea - +Hit Points/Endurance
Level 12: Bullet Rain
(A) Superior Sentinel's Ward - Accuracy/Damage
(31) Superior Sentinel's Ward - Damage/RechargeTime
(31) Superior Sentinel's Ward - Accuracy/Damage/RechargeTime
(31) Superior Sentinel's Ward - Accuracy/Damage/Endurance
(33) Superior Sentinel's Ward - Accuracy/Damage/Endurance/RechargeTime
(33) Superior Sentinel's Ward - RechargeTime/Chance for +Absorb
Level 14: Hover
(A) Blessing of the Zephyr - Run Speed, Jump, Flight Speed, Range/Endurance
(33) Blessing of the Zephyr - Run Speed, Jump, Flight Speed, Range
Level 16: Enduring
(A) Performance Shifter - Chance for +End
(34) Performance Shifter - EndMod
(34) Power Transfer - EndMod
Level 18: Executioner's Shot
(A) Apocalypse - Accuracy/Recharge
(34) Apocalypse - Damage
(36) Apocalypse - Damage/Endurance
(36) Apocalypse - Accuracy/Damage/Recharge
(36) Apocalypse - Chance of Damage(Negative)
(37) Achilles' Heel - Chance for Res Debuff
Level 20: Boxing
(A) Accuracy IO
Level 22: Hasten
(A) Recharge Reduction IO
(37) Recharge Reduction IO
Level 24: Fly
(A) Blessing of the Zephyr - Run Speed, Jump, Flight Speed, Range/Endurance
(37) Blessing of the Zephyr - Run Speed, Jump, Flight Speed, Range
Level 26: Tough
(A) Steadfast Protection - Resistance/+Def 3%
(39) Gladiator's Armor - TP Protection +3% Def (All)
(39) Unbreakable Guard - Resistance
(39) Unbreakable Guard - Resistance/Endurance
(40) Unbreakable Guard - Resistance/Endurance/RechargeTime
(40) Unbreakable Guard - +Max HP
Level 28: Dodge
(A) Luck of the Gambler - Defense/Increased Global Recharge Speed
Level 30: Weave
(A) Luck of the Gambler - Defense/Increased Global Recharge Speed
(40) Reactive Defenses - Defense/Endurance
(42) Reactive Defenses - Scaling Resist Damage
Level 32: Hail of Bullets
(A) Armageddon - Accuracy/Recharge
(42) Armageddon - Damage/Endurance
(42) Armageddon - Damage/Recharge
(43) Armageddon - Accuracy/Damage/Recharge
(43) Armageddon - Chance for Fire Damage
(43) Fury of the Gladiator - Chance for Res Debuff
Level 35: Quickness
(A) Run Speed IO
Level 38: Evasion
(A) Luck of the Gambler - Defense/Increased Global Recharge Speed
(45) Red Fortune - Defense/Endurance
(45) Red Fortune - Defense/Recharge
(45) Red Fortune - Endurance
(46) Red Fortune - Defense/Endurance/Recharge
(46) Red Fortune - Defense
Level 41: Maneuvers
(A) Luck of the Gambler - Defense
(46) Luck of the Gambler - Defense/Endurance
(48) Luck of the Gambler - Defense/Increased Global Recharge Speed
Level 44: Tactics
(A) Gaussian's Synchronized Fire-Control - Chance for Build Up
(48) Adjusted Targeting - To Hit Buff
(48) Adjusted Targeting - To Hit Buff/Recharge
(50) Adjusted Targeting - To Hit Buff/Endurance/Recharge
(50) Adjusted Targeting - Endurance/Recharge
(50) Adjusted Targeting - To Hit Buff/Endurance
Level 47: Assault
(A) Endurance Reduction IO
Level 49: Victory Rush
(A) Performance Shifter - Chance for +End
Level 1: Opportunity
Level 1: Brawl
(A) Empty
Level 1: Sprint
(A) Celerity - +Stealth
Level 2: Rest
(A) Empty
Level 2: Swift
(A) Run Speed IO
Level 2: Hurdle
(A) Jumping IO
Level 2: Health
(A) Numina's Convalesence - +Regeneration/+Recovery
(13) Miracle - +Recovery
Level 2: Stamina
(A) Performance Shifter - EndMod
(15) Performance Shifter - Chance for +End
Level 24: Afterburner
Level 1: Prestige Power Dash
(A) Empty
Level 1: Prestige Power Slide
(A) Empty
Level 1: Prestige Power Quick
(A) Empty
Level 1: Prestige Power Rush
(A) Empty
Level 1: Prestige Power Surge
(A) Empty
Level 4: Ninja Run
Level 50: Musculature Core Paragon
Level 50: Freedom Phalanx Reserve
Level 50: Portal Jockey
Level 50: Task Force Commander
Level 50: The Atlas Medallion
Level 8: Chemical Ammunition
Level 8: Cryo Ammunition
Level 8: Incendiary Ammunition
------------| Copy & Paste this data into Mids Reborn : Hero Designer to view the build |
|-------------------------------------------------------------------|
|MxDz;1576;753;1506;HEX;|
|78DA65944B4F135114C7EFD029D8963EA0E5DDD2E1D902EDD0A21B5F21C682E1651|
|A4ADC28D6A10CA5A6968629092C5DF805DCB831F85890B8F13BB8F7B93211637CC4|
|A540A226B230F574CEDFD2A493B4BF73CFB9E7DEFFB973EE2C6C279A9F5FB93B292|
|4D7E5BC6618E9945E28E50A7ADEBAA0657319418F2F9154A24A6A51999EB97A695E|
|599A4A2D29134D14F0FF9F9B5ED40A597D554D6C69F97432679436F246B01A4CE86|
|B7AC1D0D5D45651DF4C2FEA6B797D5B378423B9B19157A7F3B9EC7AC9C976C5CC15|
|B27673942AEAFAAADB34E7756D55DF34D673C5EEA9622EA356975ED0323AFD19257|
|D73A79314A9F4FB14A23FA922BC6C15BB84B82C1AEE3530231693F20E8DBDC43D9A|
|189045E3439A1792C5F570355712073CB7F19079836212D695DA24D377CA05DA997|
|607E866363B99CB946B41AEE5AF30F7741D333DB3BCBE678ED93A5DA14DB4CE303F|
|533D56C1B9D619AEC3873A7C77587FBB064E594C76A2EE2F94DBC4B9E59BA4C1060|
|D363FE7770698DDBD6090E957C03EE6575AC7815CC74BD9F4F5BE025F836F98CA5B|
|F01DD346029CAC4172EEB37EE50353234D6E5EB7C1FD807D7DF7C123CEFF467BB7A|
|0FE9671C422CC8158837946032AC671E6E00B7EBF12EDEDE55CE1EDE633E9275F1B|
|DE71DB9830F3074107C53AA0B5035A07A1D542B12E9C4157079FF7F0049FCFF02FF|
|03733F4073C66DEA23A7B3857F4A077645A2F80DA03F085D06B233F99DFA9F6206A|
|0F9E671D2317C0B3CCD173E0457092735768CF7EECD91FE5DA33E41B420D43D8338|
|2DE8DA07723E8DD287A378A1E6F21BD61E80DFB10F330C7B19697E68C61FDB167AC|
|677C177CC48C3F069F804F99AD94AB42AFDAC77AF74685889917B22C62E88FDB239|
|53B6A357BDA2F0B3CE5CAB05C16F372F50653BB734652868B7C9239EB87BD7A9785|
|84B339A8F585D97778E293A46BB8D3B392F9AD38AA8DA1675DD028DAAB7D541EADD|
|318ABF3C4EB3CA7EB3C67EA3C360F7D55B0CB1CB5791C76D27E622FD7D85A8DBD52|
|63BFAFF94AECD7D81F6BEC7F5FA1F941|
|-------------------------------------------------------------------|-
3
-
So. I just realized that Performance Shifter + chance for End aren't unique. Do they actually both proc if they are slotted in different skills? So for a Super Reflexes sentinel would it make sense to put one in Stamina, and also Enduring?
example:
Enduring with a Perf Shifter +chance, and a Perf Shifter Endo
Stamina with Lets say Perf Shifter +chance, and a Perf Shifter Endo and 50 endo mod
I have 5 slots. and i'm trying to figure out how to best slot them for max end recovery. I might be able to open up one more slot, to add onto Enduring, but i'm not quite sure if i'll be able to.
-
It runs on my wife's windows 10 laptop that doesn't have a graphics card.
-
Good ideas. I'm not a cold or thermal player. Is there to combine them or just use one to max resist and/or def for the pets?
Something else to consider is a nature and/ or rad in there for entangling aura and the rad version Choking Cloud. Slot them both with the +2 mag hold proc and some hold duration. I run a defender nature and several MM nature's and it's a nice ability. Nature also has the health absorb whick keeps the T1 pets from being one shot.
Just tossing ideas.
-
I have a Beast/kin. Get used to healing you will be using it a lot. This post isn't meant to be overly negative or positive on the combo, it's just what I've noticed. Your T1 pets will die a lot. I'm writing this on my phone so forgive any typos or abruptness.
1. Keep your self topped off with siphon speed.
2. Keep you Speed Boost and Increase Density buffs up on the pets at all times. Practice so you can do it on teams. Get the feel for how long it lasts so you don't waste time over casting it. Look in the guides forum for a recent bind files topic for helping with this.
3. Fulcrum Shift is a game changer. It's worth the wait of your fighting more than a few mobs. I like to use stealth to be able to get in close and fire it off. Jumping in does ok also.
4. Take the MasterMind attacks. Use them. Add in accuracy end redux at low levels so you can hit and keep spamming them. More on this in a bit. See item 6.
5. Eventually Do what you can to get your io slotting to get soft capped smash/lethal defences. This is a key.
6. Super Key. Pet control, pet control. With speed boost they will be running at 1 million miles an hour. I've mentioned this concept before and it's called the /assist pain train. In old Dark Age of Camelot DAOC. The players in a group would have a main assist person. The target selector, if you will. Everyone in the group would just keep a using a command called /assist to ensure they were all attacking the same target. It was concentration of damage and it was overwhelming. I vew the MM as the commander. So you keep the pets on the target you want at all times. I do this with easy macroing of my attacks combined with pet attack commands. It s a synergy of overwhelming force multiplied by 6 pets and yourself. Start with bosses and work your way down.
An example. This is a macro, you can use it as a bind if you prefer.
/macro HAWKS "petcomall attack$$powexecname Call Hawks"
Do that for Call Swarm and Call Ravens. In between heal, siphon, buff. But above all keep your pets on the target you want. .
It's crazy, chaotic and a lot to handle. More than any other secondary. it's also a very rewarding secondary, but not super uber in certain conditions. pet damage caps and all. But if your ever on an all MM team. It's gloriously hilarious and almost frightening.
-
2
-
-
I have a beam rifle sentinel. The animations "seem" to take forever. I'm almost level 50 on it so I'll stick with it one more level. @Hew What order should I use to maximize disentegrate? After about 2 missions I feel like I'm dozing off. I even made the toon look like the cyclone armor from Robotech. Well as close as I could get it. It's a BR/SR sentinel level 49.
Kinetic Melee I like. The first 3 powers do as much damage as the big hitter and together they animate at roughly the same time length as the big hitter. Weird but cool. You basically don't really need to use that big animation time attack. Additionally one of them looks like you are breaking spines when the enemy turns to run. It's hilarious. Palm strike to the spine. Just brutal! It cracks me up Everytime.
-
2 minutes ago, TheZag said:
i wouldnt mind having the upgrades baked in at certain levels to open up 2 new powers in each set.
I like that idea. It would really open up MM fun-ability.
-
1
-
-
I enjoy it on my Mercs/Elec Mastermind. I like mercs because they are ranged and I can pop the Faraday Cage to make us not get Held or knocked around. Once we have the cage up, I just tell them to Stay and put them on Defensive or aggressive as I need to. Since they are all ranged they can stay in the cage and attack mobs out side of it. On a Defender, and if you solo, then you'd have to make sure your Voltaic Sentinel pet was up or else most of your abilities would be useless.
Either way its pretty fun.
-
There is no option. Like others said, the only way around it is to use a "dummy" tray to hold the base skill that way you can watch for recharge timers there. You can use binds also instead of macros. But either way, you will need the skill actually on a tray somewhere. That is what I do, I usually pop the extra tray up by my target window so the information is available. I resize it to be 4x3 rows across and down, or something like that iirc.
It would be nice if there was a command to do it like @GraspingVileTerror mentioned
-
 1
1
-
-
I see a lot of assumptions that procs are broken, and they all are based on framing the argument and just versions of "I don't like it". Proc builds give up things to gain things. Just like other builds. The truth is that procs in their current iteration do not break the game and bring nothing negative in regards to gameplay. Mechanically, It doesn't make it any less fun for a person. There is no mechanic or DPS gate in the game that forces a player to use procs based on some DPS threshold. People aren't being shut out of content because they don't use procs. They are purely 100% optional much like any other IO bonus. I have some toons that use procs a lot, i have some builds that use them a little, and some that don't use them at all. I wouldn't want to limit the freedom that I have experienced based on someone not liking procs.
So what if a power can take 5 procs, So what if a power can be slotted with no damage enhancement and just procs. Big whoop. It has no negative impact on the game at all. None.
-
 3
3
-
 2
2
-
-
Thanks for the info. Sorry I thought that I had replied already.
-
1. Ranged Attack primary
2. Armor set secondary
3. Built in CC protection
I never liked being stuck with melee attacks to get armor toughness. They just fill a concept gap that other sets can't fill
-
4
-
-
The actual 2 Mastermind sets can only be slotted in the pets. How you slot them really depends on what you want to accomplish. Be it recharge, resists, accuracy, etc.
-
1
-
-
Glad your enjoying it 👍 Nice concept.
-
Enp Arrow is still partially broken. Last I read it wo t be fixed for a while. The next major update iirc
-
@plainguy that's a nice looking build. that ranged Def is nice! Seems like it would be fun. If your worried about your defenses, just do a quick test against a +3/8 Boss and see what its to-hit is after you tap it with Flash Arrow. I use +3 Bosses to simulate the level shift effects. (not sure if its valid idea or not). If its at 5% then your golden, as far as I can think of. My Beast/TA has 38.13 S/L defense and against +3/8 Bosses in the Peregrine Island Portal mission gets these kinds of to-hit chances before and then after popping them with Flash Arrow that has a single 50+5 Boosted Dark Watchers Despair: To Hit Debuff slotted.
Without Flash Arrow
- 53 Boss without Flash Arrow: [02:07] Council Empire Archon MISSES! Thunder Kick power had a 22.06% chance to hit, but rolled a 86.62.
- 53 LT without Flash Arrow: [02:07] Council Empire Adjutant MISSES! Crane Kick power had a 19.52% chance to hit, but rolled a 99.08.
- 53 Minion with Flash Arrow: [02:07] Council Empire Rocket MISSES! Missile Launcher power had a 16.20% chance to hit, but rolled a 50.82.
With Flash Arrow
- 53 Boss with Flash Arrow: [09:55] Council Empire Archon MISSES! Missile Launcher power had a 8.87% chance to hit, but rolled a 48.86.
- 53 LT with Flash Arrow: [09:55] Council Empire Adjutant MISSES! Grenade Launcher power had a 7.85% chance to hit, but rolled a 38.05.
- 53 Minion with Flash Arrow: [09:55] Council Empire Rocket MISSES! Brawl power had a 6.50% chance to hit, but rolled a 89.87.
Example against level 50 mobs, sorry no minions.
- 50 Boss without Flash Arrow: [11:56] Zeus Class Titan MISSES! Gas Swarm Missiles power had a 18.51% chance to hit, but rolled a 41.62.
- 50 Boss with Flash Arrow: [11:55] Zeus Class Titan MISSES! Swarm Missile power had a 7.80% chance to hit, but rolled a 39.84.
At the bottom of this post is what I finally settled on and I'm running now on live. I went back and forth between dropping Poison Gas Arrow and picking up Combat Jumping for a few extra Defense points to S/L. But after experimenting, I noticed better overall performance from myself and the pets with using Poison Gas Arrow. The Damage redux made some difference. At least it "feels" like it did. I never actually did damage received checks to validate the before and after effects of PGA. Additionally, with liberal use of Flash Arrow, my Defense seems to be manageable vs +3x8 Bosses.
I'm thinking about Swapping Call Hawk to use 5 Sighon Insights for some more S/L Defense. Right now as slotted I see this on average. One Proc going off is about 80% of the damage of the actual skill itself. 57.5 Hawk Damage and 46.63 from Gladiator's Javelin Damage, Hawk damage portion does about 11 more damage per cast than the 1 proc. So dropping a portion of the overall Hawk Damage and and the Force Feedback proc may be worth it for the extra defense.
I like Ice Arrow with some Procs in it. You get to see stuff like this
Spoiler[09:25] HIT Council Empire Archon! Your Ice Arrow power had a 95.00% chance to hit, you rolled a 40.48.
[09:25] You Hold Council Empire Archon with your Ice Arrow.
[09:25] You hit Council Empire Archon with your Impeded Swiftness: Chance for Smashing Damage for 46.63 points of Smashing damage.
[09:25] You hit Council Empire Archon with your Gladiator's Net: Chance for Lethal Damage for 46.63 points of Lethal damage.
[09:25] You hit Council Empire Archon with your Unbreakable Constraint: Chance for Smashing Damage for 69.6 points of Smashing damage.
[09:25] You hit Council Empire Archon with your Ghost Widow's Embrace: Chance for Psionic Damage for 46.63 points of Psionic damage.
[09:25] Ice Arrow is still recharging.
---------------
[09:24] HIT Council Empire Archon! Your Ice Arrow power had a 95.00% chance to hit, you rolled a 17.27.
[09:24] You Hold Council Empire Archon with your Ice Arrow.
[09:24] You hit Council Empire Archon with your Impeded Swiftness: Chance for Smashing Damage for 46.63 points of Smashing damage.
[09:24] You hit Council Empire Archon with your Gladiator's Net: Chance for Lethal Damage for 46.63 points of Lethal damage.
[09:24] You hit Council Empire Archon with your Unbreakable Constraint: Chance for Smashing Damage for 69.6 points of Smashing damage.
[09:24] You hit Council Empire Archon with your Ghost Widow's Embrace: Chance for Psionic Damage for 46.63 points of Psionic damage.Call Hawk Example. I think swapping the slotting to use 5 Siphons Insights for some more S/L might be worth it.
Spoiler[09:25] HIT Council Empire Archon! Your Call Hawk power had a 95.00% chance to hit, you rolled a 43.45.
[09:25] You hit Council Empire Archon with your Gladiator's Javelin: Chance for Toxic Damage for 46.63 points of Toxic damage.
[09:25] You hit Council Empire Archon with your Call Hawk for 11.5 points of Lethal damage over time.
[09:25] You hit Council Empire Archon with your Call Hawk for 11.5 points of Lethal damage over time.
[09:25] You hit Council Empire Archon with your Call Hawk for 11.5 points of Lethal damage over time.
[09:25] You hit Council Empire Archon with your Call Hawk for 11.5 points of Lethal damage over time.
[09:25] You hit Council Empire Archon with your Call Hawk for 11.5 points of Lethal damage over time.
-------
[09:24] HIT Council Empire Archon! Your Call Hawk power had a 95.00% chance to hit, you rolled a 74.03.
[09:24] You hit Council Empire Archon with your Gladiator's Javelin: Chance for Toxic Damage for 55.72 points of Toxic damage.
[09:24] You hit Council Empire Archon with your Call Hawk for 13.74 points of Lethal damage over time.
[09:24] You hit Council Empire Archon with your Call Hawk for 13.74 points of Lethal damage over time.
[09:24] You knock Council Empire Archon off their feet with your Call Hawk!
[09:24] You hit Council Empire Archon with your Call Hawk for 13.74 points of Lethal damage over time.
[09:24] Oil Slick Arrow is recharged.
[09:24] You hit Council Empire Archon with your Call Hawk for 13.74 points of Lethal damage over time.
[09:24] You hit Council Empire Archon with your Call Hawk for 13.74 points of Lethal damage over time.Ps. I may have found a bug with the Acid Arrow -Res(special). I'm not sure its actually working or not.
My current live build. - I do need to swap out Explosive Strike in Call Hawks to Apocolypse chance for neg damage proc. I just haven't done it yet on live. I wanted to post this build as is on live:
SpoilerThis Villain build was built using Mids Reborn 3.0.5.6
https://github.com/Reborn-Team/MidsRebornGray Warden - Live Build: Level 50 Natural Mastermind
Primary Power Set: Beast Mastery
Secondary Power Set: Trick Arrow
Power Pool: Fighting
Power Pool: Speed
Power Pool: Leadership
Ancillary Pool: Mace MasteryVillain Profile:
------------
Level 1: Summon Wolves
(A) Superior Mark of Supremacy - Accuracy/Damage
(3) Superior Mark of Supremacy - Accuracy/Damage/Endurance
(3) Soulbound Allegiance - Accuracy/Damage/Recharge
(5) Soulbound Allegiance - Chance for Build Up
(5) Overwhelming Force - Damage/Chance for Knockdown/Knockback to Knockdown
(7) Sovereign Right - Resistance Bonus
Level 1: Entangling Arrow
(A) Pacing of the Turtle - Accuracy/Endurance
Level 2: Flash Arrow
(A) Dark Watcher's Despair - To Hit Debuff
Level 4: Call Hawk
(A) Thunderstrike - Accuracy/Damage
(11) Thunderstrike - Accuracy/Damage/Endurance
(11) Thunderstrike - Damage/Endurance
(13) Gladiator's Javelin - Chance of Damage(Toxic)
(13) Apocalypse - Chance of Damage(Negative)
(15) Force Feedback - Chance for +Recharge
Level 6: Train Beasts
(A) Endurance Reduction IO
Level 8: Kick
(A) Empty
Level 10: Ice Arrow
(A) Superior Entomb - Accuracy/Hold
(15) Ghost Widow's Embrace - Accuracy/Endurance
(17) Ghost Widow's Embrace - Chance of Damage(Psionic)
(17) Unbreakable Constraint - Chance for Smashing Damage
(19) Gladiator's Net - Chance of Damage(Lethal)
(19) Impeded Swiftness - Chance of Damage(Smashing)
Level 12: Summon Lions
(A) Superior Mark of Supremacy - Damage/Endurance
(21) Superior Mark of Supremacy - Damage
(21) Sovereign Right - Accuracy/Damage
(23) Sovereign Right - Accuracy
(23) Expedient Reinforcement - Accuracy/Damage
(25) Expedient Reinforcement - Resist Bonus Aura for Pets
Level 14: Super Speed
(A) Blessing of the Zephyr - Run Speed, Jump, Flight Speed, Range/Endurance
Level 16: Call Ravens
(A) Superior Frozen Blast - Accuracy/Damage
(25) Superior Frozen Blast - Accuracy/Damage/Endurance
(27) Superior Frozen Blast - Damage/Endurance
(27) Touch of Lady Grey - Chance for Negative Damage
(29) Positron's Blast - Chance of Damage(Energy)
(29) Impeded Swiftness - Chance of Damage(Smashing)
Level 18: Fortify Pack
(A) Luck of the Gambler - Defense/Increased Global Recharge Speed
(31) Red Fortune - Defense/Endurance
(31) Red Fortune - Defense
(31) Red Fortune - Defense/Recharge
(33) Red Fortune - Defense/Endurance/Recharge
(33) Red Fortune - Endurance
Level 20: Acid Arrow
(A) Annihilation - Accuracy/Damage
(33) Annihilation - Accuracy/Damage/Endurance
(34) Annihilation - Chance for Res Debuff
(34) Touch of Lady Grey - Chance for Negative Damage
(34) Bombardment - Chance for Fire Damage
(36) Positron's Blast - Chance of Damage(Energy)
Level 22: Tough
(A) Gladiator's Armor - Resistance
(36) Gladiator's Armor - TP Protection +3% Def (All)
(36) Steadfast Protection - Resistance/+Def 3%
(37) Steadfast Protection - Knockback Protection
(37) Unbreakable Guard - Resistance/Endurance
(37) Unbreakable Guard - +Max HP
Level 24: Weave
(A) Luck of the Gambler - Defense/Increased Global Recharge Speed
(39) Luck of the Gambler - Defense/Endurance
(39) Shield Wall - +Res (Teleportation), +5% Res (All)
(39) Kismet - Accuracy +6%
(40) Kismet - Defense/Endurance
Level 26: Summon Dire Wolf
(A) Superior Mark of Supremacy - Accuracy/Endurance
(40) Superior Mark of Supremacy - Endurance/Pet +Resist +Regen
(40) Soulbound Allegiance - Damage
(42) Expedient Reinforcement - Accuracy/Damage
(42) Sovereign Right - Accuracy/Damage
(42) Call to Arms - Defense Bonus Aura for Pets
Level 28: Disruption Arrow
(A) Endurance Reduction IO
Level 30: Maneuvers
(A) Luck of the Gambler - Defense/Increased Global Recharge Speed
(43) Luck of the Gambler - Defense
(43) Luck of the Gambler - Defense/Endurance
Level 32: Tame Beasts
(A) Endurance Reduction IO
Level 35: Oil Slick Arrow
(A) Ragnarok - Accuracy/Recharge
(43) Ragnarok - Damage
(45) Ragnarok - Damage/Endurance
(45) Ragnarok - Damage/Recharge
(45) Ragnarok - Accuracy/Damage/Recharge
Level 38: EMP Arrow
(A) Basilisk's Gaze - Accuracy/Hold
(46) Basilisk's Gaze - Endurance/Recharge/Hold
(46) Basilisk's Gaze - Accuracy/Recharge
(46) Basilisk's Gaze - Accuracy/Endurance/Recharge/Hold
Level 41: Tactics
(A) Gaussian's Synchronized Fire-Control - To Hit Buff/Endurance
Level 44: Scorpion Shield
(A) Luck of the Gambler - Defense/Increased Global Recharge Speed
(48) Red Fortune - Defense/Endurance
(48) Red Fortune - Defense
(48) Red Fortune - Endurance
(50) Red Fortune - Defense/Endurance/Recharge
(50) Red Fortune - Defense/Recharge
Level 47: Poison Gas Arrow
(A) Call of the Sandman - Chance of Heal Self
Level 49: Hasten
(A) Recharge Reduction IO
(50) Recharge Reduction IO
Level 1: Alpha Howler Wolf
Level 1: Howler Wolf
Level 1: Pack Mentality
Level 1: Brawl
(A) Empty
Level 1: Sprint
(A) Quickfoot - Endurance/RunSpeed
Level 1: Supremacy
Level 2: Rest
(A) Empty
Level 1: Swift
(A) Run Speed IO
Level 1: Health
(A) Panacea - +Hit Points/Endurance
(7) Miracle - +Recovery
(9) Numina's Convalesence - +Regeneration/+Recovery
Level 1: Hurdle
(A) Jumping IO
Level 1: Stamina
(A) Performance Shifter - Chance for +End
(9) Performance Shifter - EndMod
Level 12: Lioness
Level 14: Speed Phase
Level 26: Dire Wolf
------------| Copy & Paste this data into Mids Reborn : Hero Designer to view the build |
|-------------------------------------------------------------------|
|MxDz;1459;739;1478;HEX;|
|78DA4D944B4C135114866FA7530A8552CA438A14697933404B415DFA00010BAD210|
|1415764A4038CF641A62DCA520DBE966E5C69E2C6B8D28D129626AE5CB8D368E24A|
|12E34A65010B16663CCC7F6C6792E9377366FE73FE7BEE9C266F5DA8793575FBAC7|
|0D48DA7D57C7E29A9E60B9A91D1B329F725B55034D4B45308119832D4CDD0A26AA4|
|B46C682894D037B4D058514FA7DCF4B0BDAC599A2B6632B96C644CA310E7DA6CB53|
|D1F2BAEAC44E60D7DF9C6D279C3C8DD14DED95C2E1D99D457D70A7A76D563DDCDAD|
|6B5ACA675D263435A519F9357DDD6FDDC7B31B7A5EBFA6A7F5C26670625D5F8ED89|
|227D565ED7FD11632D64DE744807E84834ED32516642162B290AE30CF49C42A218F|
|4BD6BDFCDD69B1E24058BC230B3E4C215E3BACD85D19D98E628E6DE827A986D30A9|
|A2EE753683DCF99CFC09A41E4AE89A156ED1638455A17E77385F1AE445D7573CC6D|
|D221B6A86A1522AEAA77705F7B1D8EEA32CC3832D64FA052FD0B8AB7C9224E15AAB|
|903D597A16D9C67EEA1E2B17DE61E7204F6C14EB2E16527DE6F885DA47C3EF6E27B|
|833C816DF0F85BE647BC1BDC41DE207B9926AD9FBDF89BE0FB848759CBAC06435EA|
|60FBC4FA91BB86EC32ED618FA01867F32B96E5872C13FD777D23A9A78879AA24E6B|
|D73A47A0E96C86B7AE00F300F1AE4350266D33B472337BEEA963CEE09D9EBFC2D2F|
|61E8233B4CE165E67CB227AD27B9579065F4D3FF7BA9FF7A07F57B2B40FE8B556EE|
|792B7F117EF2D0060F521B7B501A99EC254135DB59D7CEBA8794AB0331B9E314EA2|
|923E0E069E628F324F848C6E490C6D9FD099E86BE303F33BF820DE4AB0FBE44DF4B|
|E877A82503DCEB01F61AE53D8EF21E47794F63BCC731DEF37B543BC26B887C40AC8|
|36A0C239F63784058BD8B318795D2749B51DB754C294DAE19B44FB1354D097BA402|
|AE93E598396B9F714BF1CBC3A98F1443E8ED9F724C1261FEE798A640AF2C2A17E0F|
|DB75DD707DD5E39E6104F50BDF23138A29466D57CAF9466CF1C554ADF93F90F32FB|
|DEF1|
|-------------------------------------------------------------------|Here are some Macro's and Binds that I use.
For igniting Oil Slick Arrow, i use the Taser Dart skill for Tech or natural toons, I don't remember which ones get it. One button press does it all.
/bind T "+$$targetcustomnext Oil Slick$$powexecname Taser Dart"For my personal /assist pain train. Sick the pets on the criminal and fire off my attack.
/macro ICE "petcomall attack$$powexecname Ice Arrow"

/macro Hawk "petcomall attack$$powexecname Call Hawk"

/macro Ravens "petcomall attack$$powexecname Call Ravens"
I'm thinking about using one for Entangling Arrow also, because I keep forgetting to use it and not getting its -res effect in battle. But so far I haven't truly needed it.
-
2
-
I don't think that the -To Hit resist special is working on Acid Arrow for MasterMinds. I'm not sure if its just a case of some cap already being hit and thus there is nothing to actually be visible in the effects or not. Anyways here are the numbers and my results.
City of Data 2 says that Acid Arrow does reduce To Hit Resist -30% Resistance (Endurance, ToHit, Regeneration, Recovery, RechargeTime, EnduranceDiscount) for 45s (all affected targets)
https://cod.uberguy.net./html/power.html?power=mastermind_buff.trick_arrow.acid_arrow&at=mastermind
My S/L Defense is 38.13%, The mobs were level 53 Bosses (mission was set at +3x8). I used Flash Arrow that has a single 50+5 Boosted Dark Watchers Despair: To Hit Debuff slotted.
Here is what my info window shows in game for Flash Arrow:
-7.42%% to hit for 1m 0s on target
-7.42%% to hit for 1m 0s on target unresistable
Here is what my Acid Arrow info window shows in game:
-30.00%% resistance to to hit for 45.00s on target Ignores buffs and enhancements
I did check the logs and the Archon was hit by the Acid Arrow.
Test 1: Without Flash Arrow - No Acid Arrow.
Council Empire Archon MISSES! Thunder Kick power had a 22.06% chance to hit, but rolled a 86.62.Test 2: With Flash Arrow - No Acid Arrow
Council Empire Archon MISSES! Missile Launcher power had a 8.87% chance to hit, but rolled a 48.86.
Test 3: With Flash Arrow, and then cast Acid Arrow:
Council Empire Archon MISSES! Missile Launcher power had a 8.87% chance to hit, but rolled a 74.62.
Test 4: Cast Acid Arrow first, then cast Flash Arrow:
Council Empire Archon MISSES! Missile Launcher power had a 8.87% chance to hit, but rolled a 56.11.
Again, I'm not sure if there is some cap coming into play so any effects of the to hit adjustments isn't coming into play, or if there is an actual bug.
Test 1 ToHit minus the Test 2 ToHit value is 13.19. So it seems like some portion of it was being resisted. (7.42 resistable +7.42 unresistable) = 14.84
-
If you are using the original. like:
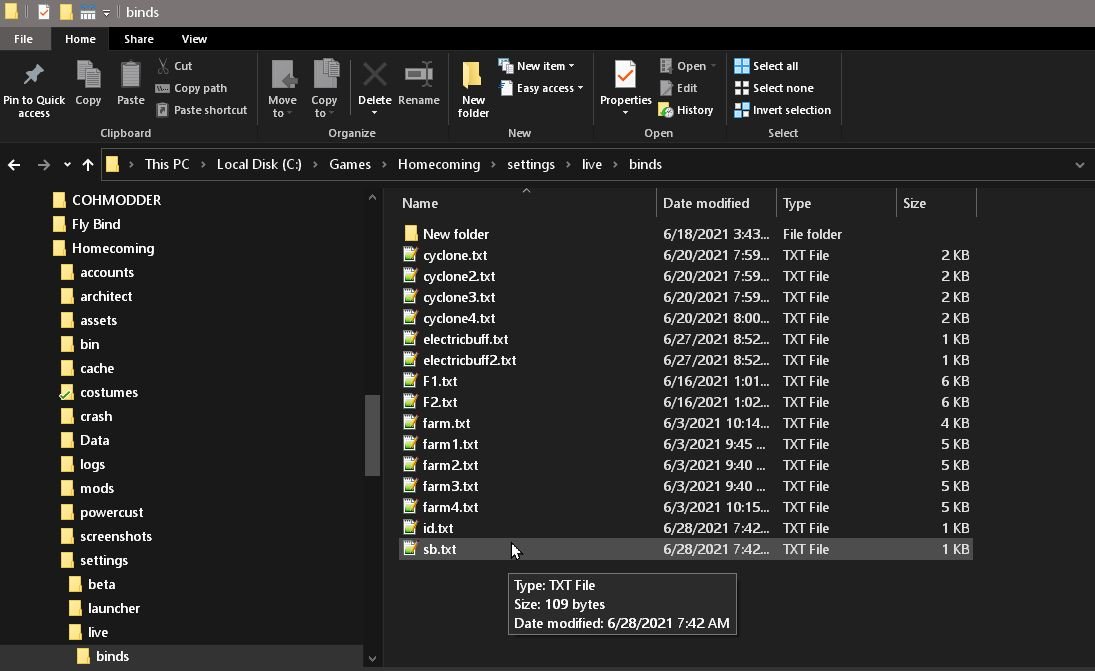
Q "+ $$- $$unselect$$targetcustomnext friend alive$$powexecname Speed Boost$$bindloadfilesilent binds/id.txt"
then you want the two files id.txt and sb.txt in the "binds" subdirectory.

-
2
-
-
2 hours ago, SuperPlyx said:
Got this message when I tried to load bind:
Unable to read in keybind file: c:*****/settings/live/binds/sb.txt
The ***is my edit. But any idea what the problem is?
are your bind files in the c:*****/settings/live/binds directory? The game will print that message out if it can't find the file.
-
4 minutes ago, Zerethon said:
It's got a random hold, mag 3-ish KB, and a mag 8 REPEL, so you can turn the KB to KD but the repel will still push enemies.
Lol, that sounds like its a troll ability almost. Has anyone actually bug reported it?
Dual Pistals - Super Reflexes Sentinal Build
in Sentinel
Posted · Edited by SmalltalkJava
Thank you both. I've only had a few minutes to start digging in. Definitely very very interesting. I have a question about the attack cycle and timing. There are 3 attacks and each attack has an animation time of 1.67 seconds. Does that mean there will be no wait time if each attack recharges within 3.24 (1.67+ 1.67) seconds?
Attack 1 and its recharge starts
>> attack 2 starts for 1.67 animation time,
>>>> Attack 2 done - attack 1 has been recharging for 1.67 seconds
>> Attack 3 starts for 1.67 Animation time,
>>>> Attack 3 done, - attack 1 has been recharging for 3.24 (1.67 + 1.67) seconds
>>>> Attack 3 done, - attack 2 has been recharging for 1.67 seconds
Then the cycle would just continue rolling with 1.67 second increments.
Looking at your builds I might be able to change some sets around to lose some recharge for resists and HP. Then my Force Feedback proc can assist a little bit to offset.