Harlequin565
-
Posts
104 -
Joined
-
Last visited
Content Type
Profiles
Forums
Events
Store
Articles
Patch Notes
Everything posted by Harlequin565
-
I'm just glad to hear someone else has a spreadsheet! I track the salvage, because it's easier when the reward screen comes up with Rare or Very Rare to pick something quick without having to dive into the UI - especially on Tinpex's. If it's uncommon or common, I just pick something random. Not being a badger or an accolade hunter (apart from TFC & Atlas Medallion which I usually do in one sitting), I don't track badges or completion of things, although the Market Crash completion is useful. I'll probably add that in.
-
Yellow = L50 and T4 across everything Orange = 50 White = Not 50 Green numbers are for the three Incarnate slots at T3 for the level shift.
-
I'm not sure this is a good thing. Interesting to note that my Vet 22 50 still hasn't +4'd everything. I await suitable character choice shaming.

-
All the following is my opinion... Take what you like & leave the rest :) I agree with Uun above. Also, I'd slot 4 LoTG in Weave for the +Acc, same for Scorpion Shield. I get the idea of building for s/l resist, but the totals don't look that great (to me!). Also another controversial suggestion would be to shift the Numina set in Energize to a Gaussian's in Tactics. More def for S&L if you want to be in blap range. Double Reticles in Aim & BU shores up a bit more S/L def. I wouldn't bother with Mace Beam Volley (unless it's thematic). With the changes Uun mentioned above plus all the recharge, I would imagine you wouldn't need to use it. I'd probably swap it for something like Power Push with 3 Explosive Strikes for more ranged def. 3 melee attacks, 3 ST ranged damage and 3 AoEs is more than enough unless you're really twitchy. Esp with all the +recharge I'd drop the Lotg+Def and the Kismet from Hover and maybe put a couple of Zephyr's in there for KB prot and a bit of ranged def. If you decide to swap Stun for Energy Punch, I'd drop 5 Blistering Cold's in there for a bit more S&L and decent damage. Just messing with the build but putting Ex Strike in a 3 slotted power push and making the changes above gives 43/43/44 S/L/R with three hard hitting melee attacks and decent ranged options. A Musc alpha will shore up the damage and End use won't be a problem. Energize is fab. To that "end", I'd probably pull the excess slots from Health & Stamina, but it might be worth playing it first to check.
-
After a Reddit post about this, I thought I'd update with my latest build. Quite a few changes over the initial build on P1... Here's the rationale... 1. I dropped all the slots in Tough to just the two +Def uniques and run without Tough turned on. If I was picking up agro for Tough to be needed, I was usually picking up too much agro and Tough didn't make a difference. 2. I picked up Total Focus as a swap out for Energy Punch. The animation changes made it viable and it hits very hard. A great boss killer, or "GTFO me now!" 3. Energy Torrent runs with Artillery which is a new set introduced for a bit more acc and ranged def. 4. Nova is sub-optimally slotted for damage, but as I have T4 Musc that pushes it right back up again. 5. Dropped to 2 (50+5) slots in Hasten. I was constantly forgetting to hit Energize when it refreshed, so it went on Auto and I now click Hasten whenever it is up. 6. Double slotted SJ & SS with Zephyr's for the ranged def. 7. 2 x Recharge procs in Torrent and Sniper blast. Knockback is less of a problem in iTrials because almost everything is resistant to it. 8. Dropped the extra slots in Stamina and Health. I didn't need them. Health is mostly fine, or at 0. If I start getting into deep trouble, generally green insps will be the lifesaver, not regen, tough or other blaster resistance/regen based defences. Quite a few slottings have been shuffled around to accommodate the changes and it plays really smooth now. Nova, Judgement and Ex Blast are all in my main attack chain. Burst and Sniper blast are my single target rotations but with all the iPowers flying around, getting into melee is viable, so I sprinkle in the 2 melee attacks for fun. 45 to S/L and 43 ranged. Dropping the +recharge IO in Torrent for a 6th Artillery slot will resolve this, but I find I don't really need it - again with all the iPowers flying around. Thanks for all the comments! This Hero build was built using Mids Reborn 3.1.2.5 https://github.com/LoadedCamel/MidsReborn Click this DataLink to open the build! Powerbolt III: Level 50 Magic Blaster Primary Power Set: Energy Blast Secondary Power Set: Energy Manipulation Power Pool: Fighting Power Pool: Leadership Power Pool: Speed Power Pool: Leaping Ancillary Pool: Mace Mastery Hero Profile: Level 1: Power Blast (A) Superior Defiant Barrage - Accuracy/Damage (19) Superior Defiant Barrage - Damage/RechargeTime (19) Superior Defiant Barrage - Accuracy/Damage/RechargeTime (23) Superior Defiant Barrage - Accuracy/Damage/Endurance (25) Superior Defiant Barrage - Accuracy/Damage/Endurance/RechargeTime (25) Superior Defiant Barrage - RechargeTime/+Status Level 1: Power Thrust (A) Kinetic Combat - Accuracy/Damage (17) Kinetic Combat - Damage/Endurance (31) Kinetic Combat - Damage/Recharge (34) Kinetic Combat - Damage/Endurance/Recharge Level 2: Energy Torrent (A) Artillery - Accuracy/Damage (3) Artillery - Damage/Endurance (3) Artillery - Damage/Recharge (5) Artillery - Accuracy/Recharge/Range (5) Artillery - Accuracy/Damage/Recharge (36) Force Feedback - Chance for +Recharge Level 4: Build Up (A) Rectified Reticle - To Hit Buff/Recharge (13) Rectified Reticle - Increased Perception (40) Adjusted Targeting - Recharge (40) Adjusted Targeting - To Hit Buff/Recharge (46) Recharge Reduction IO Level 6: Power Burst (A) Superior Blaster's Wrath - Accuracy/Damage (7) Superior Blaster's Wrath - Damage/Recharge (7) Superior Blaster's Wrath - Accuracy/Damage/Recharge (13) Superior Blaster's Wrath - Accuracy/Damage/Endurance (15) Superior Blaster's Wrath - Accuracy/Damage/Endurance/Recharge (36) Superior Blaster's Wrath - Recharge/Chance for Fire Damage Level 8: Sniper Blast (A) Sting of the Manticore - Accuracy/Damage (9) Sting of the Manticore - Damage/Endurance (9) Sting of the Manticore - Accuracy/Interrupt/Range (11) Sting of the Manticore - Damage/Interrupt/Recharge (11) Sting of the Manticore - Damage/Endurance/Recharge (43) Force Feedback - Chance for +Recharge Level 10: Kick (A) Kinetic Combat - Accuracy/Damage (37) Kinetic Combat - Damage/Endurance/Recharge (43) Kinetic Combat - Damage/Endurance (43) Kinetic Combat - Damage/Recharge Level 12: Aim (A) Rectified Reticle - To Hit Buff (23) Rectified Reticle - To Hit Buff/Recharge Level 14: Tough (A) Gladiator's Armor - TP Protection +3% Def (All) (15) Steadfast Protection - Resistance/+Def 3% Level 16: Energize (A) Recharge Reduction IO (17) Numina's Convalesence - Regen/Recovery Proc Level 18: Assault (A) Endurance Reduction IO Level 20: Weave (A) Luck of the Gambler - Defense/Increased Global Recharge Speed (21) Luck of the Gambler - Defense (21) Luck of the Gambler - Defense/Endurance Level 22: Hasten (A) Recharge Reduction IO (50) Recharge Reduction IO Level 24: Combat Jumping (A) Luck of the Gambler - Defense/Increased Global Recharge Speed Level 26: Explosive Blast (A) Overwhelming Force - Accuracy/Damage (27) Overwhelming Force - Endurance/Recharge (27) Overwhelming Force - Accuracy/Damage/Endurance (29) Overwhelming Force - Damage/Endurance/Recharge (29) Overwhelming Force - Accuracy/Damage/Endurance/Recharge (31) Overwhelming Force - Damage/Chance for Knockdown/Knockback to Knockdown Level 28: Bone Smasher (A) Mako's Bite - Accuracy/Damage (37) Mako's Bite - Damage/Endurance (37) Mako's Bite - Damage/Recharge (39) Mako's Bite - Accuracy/Endurance/Recharge (40) Mako's Bite - Accuracy/Damage/Endurance/Recharge (42) Mako's Bite - Chance of Damage(Lethal) Level 30: Super Jump (A) Blessing of the Zephyr - Run Speed, Jump, Flight Speed, Range (31) Blessing of the Zephyr - Run Speed, Jump, Flight Speed, Range/Endurance Level 32: Nova (A) Eradication - Damage (33) Eradication - Accuracy/Recharge (33) Eradication - Damage/Recharge (33) Armageddon - Accuracy/Damage/Recharge (34) Armageddon - Accuracy/Recharge (34) Sudden Acceleration - Knockback to Knockdown Level 35: Super Speed (A) Blessing of the Zephyr - Knockback Reduction (4 points) (36) Blessing of the Zephyr - Run Speed, Jump, Flight Speed, Range/Endurance Level 38: Scorpion Shield (A) Luck of the Gambler - Defense/Increased Global Recharge Speed (39) Luck of the Gambler - Defense (39) Luck of the Gambler - Defense/Endurance Level 41: Maneuvers (A) Luck of the Gambler - Defense/Increased Global Recharge Speed (42) Luck of the Gambler - Defense (42) Luck of the Gambler - Defense/Endurance Level 44: Total Focus (A) Mako's Bite - Chance of Damage(Lethal) (45) Mako's Bite - Accuracy/Damage (45) Mako's Bite - Damage/Endurance (45) Mako's Bite - Damage/Recharge (46) Mako's Bite - Accuracy/Endurance/Recharge (46) Mako's Bite - Accuracy/Damage/Endurance/Recharge Level 47: Tactics (A) Gaussian's Synchronized Fire-Control - To Hit Buff (48) Gaussian's Synchronized Fire-Control - To Hit Buff/Recharge (48) Gaussian's Synchronized Fire-Control - To Hit Buff/Recharge/Endurance (48) Gaussian's Synchronized Fire-Control - Recharge/Endurance (50) Gaussian's Synchronized Fire-Control - To Hit Buff/Endurance (50) Gaussian's Synchronized Fire-Control - Chance for Build Up Level 49: Vengeance (A) Luck of the Gambler - Defense/Increased Global Recharge Speed Level 1: Defiance Level 1: Brawl
-
So that build breaks mids for me in terms of the advanced totals... Some comments... All my opinion of course!! - Blasters are there to kill stuff. Some control is nice but you've invested heavily in slots on things that don't do much damage with Sonic Thrust & Tesla Cage. - Slotting wise, CJ generally only needs the one LoTG IO. The defence is paltry and not worth enhancing. For Stamina, the +Rec toggles that blasters recently got made Stamina a 1 slot power for me in most of my blaster builds. - I don't tend to bother with Acrobatics. It's another toggle, and only protects against KB (which can be shored up with IOs) and Holds. Stun & Sleep will still get you. Clarion (Destiny) is a better pick for Blaster mez protection at i50, with BFs keeping you sane until then. - Building for resist on a blaster is (I find) a waste of time. They have low HP and if you pick up agro, you will be dead very quickly no matter what your resists. The idea I play to is to kill it before it kills you. I tend to get Ranged & S/L Def for the majority of my protection and it works well most times. Better to have most attacks miss, than most attacks land at 50% damage or whatever. For that reason I'd drop the entire Force Mastery pool. If you're worried about cascading defence failure, and it happens, it's likely Resist wouldn't have saved you anyway. If you're looking to get Scorpion shield and have fly, this is the sort of build I'd go for... https://www.midsreborn.com/builds/download.php?uc=1415&c=651&a=1302&f=HEX&dc=78DA6593596F125114C7EF3033A514B0B42C85B658C1D6B6802C35FA6CD4F6C59260497C2513A07412020468A21FC02FA089D5D2458DEBA7717BD3BAC5676DF5D5073C33E77FC5A613B8BF99FFB967BB33277FEB9A677D7DE5B250BC57EB46A753BA426BB7DAD6F346CD2C0BEB72D27F067269CD68D4AA95F472BD5AEEB6CDB2516787B8B417375BAD66BB9B2E361B66B994371A666BB36E74CD6643B80BCD663DBD52376B1B5D8F7DBF5A355A66A3E66583A5D3D3A83455AAEDCE86D98A2CB7CC725AC6CF1BE52A2DD6FDED301516A77F46FCBBFABAD825E434E1D803F799DA23E6D063F009F35EE27FE7EF9A2D0EDF71D83C5FB05210D7C0223373839925280A9C956D959D7BCC911D7097E9D903F7996E3A58159915F580336A1F983952751959175CD6290574307D2AA831C775E612DE9A1DD9D9A3887E32EE30EF53C32E6974410C60D30552DDF234DCAFF988026F98A1B7E03B66F83D73B24F977051462F2A7678830A9B3E723BD3686B8B928FCAB6460FF820A63F31673F835F98F35F998BDF9821CA30066731860C0F28A25FA6F56F719AD85DE6D99BBCC9419E41B42582935CB64AE2843C888909DA19A59E9638D745522330AA9143843B027F31677F331F520D53B2B0A9183E380A1F85A84651EDE900E803FDCC4BD68CC9739F51755B3CA3813A38C48C39C161E638658ACBF471A4F79338274F7AEE15177AEE29F80C7CCE9C7F01BE64F6A8A10559CE028660111FFD228621816148D8AF9FD73F3E2192B2E9249A4EA1E9149A4EA1E96DCA92969BD318BD0C462F63C7CBD9EB18F59295EF388BA83944CD21EAB4361864FA597E314B825F7FF5A4BDA04933498A2DFD1819B860D7E13129C6DFC7CF93FB8E8E49F812C3495BACD82588D060E2FBD7A9FBAC7CF80B9388E386 A bit of room to mess about with this. As it stands, you have 48 def to S/L and 43 def to ranged. All your big hitting attacks are max slotted. Sonic Thrust & Sound Cannon probably need playing about with or even dropping from the build depending on what you like. Sonic Thrust is a placeholder for 4 Kin Combats for the S/L def so if you dropped them both (you can't actually drop Thrust but you can ignore it) you'd lose a bit of S/L defence and gain one power pick and 8 slots. Personally I'd probably keep 'em with KB-KD IOs in there and use them to knock stuff down and proc the +Rech IO. No Hasten in the build, but I'm not sure it needs it as you have plenty to choose from attack wise. Tough is a placeholder for the unique IOs and doesn't get turned on. Resists are utterly pathetic, but that's how I roll with most of my blasters and rarely have a problem. My ethos is to hit hard and fast. No travel power other than flight, but with Afterburner it's not too bad and Hover blasting is fun although with Short circuit and the Melee AoE you might want to spend a bit more time in melee. My Elec/Elec is the most melee blaster I have and has a ton of fun. Hope that helps!
-
Thanks for this guide... I was glaring at a bunch of sub 25 toons that I couldn't face grinding up to be mediocrely decent, so I thought I'd try my hand at farming using this guide as a starter. Set up a new account and just for the giggles decided to outfit my shiny Spines/Bio Brute without subbing inf from my main account. What I did do though, was PL him through the first 35 levels with my 50++ Rad/Rad tank which wasn't massively quick, but could easily & safely eat +4/x8 spawns. To raise cash, I ran ticket farms, rolling bronze 30-34 recipes and vendoring anything needing orange salvage (not many with bronze rolls). I then flipped with converters to something that would sell (usually, 2 converters to go in-cat to get rare, then 1 to flip until I hit Defence, or Resistance sets or got randomly lucky). Today my new Brute is outfitted with 3 purple sets, 2 catalysed ATIO sets, and all the shiny uniques. From nothing. And I was a lazy buyer & seller. I think after my first 3 runs I was sitting on around 250M inf (30ish recipes per run, roughly 2-3M profit per recipe). Stopped trying to keep track of it after that. I didn't bother with fancy insp conversions. Just turned off wakeys, BFs, oranges and blues, and ate everything else. Greens were the only things I converted. Sub-50, accuracy insps are really useful as my proc-slotted auras were whiffing quite a bit. I was really surprised at how quick this all was. At 35, I was +2/x8, by 40 I was +3/x8 and at 48 I could do +4/x8. Now he has all the 50 sets, I would imagine +4/x8 will be a breeze. iPowers will be the cherry on top. Along the way, I dragged half a dozen main account alts from sub teen numbers well into their 20s. Cheers again!
-
Same for me. Dual build PB with a perma LF human build for 50 content and a tri-form "general" build for <50. I don't use 2nd builds for anyone else although as I main an En/En blaster having a second build built for KB amuses me.
-

Bad Build Decisions You're Willing to Admit To
Harlequin565 replied to oedipus_tex's topic in General Discussion
Heh, this was me back in 2004. I think it was months before someone said "how many recharge SOs do you have in that?" I was like "how many? well 1 of course!"... -
They're two different styles of powers and I agree with the above comments. It's very difficult to say it's generally "better" because of the myriad of combos you could encounter. Generally on a blaster, I'll take Tough as a mule for the two +Def IOs. I don't switch it on because if I need +Res I'm in trouble. I'm generally building for damage and recharge (kill it before it kills you), so the +Res from Tough is just an end hog. I'll then take Weave and slot it. If I can spare, I go 4 LoTGs in there for the +Acc set bonus. Manoevers and Tactics are very much an "if I have space" choice and will mostly pick the above Tough/Weave combo first. I also try and pick up Assault though for the +Damage, and Vengeance can be a nice LoTG mule as well as being useful with just one slot (same for Assault).
-
On my Tanks, if the team are facemelting and/or chaotic, I leave them to their chaos and skip to the next group. There is no real need for Tanks in the game any more - esp at high levels, and so I'll just jump to the next mob group and get it ready for the loons to catch up. See how many I can herd up before they arrive. And when they do, I'm off into the next group. I wish the agro cap was higher! The problem with +4 difficulty is that the mobs just become bigger sacks of HP. They don't threaten as much, just take longer to kill (making scraps, brutes and blasters more valuable). And I think altering the meaning of those difficulty spikes would go a long way to resolving the issue. Folks on +0 could play as they do today and have fun. Folks on +4 (or +5/+6) could face a challenge that required controllers, buffers/debuffers and tanks.
-
What's considered a lot of wealth in the game?
Harlequin565 replied to Alphabet Soup II's topic in The Market
Hah! I also use it to keep track of iProgress so that I'm not hunting when I finally get the Rare or VR reward screen up. Spreadsheets are useful :) -
What's considered a lot of wealth in the game?
Harlequin565 replied to Alphabet Soup II's topic in The Market
Being a saddo I keep a spreadsheet on all my alts. Just so I can keep track of where my money is. Across all my toons, I have 8 billion inf. All my 50s (16 of them) are purpled out with boosters and catalysts where appropriate. Most of that money is sat across the 14 sub-50 alts I'm working on. In SG storage I have a full bin of winter IOs, 1.5 bins of ATIOs, half a bin of Purple IOs and half a bin of PvP IOs. 5 other bins of assorted IOs that I'm trying to use up. I have 1 bin of catalysts and 1 bin of boosters. I don't bother storing converters, just carry 1-200 on each toon. I say all this because I suspect it's considered to be a "small" amount of wealth compared to some, but for me, it's way in excess of anything I need. As I level a character, I tend to convert and sell all my common drops, convert merits to converters and sell the excess, and each character that hits 50 tends to have about the same amount they started with. During the Winter event, all my 50s with excess cash just buy winter packs which I sell the contents of in around Spring. If I ever get a character that looks like it's running out of money, I buy Hero packs and sell the content for profit until I have enough to finish that toon. It's probably been over a year since I did any "marketeering" to try and make money I think. -
This is my build. Soft-capped to Smash & Lethal & Ranged (almost). This is a teaming build - I don't solo with it. Mostly iContent. Just 2 Martial attacks: Ki-Push for self-defence/cool and Storm Kick for damage. Rest of the time I'm shooting. Tough is an IO mule, I don't run with it on. Never bothered with Suppresive Fire because if I want to mez stuff I'll play my controller. It just feels weak and useless. Inner Will is a great click mez protection freeing up the usual Clarion Destiny for something else if you like. I'm sure there are better builds out there, but this satisfies my shooty urges quite nicely. This Hero build was built using Mids Reborn 3.0.4.7 https://github.com/Reborn-Team/MidsReborn Click this DataLink to open the build! Ballistica: Level 50 Natural Blaster Primary Power Set: Dual Pistols Secondary Power Set: Martial Combat Power Pool: Fighting Power Pool: Speed Power Pool: Leaping Power Pool: Leadership Ancillary Pool: Mace Mastery Hero Profile: Level 1: Dual Wield -- Thn-Acc/Dmg(A), Thn-Dmg/EndRdx(3), Thn-Dmg/Rchg(3), Thn-Acc/Dmg/Rchg(5), Thn-Acc/Dmg/EndRdx(5), Thn-Dmg/EndRdx/Rchg(7) Level 1: Ki Push -- KntCmb-Acc/Dmg(A), KntCmb-Dmg/EndRdx(7), KntCmb-Dmg/Rchg(9), KntCmb-Dmg/EndRdx/Rchg(9) Level 2: Empty Clips -- SprBlsWrt-Acc/Dmg(A), SprBlsWrt-Dmg/Rchg(13), SprBlsWrt-Acc/Dmg/Rchg(13), SprBlsWrt-Acc/Dmg/EndRdx(15), SprBlsWrt-Acc/Dmg/EndRdx/Rchg(17), SprBlsWrt-Rchg/Dmg%(17) Level 4: Reach for the Limit Level 6: Swap Ammo Level 8: Bullet Rain -- SprDfnBrr-Acc/Dmg(A), SprDfnBrr-Dmg/Rchg(19), SprDfnBrr-Acc/Dmg/Rchg(19), SprDfnBrr-Acc/Dmg/EndRdx(21), SprDfnBrr-Acc/Dmg/EndRdx/Rchg(21), SprDfnBrr-Rchg/+Status Protect(23) Level 10: Kick -- KntCmb-Acc/Dmg(A), KntCmb-Dmg/Rchg(11), KntCmb-Dmg/EndRdx/Rchg(11), KntCmb-Dmg/EndRdx(36) Level 12: Super Speed -- BlsoftheZ-ResKB(A), BlsoftheZ-Travel/EndRdx(46) Level 14: Hasten -- RechRdx-I(A), RechRdx-I(15) Level 16: Storm Kick -- Mk'Bit-Acc/Dmg(A), Mk'Bit-Dmg/EndRdx(23), Mk'Bit-Dmg/Rchg(25), Mk'Bit-Acc/EndRdx/Rchg(25), Mk'Bit-Acc/Dmg/EndRdx/Rchg(27), Mk'Bit-Dam%(27) Level 18: Executioner's Shot -- Thn-Acc/Dmg(A), Thn-Dmg/EndRdx(29), Thn-Dmg/Rchg(29), Thn-Acc/Dmg/Rchg(31), Thn-Acc/Dmg/EndRdx(33), Thn-Dmg/EndRdx/Rchg(33) Level 20: Reaction Time -- EndMod-I(A), EndMod-I(31), Pnc-Heal/+End(34) Level 22: Combat Jumping -- LucoftheG-Def/Rchg+(A), BlsoftheZ-Travel/EndRdx(48), BlsoftheZ-ResKB(48) Level 24: Burst of Speed -- Obl-%Dam(A), Obl-Dmg(33), Obl-Acc/Dmg/EndRdx/Rchg(34), Obl-Acc/Dmg/Rchg(34), Obl-Acc/Rchg(37), Obl-Dmg/Rchg(37) Level 26: Piercing Rounds -- OvrFrc-Dmg/End/Rech(A), OvrFrc-Acc/Dmg(36), OvrFrc-Acc/Dmg/End/Rech(36), OvrFrc-End/Rech(37), OvrFrc-Acc/Dmg/End(40) Level 28: Inner Will -- RechRdx-I(A) Level 30: Tough -- StdPrt-ResDam/Def+(A), GldArm-3defTpProc(31) Level 32: Hail of Bullets -- Obl-Acc/Dmg/Rchg(A), Obl-Dmg(40), Obl-%Dam(40), Obl-Acc/Rchg(43), Obl-Dmg/Rchg(43), Obl-Acc/Dmg/EndRdx/Rchg(43) Level 35: Maneuvers -- LucoftheG-Def/Rchg+(A), LucoftheG-Def/EndRdx(45), LucoftheG-Def(45), LucoftheG-Def/EndRdx/Rchg(50) Level 38: Weave -- LucoftheG-Def/Rchg+(A), LucoftheG-Def/EndRdx(39), LucoftheG-Def(39), LucoftheG-EndRdx/Rchg(39) Level 41: Scorpion Shield -- LucoftheG-Def/Rchg+(A), LucoftheG-Def(42), LucoftheG-Def/EndRdx(42), LucoftheG-EndRdx/Rchg(42) Level 44: Tactics -- GssSynFr--ToHit(A), GssSynFr--ToHit/Rchg(45), GssSynFr--ToHit/Rchg/EndRdx(46), GssSynFr--Rchg/EndRdx(46), GssSynFr--ToHit/EndRdx(50), GssSynFr--Build%(50) Level 47: Super Jump -- BlsoftheZ-ResKB(A), BlsoftheZ-Travel(48) Level 49: Vengeance -- LucoftheG-Def/Rchg+(A) Level 2: Health -- Mrc-Rcvry+(A) Level 2: Stamina -- EndMod-I(A) | Copy & Paste this data into Mids Reborn : Hero Designer to view the build | |-------------------------------------------------------------------| |MxDz;1485;659;1318;HEX;| |78DA6593DB6E12511486F73083585A0A140AA51439160AADB4A8F726B56A624A83E| |501C80446189DC00486442F7D8D1ED578BCF181B41E5EC0C37DD571C1FA21243309| |7C6BD6FED75EFFDE7B76F5E9DEC2C7FBCF6F0BC977C7500783C62EFD5B5ADF73A05| |AC3BE6A087ABCBBAA61E8034B6FAA1E7A8D43D23854BB6DAD55DE1BAA46A346E33D| |63909B8CD587A6D9EB5BE5AADAB7741AAFAA5DDD1C1AAAA5F7BAC257EBF58CF23DB| |DDDB1F46EDB3B7EAB9B9AD65A1887FB9A6A52DE3F796969FD41473763774DBD599E| |34A8AA4D8DFE46F1B31572B541BFD580C063BBC529A1A208D71978CE545E802F995| |75E3103B969AD2C6A840C8D3D645E3D04EBCC38F591D0473A92C7F50BC7E00973F1| |94193803CF994BD4471E17DBF61ACDE3469CA0D883393D4261AD04BA98611954981| |137D3458573F03E07EF5E78F6C273166BC992769EB5D2FC856B5C7FFD333343633E| |F623F936795F16C120F9F6C39FFF11E7226DE64A07D499AB8FC127CC24AD2D88DA2| |0CE650DE7B28673B9867349E15C52389708F50DB1275728052D984EF39E46C8F732| |34CBA38072DB58D336D618A679A2F010155C97BAE4B1B40DFE63E6FE807F9929F21| |FE35A25F68D6BB317E07766EE0BB3F09519A57E71AE1171ECA14C3E13D8FB44947C| |26682D37589FA61E49F84BC24701FE0AF05B82AF127C95E03B48F36678FD7206EBD| |F0A80616625C45448BB0EED3AB47968F3D0E6979897E46903DA0D688BD014515384| |3644F36EB2D6BDF99A7D6DBDC1F7F5167CC7ACBC073F30A3545BC6BE94715EDB9F7| |06E34B6837DDC8187347DF662728794E9BD1DBDDAB6D877646ACAF4BE0A699CF9E1| |A58C349BF9E9C8FC9ACD3CA0A0A088DFB3397C852547BF1D47A6E2C8DC74646E393| |273B4FF3267EC23BA406EC4C733F1C94CFC1FA1A3F225| |-------------------------------------------------------------------|
-
Seriously: Alt-itis, What To Do? A Discussion on Self-Control
Harlequin565 replied to a topic in General Discussion
I'm at 22 characters with 13 of them at 50. I have 1 50 of each AT apart from VEATs, a Warshade and a Mastermind. Altitis isn't so much an issue for me as getting the right powerset/concept combo working... Doctor Chronometer for example, has had lots of attempts at different powersets and been rerolled a few times. Now going through as a Grav/Time. My Tank - British Steel - was Inv/SS back in the day and I found it boring, so when the servers opened, I went Invuln/Rad. All the way to 50+3. Hated it. Rerolled it in Feb and have just taken him back to 50+3 as Wpr/En which is more suited to the theme. BuzzBee is a bee themed toon but I can't find a powerset combo or AT that I'm happy with. Currently trialling a Rad/Plant blaster. Same for Seraphima who is a demon based fire character. Was Fire/Fire blaster back in the day, and now is a Dark/Fire Dom. I wanted Cryonica to be a cold based character, but after levelling her to 50 as an Ice blaster I hated the delay in some of the Ice blasts and rerolled her as an Ice/Spines tank. It's a great game 🙂 -
I remade my Emp/Psi main as Pain/Psi to try and see if it's more useful end-game. Focus is on recharge and defence with soft capped S/L and almost 40% ranged def. Hasten isn't perma unless the chance to recharge procs (which it often will). Attacks are mainly Scream & PSW for AoE and TK Blast & Will Dom for single target. I have a lot of heals, more than I need, but it amuses me to watch Brutes get over their head and have three heals to pull them out of the fire. Rarely do they have a clue why. Keybinds for team select and the single target buffs are pretty essential. Painbringer is perma, as is World of Pain which adds some welcome Res to many builds that are def capped. Indeed, adding to the def totals above is a flat 40% res to all damage apart from S/L which is 63%. Chuck in Angushing Cry for a rather large debuff that (again) no one ever notices and you have a very solid toon. Pretty bad at soloing unless you solo defenders and controllers for fun. I'm still not sure how this will play out over time. Currently 35 and doing well, adding value to teams, and being able to contribute more than my Empath did when a team is roflstomping the content (which is obviously more often these days) Hero Plan by Mids' Reborn : Hero Designer 2.6.0.7 https://github.com/ImaginaryDevelopment/imaginary-hero-designer Click this DataLink to open the build! Mellenta: Level 50 Magic Defender Primary Power Set: Pain Domination Secondary Power Set: Psychic Blast Power Pool: Speed Power Pool: Leaping Power Pool: Leadership Power Pool: Fighting Ancillary Pool: Mace Mastery Hero Profile: Level 1: Nullify Pain -- Pnc-Heal/EndRedux(A), Pnc-EndRdx/Rchg(3), Pnc-Heal/Rchg(3), Pnc-Heal/EndRedux/Rchg(5), Pnc-Heal(5) Level 1: Mental Blast -- SprVglAss-Acc/Dmg(A), SprVglAss-Dmg/Rchg(7), SprVglAss-Dmg/EndRdx/Rchg(7), Thn-Acc/Dmg(9), Thn-Dmg/EndRdx(9), Thn-Dmg/Rchg(46) Level 2: Soothe -- Prv-Heal(A), Prv-Heal/EndRdx(11), Prv-EndRdx/Rchg(11), Prv-Heal/Rchg(13), Prv-Heal/Rchg/EndRdx(13), Prv-Absorb%(45) Level 4: Psionic Lance -- StnoftheM-Acc/Dmg(A), StnoftheM-Dmg/EndRdx(15), StnoftheM-Acc/ActRdx/Rng(17), StnoftheM-Dmg/ActRdx/Rchg(17), StnoftheM-Dmg/EndRdx/Rchg(23), Dvs-Acc/Dmg/EndRdx/Rchg(45) Level 6: Conduit of Pain -- RechRdx-I(A) Level 8: Share Pain -- Heal-I(A) Level 10: Psychic Scream -- SprDfnBst-Acc/Dmg(A), SprDfnBst-Dmg/Rchg(23), SprDfnBst-Dmg/EndRdx/Rchg(25), SprDfnBst-Acc/Dmg/EndRdx(27), SprDfnBst-Acc/Dmg/EndRdx/Rchg(27), SprDfnBst-Rchg/Heal%(46) Level 12: Enforced Morale -- EndRdx-I(A) Level 14: Hasten -- RechRdx-I(A), RechRdx-I(15) Level 16: Telekinetic Blast -- OvrFrc-Dam/KB(A), OvrFrc-Acc/Dmg(29), OvrFrc-End/Rech(33), OvrFrc-Acc/Dmg/End(34), OvrFrc-Dmg/End/Rech(34), FrcFdb-Rechg%(43) Level 18: World of Pain -- Ags-ResDam/EndRdx(A), Ags-ResDam(19), Ags-ResDam/EndRdx/Rchg(19), StdPrt-ResDam/Def+(21), Ags-ResDam/Rchg(21) Level 20: Combat Jumping -- LucoftheG-Def/Rchg+(A), Rct-ResDam%(37) Level 22: Will Domination -- SprVglAss-Acc/Dmg/EndRdx(A), SprVglAss-Acc/Dmg/EndRdx/Rchg(34), SprVglAss-Rchg/+Absorb(36), Thn-Acc/Dmg(36), Thn-Dmg/EndRdx(36), Thn-Dmg/Rchg(46) Level 24: Super Jump -- BlsoftheZ-ResKB(A), BlsoftheZ-Travel/EndRdx(25) Level 26: Anguishing Cry -- Acc-I(A), RechRdx-I(37) Level 28: Super Speed -- BlsoftheZ-Travel/EndRdx(A), BlsoftheZ-Travel(29) Level 30: Maneuvers -- ShlWal-ResDam/Re TP(A), ShlWal-Def(31), ShlWal-Def/EndRdx(31), ShlWal-Def/EndRdx/Rchg(31), LucoftheG-Def/Rchg+(33) Level 32: Painbringer -- RechRdx-I(A), RechRdx-I(33) Level 35: Soothing Aura -- NmnCnv-Heal/EndRdx(A), NmnCnv-EndRdx/Rchg(37), NmnCnv-Heal/Rchg(39), NmnCnv-Heal/EndRdx/Rchg(39), NmnCnv-Heal(39), NmnCnv-Regen/Rcvry+(43) Level 38: Psychic Wail -- Arm-Dmg(A), Arm-Dmg/Rchg(40), Arm-Acc/Dmg/Rchg(40), Arm-Acc/Rchg(40), Arm-Dmg/EndRdx(43) Level 41: Scorpion Shield -- LucoftheG-Def/Rchg+(A), LucoftheG-Def(42), LucoftheG-Def/EndRdx(42), LucoftheG-Def/EndRdx/Rchg(42) Level 44: Kick -- Acc-I(A) Level 47: Tough -- GldArm-ResDam(A), GldArm-Res/Rech/End(48), GldArm-End/Res(48), GldArm-3defTpProc(48) Level 49: Weave -- LucoftheG-Def/Rchg+(A), LucoftheG-Def(50), LucoftheG-Def/EndRdx(50), LucoftheG-Def/EndRdx/Rchg(50) Level 1: Brawl -- Empty(A) Level 1: Prestige Power Dash -- Empty(A) Level 1: Prestige Power Slide -- Empty(A) Level 1: Prestige Power Quick -- Empty(A) Level 1: Prestige Power Rush -- Empty(A) Level 1: Prestige Power Surge -- Empty(A) Level 1: Sprint -- Empty(A) Level 1: Vigilance Level 2: Rest -- Empty(A) Level 4: Ninja Run Level 2: Swift -- Empty(A) Level 2: Health -- Mrc-Rcvry+(A), Pnc-Heal/+End(45) Level 2: Hurdle -- Empty(A) Level 2: Stamina -- EndMod-I(A) Level 1: Quick Form ------------
-
I had an illusion controller that was similar. Base costume was the Decoy costume and then I did a few more... Really like your Hellion and Skull ones so I may ressurect the character...
-
May as well add Lady Atomic for the Captain Marvel look.. Atomica And My 2nd Main Firestorm...
-
Thanks! There's a triangular chest emblem (Celtic 2) and if you make it the same colour it becomes a solid inverted triangle. One of the cape "cowls" (over shoulder mantle) is a solid piece across the neckline which can cut off the top of the chest pattern. If you pick the right chest element (Diablo in that case) you can get that triple colour look.
-
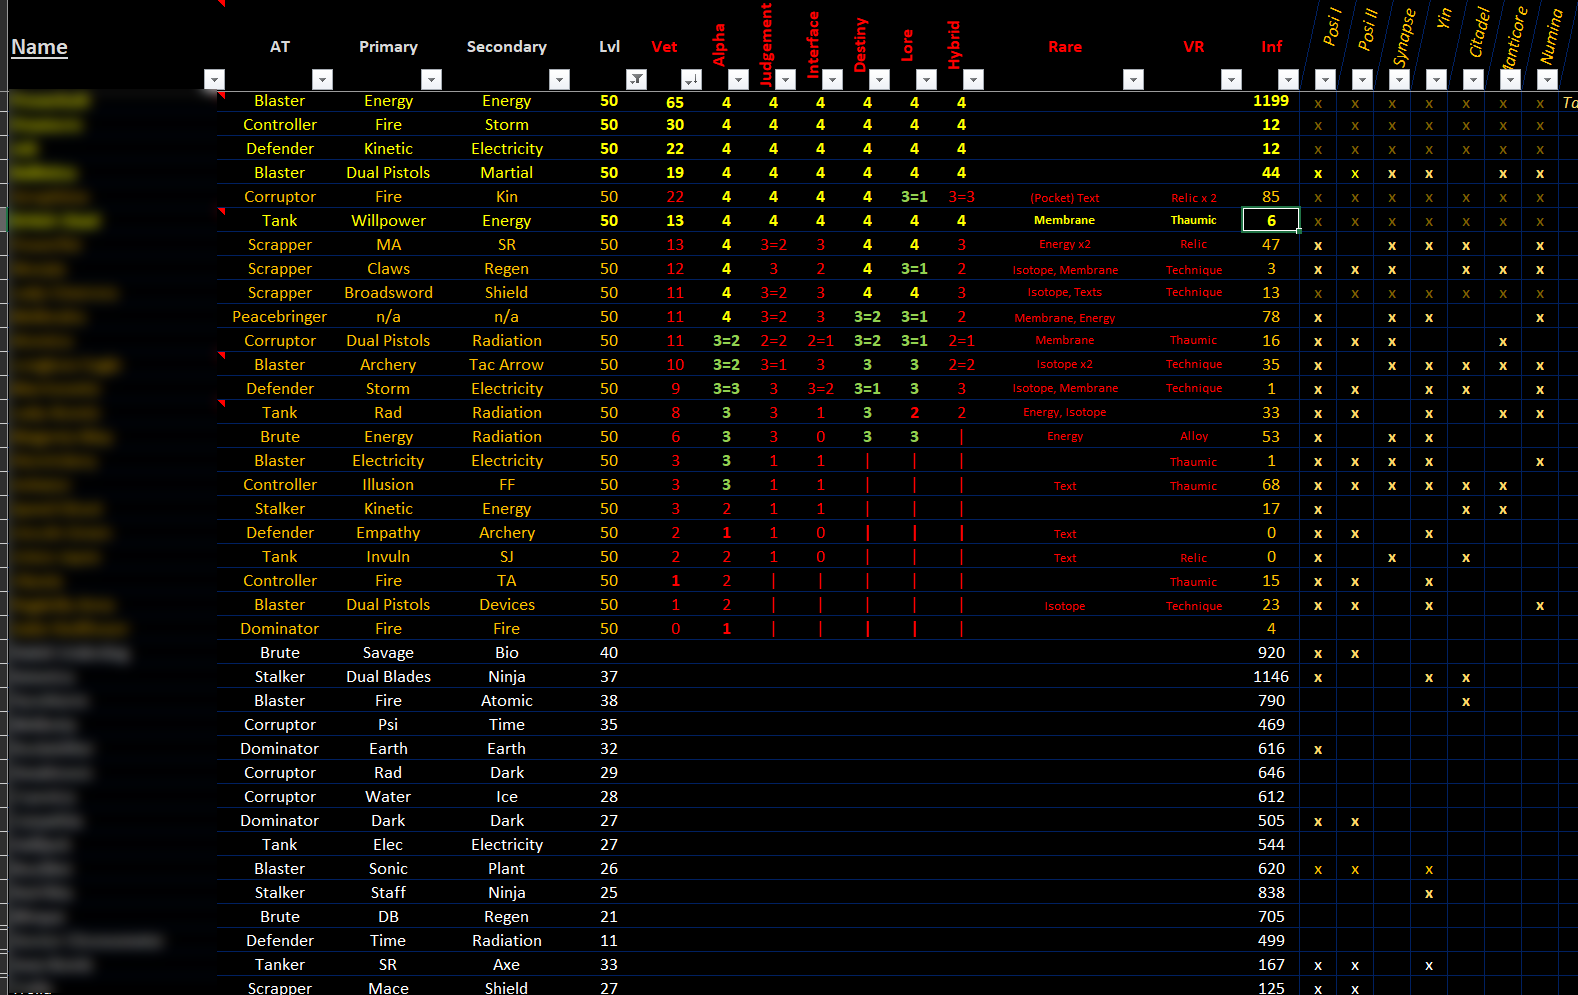
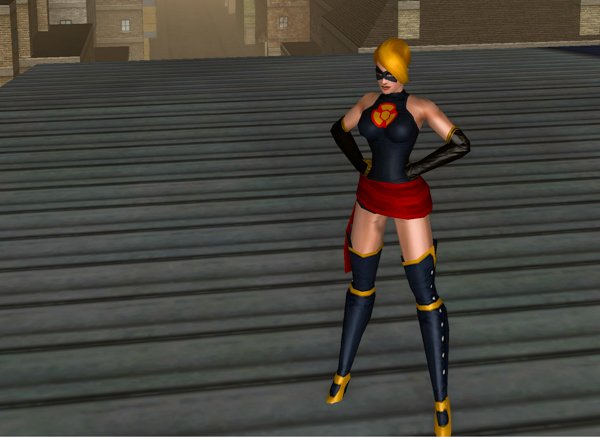
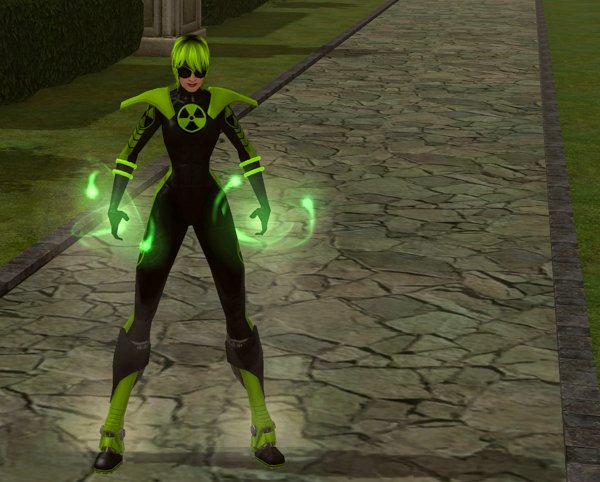
Great thread, wish I'd found it earlier... My main, En/En Blaster - Powerbolt with saved costumes from the olden days! The Orange one is inspired by the toon on the Load screen. Then I teamed with "Loading Screen Girl" (Excelsior) who had the same idea but did it way better than I did. Then my original badger, Mellenta - who has now been reincarnated as a Pain/Psi Defender Then British Steel, my Wpr/En tank. He's fun. Then I present Carpathia (SJ/En Brute) because the beehive hair just has to be used once! Jolt, my Kin/Elec bundle of terror And finally, Lady Cimerora, (BS/SD Scrap)
-
Thanks guys. I ended up with Katana because of +def and because I've not really done anything with Katana. Not a big fan of TW mainly because I don't get the momentum mechanic. Have a Broadsword scrapper and don't want to get locked into the long animations, and have a DM Brute. WM and BA I discounted for similar reasons, and because I'm not keen on the animations. I tend to go to 50, then T4 incarnates which takes a while so I really have to enjoy a build to do that. Mace and Axe lack any oomph in the wow department. I know. I'm shallow. I do have 2 DP toons though. DP/Martial blaster and DP/Rad Corruptor. I really like those pistols. DP/Regen sounds like just the ticket for a Sentinel - esp as it's the only AT I haven't tried yet...
-
Thanks guys.
-
My Savage/Regen Brute is getting deleted as I'm not enjoying Savage at all. But I've always wanted to push Regen to the limit. So has anyone got any suggestions that aren't on this list? Savage/Regen: Feels clunky Claws/Regen: Ran this to late 30s. Don't like the flippety later powers. Dark, BS, Electric, Rad, Spines and SJ are all primaries I'm running on other characters so would be good to avoid those unless there's a strong reason not to. I don't like combos that much I'm leaning to Scrapper rather than Brute but don't really have a preference. I only have one of each of these so it would be good to do this instead of Tank or Stalker as I've got a few of each of those. Suggestions appreciated! Thanks!
-
September 2004 Energy/Energy Blaster. Because that was my first Champions character from way back in... 1984... So 20 years after her creation, she lived again in CoH. I street swept in Atlas to about level 5, then joined a street sweeping team in Perez. Ended up getting lost in the park with no way out. Pre vidiot maps and definitely pre any kind of teleporter. I ended up finding a hole in the trees and hovering out. This was pre speed buff Hover. When it was bad. That was when L14 and a travel power was a major milesone. But not as major as Stamina at 20... And in 2019, 35 years after her creation, and 15 years after she first walked into Paragon City, Catherine Voss (Originally 'Powerbolt', but 'Voss' in CoH because the name was taken, then changed to 'Powerslinger' when name changes happened, then I snagged the name 'Powerbolt' on Excelsior with Homecoming) stalks the streets again.
-
The Good Missions Guide: A Heroic Levelling Journey through Story Arcs
Harlequin565 replied to Gulbasaur's topic in Guides
Really nice guide. My levelling path is mainly DFB > Faultline > Striga > Croatoa > Night Ward > ITF + Jenkins/Mac with a sprinkling of TFs, so it's nice to see the other options. I struggle mostly with repetition. Those hunt missions in Croatoa always set my teeth on edge and the "find a hostage on a boat" minigame in Striga is tedious as hell. I'd forgotten about the RWZ arcs - so thanks for that. A redside guide would be great as we can flip back and forth so easily now it would be good to break the tedium up with some different content. I do enjoy the redside stuff that's not Arachnos map after Arachnos map it's just that there are so few people to team up with.