Dark Current
-
Posts
257 -
Joined
-
Last visited
-
Days Won
1
Content Type
Profiles
Forums
Events
Store
Articles
Patch Notes
Everything posted by Dark Current
-
Thanks for your concerns with the build. As a master of time and space, Bhootakash doesn't seem to have any issues soloing standard 54 x8 missions as you can see in the video linked below. She says she'll stick with her current powers and abilities, but will keep your suggestions in mind should something come up. Bhootakash Lvl 54 x8 Solo
-
It's the secondary effects that matter more than what you can color something.
-
Put together a build to maximize the amount of cones with a ranged position dominator: Symphony Control = 4 cones Fire Assault = 1 cone Leviathan PPP = 1 cone Force of Will = 1 cone Idea is to just spray cones at groups of enemies and stacking oodles of soft control from range. Here are some sample vids from a Manticore TF I ran with Opal Dragyn from the other day to see how the concept works in the 30s. We were doing a 'kill most' taskforce run vs +2s most of the time. Only deaths I suffered were from the countess, which were not the fault of the build or powersets, but bad positioning in the first death (7a) and then getting range ganked by her on the second (7b). Here are links to the complete series of vids if you want to check it out in action: Manti TF Pt 1 Manti TF Pt 2 Manti TF Pt 3 Manti TF Pt 4 Manti TF Pt 5 Manti TF Pt 6 Manti TF Pt 7a Manti TF Pt 7b And if anyone is curious about the current build, it looks like this (not going for permadom, just range and soft control): This Villain build was built using Mids Reborn 3.4.7 https://github.com/LoadedCamel/MidsReborn Click this DataLink to open the build! Opal Dragyn: Level 50 Natural Dominator Primary Power Set: Symphony Control Secondary Power Set: Fiery Assault Power Pool: Force of Will Power Pool: Leadership Power Pool: Leaping Ancillary Pool: Leviathan Mastery Villain Profile: Level 1: Hymn of Dissonance (A) Gladiator's Net - Accuracy/Endurance/Recharge/Hold (5) Gladiator's Net - Endurance/Recharge/Hold (5) Gladiator's Net - Accuracy/Recharge (7) Gladiator's Net - Accuracy/Hold Level 1: Flares (A) Devastation - Accuracy/Damage (7) Devastation - Accuracy/Damage/Endurance/Recharge (9) Devastation - Accuracy/Damage/Recharge (9) Devastation - Chance of Hold Level 2: Aria of Stasis (A) Ice Mistral's Torment - Chance for Cold Damage (11) Ice Mistral's Torment - Accuracy/Damage/Endurance/Recharge (11) Ice Mistral's Torment - Accuracy/Damage/Endurance (13) Ice Mistral's Torment - Damage/Slow (13) Ice Mistral's Torment - Endurance/Slow (48) Debilitative Action - Disorient Bonus Level 4: Fire Breath (A) Detonation - Accuracy/Damage (15) Detonation - Damage/Endurance (15) Detonation - Damage/Range (17) Detonation - Damage/Endurance/Range (17) Detonation - Accuracy/Damage/Endurance (48) Annihilation - Chance for Res Debuff Level 6: Mighty Leap (A) Springfoot - Endurance/Jumping Level 8: Dreadful Discord (A) Glimpse of the Abyss - Accuracy/Recharge (19) Glimpse of the Abyss - Endurance/Fear (19) Glimpse of the Abyss - Accuracy/Endurance (21) Glimpse of the Abyss - Accuracy/Fear/Recharge (21) Glimpse of the Abyss - Chance of Damage(Psionic) (48) Unspeakable Terror - Disorient Bonus Level 10: Fire Blast (A) Devastation - Accuracy/Damage (23) Devastation - Damage/Endurance (23) Devastation - Accuracy/Damage/Endurance/Recharge (25) Devastation - Chance of Hold Level 12: Enfeebling Lullaby (A) Superior Frozen Blast - Recharge/Chance for Immobilize (25) Superior Frozen Blast - Damage/Endurance/Accuracy/RechargeTime (27) Superior Frozen Blast - Accuracy/Damage/Endurance (27) Annihilation - Accuracy/Damage/RechargeTime (29) Annihilation - Accuracy/Damage/Endurance (50) Annihilation - Chance for Res Debuff Level 14: Weaken Resolve (A) Shield Breaker - Chance for Lethal Damage (29) Shield Breaker - Accuracy/Recharge Level 16: Embrace of Fire (A) Recharge Reduction IO Level 18: Confounding Chant (A) Razzle Dazzle - Chance of Immobilize (31) Bombardment - Chance for Fire Damage (31) Bombardment - Accuracy/Recharge/Endurance (31) Bombardment - Damage/Recharge (33) Bombardment - Accuracy/Damage/Recharge (50) Bombardment - Accuracy/Damage/Recharge/Endurance Level 20: Wall of Force (A) Detonation - Accuracy/Damage (33) Detonation - Damage/Endurance (33) Detonation - Damage/Range (34) Detonation - Accuracy/Damage/Endurance (34) Detonation - Damage/Endurance/Range (50) Annihilation - Chance for Res Debuff Level 22: Project Will (A) Devastation - Accuracy/Damage (34) Devastation - Damage/Endurance (36) Devastation - Accuracy/Damage/Endurance/Recharge (36) Devastation - Chance of Hold Level 24: Maneuvers (A) Red Fortune - Defense/Endurance Level 26: Chords of Despair (A) Lockdown - Chance for +2 Mag Hold (36) Lockdown - Accuracy/Hold (37) Lockdown - Accuracy/Recharge (37) Lockdown - Endurance/Recharge/Hold (37) Lockdown - Accuracy/Endurance/Recharge/Hold Level 28: Assault (A) Endurance Reduction IO Level 30: Combat Jumping (A) Blessing of the Zephyr - Knockback Reduction (4 points) (39) Reactive Defenses - Scaling Resist Damage Level 32: Reverberant (A) Expedient Reinforcement - Accuracy/Damage (39) Expedient Reinforcement - Damage/Endurance (39) Expedient Reinforcement - Endurance/Damage/Recharge (40) Expedient Reinforcement - Accuracy/Recharge Level 35: Bile Spray (A) Detonation - Accuracy/Damage (40) Detonation - Damage/Endurance (40) Detonation - Damage/Range (42) Detonation - Accuracy/Damage/Endurance (42) Detonation - Damage/Endurance/Range Level 38: Blaze (A) Devastation - Accuracy/Damage (42) Devastation - Damage/Endurance (43) Devastation - Accuracy/Damage/Endurance/Recharge (43) Devastation - Chance of Hold Level 41: Shark Skin (A) Unbreakable Guard - Resistance (43) Unbreakable Guard - Resistance/Endurance (45) Unbreakable Guard - Resistance/Endurance/RechargeTime (45) Unbreakable Guard - +Max HP Level 44: Water Spout (A) Sudden Acceleration - Knockback to Knockdown (45) Sudden Acceleration - Knockback/Accuracy/Damage (46) Sudden Acceleration - Knockback/Accuracy (46) Touch of Lady Grey - Chance for Negative Damage (46) Touch of Lady Grey - Recharge/Endurance Level 47: Unleash Potential (A) Luck of the Gambler - Defense/Increased Global Recharge Speed Level 49: Consume (A) Preemptive Optimization - Accuracy/Recharge Level 1: Domination Level 1: Brawl
-
Update on my primal goddess. She's level 50 and fully IOd. Ran a couple missions exemplared to the mid-20s for comparison with the above pre-IO vids. Here they are: Level 24 Level 25 She can hold her own in a fight and create a veritable doorstop for enemies. This Hero build was built using Mids Reborn 3.4.7 https://github.com/LoadedCamel/MidsReborn Click this DataLink to open the build! Bhootakash: Level 50 Technology Controller Primary Power Set: Gravity Control Secondary Power Set: Time Manipulation Power Pool: Force of Will Power Pool: Fighting Ancillary Pool: Primal Forces Mastery Hero Profile: Level 1: Lift -- Dcm-Acc/Dmg(A), Dcm-Dmg/EndRdx(3), Dcm-Acc/EndRdx/Rchg(3), Dcm-Build%(40), Dcm-Acc/Dmg/Rchg(43) Level 1: Time Crawl -- TmpRdn-Acc/Slow(A), TmpRdn-Acc/EndRdx(34) Level 2: Gravity Distortion -- Apc-Dmg(A), Apc-Acc/Dmg/Rchg(5), Apc-Acc/Rchg(5), Apc-Dmg/EndRdx(36), Apc-Dam%(37) Level 4: Temporal Mending -- DctWnd-Heal/EndRdx(A), DctWnd-EndRdx/Rchg(7), DctWnd-Heal/Rchg(7), DctWnd-Heal/EndRdx/Rchg(37), DctWnd-Heal(37) Level 6: Time's Juncture -- IceMisTrmt-+ColdDmg(A), DarWtcDsp-Slow%(9), DarWtcDsp-ToHitDeb/EndRdx(9), DarWtcDsp-Rchg/EndRdx(23), DarWtcDsp-ToHitdeb/Rchg/EndRdx(50) Level 8: Crushing Field -- PstBls-Acc/Dmg/EndRdx(A), TraoftheH-Acc/EndRdx(11), PstBls-Dam%(11), TraoftheH-Dam%(13), ImpSwf-Dam%(13), SprWiloft-Rchg/Dmg%(31) Level 10: Mighty Leap -- BlsoftheZ-ResKB(A) Level 12: Weaken Resolve -- ShlBrk-%Dam(A), ShlBrk-Acc/DefDeb(23) Level 14: Temporal Selection -- DctWnd-EndRdx/Rchg(A) Level 16: Distortion Field -- SprOvrPrs-Rchg/Energy Font(A), SprOvrPrs-Acc/Conf/Hold/Immob/Sleep/Stun/Fear(17), SprOvrPrs-EndRdx/Rchg(17), SprOvrPrs-Conf/Hold/Immob/Sleep/Stun/Fear/Rchg(21), SprOvrPrs-Acc/Conf/Hold/Immob/Sleep/Stun/Fear/EndRdx(25) Level 18: Gravity Distortion Field -- BslGaz-Acc/EndRdx/Rchg/Hold(A), BslGaz-Acc/Rchg(19), BslGaz-Rchg/Hold(19), BslGaz-EndRdx/Rchg/Hold(21), BslGaz-Acc/Hold(25) Level 20: Unleash Potential -- LucoftheG-Def/Rchg+(A) Level 22: Propel -- Dcm-Acc/Dmg(A), Dcm-Dmg/EndRdx(34), Dcm-Acc/EndRdx/Rchg(34), Dcm-Acc/Dmg/Rchg(43), Dcm-Dmg/Rchg(43) Level 24: Time Stop -- BslGaz-Acc/Hold(A), BslGaz-Acc/Rchg(40), BslGaz-Slow%(40), BslGaz-EndRdx/Rchg/Hold(46) Level 26: Wormhole -- SprWiloft-Acc/Conf/Hold/Immob/Sleep/Stun/Fear(A), SprWiloft-Conf/Hold/Immob/Sleep/Stun/Fear/Rchg(27), SprWiloft-EndRdx/Rchg(27), SprWiloft-Acc/Conf/Hold/Immob/Sleep/Stun/Fear/EndRdx(29), SprWiloft-Acc/Conf/Hold/Immob/Sleep/Stun/Fear/EndRdx/Rchg(29) Level 28: Farsight -- RedFrt-Def/EndRdx(A), RedFrt-Def/Rchg(31), RedFrt-EndRdx/Rchg(31), RedFrt-Def(36), RedFrt-Def/EndRdx/Rchg(46) Level 30: Boxing -- Acc-I(A) Level 32: Singularity -- ExpRnf-Acc/Dmg(A), ExpRnf-Dmg/EndRdx(33), ExpRnf-Acc/Dmg/Rchg(33), ExpRnf-EndRdx/Dmg/Rchg(33) Level 35: Tough -- UnbGrd-ResDam/EndRdx(A), UnbGrd-ResDam/EndRdx/Rchg(36) Level 38: Chrono Shift -- DctWnd-Heal/EndRdx/Rchg(A), DctWnd-EndRdx/Rchg(39), DctWnd-Heal/Rchg(39), DctWnd-Rchg(39), DctWnd-Heal/EndRdx(46) Level 41: Power Blast -- Dcm-Acc/Dmg(A), Dcm-Dmg/EndRdx(42), Dcm-Dmg/Rchg(42), Dcm-Acc/EndRdx/Rchg(42), Dcm-Acc/Dmg/Rchg(50) Level 44: Energy Torrent -- PstBls-Acc/Dmg(A), PstBls-Dmg/EndRdx(45), PstBls-Dmg/Rchg(45), PstBls-Dmg/Rng(45), PstBls-Acc/Dmg/EndRdx(50) Level 47: Temp Invulnerability -- ImpArm-ResDam/EndRdx(A), ImpArm-ResDam/Rchg(48), ImpArm-ResDam/EndRdx/Rchg(48), ImpArm-ResDam(48) Level 49: Power Boost -- RechRdx-I(A) Level 1: Containment Level 1: Brawl -- Acc-I(A) Level 1: Sprint -- Clr-Stlth(A) Level 2: Rest -- Empty(A) Level 2: Swift -- Run-I(A) Level 2: Hurdle -- Jump-I(A) Level 2: Health -- NmnCnv-Regen/Rcvry+(A), Pnc-Heal/+End(15) Level 2: Stamina -- PrfShf-End%(A), PrfShf-EndMod(15) Level 10: Takeoff Level 1: Prestige Power Dash -- Empty(A) Level 1: Prestige Power Slide -- Empty(A) Level 1: Prestige Power Quick -- Empty(A) Level 1: Prestige Power Rush -- Empty(A) Level 1: Prestige Power Surge -- Empty(A) Level 4: Ninja Run Level 50: Vigor Core Paragon Level 50: Gravitic Core Flawless Interface Level 50: Support Core Embodiment Level 50: Cryonic Radial Final Judgement Level 50: Clarion Radial Epiphany Level 50: Storm Elemental Core Superior Ally ------------ ------------ Set Bonus Totals: 13% DamageBuff(Smashing)13% DamageBuff(Lethal)13% DamageBuff(Fire)13% DamageBuff(Cold)13% DamageBuff(Energy)13% DamageBuff(Negative)13% DamageBuff(Toxic)13% DamageBuff(Psionic)5% Defense(Energy)5% Defense(Negative)1.88% Defense(Psionic)2.5% Defense(Ranged)9% Max End+8.8% Enhancement(Terrorized)+16% Enhancement(Sleep)+8% Enhancement(Heal)+8% Enhancement(Held)+93.75% Enhancement(RechargeTime)+8% Enhancement(Stunned)+24% Enhancement(Accuracy)2.5% Enhancement(Max EnduranceDiscount)+8% Enhancement(Confused)+21% Enhancement(Immobilized)7.5% SpeedFlying110.6 HP (10.88%) HitPoints7.5% JumpHeight7.5% SpeedJumpingKnockback (Mag -4)Knockup (Mag -4)45% MezResist(Confused)45% MezResist(Held)45% MezResist(Immobilized)45% MezResist(Sleep)45% MezResist(Stunned)45% MezResist(Terrorized)22% (0.37 End/sec) Recovery16% (0.68 HP/sec) Regeneration10.5% Resistance(Smashing)10.5% Resistance(Lethal)6.75% Resistance(Fire)6.75% Resistance(Cold)9.75% Resistance(Energy)9.75% Resistance(Negative)7.5% SpeedRunning
-
Introducing my master of time and space: Bhootakash Gravity / Time / Primal Controller Here's a trio of vids I recorded while Mentoring down in the 30s with a blueside team earlier today. I unlocked Alpha during the first vid, so no incarnates yet and I don't have many of my IO sets slotted, and some powers are barely slotted at all. But my intended build is shown below. Mostly going for recharge and some decent damage output. She should have enough controls and buffs to support a team of 8 by herself. Once I'm done slotting her and getting the incarnates unlocked, I'll make some more vids to post for comparison. Master of Time and Space pt 1 Master of Time and Space pt 2 Master of Time and Space pt 3 https://www.midsreborn.com/builds/download.php?uc=1902&c=798&a=1596&f=HEX&dc=78DA7594594F135114C7FF435BB00B652D4BD9A42C2D5BA5D10F60C0252A2846121F9B8A05260E1DD216225FC2DD8012595C40F0D10DF5D1F8A4F8E49AF81554C40F500F737AE452C22493F9DD73EED9EE9C73FB2F1FF1AC7FE83B0CADB8D788A552D15E33914E9A86114FBA06E343A309D33047A6408FAB67D434D3B14BB1D468012D03DB1BC5267C3C199BD4D353B26E54B6F44C0C0F8707F5B178B43F96D0C7278C585A3713281D30C9EE98991C8A47CDE1E879DD305C96E8DC783C7ED1CD5A431F194D97587C2231A9A7F40BBA4161FC47C7F5A1F040521F8B1951CB458A9CA7D2F1E4541525D849EF150DEA93B103D3F40D3A918719813B0C41DC6568C72CC35C397DB73D640897E98D38D1881586AB9ABA83026812C02E01EC12A04902344B80790A605302D86D38C57EF3D127D0CFD08CD302671816C8DAA15A3BE075589A7D78939785D70C1578C510C11AC375B22C50327714E0252C8D0B335A16D658E2C1AC968525823A27EAF1C46649D221C0A92401277E70801469DC4A00CD8D7C9B655C0107C3225550A81A174AD9F74953A49E6B11EAEC96A61855027E8672543354A186E126392951AD4BF02DCF8A588ACF025F18CAF195A10ADF192629F132C59A163ECEEA1A7D7CAA5F1FEE21DB107302F30CED58105864784035552AD6B64A7CE28841C92A2859754956B72864B51AB21A4B7CF27E2C0B3C66A8C58AC02AC3430A59A3B6480D5C5C4A3DDC021E86267819BAAC7F4210A0FEA8537F4F1D3AB894DB246D504B69C006FFF5FDF823B029F097E1112513501B22803CEE8326D81896684B8B9A6F8B747DAB7446AB0C442B0624DFECD0BC272721F5AC42328C6D328C6D328C6D328C1119C64D0FACF2FE5B77E02957DB896702CF055E203B4ED9A159A7D86125735B18CD9AE5F780559105418110C34732EA563BAD5B0E78ABD9D58B2B539B23A0D7CF5BFBEC3B6F297A9D7CE003F69D97132D32F4E0A78BE4DA0E7917FBFAB55B1362CDEF1C0DF1492EC28B466EB68DDD5BA639112F6E30CCB551726A59EDBBCBB252ECDE431ED9437E700FF9A13DE4CE62BA79D5447C34991125F9CCBBB21CC1DB408EA0A43C47B0BA65A23A3DEBCBD9F10F4E5504E4
-
Testing some tweaks at low levels. Here's Cherie on a Tarikoss SF (Lvl 20 cap, so lvl 25 powers). Most everything she has is attuned. Tarikoss Strike Force - Excelsior
-
Your thoughts gave me a couple ideas and my tests pointed out how this can work. Gonna test something and post when I'm done.
-
Double-checking your feedback as I was almost positive all those things did carry the procs through. I can prove that Triage Beacon does trigger the heal. Vid Proof I am testing the drones and mine again, but haven't had them trigger yet. I'll update if they do. I mostly want the Panacea for the End regardless. But if the other two don't proc, I'll fiddle with a couple other options. Thanks
-
Sharing a little bit of mon cherie: Level 50 Trap / Ar / Mace Defender - Cherie da Bom No over the top plan / theme, just lots of ACC and DEF to pair with my Pew Pew. Here's a couple vids of her in action from 20 to 50: You've Just Set Off My Trap Card Pt 1 You've Just Set Off My Trap Card Pt 2 And here's the build plan. Only have Alpha and Hybrid T3d so far and might tweak the other powers once I see where her needs are: This Hero build was built using Mids Reborn 3.4.7 https://github.com/LoadedCamel/MidsReborn Click this DataLink to open the build! Cherie da Bom: Level 50 Technology Defender Primary Power Set: Traps Secondary Power Set: Assault Rifle Power Pool: Leaping Power Pool: Concealment Ancillary Pool: Mace Mastery Hero Profile: Level 1: Web Grenade (A) Trap of the Hunter - Chance of Damage(Lethal) (40) Trap of the Hunter - Accuracy/Endurance Level 1: Burst (A) Thunderstrike - Accuracy/Damage (3) Thunderstrike - Damage/Endurance (3) Thunderstrike - Accuracy/Damage/Endurance (5) Thunderstrike - Accuracy/Damage/Recharge Level 2: Slug (A) Thunderstrike - Accuracy/Damage (5) Thunderstrike - Damage/Endurance (7) Thunderstrike - Accuracy/Damage/Recharge (7) Thunderstrike - Accuracy/Damage/Endurance Level 4: Buckshot (A) Artillery - Accuracy/Damage (19) Artillery - Damage/Endurance (21) Artillery - Damage/Recharge (21) Artillery - Accuracy/Damage/Recharge (34) Artillery - Accuracy/Recharge/Range (43) Artillery - Endurance/Recharge/Range Level 6: Acid Mortar (A) Undermined Defenses - Defense Debuff/Recharge (15) Undermined Defenses - Defense Debuff/Recharge/Endurance (17) Undermined Defenses - Recharge/Endurance (19) Undermined Defenses - Defense Debuff/Endurance Level 8: Force Field Generator (A) Reactive Defenses - Defense (9) Reactive Defenses - Defense/Endurance (11) Reactive Defenses - Defense/RechargeTime (11) Reactive Defenses - Defense/Endurance/RechargeTime (46) Reactive Defenses - Endurance/RechargeTime Level 10: M30 Grenade (A) Artillery - Accuracy/Damage (13) Artillery - Damage/Endurance (13) Artillery - Damage/Recharge (15) Artillery - Accuracy/Damage/Recharge (37) Artillery - Accuracy/Recharge/Range (43) Artillery - Endurance/Recharge/Range Level 12: Poison Trap (A) Lockdown - Accuracy/Hold (25) Lockdown - Accuracy/Recharge (27) Lockdown - Recharge/Hold (27) Lockdown - Endurance/Recharge/Hold (37) Lockdown - Chance for +2 Mag Hold Level 14: Triage Beacon (A) Panacea - +Hit Points/Endurance (23) Doctored Wounds - Heal/Endurance (23) Doctored Wounds - Endurance/Recharge (25) Doctored Wounds - Heal/Recharge (40) Doctored Wounds - Heal/Endurance/Recharge Level 16: Combat Jumping (A) Winter's Gift - Slow Resistance (20%) (17) Shield Wall - +Res (Teleportation), +5% Res (All) Level 18: Seeker Drones (A) Cloud Senses - Chance for Negative Energy Damage (29) Cloud Senses - ToHit Debuff/Endurance/Recharge Level 20: Sniper Rifle (A) Calibrated Accuracy - Accuracy/Damage (29) Calibrated Accuracy - Accuracy/Damage/Recharge (31) Calibrated Accuracy - Accuracy/Endurance (31) Calibrated Accuracy - Accuracy/Range Level 22: Super Jump (A) Springfoot - Endurance/Jumping Level 24: Acrobatics (A) Endurance Reduction IO Level 26: Trip Mine (A) Obliteration - Chance for Smashing Damage (34) Obliteration - Damage/Recharge Level 28: Flamethrower (A) Artillery - Accuracy/Damage (33) Artillery - Damage/Endurance (33) Artillery - Damage/Recharge (34) Artillery - Accuracy/Damage/Recharge (37) Artillery - Accuracy/Recharge/Range (42) Artillery - Endurance/Recharge/Range Level 30: Stealth (A) Kismet - Accuracy +6% (31) Kismet - Defense/Endurance Level 32: Caltrops (A) Ragnarok - Chance for Knockdown (33) Ragnarok - Damage Level 35: Scorpion Shield (A) Reactive Defenses - Defense (36) Reactive Defenses - Defense/Endurance (36) Reactive Defenses - Defense/RechargeTime (36) Reactive Defenses - Defense/Endurance/RechargeTime (43) Reactive Defenses - Scaling Resist Damage Level 38: Full Auto (A) Annihilation - Accuracy/Damage (39) Annihilation - Damage/RechargeTime (39) Annihilation - Accuracy/Damage/RechargeTime (39) Annihilation - Accuracy/Damage/Endurance (40) Annihilation - Accuracy/Damage/Endurance/RechargeTime (42) Annihilation - Chance for Res Debuff Level 41: Focused Accuracy (A) Gaussian's Synchronized Fire-Control - Chance for Build Up (42) Endurance Reduction IO Level 44: Ignite (A) Annihilation - Accuracy/Damage (45) Annihilation - Accuracy/Damage/RechargeTime (45) Annihilation - Damage/RechargeTime (45) Annihilation - Accuracy/Damage/Endurance (46) Annihilation - Accuracy/Damage/Endurance/RechargeTime (46) Annihilation - Chance for Res Debuff Level 47: Summon Disruptor (A) Call to Arms - Accuracy/Recharge (48) Call to Arms - Accuracy/Damage (48) Call to Arms - Damage/Endurance (48) Call to Arms - Accuracy/Damage/Recharge Level 49: Web Envelope (A) Gravitational Anchor - Chance for Hold (50) Gravitational Anchor - Immobilize/Recharge/Accuracy (50) Gravitational Anchor - Immobilize/Endurance (50) Gravitational Anchor - Recharge/Accuracy Level 1: Vigilance Level 1: Brawl
-
Farm fresh builds! *Farming focused builds and tips*
Dark Current replied to Warlawk's topic in Guides
And I'm not sure how we would know if something is 2x, 3x or whatever xp in AE anyway. What's the standard of comparison when AE custom mobs are so variable? Is there a known xp value for mobs in door missions somewhere? -
Farm fresh builds! *Farming focused builds and tips*
Dark Current replied to Warlawk's topic in Guides
I'm not seeing the 2x xp / 3x xp booster fix in the patch notes anywhere. -
Farm fresh builds! *Farming focused builds and tips*
Dark Current replied to Warlawk's topic in Guides
You're welcome. I can expand upon my last test with another data point. I went ahead and edited all of my custom mobs to restore them to 100% xp / mob (98 - 100 to be exact) by creating a new combination of powers. EVERY mob has 6 or more attacks in a roughly 50/50 mix of ranged and melee with some heavy hitters mixed it. DESPITE doing this, I was only able to take a new alt from 1-31 on the same farm with the same farmer as when I got an alt from 1-36 pre Page 4. So even with maxing the mobs' difficulty to 100% I'm still getting less xp per target than I was before the update. Therefore, a nerf to xp itself was thrown in, not just a normalization of power points or whatever they call it. I don't see that anywhere in the patch notes. To confirm this, I rewatched my vids of my pre-Page 4 run and the post-Page 4 run above comparing 100% xp mobs side by side at level 31: Pre Min 907 Lieu 3025 Boss 9075 Post Min 605 Lieu 1963 Boss 5992 You're looking at roughly a 1/3 NERF to xp for the new custom mobs in Page 4 that have MORE POWERS that makes them MORE DANGEROUS and are reportedly the same 100% reward value as pre-Nerf. Dear HC Devs, if you're going to lower the reward value of custom mobs, then just say so. Don't hide it behind obscure and accusatory language. What exactly is the 'right' risk vs reward measure you're basing this change on? -
Is this what you're recommending? This build is easily 500 million assuming you have some of the recipes, drops already. Closer to a billion if you try and buy it all from the market.
-
Farm fresh builds! *Farming focused builds and tips*
Dark Current replied to Warlawk's topic in Guides
Ok, i got a chance to rerun the same farm with the same character. For the record, this is my own farm I made a couple years ago and have been using to level alts, etc. As I showed above, I could guaranteed get from 1 - 36 in a single run that took around 45 min (carnie outdoor map). The mobs are all custom and had a mix of ranged and melee attacks that maxed their xp at 100% per mob at level 50. After the Page 4 changes to AE mob rewards, I was only able to get a character from 1 - 29. So 7 FEWER levels. Took around the same amount of time as earlier, so the changes to aggro didn't help much with speed (to be expected considering a solid farming build mows through spawns pretty quickly before aggro on neighbor groups even matters). I went into my mob editor and see that most of my once 100% mobs (minions, lieus, and bosses) are now only worth 79% while my 100% EB is at 90% Again, they have a mix of ranged and melee, so I wasn't cheesing the farm with all ranged or gimped custom attacks. E.G. my bosses have Incinerate, Combustion, Blaze, Scorch and Fire Blast The only way I can get them back up to 100% is to add Build Up / Fiery Embrace to every single mob. So what does it all mean? Well if I want to restore the xp / mob value to 100% I will certainly have to increase the damage output of the farm. Probably not dramatically enough that I'll suddenly be unable to complete a solo run. But enough that I'll have to compensate for it. Does that by itself upset me? No, not really. HOWEVER, it is a NERF to AE whether you farm or not. Even though an AE mob was already rewarding 1/2 xp to a door mission mob, you now need to make all of them more dangerous than a typical mob just to get the same reduced reward you were getting for years. Meanwhile, all the patch notes provide is a sanitized ("normalized") accusatory ("bare-minimum") list: Custom Enemy Changes Power point values for all Custom Enemy powers have been normalized. Some powersets in the same category were set below standard point values and some were set above. This means existing AE arcs may need adjusting if any custom enemies were using the bare-minimum power selection for max rewards with powersets that were above the standard values for that type. Primary sets now have lower recharge timers than secondary sets. Custom Enemy powers that require the target be grounded are no longer calculated as ranged attacks for point value purposes. All Custom Enemy ranged attacks have a minimum range of 80ft. -
Farm fresh builds! *Farming focused builds and tips*
Dark Current replied to Warlawk's topic in Guides
If I get some time tomorrow, I'll rerun my farm and compare. From my quick look at it in the editor, I believe the total reward will be lower by 20% post-page 4. But we'll see with an actual in-game test. -
How much did this build cost you?
-
Kin + cones is a tricky combo. You'll be fighting yourself for correct positioning. But if you're teaming with a regular duo, you'll figure out the optimal positioning and power execution order.
-
Last year I was putting together some extremely rare combo builds and for a Defender I chose Poison / AR / Soul. The concept was a collector of evil souls - an undead spirit that was part Ghost Rider and part Charon. The focus would be a DEBUFFING machine. Slotting with near-total focus on debuffery, and zero buffs / heals. Thus was born The Autumn Harvester: His build slots debuff sets and plenty of procs to boost damage output. He leverages his multiple cones to lay down a field of death. https://www.midsreborn.com/builds/download.php?uc=1614&c=747&a=1494&f=HEX&dc=78DA6594CB4F135114C6EFD02965DA02A5B4BC4AA5B4D296426B2BB80779C42818020B97CD04A65033749A4E6BE0AFF0110D468D4BA32646258A8FB874AB46DDE9C2178A2FD085C6B81A0F3DE7DA693A49F3EBFD7ABFF9BE73DBE9F4CAB83393991C6142D3982AEB7A7A5CC928B905A5609D9617B3F30C2ED768A9585ACE050EC985138A5E540A36103D7C5FFA60299349CC68595DCBF9FF8BB3726E5159488CEABA5C528BE9D96C465558F38CA6A9892945861DFA5236EF2EAF27B5C2BC92D632E963595575A0A46617978AF6F2FBB9BCA22CF826F2D9F9C498562894F245AD909ED34A6A7A5ADE2DB3DA016DE2F032C28C5F86C89ED631969258DD33E273A4F882F81279B2D16C22314CA630DD2442E61499598431819B049BA52CD63710EDC80607D1893C0549166EB2BC11CBE2DEB7C477C4F7C8F007A40049566EB2DE10CAA2FD26F116D2799BB88E3C0D49366EB251522F258528294449214A3A0326899B243235912940A65E32F592C90D310E3C0983397A59596C05B19144A1F12A1E59FC1A528F32D64C3196662B1C885F62AE7AE2565D99EECF4811A66FE19D5A8EE374EE65A46704CFD533818CCB42D974160669E5A6D68F58B4ED13B2638BF88506DB444AD0D9CB3B7B5F61D7B6D7C8207CD8CEA76C1FC029ADD0AD93C7747EC5DB747D237E47766F137790E7A09B8F9B7CEB587CCF1DE25DE20632700FD902F17EDECDEFC5E9532EE49518633D7447D6B3B65B5864F5D02D480E31F810A788DD470E6E101FE0E6C127B85E836E7DBC5B5F120B47F6138790B161E201E40A548C529225FA0B0BF7FF26FE21FE456E3A191BA0046180CE314E5C853D091E9F58034424B6EF3CF102F12232750959845F53924F9FF461CC51A8468FA761748B95E79BB12ECC9AAA12259C7F46AC3CD44CF0E1CE6D3B88FCAB174228EE548951147F548987E15D44643F4DA22004706713F148AC52DEB8DC6F5AC4AAFA1970B164AD94AA95866AA5E15A497255FE898CEBF0ACA4F869053DA6459FD7B47864DEF638685A88EDA6C53FD52F021F So I dusted him off last night when I saw a call for an all-Blaster / Defender kill-most ITF. He's Level 50+3, T3d in all incarnates, and fully IOd as above. If you want to watch his poison debuffs melt minotaurs, sizzle cyclopses and hold Romulus oh so tenderly, I went ahead and recorded the fun (vid is a bit pixelated during the cave fights with all the particle effects in the dark - sorry... working on OBS settings to fix that). Those poor Cimmies didn't know what hit them! Enjoy!

-
- 3
-

-

-
Energy/Energy Build Critique... Can't fix heavy endurance!
Dark Current replied to TCUFROGS's topic in Blaster
With Hasten activated, it's at 127.5% recharge and Hasten is near-perma (about 15 sec short). The number I gave above for the ratio includes Energize active. Based on what he's saying and what the build shows, he's running too many toggles and firing powers in rapid succession that his recovery can't keep up. IMO he needs to shut down a couple toggles, and use Energize as an auto at the bare minimum. If he actually wants to Aim / BU, then fire a 3 ST combo of Power Blast, Power Burst, Sniper Blast, with a healthy mix of Energy Torrent, Explosive Blast and Nova one group after the other, he's going to need to do a lot more. OP - I provided some analysis and suggestions. It's your choice what you want to do with them. -
Energy/Energy Build Critique... Can't fix heavy endurance!
Dark Current replied to TCUFROGS's topic in Blaster
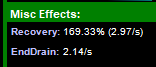
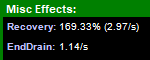
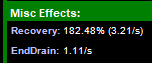
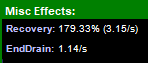
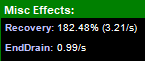
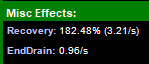
Here's your problem: Your Recover to Drain Ratio is only 1.4. So if you're running 6-7 toggles non-stop, your static end drain is almost equal to your recovery. That's you just STANDING there. Now, you couple that with your uber recharge build and I'm sure you're firing away on all cylinders: BLAST, BLAST, BLAST!!! Looking at your likely ranged attack chain, with Aim / BU opening and Nova finishing, you're burning through half your endurance in about 15 sec. You then turn and burn like Mav to the next group and unload again. There goes the other half of your endurance. Put it all together and your end recovery : end drain ratio just can't keep up with that level of heat. Your only saving grace is Energize. When that's active, your numbers look like: That makes your ratio 2.6, which is really solid, but still going to struggle with the high recharge / high burn build you have here. So as stated, put that on Auto and leave hasten as your click. It's perma as is, so might as well keep it clicked. Speaking of Hasten, you can move one of those Rech slots out to somewhere else. You're already smashing the ED cap. You might as well +5 the first 2 slots, which gets you where you are with 3, and then move that 3rd into Health and put Numina's Proc or Panacea. Both will give you more end recovery. Here's the numbers with that 1 slot switch to Numina's: Ratio = 2.8, which is really close to the 3 I shoot for with all my high burn builds. One other option to throw in the mix is picking up Victory Rush to give you another source of recovery. You could put that in 47 or dump SJ for it at 49, and take power boost at 47. Oh, and +5 your End Mods in Stamina, too. Then take Vigor Core for the Alpha for the Acc, End Redux, Heal boosts. Even with just the T3 Partial Core, your numbers will look like this with those 2 things added in: Yahtzee! You should be able to fire away with all your toggs running there. Toss in Support Radial Hybrid for the global 5% End Redux if you're still having issues, and if that's still not good enough, then take Ageless Destiny (that of course will solve most end problems off the bat, but you don't HAVE to take it with the suggestions above if you wanted something else). Good luck!
-
Farm fresh builds! *Farming focused builds and tips*
Dark Current replied to Warlawk's topic in Guides
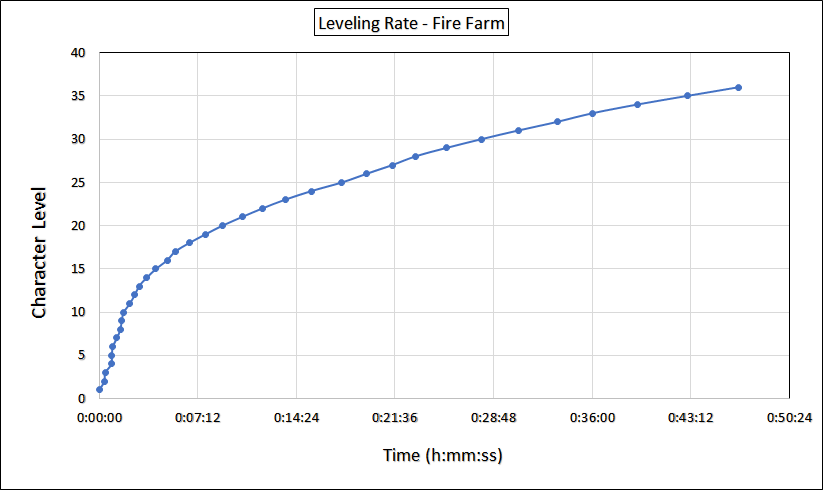
Was making a silly vid for a Sitters Guide joke post with the camera locked on a new alt I was leveling up. As I was reviewing the recording it dawned on me I could track the character's leveling rate and use that as a method to compare farms, farming styles, builds, etc. The graph below was generated from a run by my Rad / Fire / Soul brute using my Scorch Town Circus fire farm. A single run with just him and an alt will take that alt from 1 - 36 in 45-50 minutes. He's not as tweaked out as some builds I've seen, but he's T4d everywhere and works for me for farming and content. Not sure if this is useful to anyone else, but I figured I'd share as a data point for the community. Raw data: Time Level 0:00:00 1 0:00:23 2 0:00:27 3 0:00:54 4 0:00:56 5 0:01:00 6 0:01:18 7 0:01:33 8 0:01:39 9 0:01:48 10 0:02:15 11 0:02:37 12 0:02:55 13 0:03:29 14 0:04:09 15 0:04:58 16 0:05:33 17 0:06:35 18 0:07:46 19 0:09:00 20 0:10:26 21 0:11:56 22 0:13:35 23 0:15:30 24 0:17:44 25 0:19:32 26 0:21:24 27 0:23:05 28 0:25:24 29 0:27:55 30 0:30:37 31 0:33:27 32 0:36:03 33 0:39:19 34 0:42:58 35 0:46:43 36
-
Watch the video below for all my tips and tricks on how to door sit for maximum efficiency! Door Sitting with Wyddershins
- 1 reply
-
- 1
-

-
New Powersets and Changes for Dominators in Page 4
Dark Current replied to oedipus_tex's topic in Dominator
Call me when they've been implemented. -
The trick to playing any dominator, regardless of powerset combo, is target recognition. Who is the biggest threat to you personally? Eliminate that threat. You need to be very familiar with enemy factions and which enemy can do what. You need to pinpoint the most dangerous threat in a crowd and neutralize it. You don't have the armor, hp, or mez / debuff protection that a melee AT does to survive long in melee. You don't have the buffs, heals, or raw dps to survive at range for long either. What you do have is over the top, one shot controls for just about everything short of EBs. Even AVs can be one-shot controlled outside of PToD (iirc they have boss-level mez protection). Also, know that certain controls will work with one shot even against those targets... ST sleeps, immobs. You also have to have nerves of steel. You will dive into groups. You will eat alpha when your AoE controls miss. You will red-line your health. You will be hanging in as long as you can hoping that mega control power recharges in time before you face plant because you know you can turn the tide of battle if it does. Lastly, you have to use Domination. Each time. Every time. No excuses. What are you holding onto it for? Click It! It's the hands-down, best and probably only true-inherent power in the game. All other Inherents were after thoughts, or 'would be nice' choices. Domination is CRITICAL to the AT. It makes dominators what they are. USE IT.
-
New Powersets and Changes for Dominators in Page 4
Dark Current replied to oedipus_tex's topic in Dominator
That Disruption Aura is going to get you a lot of hate. The set has only 3 melee attacks, 2 of which are ST. So going into melee to leverage that toggle will be risky with only a single PBAoE attack available. I think the control set you pair with will be critical if you want to get the most out of the Disruption. The new Symphony Control set doesn't seem to have much synergy with sonic assault. Zero PBAoE controls. So if you pair those two, as would seem natural, and go diving in to a mob to get the -RES aura maxed, you're gonna have a problem with efficiency. Fire, Ice, Elec seem much better pairings as you can stack auras and patches in melee range. Earth and Dark would probably be decent as well. Grav, Plant and Mind... not so much.