The Beta Account Center is temporarily unavailable
×
We are experiencing intermittent network issues affecting Everlasting and Excelsior


oedipus_tex
-
Posts
2652 -
Joined
-
Last visited
-
Days Won
4
Content Type
Profiles
Forums
Events
Store
Articles
Patch Notes
Everything posted by oedipus_tex
-
Electric Control is very low damage, so if soloing is important to you, you'll want to figure out how to address the damage deficit. A combo that sticks out to me as extremely hard to kill is Electric/Dark. Electric/Time is a similar tanky option. Neither will do huge damage but they'd be the top choices for wading in and sapping without dying. Electric Affinity, the newest secondary, naturally pairs very well. The mezz protection in Faraday Cage will keep Conductive Aura from detoggling, which is very useful. Also Faraday Cage provides knockback protection to pets. Electric/Kin isn't a bad choice either. Radiation or Nature both have some useful overaps with their PBAoE auras. Electric/Storm is fun. Electric wasn't my favorite pairing for Storm, but it wasn't terrible either. I just don't like that DoT powers like Freezing Rain or Sleet ruin the pulsing Sleep in Static Field. On live I ran an Electric/Force Field to 50. I don't consider it especially powerful. It's just something I did, mainly because back then FF was one of the only sets that gave mezz protection.
-
Yes, that .:)
-
Actually the new Burst of Speed power is one of my favorite play things. It's Super Speed mixed with Teleport and very useful for AE content.
-
I haven't played Earth/Earth but I've played each with other primaries/secondaries. Earth Control is a good set, but only has one AoE power that Dominates, Stalagmites. Luckily Volcanic Gasses is still really good, it just is identical to the Controller power. Earth Control is a very loud, very graphically impactful set. Earth Control is also one of the few sets with no Confusion power (only Gravity and Fire also lacks this). The secondary effect of its powers, -Defense, isn't worthless but also isn't likely to decisively shift the battle in your favor too often. Between Stalagmites, Earthquake, and Volcanic Gasses Earth can saturate a battle field and achieve an excellent level of safety for the team. Earth Assault is a fun but endurance heavy set. It is a close range. Moreover, its a close range set with no armor or self healing on an archetype that also has no armor or healing. A few powers can do heavy damage (procced out Seismic Smash for example). The close-range aspect of the set though makes me mark this as either a "sandbox" kind of set for running easy missions, or a set mainly for very experienced players. You won't be able to most of use your controls on AVs and your damage is point-blank, so you're standing in their face without mitigation except for whats in your pools, epics, and IOs. You can become quite strong from these sources, but you are definitely not a Scrapper or even a Defender. Earth Assault's Mudpots is a PBaOE damage aura, which is a rare find among the Assault sets. PBAoE damage auras on melee characters are well known to increase their damage potential due to their effectively infinite DPA. On a Dominator though powers like this are harder to take advantage of and in a team setting can attract unintended aggro. Overall Earth/Earth might have enough control to overcome some of the limitations, but if you are participating in team content at +4, in iTrials, or difficult AE missions you can expect to faceplant a lot. I run a Earth/Dark, mainly for the self heal, and still die a lot even standing back at range. A semi-safe alternative to Earth/Earth is Gravity/Earth, because you can Wormhole enemies to you and only attack what gets teleported. This has some limitations tho because bosses more than +3 to you won't be teleported, and teams won't wait around for you to do this most of the time. Dark/Earth, Plant/Earth or Mind/Earth would also be solid alternatives, for various reasons. Electric/Earth is something I'd avoid due to a conflict between the PBAoE aura and your sleep patch power. There are ways to make it work, but I like to cast that power directly underfoot. On the flip side: Fire Assault and Psi Assault are widely regarded as the strongest of the Assault sets, Fire for pure damage and endurance maintenance, Psi mainly for the sustainability of Drain Psyche. Fire Assault in particular is a great set for a first Dominator; Earth/Fire will not disappoint. Other strong sets are Savage or Energy. I run an Earth/Dark for theme; it has a modestly effective ranged self heal, which it trades away much of its damage for. TLDR Earth/Earth won't be bad, especially if you play it sandbox style not super concerned about comparisons to other archetypes. There's a band of content where it will severely struggle though due to being a very melee heavy option on an archetype without armors or reliable healing. If you can, you'll want to go permadom as fast as possible with IOs, but even that won't likely completely stave off wipeouts.
-
Is there a reason you are seeking 58 defense to Smash/Lethal? That can help with iTrials or against -Defense effects, but I still think it's more important to shore up your resistance. Even soft capped, a significant number of attacks will get through. If it's just because you really want Seismic Smash and Fissure you can make it work, but to me this build, like Time/Force Field/other Traps builds begs for a Resistance armor to shore up the whole package of tankiness. In most content, this build won't be much more survivable, and possibly actually less so, than other IOed Controllers who don't get a big bubble shield. Other sets take Rock Armor because capping to S/L is hard for them, but you can easily do it while still taking a Resist shield.
-
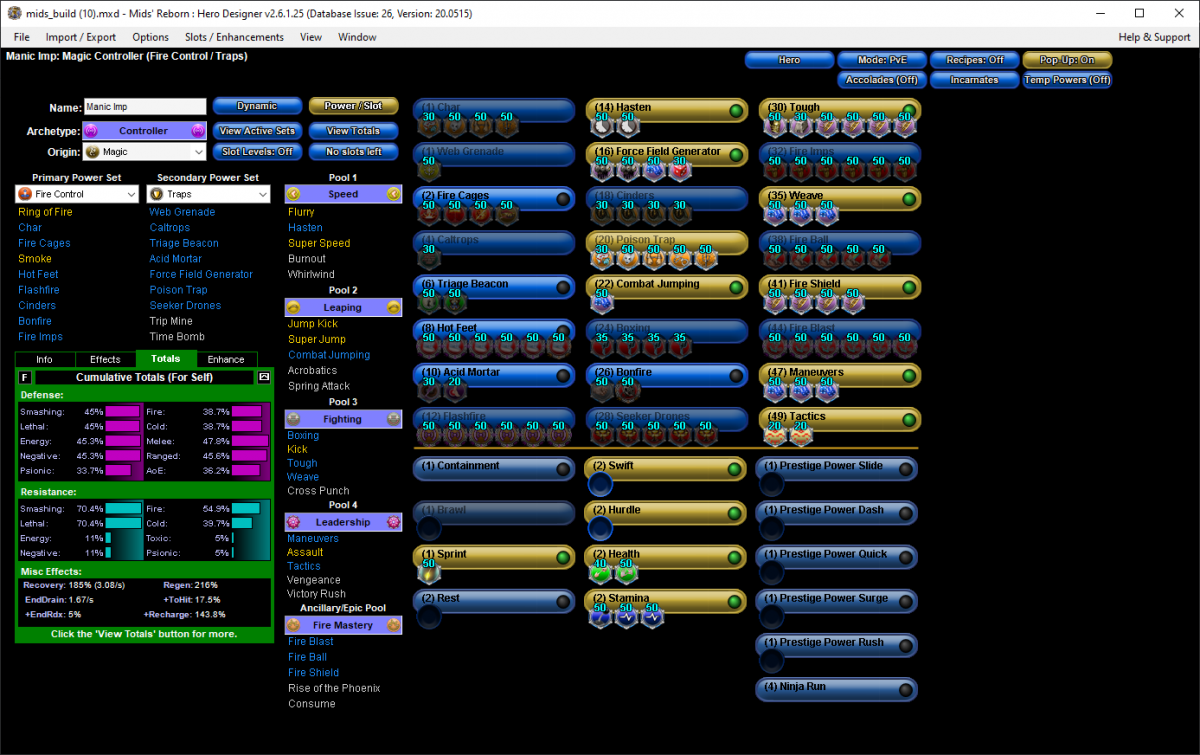
Traps is a good set. 10 base Defense and Hold, Immobilize and Stun protection, which is actually better than Force Field gets in its big bubble. I feel like this build would benefit from a Resistance shield instead of a Defense unless you're trying to be incarnate capped. You can still soft cap to most positions while picking up much better resistances. Remember that Resistance armor if slotted with x4 Unbreakable Guard is worth 3.13 Melee defense. Since you will have Tough as well, this is worth 6.26 Melee defense total. I am not an expert on Traps and didn't mess with your proc slotting much. However I noted even with Kismet and Tactics several powers still have only around a 60% chance to hit a +4 enemy (once level shifted that improves somewhat but is still around a 75% chance). Partially revamped build using the Fire APP instead of Earth: Hero Plan by Mids' Reborn : Hero Designer 2.6.1.25 https://github.com/Crytilis/mids-reborn-hero-designer Click this DataLink to open the build! Manic Imp: Level 50 Magic Controller Primary Power Set: Fire Control Secondary Power Set: Traps Power Pool: Speed Power Pool: Leaping Power Pool: Fighting Power Pool: Leadership Ancillary Pool: Fire Mastery Hero Profile: Level 1: Char -- NrnSht-Dam%(A), GhsWdwEmb-Dam%(3), Lck-%Hold(3), GldNet-Dam%(5) Level 1: Web Grenade -- Acc-I(A) Level 2: Fire Cages -- Bmbdmt-+FireDmg(A), PstBls-Dam%(5), Ann-ResDeb%(7), TraoftheH-Dam%(7) Level 4: Caltrops -- ImpSwf-Dam%(A) Level 6: Triage Beacon -- Prv-Absorb%(A), Pnc-Heal/+End(11) Level 8: Hot Feet -- SprAvl-Acc/Dmg(A), SprAvl-Dmg/EndRdx(13), SprAvl-Acc/Dmg/EndRdx(13), SprAvl-Acc/Dmg/Rchg(15), SprAvl-Rchg/KDProc(15), Avl-Rchg/KDProc(17) Level 10: Acid Mortar -- ShlBrk-%Dam(A), AchHee-ResDeb%(17) Level 12: Flashfire -- SprWiloft-Acc/Conf/Hold/Immob/Sleep/Stun/Fear(A), SprWiloft-Rchg/Dmg%(19), SprWiloft-Conf/Hold/Immob/Sleep/Stun/Fear/Rchg(19), SprWiloft-EndRdx/Rchg(21), SprWiloft-Acc/Conf/Hold/Immob/Sleep/Stun/Fear/EndRdx(21), SprWiloft-Acc/Conf/Hold/Immob/Sleep/Stun/Fear/EndRdx/Rchg(23) Level 14: Hasten -- RechRdx-I(A), RechRdx-I(23) Level 16: Force Field Generator -- ShlWal-Def(A), ShlWal-ResDam/Re TP(25), LucoftheG-Def/Rchg+(25), Ksm-ToHit+(27) Level 18: Cinders -- BslGaz-Acc/Hold(A), BslGaz-Acc/Rchg(27), BslGaz-Rchg/Hold(29), BslGaz-EndRdx/Rchg/Hold(29) Level 20: Poison Trap -- NrnSht-Dam%(A), GhsWdwEmb-Dam%(31), Lck-%Hold(31), UnbCns-Dam%(31), GldNet-Dam%(33) Level 22: Combat Jumping -- LucoftheG-Def/Rchg+(A) Level 24: Boxing -- KntCmb-Acc/Dmg(A), KntCmb-Dmg/EndRdx(33), KntCmb-Dmg/Rchg(33), KntCmb-Dmg/EndRdx/Rchg(34) Level 26: Bonfire -- FrcFdb-Rechg%(A), OvrFrc-Dam/KB(34) Level 28: Seeker Drones -- Apc-Dam%(A), Apc-Dmg/EndRdx(34), Apc-Acc/Rchg(36), Apc-Acc/Dmg/Rchg(36), Apc-Dmg/Rchg(36) Level 30: Tough -- GldArm-3defTpProc(A), StdPrt-ResDam/Def+(37), UnbGrd-ResDam(37), UnbGrd-ResDam/EndRdx(37), UnbGrd-EndRdx/Rchg(39), UnbGrd-Rchg/ResDam(39) Level 32: Fire Imps -- ExpRnf-Acc/Rchg(A), ExpRnf-Acc/Dmg(39), ExpRnf-Dmg/EndRdx(40), ExpRnf-Acc/Dmg/Rchg(40), ExpRnf-EndRdx/Dmg/Rchg(40), ExpRnf-+Res(Pets)(42) Level 35: Weave -- LucoftheG-Def/Rchg+(A), LucoftheG-Def/EndRdx(42), LucoftheG-Def(42) Level 38: Fire Ball -- Rgn-Knock%(A), Rgn-Dmg/EndRdx(43), Rgn-Acc/Rchg(43), Rgn-Acc/Dmg/Rchg(43), Rgn-Dmg/Rchg(45) Level 41: Fire Shield -- UnbGrd-Max HP%(A), UnbGrd-ResDam/EndRdx/Rchg(45), UnbGrd-ResDam(45), UnbGrd-ResDam/EndRdx(46) Level 44: Fire Blast -- SprWntBit-Acc/Dmg(A), SprWntBit-Dmg/Rchg(46), SprWntBit-Acc/Dmg/EndRdx(46), SprWntBit-Acc/Dmg/Rchg(48), SprWntBit-Dmg/EndRdx/Acc/Rchg(48), SprWntBit-Rchg/SlowProc(48) Level 47: Maneuvers -- LucoftheG-Def/Rchg+(A), LucoftheG-Def(50), LucoftheG-Def/EndRdx(50) Level 49: Tactics -- RctRtc-ToHit(A), RctRtc-Pcptn(50) Level 1: Brawl -- Empty(A) Level 1: Containment Level 1: Prestige Power Dash -- Empty(A) Level 1: Prestige Power Slide -- Empty(A) Level 1: Prestige Power Quick -- Empty(A) Level 1: Prestige Power Rush -- Empty(A) Level 1: Prestige Power Surge -- Empty(A) Level 1: Sprint -- Clr-Stlth(A) Level 2: Rest -- Empty(A) Level 4: Ninja Run Level 2: Swift -- Empty(A) Level 2: Health -- Mrc-Rcvry+(A), NmnCnv-Regen/Rcvry+(9) Level 2: Hurdle -- Empty(A) Level 2: Stamina -- PrfShf-End%(A), EndMod-I(9), EndMod-I(11) ------------ ------------ Set Bonus Totals: 11% DamageBuff(Smashing) 11% DamageBuff(Lethal) 11% DamageBuff(Fire) 11% DamageBuff(Cold) 11% DamageBuff(Energy) 11% DamageBuff(Negative) 11% DamageBuff(Toxic) 11% DamageBuff(Psionic) 17.25% Defense(Smashing) 17.25% Defense(Lethal) 11% Defense(Fire) 11% Defense(Cold) 17.56% Defense(Energy) 17.56% Defense(Negative) 6% Defense(Psionic) 20.06% Defense(Melee) 17.88% Defense(Ranged) 8.5% Defense(AoE) 4% Enhancement(Held) 5% Enhancement(Max EnduranceDiscount) 4% Enhancement(Confused) 4% Enhancement(Stunned) 4.4% Enhancement(Terrorized) 30% Enhancement(Accuracy) 73.75% Enhancement(RechargeTime) 8% Enhancement(Sleep) 8% Enhancement(Immobilized) GrantPower Preventive Medicine (10% chance, if Scourge) 145 HP (14.25%) HitPoints MezResist(Confused) 42.5% MezResist(Held) 42.5% MezResist(Immobilized) 42.5% MezResist(Sleep) 42.5% MezResist(Stunned) 42.5% MezResist(Terrorized) 42.5% MezResist(Teleport) 100% (20% chance) 20% PerceptionRadius 14% (0.23 End/sec) Recovery 56% (2.37 HP/sec) Regeneration 30% ResEffect(SpeedFlying) 30% ResEffect(RechargeTime) 30% ResEffect(SpeedRunning) 15% Resistance(Smashing) 34.5% Resistance(Fire) 34.5% Resistance(Cold) 21% Resistance(Energy) 21% Resistance(Negative) 15% Resistance(Toxic) 15% Resistance(Psionic) 15% Resistance(Lethal) | Copy & Paste this data into Mids' Reborn : Hero Designer to view the build | |-------------------------------------------------------------------| |MxDz;1448;676;1352;HEX;| |78DA6594C94F136118C6BFE94C811690D652F6B5B2434B2BA84713110C481314E3D| |54C608049589AB6267AF48071BB7B4034464516F5ECD5FFC12571F7E40941C53531| |F5659EA740D2499A5FBFF77DDEEDFBBE99F885E3454F4E5C3AAA345FDFB4994A9DE| |B9B9B4D27E7A6A7ADA43B6E4EDA634A1E4FDC9CB5C71A066712F9B2AADF9564D591| |013B696517C13DFE63E727262267926622A5BC2373221C4D58D67891F377D83213F| |6EC64B1B318B027A7D2B22AC9BAC6AD646ACA4EF8FB13F618D2C7CD54DA4A5EAC90| |169AE537AF293E195D99B2A835946B461813FE753934FA7587AF5B76B44A5529C77| |659A41AE335971BFAA7F0E57D465CDE02F2BD91789DF1FA126ABD159B1B36CDBD0E| |BDB711BC22927CF8DCF9B70CC756B448DE06F7DD21EF82BE05F09DE4F530AF274F7| |76AF99EC93C01435D95BC85CC5BB8845AFBD7C88760E932B90296AD822169A85843| |DEE24ECC5946BE979A25F0E92543D0579C2483D883AA7FCAE9E59A2CFDDC37FF739| |763AB7A01D6BC245F811F246F00798D00CFA88E6754C733AA1B041B785665D26710| |312AC8DA9AD8CA59B37C441012FD29F234D8380A5E97904AEE5FE53C72377E42EE8| |FD24F357C46758CBE2878A09B8C90615097DAB5E8C75D7B10799ACA314BD316D73F| |C0969FE42FF086C8EA795EF51BC8D7B209B67E25BF91DFC1F62DDE5DA91B425D578| |8FBD0EE234BC1FB3ADE85ED799A8F20AEE3307988EC05BB7AC00712D3C6B36EFB83| |3EBB7E939C27CC79EE093AD97FE732EE6778855C05BBD7C847E463D02FFD47D87F8| |4FDC7D8778C73044413E59D8C2EE08EC716C11A63CF3B9B91677BC3B3964C478E37| |9A6389E5587A722CBD3996E16D0BEF9FF260CF468C9D6F85D21C95C7B7F345C8AC7| |BC5ABEDF56EEC5A346D48FEB41AAAE02C66FE92A3DEDCB5B8B49BA858D08037D34B| |FE07D379EAAC| |-------------------------------------------------------------------|

-
Terrify slotted with a knockdown proc has a very good chance to sweep a mob off its feet. If you do this, they lose out on their chance to attack or run when hit by a follow up Terrify. For that reason this is a good power to put Ragnarok in. The alternative is to 5 slot something like Positron's Blast and make the 6th slot Ragnarok. Or you can elect for 2 damage procs in this power. In general, any time you can combine Terrify with knockdown, you've increased the safety the power offers, including with powers like Energy Torrent.
-

Herodrome: The Super Super Superhero Show (Arc 30937)
oedipus_tex replied to oedipus_tex's topic in Mission Architect
[saved for future post] -
Herodrome: The Super Super Superhero Show (Arc 30937)
oedipus_tex replied to oedipus_tex's topic in Mission Architect
[saved for future post] -
Herodrome: The Super Super Superhero Show (Arc 30937) Greetings heroes, Have you ever wanted to be a celebrity? Herodrome: The Super Super Superhero Show is recruiting hopefuls to be a contestant on our game show! What's that? Never heard of it? It's only the most popular program on at 3AM in the upper Mid West, between infomercials! Sure, its violent, but that's what viewers love. Don't worry, not everything you see on TV is real. We'll set you up with our team of stunt coordinators to create gruesome effects perfect for America's living rooms. Yes, there's been a lawsuit or two from former contestants who allegedly suffered concussions from propelled lamp posts, but you know how to duck right? Information About This Arc 5 missions, progressing difficulty. Tested with the team lead at level 50. Recommended level for all team members is 30-50. Recommended difficulty setting for 8 player teams: +2 if mostly a green group, +3 if you feel confident, +4 if everyone is completely decked out. These missions are specifically designed to give high level teams a hard time without being overly punishing. Specifically, powers or abilities that may not normally be useful may b much more so here. It is highly recommended that most team members have some form of knockback protection. Support and Control classes will greatly assist you on this task force. In this sense it is similar to some of the game's old school task forces, where support, control, and efficient tanking were very important. Stick together. TV viewers love nothing more than an ambush. General Strategy and Tips Energy Blast is the most common powerset you will encounter. Knockback protection of some kind is highly recommended. Rather than powerful bosses or elite bosses, most of the powerful enemies in this challenge are minions. Picking minions off quickly is critical for your team's survival. Most enemies are color coded and grouped by color. Many enemies have area denial or unmoving damage patches. Moving or breaking line of sight protects you from these abilities. None of these missions is a kill-all. It is possible to evade some of the more difficult groups. No arch villains. Some Elite Bosses (should be manageable by a level 50 team). Because of the challenging minions, Snipe powers can be of great assistance here. Tip for dealing with enemies with pets: Most of the enemies with pets in this arc are minions, or, occasionally, lieutenants. Confusing a pet owning mob turns the pets on them. Killing them instantly kills the pets. The final mission is far harder than the 4 preceeding missions. It assumes you have learned what you are up against in the previous 4. Pulling enemies and proceeding with caution is recommended. Solo Players This arc will be quite difficult for any solo player because of the variety of challenges thrown at the player. If you insist on running solo, it is recommended to run it no higher than +0x3 unless heavily IOed. The only mission that includes Elite Bosses that must be defeated to advance is failable if the bosses reach the mission exit. Failing this mission allows you to progress to the next mission. If you cannot complete this mission due to the bosses, you can have them chase you to the door and proceed by failing.
-
I've been joining teams for that one random arc I forget the name of where enemies roll random powers. I also have a mission arc I wrote that I sometimes run. No AVs, but minions designed to be extra difficult. The trouble is the AE lately has been breaking on multi-arc missions. Usually, it breaks sometime after the first or second mission and won't let the team continue the arc. I can't figure out if it is something with my mission code, or just a general AE bug. Maybe we could put a Dom team together and try some of these. Would be interesting. Also, I'd like to add the Speed of Sound power to the list of useful abilities for the AE. It's a combo Super Speed/Teleport in one power. Extremely useful when you encounter slows or stacked Immobilizes.
-
I probably wouldn't worry about too much about it if this class was mostly ranged. But it's an unusual hybrid melee-ranged class where some of the sets are ranged attacks and some are similar to actual melee sets. This is different from Blaster secondaries. A Blaster secondary that is heavy on melee attacks will still have a primary that functions at the Blast role. Almost all the sets have that 15 foot radius PBAoE attack with 2-3 second cast time, it's as much a staple for this class as ranged AoEs for Blaster, Defender, and Corruptor, so I have to assume the intent is it get used. The DPA on these attacks in most cases leave much to be desired, on top of very long animation times while you are in a vulnerable position.
-
I usually include kb protection in my build in preparation for moments spent outside of Dom because of moments like this. I call having to kill easy enemies outside the mission to pick momentum back up "Domination tourism." You can game the system with a snipe by starting to cast and hitting the jump key or moving, but it will drain you of endurance fast. Basically if the enemy group has mezz of any kind building the Dom bar back up in a legit way is often a dangerous chore. There's an Energy farm map I can run at x8+4 mostly without dying. If I go down even once tho, a lot of times I'll drop 3 or 4 times in quick succession, because of being stunned/held. I think people tend to think of getting mezzed as just stopping you from attacking, but its the fact that it stops you eating inspirations that kills you. Plus, two of the Control sets, ice and Electric are built around PBAoE auras that drop on mezz. Because the gods hate Ice Control, Arctic Air also has a 15 second recharge after dropping, just to penalize you for trying to use that power without sufficient sacrifice.
-
I wouldn't call it bad, just midling. For sure it struggles to kill bosses due to relying so heavily on a snipe for ST. I did take the early melee attack to speed up killing bosses once the rest of the spawn is clear. I've not done any comparisons for damage type resistance. It might do okay damage with that considered. Dark Assault lacks area coverage. I guess that's a theme borrowed from Dark Melee. The cone power is 20ft wide, hard to tell from a single target blast except from far away. The PBAoE is the standard Dominator PBAoE. It's 76 damage 15ft radius, 2 second cast time. Not strictly bad but not great when the opportunity cost is so high. I ended up skipping it. Staying away from mobs is a better strategy for this character. He had his blood spilled many many times even after reaching permadom. I have Rise of the Phoenix but it still knocks me out of Domination and needs to be avoided.
-
I just leveled up my first Dark Assault character and hit 50. I leveled at Earth Control/Dark Assault. This leaves only Radiatioactive, Martial, and the revised Energy (I played the old one on live) that I haven't played at high levels. I just slotted up to permadom and ran my first two ITFs. One thing that stands out immediately is the difference between Dominators with a heal and Dominators without. Dark Assault's damage is on the low end, and its access to AoEs laughable... the 20ft wide cone rarely seems to hit more than 2 or 3 enemies. What's propping the set up is the ability to heal from range. I plan to spec out of the cone power at the next opportunity, at which point all of my AoE will come from APPs. (Dark has a PBAoE attack but its got a 15ft radius, 2 second cast time). One irony that's not lost on me is having the ability to mezz a boss but then having to turn bosses off because it takes too long to kill them. Earthquake has a frightening long cast time. Mids says it 2.03 seconds but it feels like ages. I'm not asking that it be changed, just noting how long cast times put you into panic mode. More than once I was holding down the directional keys and slamming buttons as Earthquake left me rooted during a scenario change I needed to react to. Until you have played this class in a real mission or task force I think its easy to underestimate how quickly situations change and how fast you have to be to react. On that note, Life Drain isn't a reactive heal, not really, altho it does recharge fast enough with a good recharge build that you can heal from empty to full in about 10-15 seconds, faster or slower depending on the availability of your Power Boost like effect. The main point of it really is to cap off your HP when you take ding damage to insulate you from instant death that can come from quick hits. This is a critical feature lacking in many of the other Dominator sets. Even small amounts of damage can cascade into an instant death when you have no efficient way to repair it. Even with the heal this character cannot stay in melee range with enemies, it is far too risky. My fingers got tired from the number of times I hit the S key to backtrack. Even if you manage to kill things there are so many "do terrible things to players on death" effects to be found that immediate escape is top priority. Even with this strategy, I still died regularly, almost always in a quick succession of hits almost too fast to see. As I was leveling this character, I found myself also wanting to try Martial Assault, and then backing away from the idea because IMO the lack of both a heal and endurance recovery is too much to overcome. One or the other tends to be a sign of a good set; note the top performers Fire and Psi both fill at least one of these holes. I still plan to try it though, in the interest of completionism. I'd rate Dark Assault solidly in the middle of sets. The heal is what carries it. Damage is low though and you can get caught in this endless cycle of mezzing mobs and just standing around them waiting for your team to come deal with them. Versus a similar Controller, my damage as an Earth/Dark Dominator is shockingly bad on a power by power basis, but that isn't quite the full story. The best in show is the snipe; I can consistently take a same level minion out in one snipe shot, which a Controller could not do. Also when I take the Fire APP I get both Fireball and Rain of Fire, so at least there's two AoEs operating there.
-
I played around with this a bit and made some suggestions. I know you went with Ice armor, but I feel like this is a case where you can have your cake and eat it too if you finagle it. You skipped Ice Storm in Ice which makes me assume you aren't after a huge damage Fire/Kin anyway. Based on that I'd recommend Fire/Kin/Psi. This will cover your mezz protection and give you a boat load of Psi defense while still providing a resistance armor. This then frees you to take Barrier Destiny as your Destiny power, which in turn means the Defense cap you need to hit is lower than it would be. The build below is likely to be controversial. It is meant to be paired with Destiny Barrier, which at its lowest ebb provides +5 defense +5 resist to all. The build below would effectively cap you to Melee, Range, and Psi, with capped S/L resist and mezz protection, with around 40 defense to S/L. The only attacks you'd really have to worry about are Cold/Fire/Energy AoEs. I said its controversial because to cap Melee, I didn't slot fire cages with damage procs. (In fairness, you didn't slot many either). So, this would be a tankier version of Fire/Kin than many. I would normally never skip damage slotting in a power like this, but Fulcrum Shift takes the place of damage slotting in AoEs. FYI this build has very poor single target performance. Hero Plan by Mids' Reborn : Hero Designer 2.6.1.25 https://github.com/Crytilis/mids-reborn-hero-designer Click this DataLink to open the build! Level 50 Technology Controller Primary Power Set: Fire Control Secondary Power Set: Kinetics Power Pool: Leaping Power Pool: Speed Power Pool: Fighting Power Pool: Leadership Ancillary Pool: Psionic Mastery Hero Profile: Level 1: Char -- BslGaz-Acc/Hold(A), BslGaz-Acc/Rchg(3), BslGaz-Rchg/Hold(3), BslGaz-Acc/EndRdx/Rchg/Hold(5) Level 1: Transfusion -- TchoftheN-Acc/Heal(A), TchoftheN-Acc/EndRdx/Heal/HP/Regen(5), TchoftheN-Heal(7) Level 2: Fire Cages -- EnfOpr-Acc/Rchg(A), EnfOpr-EndRdx/Immob(9), EnfOpr-Acc/EndRdx(9), EnfOpr-Acc/Immob/Rchg(11), EnfOpr-Immob/Rng(11), EnfOpr-Acc/Immob(13) Level 4: Siphon Power -- Acc-I(A) Level 6: Combat Jumping -- LucoftheG-Def/EndRdx(A), ShlWal-ResDam/Re TP(13) Level 8: Hasten -- RechRdx-I(A), RechRdx-I(15) Level 10: Siphon Speed -- Acc-I(A) Level 12: Flashfire -- SprWiloft-Acc/Conf/Hold/Immob/Sleep/Stun/Fear(A), SprWiloft-Conf/Hold/Immob/Sleep/Stun/Fear/Rchg(15), SprWiloft-EndRdx/Rchg(17), SprWiloft-Acc/Conf/Hold/Immob/Sleep/Stun/Fear/EndRdx(17), SprWiloft-Acc/Conf/Hold/Immob/Sleep/Stun/Fear/EndRdx/Rchg(19), SprWiloft-Rchg/Dmg%(19) Level 14: Hot Feet -- SprAvl-Dmg/EndRdx(A), SprAvl-Acc/Dmg/EndRdx(21), SprAvl-Acc/Dmg/Rchg(21), SprAvl-Acc/Dmg/EndRdx/Rchg(23), SprAvl-Rchg/KDProc(23) Level 16: Kick -- SprBlsCol-Acc/Dmg(A), SprBlsCol-Dmg/EndRdx(25), SprBlsCol-Acc/Dmg/EndRdx(25), SprBlsCol-Acc/Dmg/Rchg(27), SprBlsCol-Dmg/EndRdx/Acc/Rchg(27) Level 18: Cinders -- BslGaz-Acc/Hold(A), BslGaz-Acc/Rchg(29), BslGaz-Acc/EndRdx/Rchg/Hold(29), BslGaz-Slow%(31) Level 20: Maneuvers -- LucoftheG-Def/Rchg+(A) Level 22: Speed Boost -- BlsoftheZ-ResKB(A), BlsoftheZ-Travel/EndRdx(43) Level 24: Tough -- StdPrt-ResDam/Def+(A), UnbGrd-ResDam(31), UnbGrd-ResDam/EndRdx/Rchg(31), UnbGrd-EndRdx/Rchg(33), UnbGrd-ResDam/EndRdx(33) Level 26: Bonfire -- OvrFrc-Dam/KB(A), FrcFdb-Rechg%(33) Level 28: Weave -- LucoftheG-Def/Rchg+(A), LucoftheG-Def(34), LucoftheG-Def/EndRdx(34), Ksm-ToHit+(34), Rct-ResDam%(36) Level 30: Increase Density -- GldArm-3defTpProc(A), UnbGrd-ResDam(36), UnbGrd-ResDam/EndRdx(36), UnbGrd-EndRdx/Rchg(37), UnbGrd-ResDam/EndRdx/Rchg(37) Level 32: Fire Imps -- ExpRnf-Acc/Rchg(A), ExpRnf-Acc/Dmg(37), ExpRnf-Acc/Dmg/Rchg(39), ExpRnf-+Res(Pets)(39), ExpRnf-EndRdx/Dmg/Rchg(39), ExpRnf-Dmg/EndRdx(40) Level 35: Transference -- PreOptmz-Acc/Rech(A), PreOptmz-EndMod/End(40), PreOptmz-EndMod/Rech(40), PreOptmz-EndMod/Acc/End(42), PreOptmz-EndMod/Acc/Rech(42), PreOptmz-EndMod/End/Rech(42) Level 38: Fulcrum Shift -- Acc-I(A) Level 41: Indomitable Will -- LucoftheG-Def/Rchg+(A), RechRdx-I(43), RechRdx-I(43) Level 44: World of Confusion -- CrcPrs-Conf/EndRdx(A), CrcPrs-Conf%(45), CrcPrs-Conf(45), CrcPrs-Conf/Rchg(45), CrcPrs-Acc/Conf/Rchg(46), CrcPrs-Acc/Rchg(46) Level 47: Mind Over Body -- UnbGrd-Max HP%(A), UnbGrd-ResDam/EndRdx/Rchg(48), UnbGrd-ResDam(48), UnbGrd-ResDam/EndRdx(48) Level 49: Psionic Tornado -- PstBls-Dam%(A), PstBls-Acc/Dmg/EndRdx(50), PstBls-Dmg/Rng(50), PstBls-Dmg/EndRdx(50), PstBls-Acc/Dmg(51), FrcFdb-Rechg%(51) Level 1: Brawl -- Empty(A) Level 1: Containment Level 1: Prestige Power Dash -- Empty(A) Level 1: Prestige Power Slide -- Empty(A) Level 1: Prestige Power Quick -- Empty(A) Level 1: Prestige Power Rush -- Empty(A) Level 1: Prestige Power Surge -- Empty(A) Level 1: Sprint -- Clr-Stlth(A) Level 2: Rest -- IntRdx-I(A) Level 4: Ninja Run Level 2: Swift -- Flight-I(A) Level 2: Health -- NmnCnv-Regen/Rcvry+(A) Level 2: Hurdle -- Jump-I(A) Level 2: Stamina -- EndMod-I(A) ------------ ------------ Set Bonus Totals: 11% DamageBuff(Smashing) 11% DamageBuff(Lethal) 11% DamageBuff(Fire) 11% DamageBuff(Cold) 11% DamageBuff(Energy) 11% DamageBuff(Negative) 11% DamageBuff(Toxic) 11% DamageBuff(Psionic) 22.25% Defense(Smashing) 22.25% Defense(Lethal) 6% Defense(Fire) 6% Defense(Cold) 20.06% Defense(Energy) 20.06% Defense(Negative) 6% Defense(Psionic) 27.25% Defense(Melee) 26.63% Defense(Ranged) 6% Defense(AoE) 1.8% Max End 7.5% Enhancement(Max EnduranceDiscount) 4% Enhancement(Stunned) 4% Enhancement(Held) 4.4% Enhancement(Terrorized) 8% Enhancement(Confused) 8% Enhancement(Sleep) 33% Enhancement(Accuracy) 11% Enhancement(Immobilized) 77.5% Enhancement(RechargeTime) 122.1 HP (12%) HitPoints Knockback (Mag -4) Knockup (Mag -4) MezResist(Confused) 46.25% MezResist(Held) 46.25% MezResist(Immobilized) 46.25% MezResist(Sleep) 46.25% MezResist(Stunned) 46.25% MezResist(Terrorized) 46.25% MezResist(Teleport) 100% (20% chance) 18.5% (0.31 End/sec) Recovery 20% (0.85 HP/sec) Regeneration 30% ResEffect(SpeedFlying) 30% ResEffect(RechargeTime) 30% ResEffect(SpeedRunning) 18% Resistance(Smashing) 32.25% Resistance(Fire) 32.25% Resistance(Cold) 28.5% Resistance(Energy) 28.5% Resistance(Negative) 21% Resistance(Toxic) 21% Resistance(Psionic) 18% Resistance(Lethal) | Copy & Paste this data into Mids' Reborn : Hero Designer to view the build | |-------------------------------------------------------------------| |MxDz;1473;681;1362;HEX;| |78DA6594C94F136118C6BF69A7620B855628FB5E10042D8BDE4D44500412128D271| |59B32D0499AB6696B22470F18B7039B47B78B6BA2078DFA672851A3D18B7F808282| |0A2EA9EFCCF3149A74D2E637F3BCEBF7BDDFCCD8F9C3258F8F5C38A834DF402C9C4| |E4F0C24E29954221633529E1346241A4FC412D333CABA8AE4DFB46DCE798686CC94| |917BA8CEB31F3A3735151A31E346C68CA4FDC3F1A89132E29950EEA6643C21C1A34| |63869C6A73DF6C3F1A4614C7AEDDB21733A9A114359CE6BD248A5A366B262306946| |42E369331137231363E174C648CD544B67EDF29FD514AFAC53BD7128D5A02BC75BF| |21DA8BF0707B77D1D2AE054AA4F6C95E08E72F0A2F8C02DEBD2E6345BDB394F2E80| |9E2572112CB90E0E099C767456396B95AD55CA16BAEC8459CDE5A3FF086AB58AAD8| |8B6A26EF8979247457733979BB92ECB63317B2BBE8B1CA5F740DF7DF201B8EB21F9| |08BC24B15ED4D2BD37745BABB849DE022B6F93774087F457867A7AD91CB4EA79720| |1AC5D2497C02B52C3CF79F8398F7ACEA39E7368FC00FA257F397A52E501ECCD3141| |00F15AE093C3D6BA3E824EF1AFE21AAAAC1B2BD73AD6D7B80136FF247F8057C5AD8| |6F96A3ED3368B7CBAE4AB63BE3AD66FA92039AB967FCAAE135C43ECB055967BD2D0| |0F2DC81E82ACD9C61EDAD8D3358969E2DC9A5650BB6D15DCFD9D5C27D7C08E6FE0A| |8C4B632B6F517F6B86383DC04F7FC26FF907FC131CD7A477086DA79865E494B9D58| |B3A3936BEEE299CBF18957A96EF8B8BACFA28FBD61F214791ADC77869C005F4BFE1| |0629DA14DACBF87FBD0C37DEAE13E2D0B7AB9B6DE97A8DDF7827C4E3E03FB9F929C| |5DBDBEF52ECB4F2E6B483925DB5560ED2D50FA0A94FD05CA810265D4527866951BB| |D8CEB5BDF0CA5D5A14FB7CFFA16A09B2F1EB133460BC2BE92AF9DC41CBEE66B9DF0| |5BCDD79AA1FD07325CEE6F| |-------------------------------------------------------------------|
-
In particular you'll want to hit Power Boost before using your Endurance restoration power. Doing that will greatly increase its strength and restore over half your bar. Your heals and absorbs also benefit.
-
I took a stab at it. I have a lot of feedback but basically this: slot attacks as attacks. Some control powers in Mind are actually attacks and should be slotted that way. I highly recommend Power Boost for this combo as almost every power benefits. You'll want to hit Power Boost every time its up. The build below would put you at capped S/L resists with decent Ranged defense that caps during Power Boot periods, which should be up 50% of the time. Meanwhile almost every power lasts longer or is stronger during your boosts except for Faraday Cage. BTW Faraday Cage is mezz protection, so you don't need Indom Will. Hero Plan by Mids' Reborn : Hero Designer 2.6.1.25 https://github.com/Crytilis/mids-reborn-hero-designer Click this DataLink to open the build! Brainfry: Level 50 Mutation Controller Primary Power Set: Mind Control Secondary Power Set: Electrical Affinity Power Pool: Speed Power Pool: Leaping Power Pool: Flight Power Pool: Leadership Ancillary Pool: Primal Forces Mastery Hero Profile: Level 1: Levitate -- SprWntBit-Acc/Dmg(A), SprWntBit-Dmg/EndRdx/Acc/Rchg(3), SprWntBit-Acc/Dmg/Rchg(3), SprWntBit-Acc/Dmg/EndRdx(5), SprWntBit-Dmg/Rchg(5) Level 1: Shock -- EffAdp-EndMod/Acc(A) Level 2: Dominate -- BslGaz-Acc/Hold(A), BslGaz-Acc/Rchg(7), BslGaz-Rchg/Hold(7), BslGaz-EndRdx/Rchg/Hold(9), HO:Perox(9), Dmg-I(11) Level 4: Mesmerize -- Apc-Dmg/Rchg(A), Apc-Acc/Dmg/Rchg(13), Apc-Acc/Rchg(13), Apc-Dmg/EndRdx(15), Apc-Dam%(15) Level 6: Rejuvenating Circuit -- Prv-Absorb%(A), Prv-Heal/Rchg/EndRdx(17), Prv-Heal/Rchg(17), Prv-EndRdx/Rchg(19), Prv-Heal/EndRdx(19), Prv-Heal(21) Level 8: Mass Hypnosis -- FrtHyp-Plct%(A), FrtHyp-Sleep/EndRdx(21), FrtHyp-Acc/Rchg(23), FrtHyp-Acc/Sleep/Rchg(23), FrtHyp-Sleep/Rchg(25), CaloftheS-Heal%(34) Level 10: Energizing Circuit -- PreOptmz-EndMod/End/Rech(A), PreOptmz-EndMod/Acc/Rech(33), PreOptmz-Acc/Rech(34), PreOptmz-EndMod/Acc/End(34), PreOptmz-EndMod/Rech(36), PreOptmz-EndMod/End(43) Level 12: Galvanic Sentinel -- EndRdx-I(A) Level 14: Hasten -- RechRdx-I(A), RechRdx-I(25) Level 16: Faraday Cage -- GldArm-3defTpProc(A), GldArm-ResDam(27), GldArm-RechRes(27) Level 18: Total Domination -- SprWiloft-Acc/Conf/Hold/Immob/Sleep/Stun/Fear(A), SprWiloft-Conf/Hold/Immob/Sleep/Stun/Fear/Rchg(29), SprWiloft-EndRdx/Rchg(29), SprWiloft-Acc/Conf/Hold/Immob/Sleep/Stun/Fear/EndRdx(31), SprWiloft-Acc/Conf/Hold/Immob/Sleep/Stun/Fear/EndRdx/Rchg(31), SprWiloft-Rchg/Dmg%(31) Level 20: Hover -- LucoftheG-Def/Rchg+(A), Rct-ResDam%(33), Krm-ResKB(33) Level 22: Empowering Circuit -- GssSynFr--Build%(A) Level 24: Combat Jumping -- LucoftheG-Def/Rchg+(A) Level 26: Terrify -- PstBls-Dam%(A), PstBls-Acc/Dmg/EndRdx(36), PstBls-Dmg/Rng(36), PstBls-Dmg/EndRdx(37), PstBls-Acc/Dmg(37), Rgn-Knock%(37) Level 28: Maneuvers -- LucoftheG-Def/Rchg+(A), ShlWal-ResDam/Re TP(43), LucoftheG-Def(50) Level 30: Defibrillate -- RechRdx-I(A) Level 32: Mass Confusion -- CrcPrs-Conf(A), CrcPrs-Conf/Rchg(39), CrcPrs-Acc/Conf/Rchg(39), CrcPrs-Acc/Rchg(39), CrcPrs-Conf/EndRdx(40), CrcPrs-Conf%(40) Level 35: Insulating Circuit -- NmnCnv-Heal/EndRdx(A), NmnCnv-EndRdx/Rchg(40), NmnCnv-Heal/Rchg(42), NmnCnv-Heal/EndRdx/Rchg(42), NmnCnv-Heal(42), NmnCnv-Regen/Rcvry+(43) Level 38: Amp Up -- RechRdx-I(A) Level 41: Conserve Power -- RechRdx-I(A), RechRdx-I(46) Level 44: Energy Torrent -- Rgn-Dmg/EndRdx(A), Rgn-Acc/Rchg(45), Rgn-Acc/Dmg/Rchg(45), Rgn-Dmg/Rchg(45), Rgn-Dmg(46), FrcFdb-Rechg%(46) Level 47: Temp Invulnerability -- StdPrt-ResDam/Def+(A), UnbGrd-Max HP%(48), UnbGrd-ResDam(48), UnbGrd-ResDam/EndRdx(48), UnbGrd-Rchg/ResDam(50) Level 49: Power Boost -- RechRdx-I(A), RechRdx-I(50) Level 1: Brawl -- Empty(A) Level 1: Containment Level 1: Prestige Power Dash -- Empty(A) Level 1: Prestige Power Slide -- Empty(A) Level 1: Prestige Power Quick -- Empty(A) Level 1: Prestige Power Rush -- Empty(A) Level 1: Prestige Power Surge -- Empty(A) Level 1: Sprint -- Empty(A) Level 2: Rest -- Empty(A) Level 4: Ninja Run Level 2: Swift -- Empty(A) Level 2: Health -- Mrc-Rcvry+(A) Level 2: Hurdle -- Empty(A) Level 2: Stamina -- PrfShf-End%(A), PrfShf-EndMod(11) ------------ ------------ Set Bonus Totals: 12% DamageBuff(Smashing) 12% DamageBuff(Lethal) 12% DamageBuff(Fire) 12% DamageBuff(Cold) 12% DamageBuff(Energy) 12% DamageBuff(Negative) 12% DamageBuff(Toxic) 12% DamageBuff(Psionic) 9.13% Defense(Melee) 7.56% Defense(Smashing) 7.56% Defense(Lethal) 6% Defense(Fire) 6% Defense(Cold) 22.25% Defense(Energy) 22.25% Defense(Negative) 6% Defense(Psionic) 27.25% Defense(Ranged) 6% Defense(AoE) 1.8% Max End 6% Enhancement(Heal) 4% Enhancement(Held) 54% Enhancement(Accuracy) 4% Enhancement(Stunned) 6.25% Enhancement(Max EnduranceDiscount) 98.75% Enhancement(RechargeTime) 4.4% Enhancement(Terrorized) 8% Enhancement(Confused) 8% Enhancement(Sleep) 8% Enhancement(Immobilized) 7.5% SpeedFlying GrantPower Preventive Medicine (10% chance, if Scourge) 160.2 HP (15.76%) HitPoints 7.5% JumpHeight 7.5% SpeedJumping Knockback (Mag -7) Knockup (Mag -7) MezResist(Confused) 57.5% MezResist(Held) 57.5% MezResist(Immobilized) 57.5% MezResist(Sleep) 57.5% MezResist(Stunned) 57.5% MezResist(Terrorized) 57.5% MezResist(Teleport) 100% (20% chance) 23% (0.38 End/sec) Recovery 38% (1.61 HP/sec) Regeneration 15% ResEffect(SpeedFlying) 15% ResEffect(RechargeTime) 15% ResEffect(SpeedRunning) 14% Resistance(Smashing) 14% Resistance(Lethal) 31.25% Resistance(Fire) 31.25% Resistance(Cold) 11% Resistance(Toxic) 11% Resistance(Psionic) 10.25% Resistance(Energy) 10.25% Resistance(Negative) 7.5% SpeedRunning | Copy & Paste this data into Mids' Reborn : Hero Designer to view the build | |-------------------------------------------------------------------| |MxDz;1469;682;1364;HEX;| |78DA6594594F13611486BFA153A1A5081590B5B289C5623740BD3246104C942628E| |E5B9D94298C0ED3663A2472E985F7C61BFF81522068A251FF02897AE5F217DC50E3| |12404DEAE99CB7409C2F699EF9DEB37CEF9CE94CE2E651DFD2B15B87855433A42BB| |95C722863586646D755B32231632996963104AD8A4153D18CB4395B4E9BB6CDA452| |7E24A11913A54DD796F8E04C3A1D19D6D594656A29454F1E49A73543B36685772C4| |365E359559DF0D997A3AA92D58CC94A7B33A26B935356752930A19AB9292DDB3C9C| |D5529131539BA64E231933A5E692092567A9E66C23F9EAA65F5E12580559CCC942C| |46551B6082E30E57930CF9C0C6DD40871A7CCD6E6A90FB72AB8A5D7A40564B1ED0D| |F89659F10E3C4469B24B7803C2AE9DA342173CB8C2DCCF1701A3CCED3130CE9C220| |F6E9CE75E71D95ACD67F01373C747F003B3EE3D7391CE2B476DF925EE577791B9F3| |02789ED9788ED9B12CD9BC4EE77A50EBF9CBF368FFC3EC58057F33BBD699A135A64| |6B595985B6507DF7B2719A9B2075790AA7A596B046F507E35C7CAAAFBD87B73141C| |602E51DC0F3FFEFBACB53E00E798BBF2E03CB8C0F4D0D9B5E85F5BCFF7D7FE8363E| |D6BC27E563A79A8E71C519FC76CA8AE015A03EA1E129AE0A3E939FBEF7A063E65EE| |7E023E060F723F3FF56B818F16F40B9D601FF13ADE4F938F006617C07C1E51A88DE| |BDC6D97B9D79E2BE05530C90C5E0315A641FD3A51DB7992CF089E62EE1D074F8367| |E0E92C331BE277A7E8A51B5E5E90DD1ED6A41E6861F0BB4F885ECCA6F7009FBF6F3| |F3800F633C37DE06DE64BEA1B619F72A438747A26D17517F327F80BB35A65BE22C4| |E025060F71B055DEF2EE1668151B949442C8118D3994B843E97728030E65D4A18CC| |91B5F0C21D98AA766E33B5058F1FE1FFD5A54F0AF938ED34550165F1C59DF361549| |BAC733F4DE65FE039CA6F809| |-------------------------------------------------------------------|
-
I miss my Ice/Fire/Fire the way the game was just before the servers closed on live. Just a nostalgia thing. That was my "main." I was one of very few Ice Control Dominators. I missed it so much over the years I wrote a mod for Torchlight 2 heavily inspired by Arctic Air. It was never the most powerful build, but it was my unique one. It's seen some ups and downs since back then. The Contagious Confusion proc in Arctic Air used to be pretty effective. Now less so because of proc changes. The main beneficiary of that change was... Plant Control. <jealous face> I've got some ancient videos of Ice Control from pre-closed servers. If you can stand the choppiness, here are a few. Ice/Rad Troller circa 9 years ago. I think was right after Alpha slots came out, a while before Destiny came into the picture. You can see the massive problems I'm having with endurance costs resulting in many powers going unused (this is how we lived back then). Ice/Rad versus the original fire farms that relied on ambushes in a conference room, it was surprisingly good at this. Ice/Fire Dominator mission circa 9 years ago
-
I feel like I'm harping a little and don't mean to. It's not my intent to pile on, there's just a lot to say. 🙂 When we say "Doms don't get armor" we mean two things. One, the obvious part, Doms don't get Defense or Resistance really at all except for in pools and APPs. And two, Doms mostly don't get the little extras that go with armor like resistance to -ToHit, Endurance drain, Defense debuff, -Recharge, etc. There are a handful of exceptions. Mainly, Fire Assault resist Endurance drain. There may be others but I can't think of them. This is atypical for an archetype. You can build almost any other class, including Controller, Mastermind, or Defender to have these things, but not really a Dom.
-
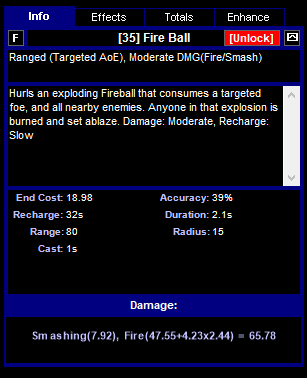
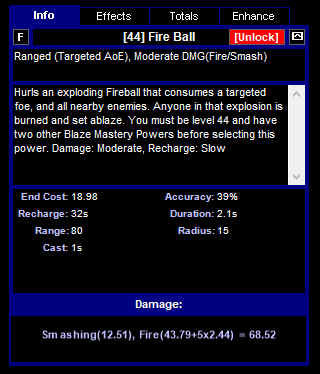
I keep bringing up Scrappers so I wanted to show a comparison about that. It's well known that a Dominator's best access to AoE damage comes from its apps. A lot of Dom players feel like that's where the at really becomes unleashed. Here's the stats for Fireball: Meanwhile here's Fireball on Scrappers: Basically, Dominator AoEs run neck and neck with Scrappers for ranged AoE damage. Both archetypes have most of their APP AoEs on a 32 second recharge. The radius, cast time, endurance cost tend to be the same. It's just that on the Scrapper the blast tends to be an "extra" while on Dominators its "bread and butter" because the Assault sets don't provide good area coverage. Some of the APPs have additional AoE blasts or faster recharging blasts that even this out a bit better, but the overall picture is the same. The archetype is getting its AoE damaged from APPs, where it is penalized as heavily as a melee AT. Meanwhile its much harder for a Dominator to carpet an area with their PBAoEs and cones, even given slightly better radii. All of this supports Frosticus' assertion that Dominators are on the low end of the AoE damage list.
-
Nihili is a long time player who's been around for ages and whose opinion I think highly of. I'm sure animation time is what was meant. 🙂
-
I think what frustrates me about mezz protection being tied to Domination is that when Domination drops it shuts down all avenues at once. Like, if I can't mezz enemies consistently, I'll need to tank through their attacks. But I also don't want to tank through their attacks at a time when I don't have mezz protection. Domination is binary and a constraint on moving forward with the mission. The existence of broken tricks like starting and interrupting your Snipe makes me think this isn't a balance concern but rather a holdover from the original Dominator design. Overall this archetype leans very, very, very, very heavily on Recharge to make it work. With the Buff/Debuff classes I'm more okay with that. But this class is not a force multiplier. Your damage isn't very good (barring Plant), the coverage of your attacks is limited, and your only real contribution to a team is the ability to mezz bosses. Certainly your damage output leaves much to be desired, and you require a lot of support. I understand that archetypes need holes. This archetype has plenty of other holes and deserves a break somewhere. The test I sometimes give to people when talking about this archetype is "Are you saying your Scrapper teammate can turn off his or her armor and mezz protection and survive on the strength of your controls?" Because if he or she can't do that, then that tells you how strong these controls are as a substitute for armor. This class does have some ranged capability, so the comparison isn't perfect. However I don't feel this class fulfills the developer's intentions of being a melee-blast hybrid. There are ways to make that work but it's not there.
-
I don't have a lot of experience with /Rad, but I have a lot with Ice\. This will be a difficult Dominator to play. Ice Control is probably the weakest of the Dominator Control sets. I say this with some sadness as someone who used to main an Ice/Fire Dom. If you strongly want to play Ice Control, I recommend /Psi as your secondary. Psi has Drain Psyche, which will allow you to tank through the damage that will be thrown your way playing Ice Control. Also, the -Recharge in Psi stacks with Ice and will floor enemies, somewhat slowing their ability to fire at you.
-
I'm going to keep pushing for all-the-time mezz protection. That's the key ingredient that hurts this AT. A lot of the other stuff I mentioned are also issues, but the mezz protection is a big "whoah" thing. When you get mezzed you can't teleport away, eat an inspiration, use a power, nothing. Your dom bar stops building because you can't attack. I happen to be leveling a Earth/Dark Dom right now. He's not a permadom. Here's me browsing radio missions: Carnival of Shado...nope Archn... nope Council. Fine, council. Part time mezz protection is not very useful. So I can run in, start the fight, lose protection midway though and drop dead? Can you imagine Scrappers or Sentinels with part time mezz protection, having to dive into pool powers or Clarion Destiny to close range? Putting the mezz protection in Domination was as big a mistake as back when Dominators used to have low damage and it only got boosted by Domination. The developers envisioned this meek little archetype that turned into a powerhouse part of the time. Dominators were widely considered one of the worst archetypes outside of permadom until that got fixed. I wish they'd have fixed the mezz issue at that time as well. I'd be somewhat more likely to use a PBAoE if I didn't feel like it would wipe out my dom bar. This Earth/Dark has a heal in Drain Life, his various controls, I play him mostly ranged, and I still died 4 times at level 43 on a team running Dark Astoria missions. Almost every death happened so fast I didn't see what hit me. That's what happens when you literally have no armor (I do have Tough/Weave and Combat Jumping at present).