Crysis
-
Posts
1552 -
Joined
-
Last visited
-
Days Won
1
Content Type
Profiles
Forums
Events
Store
Articles
Patch Notes
Everything posted by Crysis
-
I’m going to preface this with the clear statement that this is totally subjective and based on my personal play style preferences. Unless the AT delivers measurable and noticeable (subjective) damage I just don’t/won’t play it. I did on Live and had at least one AT of everything at 50, fully incarnated. But on HC I’ve stuck to only what I like and thus have only one Controller (a Fire/Kin I rolled only because I knew it could run fine on SO’s for PL’ing my other alts I wanted) and everything else is a Dominator, Corruptor, Blaster, Scrapper, Stalker, Mastermind or Brute. Ive thus far avoided Defenders (have a lone ‘proc monster Offender‘ perma parked at 46), Controllers and EAT/VEAT’s and have a tank or two stalled in their 20’s but mostly because I realize all of those AT’s peak in team utility in the 30’s and then just diminish in value in the 40’s and late game relative to the Buff/Debuff from other AT’s becoming “plenty enough” when coupled with serious and sustained DPS. I will only play something that continues to improve overall into the 40’s. All those support AT’s just peak out at 40 and then everyone else gets so much better that relatively speaking the contributions of Controllers and Defenders just stall out to minimal contributions. And EAT’s/VEAT’s just have never been my thing. I clearly prefer direct damage AT’s that can buff /debuff what they put out themselves and the efforts of others.
-
I spent a lot of time poring over the old Live forum archives before re-making my TW/Elec again here on HC. The ATO’s will change some of your slotting. I will say, soloing +4/x8 Arachnos Radios in my early 40’s was a royal PITA. I often would just turn it down in difficulty. Tons of ranged attacks, many Toxic, and just a bunch of Def Debuffs pretty much took my “Uber” Electric Armor brute and shredded her. Late game, however, you are pretty much indestructible, and being the Siege/Nightstar puller in iTrials will get you onto leagues quickly. I started with this thread: https://web.archive.org/web/20120907071259/http://boards.cityofheroes.com/showthread.php?t=280149 I also want to point you to this thread on the old archives, specifically this particular post. The Achilles heel for an /Electric Armor brute is Toxic and to some extent Psi, and most of these types of attacks are delivered from Range. It’s pretty easy to softcap /Elec to Melee and Lethal just via normalized slotting techniques, especially once you throw in the buff from Defensive Sweep. But it’s Ranged attacks delivering defense debuffs (like Toxic/Poison) that will cause cascading failures of your armor and damage mitigation. Thus why the first link I posted pushed so hard for trying to softcap ranged defense. https://web.archive.org/web/20120911115213/http://boards.cityofheroes.com/showpost.php?p=4156067&postcount=10
-
There are times, with a few alts, where I like to slow down levels 40-50 a bit since there’s so much to do with the AV arcs, getting the accolades and such. And I’ve also noticed this about the ITF’s. Crazy amounts of XP especially if kill all/most approach. And not at all uncommon for me to get two purple drops per longer run. As for secret entrances, I discovered the other day that the little shack under the guard tower on the center Portal Corps building has a door on it. Clicking on it will take you into that Portal Corps building. Not like you ever need to but I’ve got a habit of clicking on doors just to see what will happen (usually nothing). I also seem to recall being in Steel Canyon or Galaxy way back in the early days of Live, before I had a travel power (wasn’t level 14 yet) and discovering another of those buildings that had a street level entrance to the roof. It’s how I discovered that I really wanted SuperJump instead of Fly.
-
I PL 90% of all my alts to lvl 33 and then give them 200-300MM to start. About 50Mm goes to P2W vendor, 120MM goes to Hero Packs as fodder for the ATO’s I need for that alt (unless I can snag any for 6mm or less) and the rest goes to converters. I tend to buy lowest within category and then convert to what I really want. For all the purples, winters and uniques I have dozens of each already in email and other alts’ inventory for the new alts to grab. Any remaining is used to fund what I need on way to 50. Once I T4 out that alt I Xfer any remaining influence to email for next alt.
-
I do this with KB to KD attuned IO’s, PerfShifter +END, Numina/Miracle and Kismet +ACC. It’s pretty apparent when leading a “All levels welcomed” PUG who is having significant issues with END, knockback all over the place or even missing constantly. I simply xfer the IO and a couple of Enhancement Unslotters over to the individual, ask them to trust me and try slotting them in the right places (using the unslotter to pull out whatever they have in there) and if they don’t like it, use the second unslotter to yank it back out at end of our time together. I tell them to keep the IO if they don’t want it and pass it on or sell it. I have made a LOT of in-game friends doing this. Selfishly, it makes my game more enjoyable also because dead teammates, or those who simply can’t contribute fully, aren’t a lot of fun. But I do enjoy introducing people to the joy of learning how to make a build perform to it’s best. It’s also handy to keep a few Celerity stealths around for same reason. I have never had someone say anything other than a big thanks. Sometimes I’ll buy 100 at a time and just stand near Miss Liberty and hand them out like candy to the lower levels. Always seems appreciated. I’d honestly rather give someone advice in real time, and the means to use it, than a stack of influence. Makes for a better player base IMHO.
-
Thank you. Lets just nerf the busybodies and get back to the game. I sometimes feel like this game is a bunch of old Homeowners Association members bitching about a the depth of mulch around Mrs. Johnson’s flowerbed not being up to their interpretation of code. As for power set inequality, I’ve long believed they shouldn’t be equal. The AT’s themselves, and the unique combinations of power sets within each AT, are to me the games real “difficulty slider” mechanism. As a brute (pretty much any brute) I can solo just about any content the game can throw at me up to and including many AV’s. And do it starting in my late 20’s/early 30’s on max difficulty. That’s a much harder proposition to do that with a Controller until my late 40’s, and even then, only SOME Controllers. That’s your difficulty setting. If I want an easy experience, I roll a Brute. If I want a more challenging one, I roll a Controller. Trying to equalize them simply breaks the harmony that makes up the play style difficulty settings. And frankly, you’ve got different methods for achieving same goal (eg; completing the mission) ranging from “Brute Force” to “Trickery via Devices” and “Masterminding the victory.”
-

Why do I never see Rest or the Prestige Sprints as mules?
Crysis replied to Menelruin's topic in General Discussion
Physical Perfection is a fantastic 1-slot wonder. First, if blue side, it’s just a normal epic, meaning you don’t have to go red side and do the PPP to snag it. Second, both it and Superior Conditioning in the same set mean you have two places to put any of the really good Heal procs (+Absorb, +Regen, etc), Panacea or one of the two ENDMOD procs (Perf Shifter +END or the newer Power Transfer Chance to Heal Self). Both are also Auto, meaning zero END burn. And since you usually aren’t taking them until your 40’s, all your slots can go to your more powerful Primary and Secondary power sets. Honestly, for most Defense and Resistance based sets that can already achieve DEF or RES softcap (or RES hardcap), unless you need the damage from something like Pyre Mastery/Fireball, there’s very little reason to look elsewhere. -
So...what's this I hear about changes to TW?
Crysis replied to JnEricsonx's topic in General Discussion
Amen. The most difficult mobs in the game are largely ignored because this game is about casual play, not challenge. I have come to believe COH is really just a social chat client with some game elements built into it. Which is fine for me. I can go find some challenging content, and largely uncontested at that given the zones I’ll find it in are largely devoid of any other players, let alone teams. -
I’ll look at it next time I’m near my PC and can pull it up in MIDS but in meantime here’s a few builds for comparison. I’m running a Staff/Elec right now and in mid 40’s. Until you get your recharge up and your attacks mostly slotted out you’ll really appreciate getting your Defenses up near softcap. It’s not hard to get Lethal and Melee there with one (or two with recharge) Guarded Spins. Going all Resistance is possible but I found I had to make my damage suffer to do that so went the Def + Res approach for cascading mitigation. I don’t have to heal what doesn’t hit me, and what does hurts a lot less with both Def and Res. Post-50 you can respec and go for mostly RES and high recharge both but for me I had to make some changes for the leveling pre-50 game before I can slot all those Superiors and Purples.
-
Make sure you check out the thread “The Matrix Build” as it’s totally focused on DP/SR for Sentinels.
-
Likely only for Sentinels. Where, surprisingly, Regen is actually pretty good. Shhhhh....don’t tell anyone though. For reals, I fully suspect Procs are going to be hammered into cute trick levels of uselessness SOON(tm).
-
So...what's this I hear about changes to TW?
Crysis replied to JnEricsonx's topic in General Discussion
I solo at +4/x8 pretty much everything. But if I’m going to run a PUG I always drop it to +3 and advertise I’m running +3 radio or story missions. That gives me greater assurance that people will feel challenged, still join up for the XP and not be totally useless. What’s ironic is the overwhelming majority of players =ASK= me to bump it to +4 after first mission. I oblige usually, depending on how badly other players were getting torn up. So while I agree, annoying to not be able to hit anything, it’s not the hive mind preference apparently to do anything less than +4. -
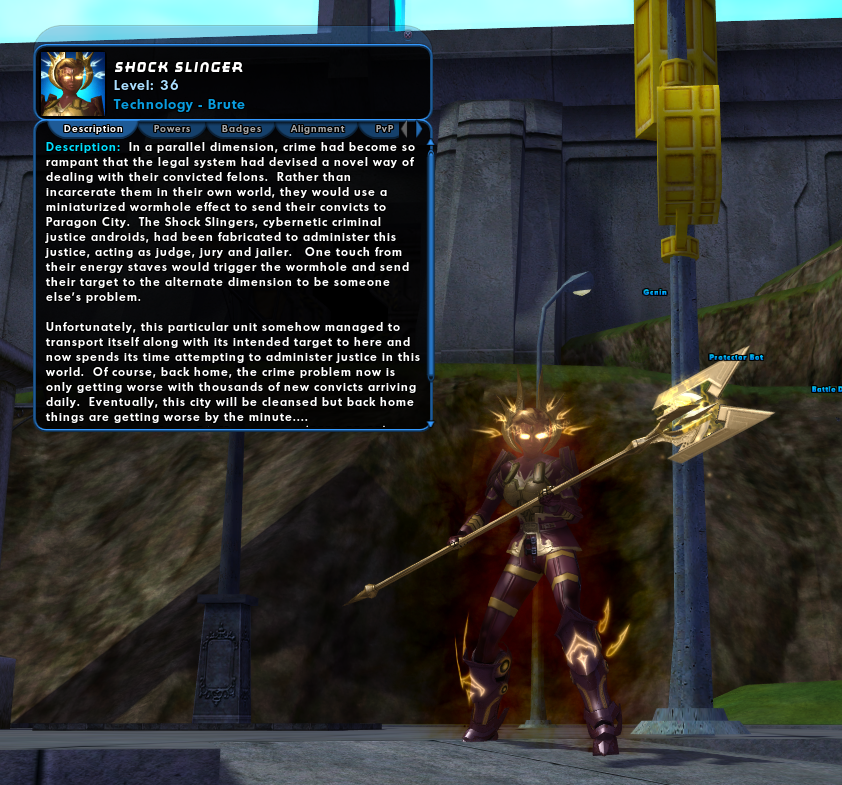
Staff/Elec brute, pseudo-homage to Judge Dredd, but with a twist.... *Photobombed by an all-MM TF running Numina LOL

-
Lam’s aren’t so bad on my Demon/Storm I’ve found. I keep them on passive until I get to a weapons chest and then put them on attack. The numpad binds are a must for this and other “close quarter” trials and TF’s (I’m looking at you Apex/Tin Mage).
-
Wait....Tactical Arrow getting nerfed? Why?
-
I don’t know the answer to your question but this was a good thread to answer more about Detonator.
-
Somewhat depends on secondary. My /Storm MM’s and /Time MM’s only have 4-5 click powers from secondary, and two of those are long duration cooldowns. So plenty of room to take primary attacks and/or pool attacks and proc those out. Web Cocoon fully procc’ed out does pretty decent damage for a MM. I can one shot a +1 minion given all my other -Res I’m throwing around.
-
BTW, and I’m surprised I never noticed this before, but nice bonus of these binds is they work on Lore Pets as well. Example: pressing Zero (all pets) and Four (Aggressive) in the prisoner escape portion of a BAF not only puts all your henchmen into Aggressive mode, but your Lore Pets also.
-
So...what's this I hear about changes to TW?
Crysis replied to JnEricsonx's topic in General Discussion
I was under the impression it wasn’t just TW but specifically TW/Bio on a Scrapper that was “ridiculously overpowered,” and thus on the short list for nerfs per Capt Powerhouse. TW/anything else isn’t in the same league as TW/Bio. -
I just finished up my latest Demon/Storm MM. I had one years ago on Live but built this one for all out carnage. As typical, /Storm is merciless on your END bar. And because I’m averaging over 230% Recharge in most missions I’m burning END like crazy. But really there’s no reason to suffer like this on HC. I routinely ran the Survival Amplifier temp power from the P2W vendor, carried several dozen charges of the Recovery temp also from the P2W vendor and also used the base amplifier for the +Recovery temp. Was this a hassle to keep all these temps running? Yup it was. Was it worth the effort? Absolutely, at least until I got Ageless. And it beats carrying a tray of blues. I do support adjusting MM End penalties. But it’s so much easier to work around these penalties now vs back on Live. As such I’m not sure I’d support spending dev time on this versus a number of other more game breaking issues.
-
guide A Comprehensive Guide to the Incarnate System
Crysis replied to Robotech_Master's topic in Guides
This is a great guide, but I think this part right here should be emphasized. I’ve seen my fair share of players who unlock Alpha, slot it to T3 for the level shift and then run straight up the Judgement and Interface trees trying to T3/T4 those out. That’s fine, free will and all that, but many of them quit before getting their other two level shifts because they find the Incarnate trials or DA story missions “too hard” or claim they “can’t do much of anything.” I always build out Alpha to T3 and Destiny plus Lore to T3 before doing anything else. The level shifts, once achieved, give you the best feel for what your “Incarnate build” is going to feel/play like. It can actively persuade you to go a different path for Hybrid, Interface and Judgement in some cases. I have some builds that struggle with Endurance all the way up to 50, but once you get Ageless to at least T3, that’s entirely a non-issue and can literally allow you to do things like totally respec into a higher recharge build, pull out most -END IO’s (that aren’t contributing to set bonuses at any rate) and replace them with Procs, etc. And run the variety of “speed” TF’s and iTrials that often would leave my character face planted as a healthy, contributing member of the league. Those three level shifts, and the benefits the T3 achievement provides, provides the backbone of your Incarnate build, the one you will ultimately play with for remainder of the game and/or retire that toon with. So getting them quickly, to me, is the key to not “wasting” the rest of the Empyrean merits you’ll earn and spend on the T4’s.- 57 replies
-
- 1
-

-
- incarnate
- incarnate trial
- (and 3 more)
-
QFT The only 50 I ever T4’d out all incarnate powers (on LIVE when there were no shortcuts), used all ATO’s, 18-24 purples, two Winter Sets AND Hami-O’s and STILL ended up melting down to strip all IO’s and deleted in disgust. Trick Arrow needs serious, serious work on a MM. Its hard to gimp Demons but.....this will do it.
-
COVBINDS for MM's. Here they are. All zipped up.
Crysis replied to vtshadow314's topic in Mastermind
Sorry, wasn't meant in a negative way, was asking if you'd somehow improved the original numpad MM binds or if they were just a repeat of the Sandolphan/WarLawk versions. Numpad MM controls are great, highly recommended for any user. I even went so far as to buy a cheap Bluetooth numpad device just so I can use this on a laptop when I travel just like I do on my main gaming rig at home. -
Weekly Discussion 53: How to Increase Villain Population
Crysis replied to GM Miss's topic in General Discussion
Not semantically perhaps. But you will NEVER have POPULATION without increased ACTIVITY. In a game world, or the real world, they go hand in hand. So I think it’s perfectly acceptable theory crafting to push to address one in the hopes it leads to more of the other. If I never take the time to make a guest comfortable in my home or place or business....they are far less likely to return a second time. Make them comfortable and they will. Comfort is highly subjective, of course. -
COVBINDS for MM's. Here they are. All zipped up.
Crysis replied to vtshadow314's topic in Mastermind
How does this differ from Sandolphan’s numpad binds, already stickied?