Voltor
-
Posts
826 -
Joined
-
Last visited
-
Days Won
8
Content Type
Profiles
Forums
Events
Store
Articles
Patch Notes
Everything posted by Voltor
-
https://www.cbr.com/the-matrix-5-announced-drew-goddard-directing/
-
Only after they are buffed by the machine and that failsafe for the ambushes only works 4 times
-
Mo Barracuda is still a bit of a pill to get. Luckily its been changed so that the team leader gets the power needed to shut down Reichsman's phase power However he is still overamped and has the ambush waves. I have had some teams of late that were not as optimal as past teams gain the Mo Cuda badge but we literally had to stay in the fight until ALL the ambush waves were destroyed while the tanks/brutes kept him occupied. Approximately 15 waves of ambushes. As to RHW badge, I agree with what you say about Okie's leadership. Okie, you do a fine job running the Mag trials and i also hope you do RHW again. Your choice of course. 🙂
-
Your leadership is fine, as you say it is the PUG factor .
-
Agree to disagree 🙂
-
Back on live before Ouroborus was introduced, the devs set up where ONE target for the isolator badge appears in the train terminal in the PVP Recluse Victory zone. You can defeat it then leave and come back later for another, and another and another...... long respawn time as i recall. This would be the only way I remember for red siders to work the badge at all. Just be hero or vigilante and do the Ouroborus intro story arc, the second mission puts you back to level 1 in the Outbreak tutorial map.
-
Bug Hunter is a trophy, not a badge and does not count towards the grand total. I also do not have the Rikti Vanguard training dummy nor the Excalibur toy sword on any alt, and that is perfectly fine with me.
-
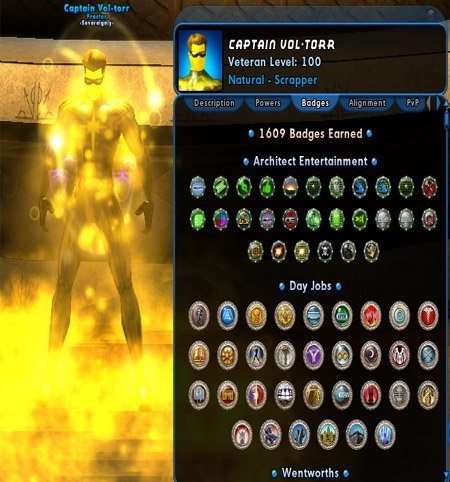
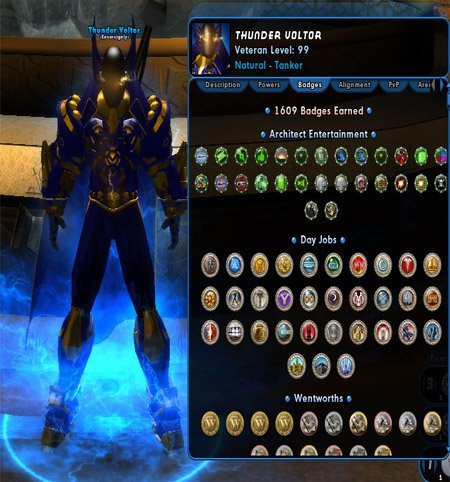
Can we post self-congratulatory milestone screenshots?
Voltor replied to EmperorSteele's topic in Badges
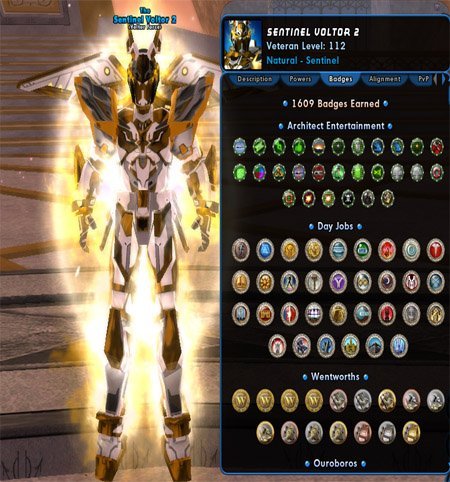
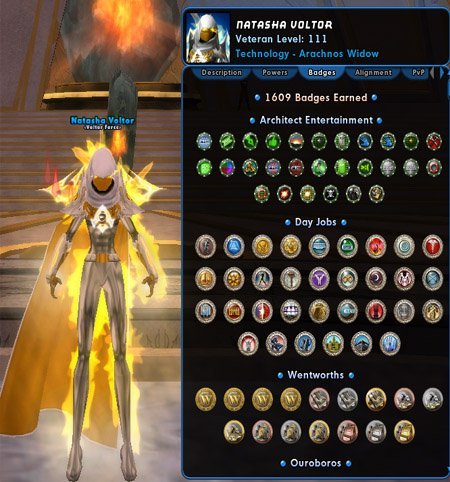
THE MOST PROMINENT DOMINANT BADGE HUNTER RISES AGAIN! 25 alts completed again!
-
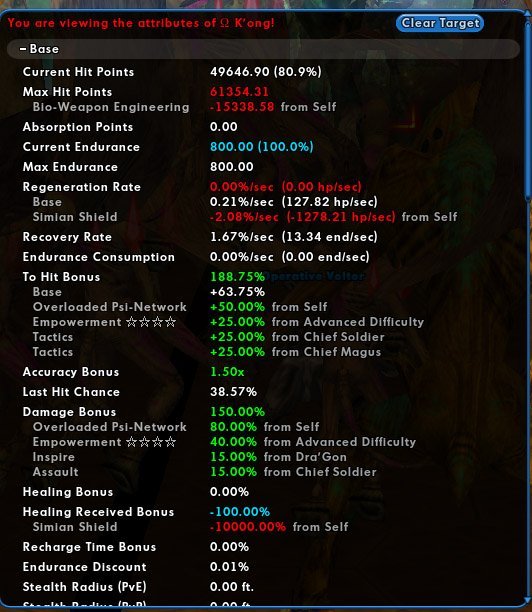
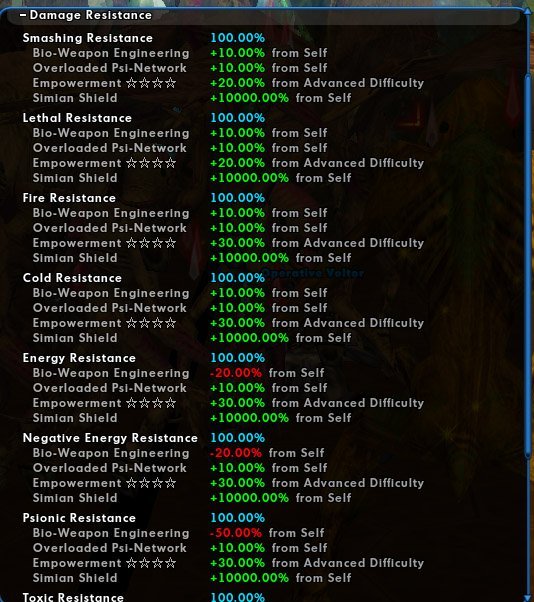
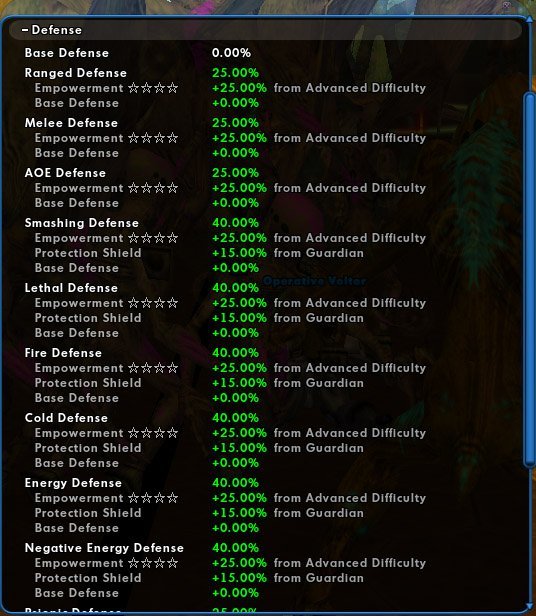
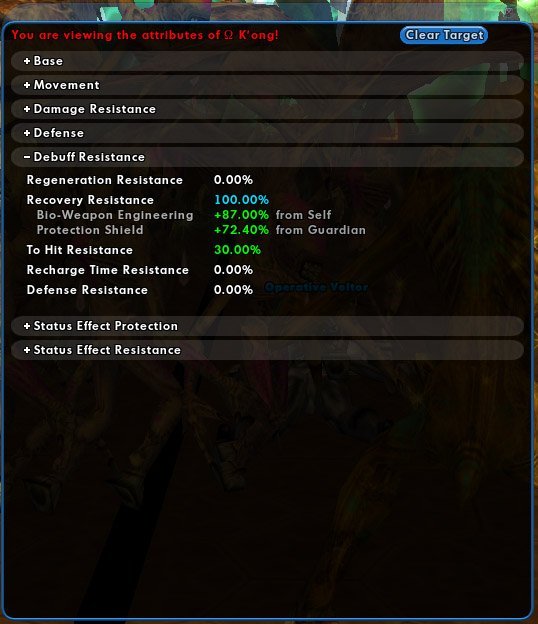
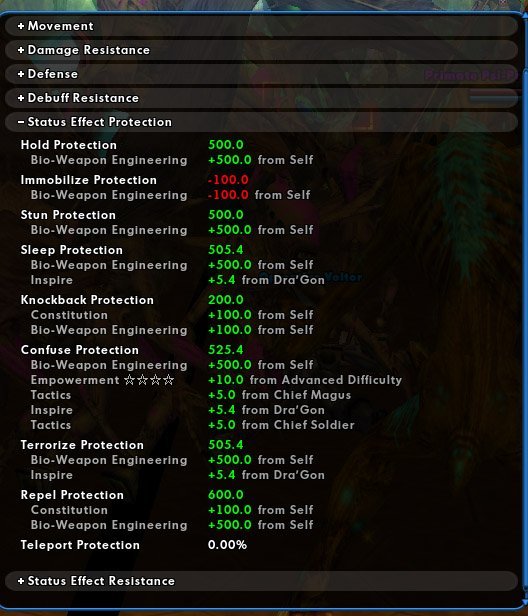
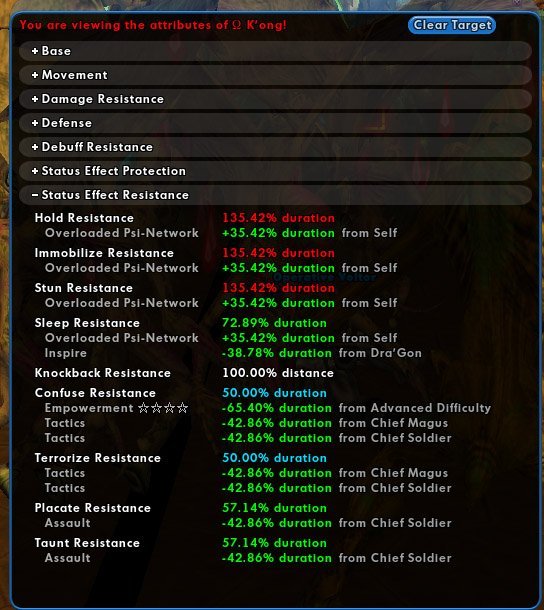
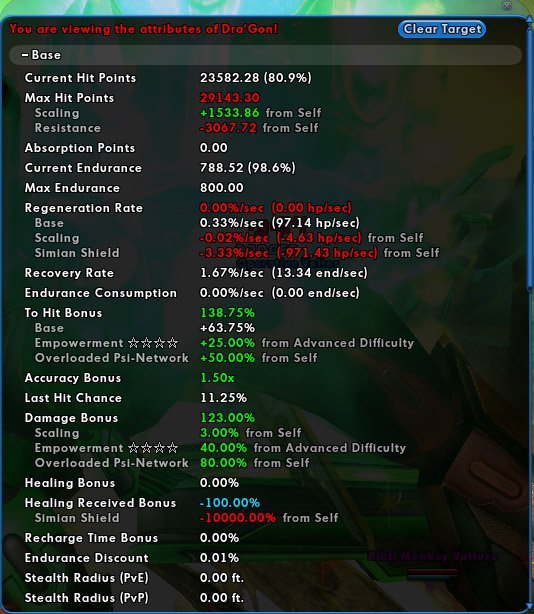
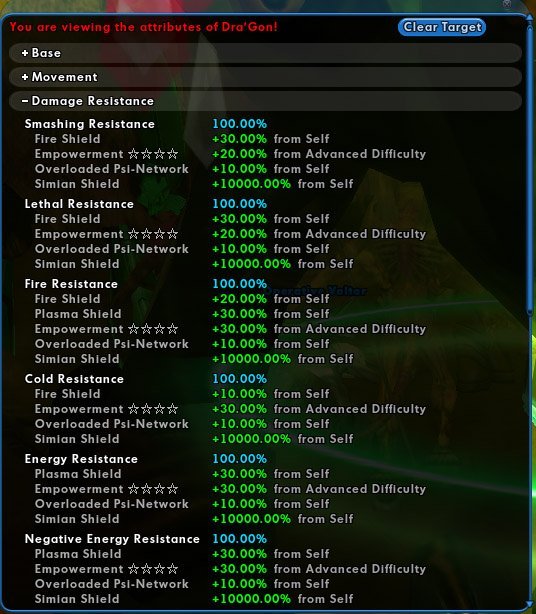
and finally, here is OMEGA K0ng's stats
-
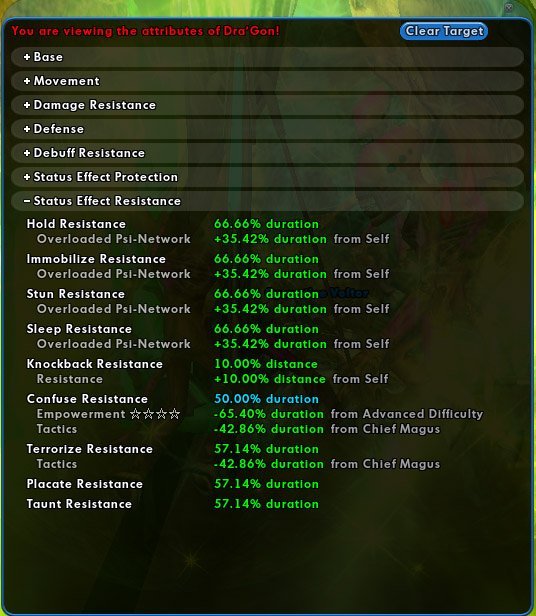
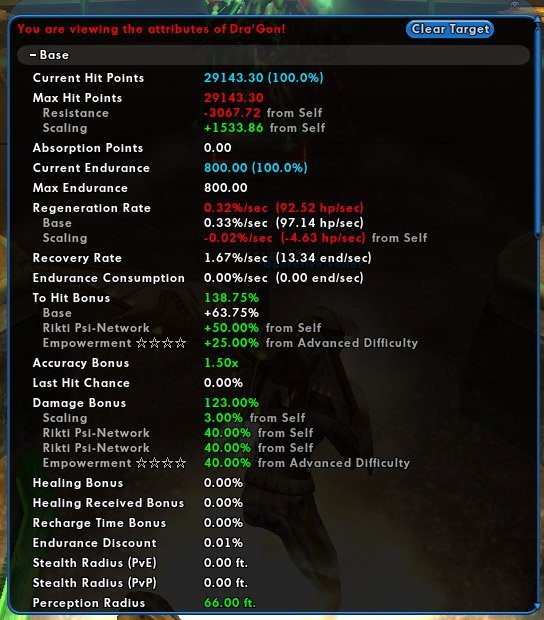
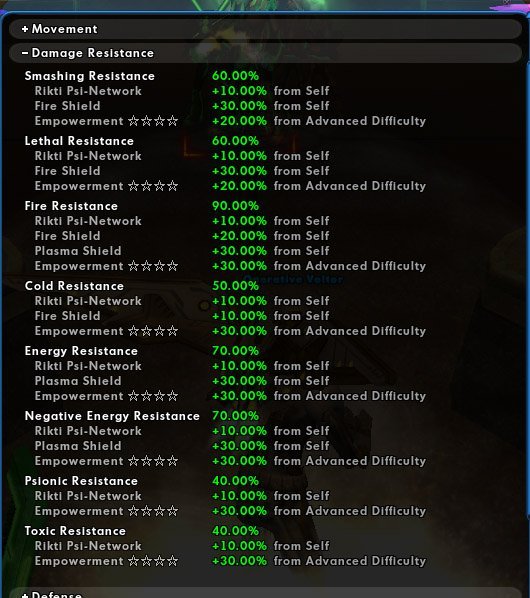
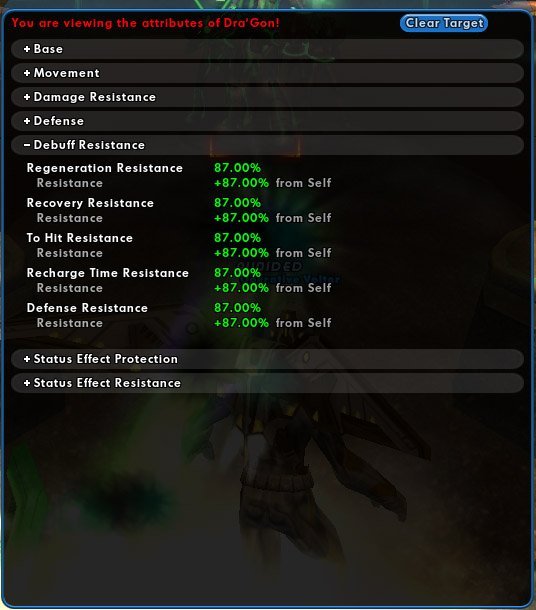
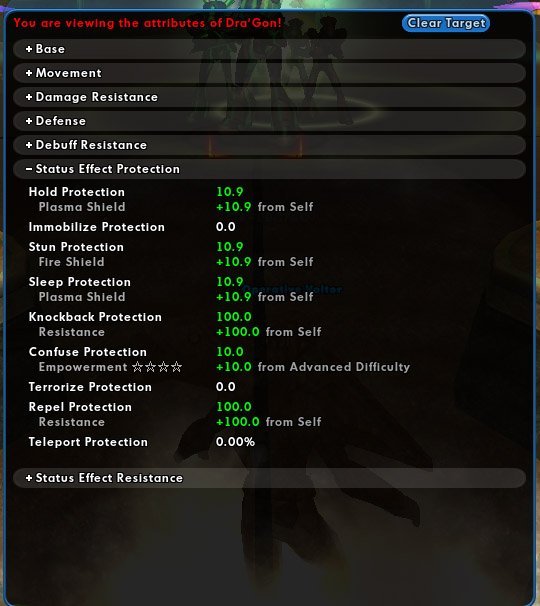
Now here are Dra'gon's stats AFTER OMEGA K0ng has appeared and has power linked to Dra'gon!
-
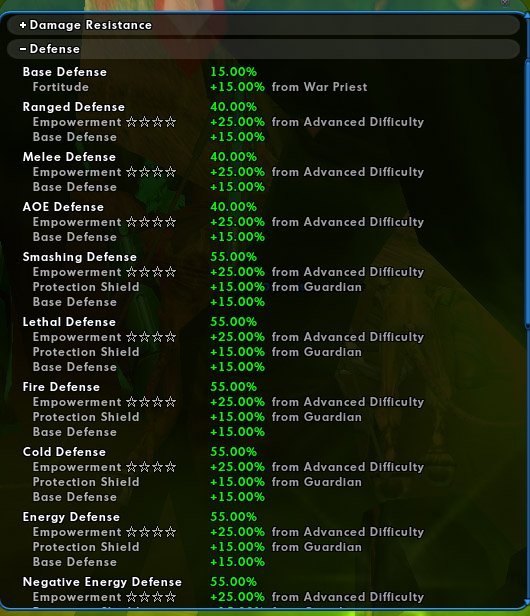
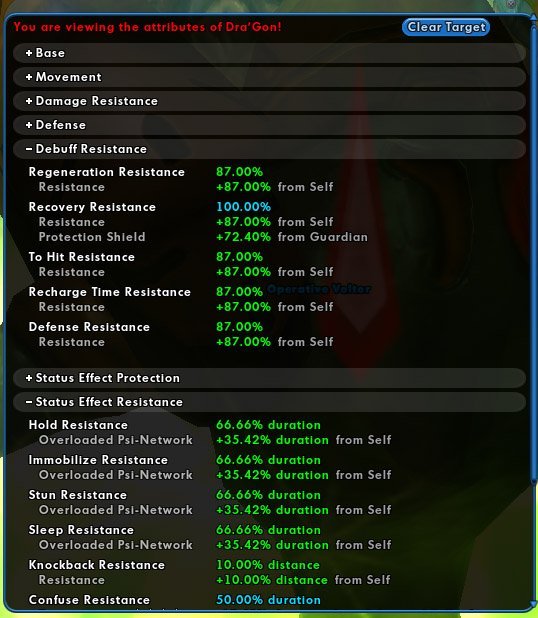
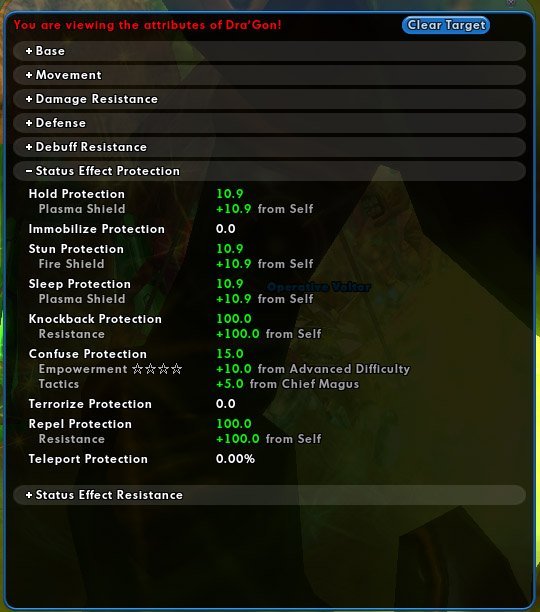
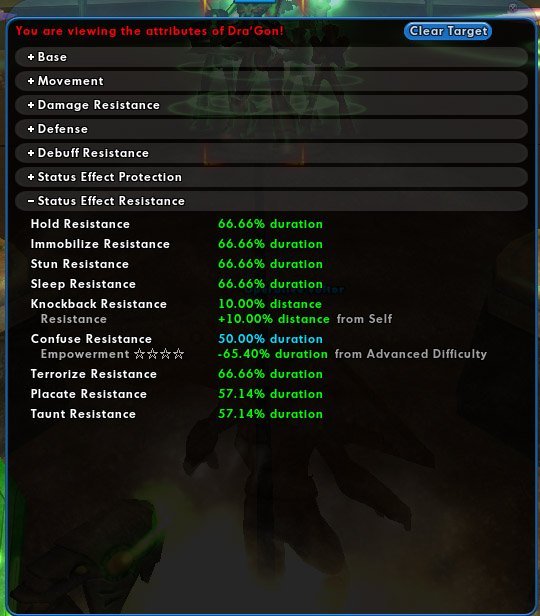
Okay my badge hunter Operative Voltor who has the surveillance power went in at great personal risk by himself on 4 star mode and obtained the following intelligence data on Dra'gon and OMEGA K0ng
-
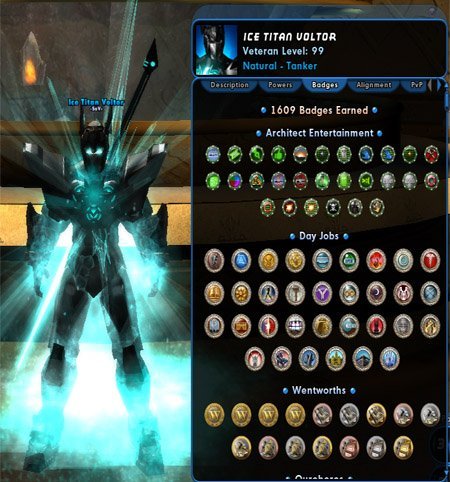
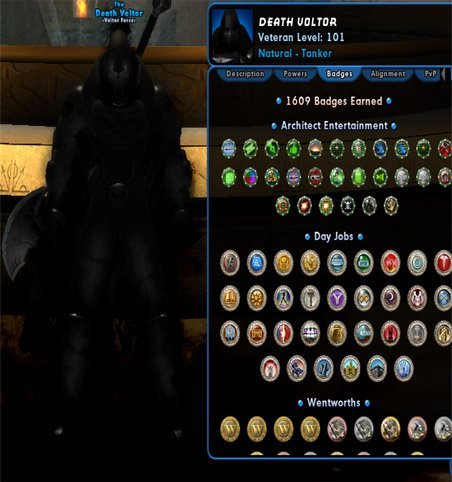
Can we post self-congratulatory milestone screenshots?
Voltor replied to EmperorSteele's topic in Badges
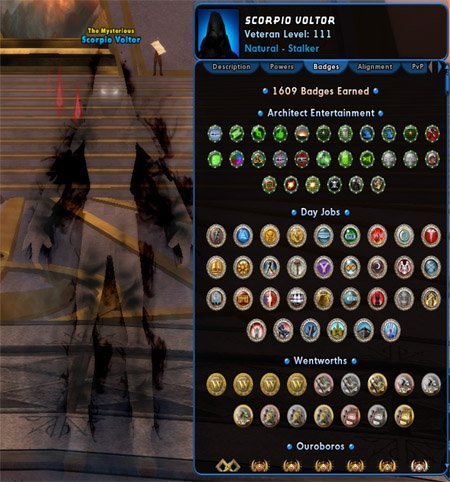
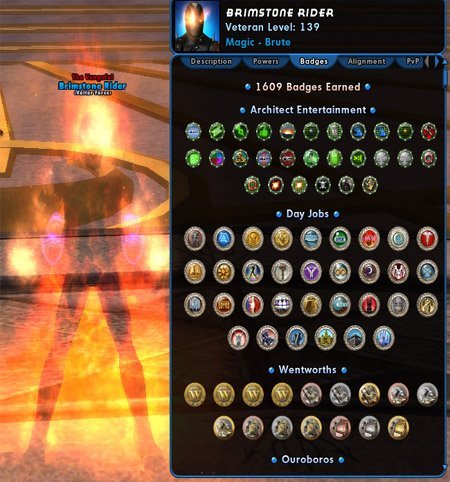
And again.....
-
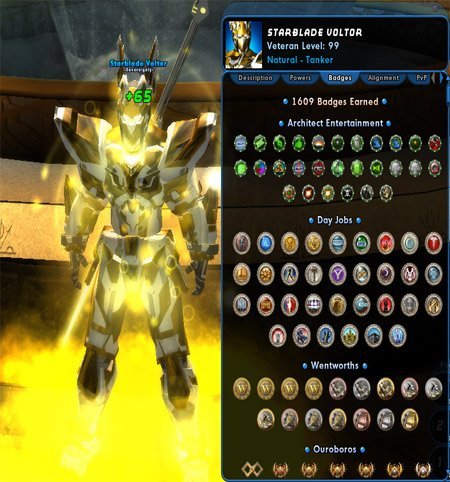
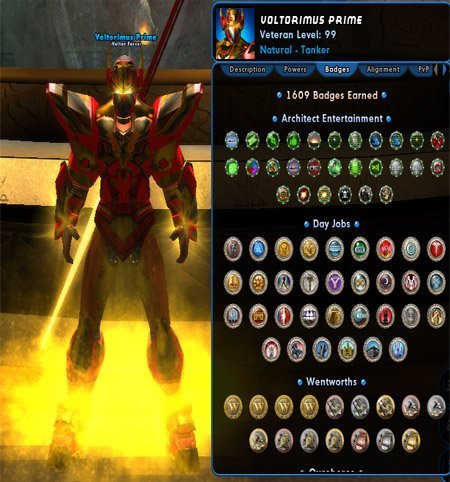
Can we post self-congratulatory milestone screenshots?
Voltor replied to EmperorSteele's topic in Badges
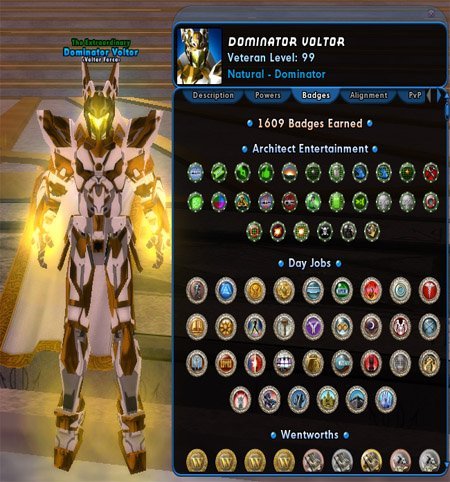
And again.....
-
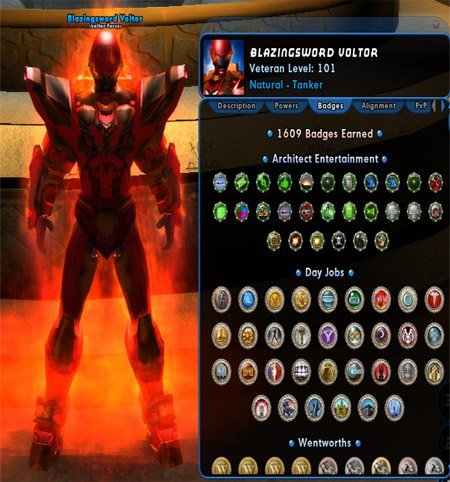
Can we post self-congratulatory milestone screenshots?
Voltor replied to EmperorSteele's topic in Badges
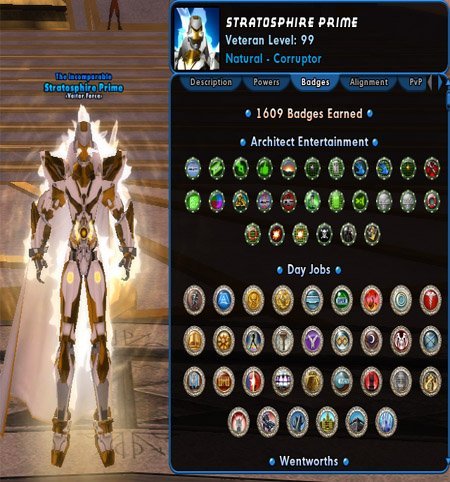
And again.....
-
Can we post self-congratulatory milestone screenshots?
Voltor replied to EmperorSteele's topic in Badges
And again.....
-
Can we post self-congratulatory milestone screenshots?
Voltor replied to EmperorSteele's topic in Badges
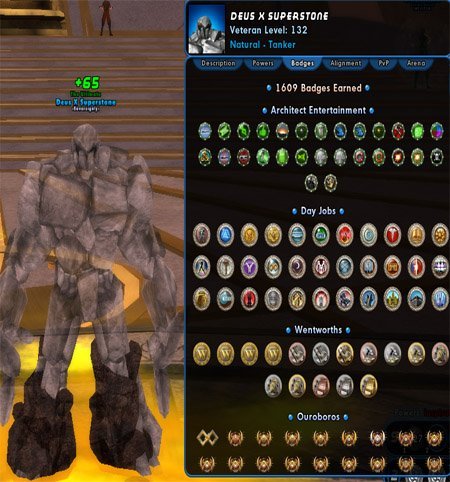
Here we go again.....
-
Can we post self-congratulatory milestone screenshots?
Voltor replied to EmperorSteele's topic in Badges
Once more unto the breach.....
-
Can we post self-congratulatory milestone screenshots?
Voltor replied to EmperorSteele's topic in Badges
DEJA VU........all over again......AGAIN
-
Can we post self-congratulatory milestone screenshots?
Voltor replied to EmperorSteele's topic in Badges
DEJA VU........all over again......
-
Can we post self-congratulatory milestone screenshots?
Voltor replied to EmperorSteele's topic in Badges
DEJA VU........
-
New Data: Mission 3: While Dra'gon won't leave the battle room completely he can be pulled to the doorway. It is suggested that you pull him there and keep him there as K'ong spawns in the center of the room. Leave K'ong alone and finish Dra'gon. Once K'ong has spawned, the room door is closed via a force barrier that traps players inside. Players on the outside can click a portal in the barrier to enter the fight area. Once K'ong has spawned and the barrier is up, if players need to go to the hospital, they will arrive in a small hospital room in the map and can exit at a door that puts them back into the battle room. Defeat Rikti monkey vultures to keep the gas pressure in the room down, if it gets above 24 the team takes damage Mission 5: in the final battle after the cutscene remember that Lord of War is more vulnerable to melee and Honoree is more vulnerable to ranged. My battle plan is simply Sun's out, Lore's out plus any and all pet powers the team has, shivans, signature summons, etc. Target is the Honoree Once he is defeated, RUN.
-
You're welcome
-
Can we post self-congratulatory milestone screenshots?
Voltor replied to EmperorSteele's topic in Badges
How about that...........
-
First as always get your team together and have holds for the greens in mission 4, plus melee and ranged. On ONE Star I have won with a team of 6 but 8 is better of course. For Destiny I suggest this: 5 with Barrier, preferably Core, T3 minimum 2 with Clarion 1 with high stealth, phase shift optional and Incandescence. Any AT can do this if set up for it, I have even used my brute and tank. Stealth power pool, plus celerity+Stealth in sprint. Phase shift optional or use the hyper phase temp power from Warburg patrol. Note: don't use incandescence while phased 🙂 Stealth toon runs through mission 1 to target area where Yin is captive and warps the team. Buff up and barriers. Once she is freed the Clockwork King and his Court spawn right there on top of you. CK has psi melee in addition to his other powers, direct all firepower on him. Yin teleports away, no need to lead her out. Mission 2: stealth toon warps the team to each Rider group. Famine first as always. Riders all are recolored to look different from each other. The Rider known as DEATH is an AV, the others should be EB's. You will know Death when you see him. Mission 3: Infernia always spawns near the door, team frees her while stealth toon goes to the end of the tunnel where Glacia spawns now. These are fixed spawn points and do not change. Warp team to Glacia, free her and crush the ambushes then move to the AV room. Stop outside AV room, Lores out, buffs and barriers. target and destroy Dra'gon, then lock lores onto K'0ng. Destroy Rikti Vulture monkeys and psi protectors to weaken the giant. Defeat him, mission ends and you get Zookeeper Omega badge Hospital is next to the battle in this mission: go to the hosp if you drop, use the purple lines to exit, then buff up and click the portal in the barrier to enter the fight when ready. Use the green lines to the door that takes you directly back into the fight. Your choice. Mission 4: Ignore the pylons at first and destroy the Mitos. Now destroy the pylons and the dropship spawns. Don't try to shoot it down, no badge and takes too long, just destroy the Hamidon. Recent patch has changed the dropship spawn time, by the time you take down 2 pylons you can expect the dropship to be spawned. Just smash the pylons, then the mitos and then Hami as fast as you can hamidon is altered now in mission 4 on regular, master and star settings. EoE's no longer needed, save them for Hami Raids. Hamidon buff power is a toggle that can be passed to another, either tank or the stealth toon should have it. Turn it on, it actually works now. Mission 5: stealth toon goes to end of map and after the new cutscene warps the team there. Focus fire power ONLY on the Warlord, ignore U'kon Grai. Once Warlord is beaten to about half health the team is pulled into the Ritki starbase. Travel powers won't work except sprint and hover. Follow the green lines on the floor to the main portal, stealth toon can get into it first and after cutscene, warps the team to him. Lores and other pets out, target Honoree as he is linked to the Warlord. Taking him down defeats both and final countdown begins Follow the RED LINES to the exit portal, stealth toon can warp team to the portal. Click the portal to leave and you get the other new badge. If you don't escape you get killed and lose the badge. New things to expect: Tougher enemies, Rikti Scientists open new Volatile portals that spawn hydra tentacles and a Feral Kraken, Portals have approx 5000hp and defeating the scientist will NOT close the portal. Portal closes when Kraken emerges, try to wreck the portal first. New: see new post below for images of the combat stats for Dra'gon and OMEGA K0ng on 4 star setting!
-
Can we post self-congratulatory milestone screenshots?
Voltor replied to EmperorSteele's topic in Badges
Always TWO MORE there are...........