The Beta Account Center is temporarily unavailable
×

Sovera
-
Posts
4844 -
Joined
-
Last visited
-
Days Won
2
Content Type
Profiles
Forums
Events
Store
Articles
Patch Notes
Everything posted by Sovera
-

This Tanker build is good...but could it be better?
Sovera replied to Captain Citadel's topic in Tanker
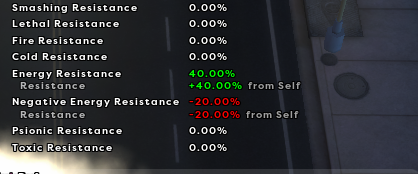
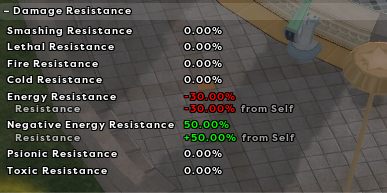
Truer words, my internet friend! I loathe playing melee in any other game. Guild Wars 2 and melee was attempted several times and ugh, boss does PbAoEs, there is a flood of CC happening, particles flying and covering the target so I can hardly see the tells to dodge. So in all other games I am resolutely playing ranged, period, no ifs and buts (butts). But in CoH I wallow in being a meleer and jumping first into groups, taking the alpha, beating up the bad guys. The game lends itself super well to it without a need to dodge crap or manage defensive cooldowns. We can feel the simple aspect of it because of the underlaying idea that there is no trinity. Anyway, I decided to take a stab at this. It did not conform to your request but you can easily change things to your taste: - 40% to Smash, Lethal, Fire, Cold, Energy and Negative with one enemy in range. With four enemies in range you are softcapped which is when we need the extra defense. I personally would take Barrier since it is a permanent 5% defense boost. More importantly it covers your squishies as well. But since lacking in heals (not strictly necessary, I took this to the ITF on a Claws version and the romans did not hurt on +4 enough to heal, and could AFK in the seafood ambush atop the hill in the first mission) you can use Rebirth instead, or go for Ageless to shore your endurance (I would personally use Recovery Serums from the P2W vendor for that purpose. They are cheap and stack up to 50. Very discrete animation and FX so it is not glaring when used). - Slightly overcappd in S/L resistance considering the extra Might of the Tanker procs that will happen as playing. With one stack already at 84% so just one more and hardcapped. Negative/Energy is a tad undercapped but nothing that will make you die. Between more tanker procs and maybe using Barrier for another 5% resistances you'll be at 90%. - Did take Hasten. Remove it and use that slot for something else if you'd like (perhaps Taunt if you like it). Took several Force Feedback procs and again swap for damage procs if not wanting them. - Air Superiority is not great damage but I wanted to pad your attacks a bit so you'd not be having gaps. Regardless I think it fits the theme with your super strong character flicking mobs up in the air and on their backs between Haymaker's chance for KD, Air Superiority's 100% chance for knock up and and KO Blow doing the same. - I was a bit gratuitous with slotting. With Jab and Footstomp on one hand another 30% resistance to slows and recharge is good (80% total). On the other the stats are on the red and the IOs are expensive. Use if desired but it's a luxury. Same with the extra slots in Unyielding and Resist Physical Damage used for just 7% psi resist (I just had really nothing much to spend on). If wanting to keep Handclap those two slots can be used. From my experience you'll be near indestructible with this setup. If you happen to play on Everlasting I can come with my tiny barbarian paladin of FIRE! and compare by smacking stuff together. -
This Tanker build is good...but could it be better?
Sovera replied to Captain Citadel's topic in Tanker
The game is gentle enough to us that we can get away with playing even 'unoptimized' builds and still clear content. We can aim for softcaps and hardcaps, but it will be for fun. Most players don't min max and still go into a TF or a trial and walk out with a victory under their belt. -
This Tanker build is good...but could it be better?
Sovera replied to Captain Citadel's topic in Tanker
Infinitum is definitely your Invuln guru so you're in good hands. I confess I don't mind not having a ranged attack as well. Martial Arts (with the animations swapped to punches) would help a fair bit moving away from the clunkyness that is Rage, and the extra 10% defense from Storm Kick is just generous to reach defense caps. But I can imagine how badly themed it would be for a themed character, even if we don't roleplay calling it martial arts (I mean, I RPed a magic character using radiation blast colored a brilliant white and calling it magic blasts). My one try at Invuln ended up so good it could tackle the ITF without even a heal and just relying on natural regeneration, so after that, yeah, more damage. I still prefer the Fire Armor approach since dead things are not trying to hurt me back and it is sturdy 'enough' despite being one of the squishiest sets but this is unrelated to a themed build. -
When we can buy medium greens between missions just by typing /ah it is usually sufficient.
-
This Tanker build is good...but could it be better?
Sovera replied to Captain Citadel's topic in Tanker
But it doesn't say -when- it will turn red, which was what I was aiming that. If I know I'm going to drop in five seconds and I'm about to jump in then I would rather not spend the next 10 seconds surrounded by enemies while unable to hurt them and with a hefty defense debuff. -
This Tanker build is good...but could it be better?
Sovera replied to Captain Citadel's topic in Tanker
Point. -
This Tanker build is good...but could it be better?
Sovera replied to Captain Citadel's topic in Tanker
All sets care about Rage drop. Perhaps at most Invulnerability since it's such a beast. Don't fall into the mistake of thinking that resistance armors don't care about defense because they do. At 50% base chance for hitting us the mobs gain another 20%. We go from being hit 50% of the time to being hit 70% of the time. When that happens we take more damage and 90% resistances stop being enough. At that point kill fast or be in trouble. Oshi-... Right ,we can't hit things for 10 whole seconds when Rage drops 😄 Anyway, jokes aside, for regular play the Rage drop is not that bad depending on when it happens. If it happens as we go to another pack of mobs and we jump in, debuffed, unable to damage them, then yeah, bad. But if it happens once we are down to 3-4 mobs then its okay. Also teams can handle th mobs even if we can't damage them. The unpredictability of it since we only have a tiny icon without even a timer on it, is what kills the set for me. If I had a nice timer I could just glance and see when the drop is happening I could at least plan around it. But it just happens too often and it's too annoying. No damage -or- defense drop. Not both. Super-Strength is nothing special that it deserves such drawbacks, but like Stone Armor it's an old mechanic. A common trick is keeping Hand Clap for Rage drops. KD with Footstomp, Handclap for CC, whittle away those 10 seconds of waiting. -
EM has poor AoE and its heavy hitter only comes at 38. Oh, hello there Fire Armor... Katana works very well. Hard hitting, nice place for FF procs. Decent AoE. It's main sin for me is that it exemplars like crap with both heavy hitters at 35 and 38. One of those should have been at level 28 to space things out. But if you don't intend to exemplar its otherwise great. Pair it with resistance armors for extra defense (doesn't stack unlike for other ATs) or just ignore Divine Avalanche on a defense based set.
-
This Tanker build is good...but could it be better?
Sovera replied to Captain Citadel's topic in Tanker
Sad as it may be if you're going to ignore Rage you might as well not play Super Strength. The saving grace of the set is Rage and without it no optimizing will save it. Look perhaps into something like Martial Arts (some of the animations can be replaced by crude punches that have no bearing whatsoever with martials arts) or if you can bear the FX then Energy Melee (sadly no FX option). Sadly not much option for super strong animations that don't look like martial arts (Street Justice, even Martial Arts will still do fancy kicks since not all animations can be replaced). I suggest giving Energy Melee a stab and color the pompoms the darkest shade you can, that usually makes FX near not noticeable and you can then RP it as super strength. -
No inspiration used, no clickies either. It was just a test of -res VS damage procs done in a vacuum.
-
Where I have 'damage procs' I have the build I posted. Where I have '-res procs' I have an Achilles in CAK and a Fury of the Gladiator in Burn. I calculated 5-8% by doing a run with -res procs for 5 minutes then see what the AV's HP is. Then do another run but with damage procs. The AV's HP is 30.600 so I deduct the current HP at the 5 minute mark from the total HP and see what percentage of damage I did. I then look at the difference between the -res and the damage proc run and see the % separating both. Looking at Neuron, for example, with the -res run I did 67% damage to him. The damage proc run did 61% damage to him. So without overcomplicating it I call it 5% more damage by having used -res procs over damage procs.
-
Not yet, today was a different set of testing.
-
But... the one who died in less than five minutes and the one who only had 18% shaved off both had the same 5-8% despite wildly different resistances. Regardless and to get to the bottom of it (I hope you appreciate the effort, @Bill Z Bubba!) Neuron: Black Swan: Chimera: Nightstar: Booyah, no wonder 5 minutes of wailing on her was only 18%. Tested on a Martial Arts so all Smash damage. CAK, Storm Kick, Crane Kick, Storm Kick. Burn when ever it is up.

-
But you see this is the testing I am trying to make. I'm trying to ask Bopper if the 5-8% damage boost is 40%+ for the team or not. I have no clue so I'm asking better heads. As my example above giving a boss a 5% damage debuff in WoW means just that. 5%. Not 5% multiplied by the whole raid, suddenly the boss taking 5%x20 persons = 100% extra damage boss. I don't need to tell you it doesn't work that way. The boss is simply taking 5% more damage. IS a single someone with the -res procs slotted actually multiplying everyone's damage? Are they instead giving an additive buff? Multiplicative and additive are not the same. In CoH? -res involved? Who da heck knows. Not me 😄
-
I don't think that the AV's resistances matter. If you look at the list there were quite the opposites of the spectrum. Some AVs were so resilient that after 5 minutes I only took 18% HP. Some were so squishy I actually killed in 5 minutes. But the % of the damage increase from having both -res procs remained consistent averaging a 5-8% damage boost over damage procs. I went to do a quick test on a pylon. Swapping both -res procs for damage procs my 3 minute kill build turned into 4:03 - 4:20 minutes. This is not a 5-8% increase. If I am not sucking too much in mathing it's a 25% damage boost from having both -res procs slotted in. Builds have had pylon testing so ingrained that we now equate -res procs = 25% damage boost, and damn, yeah, for 25% it's defs worth it. 5-8%? Not as much further considering it does not stack. And when tested in a farm map just to somewhat mimic gameplay not involving AVs the times with -res procs did not increase finishing the map faster. Damage procs averaged the same time, with the bonus there would not be non-stacking problems. But this part I can't rely on since Burn loves damage procs so it probably skewed that test. Though it's not super important in itself but building for the 'real world' may be showing that the -res procs are not nearly as important as pylon testing has trained us to think.
-
+4, but +3 with Alpha T4-ed, but that was not the ball court thing, sorry for being obtuse. The test rose from how the use of -res procs became prevalent in builds because of pylon testing. I recently doubted of the effect of -res procs on AVs because of their resistances to -resists and purple patch, which is where this sudden bout of testing came to be. To simplify this my testing showed that two 20% -res procs averaged out around 5-8% in extra damage (not killing time) after five minutes of bashing AVs. The reiterated question is: are those 5-8% just 5-8% in a team of 8? Is it multiplied becoming 5% x 8 = minimum of 40% extra damage the AV takes? My confusion raises from how in WoW (and in other games I'm sure) it's common to bring a class just because it can apply a boss debuff increasing the damage it takes by 5%, but no one says the boss is now taking 50% more damage from everyone combined! It's just taking 5% more. But I have heard it both ways. A 5% debuff means 5% while others say it's 5% X everyone. In this case it's from a -res effect which further muddles things.
-
Y'have the numbers in front of you, man 😛 Sheesh, such utter lazyness makes me proud. Like I said here: I'll throw the ball on@Bopper's court. Does a non stacking 5-8% difference in a team mean the boss dies 5-8% faster, or does that 5% become a 40% damage increase once multiplied by 8 people? I've heard it both ways.
-
All tests are 5 minutes long to smooth the 5% miss rate. Bigger numbers = better. Chimera. - Degenerative 75% chance for DoT and -res procs: 62% / 68% / 72%. 10% difference. Damn you RNG game! - Degenerative 75% chance for DoT and damage procs: 60% - Degenerative 75% chance for DoT, one -res in CAK, damage proc in Burn: 54% / 65%. 11% difference again. - Degenerative 75% chance for -HP and damage procs: 54% The rest of the testing can be found here.
-
Following @Sir Myshkin suggestion I tried Degenerative 75% chance for DoT and was pleasantly surprised at seeing it cut down the map times from 7:20 - 7:40 to 6:40-6:50. While this is a bit unreliable to test since mobs may flock or spread around and etc it may show a nice half term for an Interface choice that serves for 'real' play and AV. The effect is pretty minimal anyway as it takes 7 minutes of fighting to shave 30-40 seconds off. Following @Bill Z Bubba's suggestion as well I found the Praetorian Invasion and used it to test. All tests are 5 minutes long to smooth the 5% miss rate. Bigger numbers = better. Neuron: - Degenerative 75% chance for DoT and -res procs : 67% HP beaten out of the AV. - Degenerative 75% chance for DoT and damage procs: 61% HP beaten out of the AV. - Degenerative 75% chance for -HP and damage procs: 54% Nightstar. This one messes with testing with the constant knockbacks interrupting things. Still, it would be a nightmare to kill it with its resistances: - Degenerative 75% chance for -HP and damage procs used: 25%. - Degenerative 75% chance for DoT and -res procs used: 23%. - Degenerative 75% chance for DoT and damage procs used: 18%. Shadowhunter: ... waste of time, he healed up so a worthless AV to test things on. Chimera. The best I found to test. But not to be taken lightly as he can be quite dangerous by causing defense debuff cascades and messing with endurance. I ended up doing more tests on him. - Degenerative 75% chance for DoT and -res procs: 62% / 68% / 72%. 10% difference. Damn you RNG game! - Degenerative 75% chance for DoT and damage procs: 60% - Degenerative 75% chance for DoT, one -res in CAK, damage proc in Burn: 54% / 65%. 11% difference again. - Degenerative 75% chance for -HP and damage procs: 54% Black Swan: - Degenerative 75% chance for DoT and -res procs: killed in 4:53 minutes. - Degenerative 75% chance for DoT and damage procs: 95%. That's about all I had the patience to test. Poor Black Swan is the runt of the litter and funny enough it is not the living electricity or the android, or the avatar of darkness... but the normal guy with a sword that ends being the most dangerous. Chimera shaves defense like no one's business and then plows through 90% resistances. Pure resistance builds might get owned pretty badly by him. I'm curious as to how a Radiation Armor would do since they at least have a heal and a shield but it didn't look good. The damage procs are invariably last in the testing though the difference is not huge unlike with pylons and it took two -20% to have about 5% better times, but it can be argued it would multiply the damage of the whole team. Small as it turned out to be I personally prefer damage procs for regular play considering they do not stack with other players using them. But this is a personal decision and I'll just leave the data for others to decide for themselves. Degenerative 75% DoT ended up being on par with its -HP counterpart for AV beating but the effect outside AVs while minimal is still almost as much as Reactive 75% DoT who on the other hand has little to no effect on AVs. I did not test Reactive against AVS but since it is half the -res of a single -res proc and it took two of those to give about 5% better times I do not see the point. Edit: I ended up doing one last test with just one -res proc in CAK. I've added the numbers to the list.
-
This is a common tip, but slotting just the Theft of Essence proc in Dark Regeneration turns that end hog endurance neutral at best and a bar refiller if used on a full spawn. It does not work that way for single target, but a Recovery Serum from the P2W vendor (super cheap and stacks to 50) takes care of business on that end.
-
But you see, this is what I am talking about and why I requested tests. From my own testing normal mobs did not die faster from having -res slotted in. Maybe there is some math behind it. Maybe the amount of extra damage we obtain from -res is not enough to account for a 'last hit' and since we have to do a last hit it nullifies the shaving obtained by the -res. I don't do the maths, that's very much Bopper's side of things. Just like you do I merely test stuff, although you did it on a scale that shames my pale efforts. I still remember the -hours- you spent with each build in the proc monster thread. And this is what I saw so far: damage proc slightly ahead or same as -res on an AV where on a pylon it is an immediate 40 second boost. So that's what I'm talking about: testing. Testing clears all doubts and just provides proof. Well, definitely more testing is needed then which is why I did my request. During the week-end I may just set up a mission with a varied assortment of AVs and clear my doubts. One run on one AV is definitely a terrible expression of the scientific method 😄
-
He certainly kicked my butt in PvP 😄 I'm not used to meleers smacking me around but I expect he built for PvP. DM/Rad is super sturdy but calling it a beast might be overeaching. Playing a Scrapper to have Tanker level of damage we might as well play a Tanker. A Scrapper will still be squishy for debuffing enemies. But it will excel at taking down hard targets such as AVs thanks to three heals. Heals just tend to be overrated. It's better to not take the damage in the first place. Invulnerability, for example, lacks all the bells and whistles of Rad Armor and only has one heal in an obscenely long cooldown, but it can AFK in the ambush of ITF's first mission where Rad Armor would be torn to pieces. I personally go full on damage so barely played Rad Armor other than one character to 50 and never touched Invulnerability other than one test once. I have the Rad/MA linked in the first post. It has a ton more bells and whistles and debuff protection than Fire Armor, just not the damage output.
-
You can swap Crippling Axe Kick for Eagle Claw if you'd like, especially now that I'm abandoning -res procs. In its favor CAK does animate faster and I loathe being stuck in super long animations to then whiff. But Eagle Claw has a 33% damage buff lasting 3 seconds. This is long enough to do Crane Kick and Storm Kick (as long as the animation starts within the window of opportunity it does not matter if it finishes when the buff has expired), or Burn and Dragon Tail. Kind of like having your cake and eating it too with Build-Up and a sort of Follow-Up. I personally dislike long animations (nearly 2.8 seconds) but the main reason for taking CAK may be gone so I should test it and see how that buff plays. It's just not a huge buff. For example Burn goes from 363 to 403. Nice to have, but, 2.77 animation *cringe*.
-
Dragon Tail. Despite having low damage it animates fast and takes the Force Feedback proc which speeds everything. Neither EM nor Ice have that and having it in the AoE makes everything recharge faster which means more damage, more AoE. But I'll be honest with you that if you are having fun with Ice then carry on. You don't need to chase the most min maxed version. Then again this is CoH and we have 5k character slots so go nuts if you want to try it. Personally I'm rather enjoying it. With the changes to everything from dropping the heavy proc approach to dropping the -res procs everything feels nice and chunky even in the low levels. Or even more so in the low levels where there is little recharge due to not having access to all the bonuses. And as Parabola mentioned kicking people while wreathed in flames plays well with my aesthetics. I barely restrain myself from macroing 'HURRICANE KICK!' and 'HADOUKEN!.
-
It's surprising they don't seem to have a big effect on normal mobs compared to regular damage procs. It is as you say that the point in slotting them seems low unless more testing with different ATs and power sets changes results.