The Beta Account Center is temporarily unavailable
×


Nemu
-
Posts
1418 -
Joined
-
Last visited
-
Days Won
3
Content Type
Profiles
Forums
Events
Store
Articles
Patch Notes
Everything posted by Nemu
-
Harmless Panda.mxd The thought is that once I have VG the -to hit should cover my melee/aoe defense in range, augmented by weaken and envenom. range defense is the only thing I really need to worry about. Since the power availability revamp you can get VG way early so it works out very well for exemping too. This opens up more room to proc out poison trap/dominate and bring a little more damage to the table. This build was designed to stack -dmg so chemical rounds is always used.
-
The YT build focuses on recharge and only recharge and the reason it's ripping through +4 mobs is because there are no bosses, the user is overdosing on red pills, and the mobs don't really have anything really dangerous such as mez or debuffs in their arsenal. That type of build philosophy is good for vanilla mobs such as those cherry picked for farms, but you will start to see all the blaster holes rearing their ugly heads against anything that brings debuffs/mez to the table. The lack of single target is really going to sting against bosses as well, especially if you follow the slotting on dehydrate which for that build is nothing more than a recharge set bonus mule.
-
It's not immob resistance, it's immob protection. Resistance shortens immob duration, protection lets you shrug it off completely. As a blaster you have some many mez holes, and eliminating one of the more common ones so you don't need to burn a breakfree every time that happens makes CJ a no brainer in my book. Whether you blast an enemy from 15 ft away or 100ft away, as long as they can't melee you it's still range blasting. Mobility is very important on a blaster if you wish to be successful, combat jumping at base level offers superior unsurpassed movement compared to hover. Hover can get there but you are incentivized to take evasive maneuvers which means sinking 2 additional power picks in your build. For those situations where you really need to fly up you can always buy charges of the temp jetpack from the P2W vendor. I don't really see any reason to take the fly pool from a practical non-thematic/concept perspective when those jetpacks exist. Fly provides the illusion of safety until you get grounded and immobilized or slowed in an anti-fly patch. A lot of blasters hover blast, and they tend to stay in one place. When shit hits the fan they die because they don't appreciate how much being mobile contributes to their survival. You don't need fly to minimize contact with mobs, learn to joust. Learn all the tricks of the book - builds, movement, tools, mob AI, etc and you can be successful even on SOs.
-
There's defensive powers and there's active mitigation. You can get by with very little of both if your plan is to team and have survival covered for you by teammates. The less survival you have the more opportunistic you have to be though, and you'll have to make decisions on when to hold back and when to go all out depending on team dynamic and the state of the battle. I think it's great that you want to take the team approach though. Playing a blaster in that setting opens your eyes to the importance of GOOD support and teamwork, and the numerous issues that endanger a glass cannon build that need to be covered for you to go all out. In doing so it may enlighten you on how you can play support yourself to empower your teammates. Staying true to the all damage/glass canon mantra, this is what I worked up. The goals are: High recharge Procs galore Slow resistance Hero Blaster Build plan made with Mids' Reborn v3.6.6 rev. 3 ────────────────────────────── Primary powerset: Fire BlastSecondary powerset: Fire ManipulationPool powerset (#1): SpeedPool powerset (#2): LeapingPool powerset (#3): LeadershipPool powerset (#4): ConcealmentEpic powerset: Flame Mastery ────────────────────────────── Powers taken: Level 1: Fire Blast A: Superior Defiant Barrage: Accuracy/Damage3: Superior Defiant Barrage: Accuracy/Damage/RechargeTime3: Superior Defiant Barrage: Accuracy/Damage/Endurance5: Superior Defiant Barrage: Accuracy/Damage/Endurance/RechargeTime5: Superior Defiant Barrage: RechargeTime/+Status Level 1: Fire Sword A: Hecatomb: Damage17: Hecatomb: Chance of Damage(Negative)40: Hecatomb: Damage/Recharge/Accuracy40: Hecatomb: Recharge/Accuracy42: Hecatomb: Damage/Endurance42: Touch of Death: Chance of Damage(Negative) Level 2: Fire Ball A: Superior Frozen Blast: Accuracy/Damage7: Superior Frozen Blast: Accuracy/Damage/Endurance7: Javelin Volley: Chance of Damage(Lethal)9: Positron's Blast: Chance of Damage(Energy)9: Bombardment: Chance for Fire Damage11: Annihilation: Chance for Res Debuff Level 4: Super Speed A: Blessing of the Zephyr: Knockback Reduction (4 points)13: Winter's Gift: Slow Resistance (20%) Level 6: Combat Jumping A: Luck of the Gambler: Defense/Increased Global Recharge Speed34: Kismet: Accuracy +6% Level 8: Rain of Fire A: Superior Frozen Blast: Accuracy/Damage/Recharge11: Superior Frozen Blast: Damage/Endurance/Accuracy/RechargeTime13: Javelin Volley: Chance of Damage(Lethal)15: Positron's Blast: Chance of Damage(Energy)15: Bombardment: Chance for Fire Damage33: Superior Blaster's Wrath: Recharge/Chance for Fire Damage Level 10: Fire Sword Circle A: Superior Avalanche: Accuracy/Damage37: Superior Avalanche: Accuracy/Damage/Endurance37: Scirocco's Dervish: Chance of Damage(Lethal)37: Obliteration: Chance for Smashing Damage39: Eradication: Chance for Energy Damage39: Fury of the Gladiator: Chance for Res Debuff Level 12: Aim A: Gaussian's Synchronized Fire-Control: Chance for Build Up Level 14: Hasten A: Invention: Recharge Reduction17: Invention: Recharge Reduction Level 16: Build Up A: Invention: Recharge Reduction Level 18: Blaze A: Apocalypse: Damage19: Apocalypse: Damage/Recharge/Accuracy19: Apocalypse: Recharge/Accuracy29: Apocalypse: Damage/Endurance31: Apocalypse: Chance of Damage(Negative)43: Gladiator's Javelin: Chance of Damage(Toxic) Level 20: Cauterizing Aura A: Synapse's Shock: EndMod21: Synapse's Shock: EndMod/Recharge21: Synapse's Shock: Damage/Recharge/Accuracy27: Synapse's Shock: Damage/Accuracy/Endurance27: Synapse's Shock: EndMod/Increased Run Speed29: Preventive Medicine: Chance for +Absorb Level 22: Blazing Bolt A: Sting of the Manticore: Accuracy/Damage23: Sting of the Manticore: Damage/Endurance23: Sting of the Manticore: Accuracy/Interrupt/Range25: Sting of the Manticore: Damage/Endurance/Recharge25: Sting of the Manticore: Chance of Damage(Toxic)42: Gladiator's Javelin: Chance of Damage(Toxic) Level 24: Maneuvers A: Luck of the Gambler: Defense/Increased Global Recharge Speed48: Shield Wall: +Res (Teleportation), +5% Res (All)48: Reactive Defenses: Defense/Endurance49: Reactive Defenses: Scaling Resist Damage Level 26: Inferno A: Superior Blaster's Wrath: Accuracy/Damage/Endurance31: Superior Blaster's Wrath: Damage/Recharge31: Superior Blaster's Wrath: Accuracy/Damage/Recharge33: Superior Blaster's Wrath: Accuracy/Damage/Endurance/Recharge33: Superior Blaster's Wrath: Accuracy/Damage Level 28: Burn A: Armageddon: Damage34: Armageddon: Damage/Recharge/Accuracy34: Armageddon: Recharge/Accuracy36: Armageddon: Damage/Endurance36: Armageddon: Chance for Fire Damage40: Eradication: Chance for Energy Damage Level 30: Hot Feet A: Ice Mistral's Torment: Endurance/Slow46: Ice Mistral's Torment: Damage/Recharge46: Ice Mistral's Torment: Damage/Slow46: Ice Mistral's Torment: Accuracy/Damage/Endurance47: Ice Mistral's Torment: Accuracy/Damage/Endurance/Recharge Level 32: Tactics A: Invention: Endurance Reduction Level 35: Bonfire A: Overwhelming Force: Damage/Chance for Knockdown/Knockback to Knockdown36: Force Feedback: Chance for +Recharge Level 38: Fire Shield A: Steadfast Protection: Resistance/+Def 3%39: Gladiator's Armor: TP Protection +3% Def (All)47: Unbreakable Guard: +Max HP48: Unbreakable Guard: Resistance/Endurance Level 41: Char A: Nucleolus Exposure43: Gladiator's Net: Chance of Damage(Lethal)43: Gladiator's Javelin: Chance of Damage(Toxic)45: Ghost Widow's Embrace: Chance of Damage(Psionic)45: Neuronic Shutdown: Chance of Damage(Psionic)45: Unbreakable Constraint: Chance for Smashing Damage Level 44: Stealth A: Luck of the Gambler: Defense/Increased Global Recharge Speed Level 47: Grant Invisibility A: Luck of the Gambler: Defense/Increased Global Recharge Speed Level 49: Vengeance A: Luck of the Gambler: Defense/Increased Global Recharge Speed ────────────────────────────── Inherents: Level 1: Brawl (Empty) Level 1: Defiance Level 1: Sprint A: Unbounded Leap: +Stealth Level 2: Rest (Empty) Level 1: Swift A: Invention: Run Speed Level 1: Health A: Panacea: +Hit Points/Endurance Level 1: Hurdle A: Invention: Jumping Level 1: Stamina A: Performance Shifter: Chance for +End Level 4: Speed Phase Level 49: Quick Form G6ZkACwK7MbkpAE+MVVz3ruj/hlDqWtRyh6BccvRJmk7Vfp4497t2mbKo0j6iuV7a9My35hNlR5p4wO05C90XFNd31ct4h839BT9v9WjIZkH1hobOc7unSAicv83rflTiodyddYtSISrQu2UzNVSfhJy9KJKqa6r6lA4hUYYnLz/aRl6ToHkHLhbF7xbiT9G8122+8EzkEOOZd7bGRZxo6IXH3uB1zWGLLV9esTNw0aguccYxm8vGwWwQyodAxSZCPA+8HvcE2fybvpE4YMV0pgxTAso3Plj1x+1CkVLxgi+lDgxfbFLGcH4rPak5b8sYXi0qHkdoXuAb8gIUTAm/Ge2sR/+atpqRdWvTkaC/6lodL8qQ3LRN8Pk6loc80d/s8x1sr6yImoTceFVB2B5ZW128lbGYqvR+pIyGcX5L/i/Hfs0HiS0pLdhjCZduQ6LbdLfSIlzPaHYUOnkHZhPnEhfVnljvvQaW3iJVrU0M+s24ajv8cWTt4NBy//q2ezKxOZw3DcaS//gxyDRkIJC3/6U/m/K6ZfMqs28UZlQtT5X8SawHAQisHN5JPD0+RszkQdv18XCUNwKvP/rRu+TSZ9VzLhJXGxl2dQpgl7xDYzKdbFSwhlf0RsoflUon4lshrOEtwJcJdpqXGCsHH1fwZ5lNCO04cifwfnbzMaTeivIzDzyXRmbyu0W1UwtwXIsSD+3Be86YDkkS3vFgteN+MzPlsemfIGx3BxObDZzrto0gsBLfcToyDwp2wq7flHeTweRRwXwl5ild6nvIKjOzWWIFPua8GfagA7t0YeDA1YIyhC9poB7qthwuCqftvNMYh7QpmA77/wRzZtkuH1alrhhkV5zKQu9hZ8bosZYMIRKiNd/bGIF4+yHZnKIXGefJVjENihu/XaTQOHgfNpUg9PW24CXLmoNFsWOsScIZWtiu2OZBz95HU+xiOblTsWrzUny+8lPhDFfyg9jye+/WOqe7Evq4uEPWM38if0Q58tCqX9yJ1lJW3MN/YwCpcjcbo0ZN7fwUgVogsW5KWNxsJM12ytJ/acWTzOHyoPiGGX5zCjtZKt8ogMsh2yjKMzVEsT0/jwanMy9wZc3qGEyatou74ic1UIaIkb90OyfkvNm+6yFBEP6bkdJQywzQ7TbZ56BPBQZHrARpH288iolilIJaXAsdlRkTwjjPRRWjh4Vvw0KyJRpw/N/XyS8FP80inEv7WDB07+9nrqpJGPoLtT4RDvEdvbFeK9DB6oUJLL58Lg3naHJ9HgS4ENYUQXpMcTtXfo9GOXkr9vKIe+f8v8+YcwSiz5JhRRSwU/2xBfKnlkbuYwfZiK2rBCu3oO7X2qPKzq0pCW+wW7YGFu7JAJCBlBy4OloQ0A/XplIFNykVUM3uEuNAR3w8cUzheKZK4NvcjO+CRxeXqBPV2PX945dot17jmmEgfiw40g/3sMBU25JMJtgLC01Vnwa9ZAborhm80cpX9oowTXvKLav2AP94QbHYnvHoteT4WqUKBOaw8vdQlv96bUK+yMp12yUUAj4W4EfgYMFTgFfJRWMLFOwI6qCunU+Eda45bX4/H0sr5/2IcJ4BHBrHpsEKvnpysI1DWZgzY2zRzx0MyyleKg/fwgKibOoRPAOZkhi5C0Z0a+cCZYzPq2g2hGKMSGVA6FI+znB4Di2kHoP4yC/Ndjh88T2I1H27cWHUOuzA36pBRDb0G9UXh6JFLcvPjCf4c65DFW/QCogjhesciiz5RVGg+0dvzAGcoGK7fZhqpaTIVllezutGOYGd/BNd/Pj74/1SaJyHAwkGQt++6sfXipubxnw6FG2HdzD+JjBN0x770S4xYmdtbqFAysT7T6hEgZe+iPXzlMat9jNCoPmsM1BySmv7DxXQ6rQgqsIUVY83RcOWVoG9NNsHgaqoM3lI2SgKUV+aBzOvJTqHdU5gX/A4cf2QAJlDbm6ST35KMibDGbYcTTl0cmMdefm1ueOk3C7STCpl6Vk9IzcMi6bv2rx+HKa64DWWI5feEb1B5vHNNzp/7qLMilJYLNeHYND55yuuNgLlRQzpDISFizEQ2Cs1cpJVM+K4L2hgSN1/oPNoHgbxmNwbe9juBPG6bHY/ni7LYHxbA27KYUZT95ujue4t8gFtiPqfAMZj4P7Q3ykLyxNsAnGX4nVWw4Bam9wnSHKTvUucDW69vYyVGDayudEtsnvzSckDdt+7cIc04Z+Az0Ih3VxX7ctp1R/WK2bPrdA4V+uNXFb1Rb2oPVuGPjoWf3BZoYz2Bmq7S1W+30hliN2OfNWZ6ead5w4Cc3jgNp3B6b+c/QZIR42fJM1GuaJwdPaGTRb5EP5HQdtp+ij/zvmevFZs8HClzXduDAReFDPlfLf4N9BcDtQYUtXo0Eu9Nfpldo0dp5NYw65t9jqkZ+4J6KKBTSG6Iv/EcSWc4MZ/Mqgvu3YczU/yM3tNlSqojCt95608gluUr14dIOhEAtwku/LJ1BNoE/lVdyjKtGXXuWCDfs+vubEKYYFfDQe8RQ6dsPQjwdfm6AluFXa+ixBUDtv9EpxWBu0XNnkEs/dJ2MKwpCcPjyhN5B7K12RPbgSqkDXhsDuRn8AK0S83Ps= Bonfire with a kd proc is pretty OP and it'll give you quite a bit of breathing room to get in melee range for your pbAoEs. I'm not a fan of hotfeet but it does slow mobs down in your rain of fire. My outlook is that glass cannon builds need to move around the battlefield and not plant themselves in one place. Hotfeet basically invites you to do exactly the opposite of being mobile and has a heavy end cost at that. Slows also causes mobs to scatter because they want to run out of the slow field, and that's not exactly conducive to many team strategies either. Finally some players are enamored with hotfeet's ability to do damage but you are a blaster, and a fire/fire/fire at that. What you can do in terms of aoe burst damage makes hotfeet a laughable source of damage. I actually prefer fire breath in place of rain of fire with the exact same proc slotting because it's more spammable and does more damage when spammed over the course of a Rain of Fire cycle, but it does present a playstyle challenge of you having to position yourself every time you need to use it. Good luck, glass cannon builds like these can be very rewarding but it does take a modicum of skill to get the most out of it.
-
If you are still looking for a build it helps to fine tune your requirements/needs. Here are some questions that can better define what is best for you: How do you envision your playstyle for a blaster? Is it: Blast from range, making sure not to get too close to mobs or Mix it up and go into melee and punch stuff as well as blast stuff from range. How comfortable are you with managing survival? Is it: I need a build to cover that for me or I know how to use inspirations/move around/use my toolkit/teammates/game mechanics What do you want to do with the build? Is it: I want to solo +4/8 and other end game content without too much assistance or I want a team build that maximizes my damage potential, let my teammates cover my survival Are there any power picks that you absolutely need because that's going to make your blaster experience more fun? Similarly are there any powers that you don't want? This has not been said before but playstyle and familiarity with the game/mechanics is a significant factor in your success as a blaster. I'd say only 25% of success comes from builds. What most posters don't include with their builds is how they play them and you will find even less posts that cover fundamentals of the game and how to play the game in spite of godly builds. Master the latter and naturally your builds will improve because you will know what to build for.
-
The person who posted that build has consistently shown tendencies towards survival first. It's excessive in my opinion and completely relegates killing stuff fast, which is also a very effective form of mitigation, to the backseat. Whether you feel the latter comment is true or not it doesn't take away from the fact that the build doesn't jive with your goals of max damage, if that's how you measure "the absolute best." The builds in this thread might be more aligned with your goals, if doing max damage is truly your goal. I recommend @Onlyasandwich's build. Just be aware that Max Damage builds sacrifice safety for damage. Look at the progression that the OP took in that thread, from: "I want the highest DPS possible!" to "I'll just turtle up and hover blast." So, is Max Damage what you REALLY want and is what you are going to give up for it something you are comfortable with?
-
Depends on your definition of viable. i27 Page 5 allowed us to take powers sooner so the build can be revised to reflect taking key powers earlier, but as for slotting nothing changes. However, I built what I posted with the OP's goals in mind. He wanted a team build with perma-hasten and I built a blaster with perma hasten with a few powers that took advantage of high recharge. The build has very little defense, the premise is that survival is covered by teammates. Let's define what your goals are, is it: 1 - I want to be able to play aggressively and solo mobs meant for a big team without too much help. or 2 - I want a team build and I understand that I'll need teammates to buff/heal/cover me, but when they do I can go all out and maximize my damage potential. Your playstyle and knowledge of the game may also influence what you consider viable: 1 - I know all the tricks to playing blasters from movement, line of sight, using hard/soft controls from my toolkit, target priority and inspirational use and I'm ok with a build that focuses more on damage than survival. or 2 - I see mobs and I snipe them while standing/hovering out in the open, but I keep dying because everything gangs up on me after my snipe. I'm tired of dying. Most people I see opt for survival over damage. You can even see the OP gravitating towards range defense in his revisions. If you have the same mindset then this build will leave a lot to be desired.
-
Pretty sure power boost boosts the heal in life drain. Surprised that all the people that go bonkers over heals and slot attacks as a heal just because it has a healing component aren't jumping all over this.
-
Once you joust your first inferno, you will never go back. And if you joust your inferno you also solve solarverse' problem. You're not really in melee all that long, and by the time he hits taunt the team would have moved on to the next mob.
-
You may find some stuff here helpful
-
@Frosticus people seem to listen to you. Do Whirlwind next. It's time to bring SPIN awareness to the masses.
-
So first of all my comment about blappers is not a personal attack on you. I'm just trying to highlight the common philosophy around this AT and how it doesn't align with how every other AT is played. I want to do my part to stop perpetuating this fallacy, and my goal is to help you be successful. As for this comment about interesting builds for teaming, you can always try this jank. You won't have the luxury of softcap defenses with this build but it gives you enough tools to do stuff in melee range. Knowing how to play blasters is key, movement is key. As for your comment about using combat teleport - you can't joust with combat teleport. Your mind is in the right place: get in, get out. But where you are most vulnerable is getting locked in animation while you are in melee range trying to fire off that 2-3 second attack. What good is combat tp when you die to retaliation or get mezzed then die during animation before you can use it to get out? Learn how to joust, it is more useful in those combat situations than combat tp. Secondly, combat tp consumes a pool slot. Typical builds will include hasten sometimes just because. Most go tough/weave, some take leadership for more defense/to-hit/Blind protection, teleport could be the last pool consumed. I'd recommend patching up as many holes as possible if you want to dip your toes in melee. Blasters are weak against mez, some like holds/sleep/disorient you are going to suck it up and burn a breakfree on. Immobilize is yet another mez, it's not as serious as the others because you can still attack, but an immobile blaster is a DEAD blaster. Combat jumping is an easy fix, it give you immob protection. In addition, that jump control gives you better mobility for jousting. An immobile blaster is a DEAD blaster, I also recommend a healthy dose of slow resist. Ever get stuck in a caltrops patch or get slowed by psi attacks that neuter your recharge? Blasters depend on mobility and doing damage, if you can't do either you are going to die. Don't skimp on slow resist.
-
You are not, it's a real term that makes range blasting sound like the norm and using your melee attacks an outlier. I don't agree with that at all. Blasters use both their primary and secondary and those that skip their secondary are the outliers, Of all the other ATs can you think of any that promotes skipping half their powerset as the norm?
-
@HjarkiI don't think you are disagreeing with me too much on what I said. I will share my outlook on PbAoEs and what makes /Electric so strong. I do use my pbaoes in the secondary regularly but not all of them are built the same and there are ones I favor and ones I think are doo-doo like atom smasher. The biggest factors are radius, secondary effect and cast time. Lotus drops for example has an 8 ft radius and a meh secondary effect, and it is the doo-dooist of the doo-doo pbaoes because it might as well be a low damage single target attack. Deafening wave is 15ft radius and you can cram hold damage procs galore in that power which makes it the most un-doo-dooist of PbAoEs. And then you have Thunderstrike that has a 10 ft radius, 3 second cast time, doesn't do all that much AoE damage which on paper makes it seem very doo-doo. But it has great secondary effects in AoE knockback (converted to KD) and stun which makes it in fact, not doo-doo and a staple in my /elec kit. Since I'm Fire/Elec I don't get too much value out of shocking grasp as if I were Ice/Elec because I don't have a reliable way of stacking holds, and especially since I slotted Shocking Grasp as an Attack/proc monster I don't get a whole lot of hold duration when I do double stack holds via the Blistering cold proc in charged brawl on a boss. What has consistently allowed me to go toe to toe with multiple +4 bosses is my ability to rotate knockdowns via Thunderstrike and Force of Thunder, and both powers can also stun (not something I bank on). I've espoused chain knockdown when I came back to Homecoming and to date I think people are still underestimating how useful and how fun that is. On my Fire/Elec I have multiple layers for survival - being mobile, kill stuff fast, softcap defenses, chain knockdowns/stun stacking, a hold, and even end drain (which I've used on LGTF against hami to slow down its blasts). On the other hand I also picked Fire/Elec because it has a very fast, high DPA ST attack chain when you look at the cast times on blaze, blazing bolt, charged brawl and shocking grasp. Since Thunderstrike and Force of Thunder both take Force Feedback procs and I spam them regularly as part of my game plan they only feed my recharge rate. More Inferno=more fun. This combination gives me the best of all the worlds - AoE damage, ST damage, Range damage, face punching damage, tankmagery/mitigation, fun.
-
What you call blapper I call just normal blaster. Don't mistake the term with the notion that you can just stand still in melee range punching stuff. There are powersets that help you stay in melee range a little longer, but movement is still key. Someone mentioned mezzes, they might work ok for even con - +2s, When you run at +4 mez duration drops off due to mob scaling, so they are less effective. Hard controls are rather lackluster in the blaster arsenal. And when I talk about controls I don't mean single target, because while you are neutralizing one mob there are 10 others shooting/punching back. I'm not dismissing the value of single target control, but if you look at the big picture you are rarely engaging just a single target, so you need to make sure their friends can't fight back either. Most of the AoE control tools in the blaster arsenal are also slot traps. They typically do low to no damage, and they demand slots to be remotely spammable/effective, so now your slotting decisions are split between doing damage as you should be as a blaster vs pretending to be a really really really sub par controller. There are exceptions, and there are powers that do good damage that also have a control component, but usually the control component has a chance to happen, so they are not super reliable. That said you don't NEED controls to play a blaster. You are an opportunist, and you can either create opportunities to get a hit or 2 in melee or you can leverage your teammates to create those opportunities. Movement is key. Learn to joust and never look back at the days that you thought blaster safety = hover. There are more layers than that. I favor my fire/elec blaster above any other blaster combinations that I've tried and see other people play in game. I've also done dark/atomic where the two sets are at odds with each other because one wants to be at range firing cones and the other wants to be in melee for punches/pbaoes. The former has mitigation in the form of knockdowns which are much more reliable than other forms of hard control because it takes mobs the same amount of time to get back up regardless of level. The latter I just joust a lot. Movement is key.
-
Some areas of your build show a good understanding of stacking set bonuses. With a little fine tuning you can create good builds in no time. You don't need to chase perma-hasten on every build. But hasten is nice for double gun drones and faster recharge nova. That said, don't discount what Force Feedback procs add to your overall recharge rate. The trick is to have multiple powers with it so you can more consistently trigger it. Of all your powers that should get a KB-KD trip mine would be it. You are almost always going to plant it in the middle of a pack and that'll send stuff flying everywhere without killing them. All the other ones you can position yourself to direct the knockback if that's your thing, even Nova. Slot attack as attacks. Dead things don't fight back. Heavy hitters deserve more slots than low damage attacks. Caltrops and smoke grenade are one slot wonders. You have to make a decision between throwing that many slots into these powers vs slotting your attacks so you can kill stuff. You also don't need both power bolt and power blast, do you really use both in your single attack rotation? I'd imagine you have enough recharge to string together power burst, snipe and one of these two. I can see taking both as you are leveling, but as a complete build, you can afford to skip one of those. Blasters need to learn to deal with debuffs and mez, period. Inspiration use isn't a sign of weakness. High defenses help, but a lot of mez bypass those defenses and you have no protection from def debuffs. You can't have it all on a blaster, which is why the number 1 rule on blasters is still "kill stuff before it kills you" even if you decide to invest a lot into survival. Your nuke contributes a great deal to that. That said, stock up/convert insp to breakfrees. Here's a rework of the build. Kb-kd procs are in all the AoEs but attacks are still slotted decently to do damage. Musculature pushes enhancement values on all attacks past ED softcap. When you exemp, you'll have very high range defense by level 30 and S/L/R softcap by level 35. Blaster (Energy Blast - Devices).mbd
-
A build with set bonuses that shoot toward a cohesive goal will be superior to a build with only HOs. However HOs can be used to supplement a build to cover gaps in enhancement values. For example The 2 winter IOs give me slow resistance which is the bonus I want but with 33% damage enhancement on each I'm at 66% damage enhancement and 33% acc enhancement. The Acc/DAM HO pushes those numbers into more acceptable values of 66% Acc enhancement and 95% Dam enhancement. The more useful HOs are Acc/Dam, End/Def/To hit, Recharge/Def/tohit, Dam/Recharge, End/Defdebuff/tohitdebuff. A lot of these serve as the best slotting for one slot wonder powers.

-
Movement I don't like WASD, there's a lot of real estate for your pinky gone to waste when you bind your move keys so close to the left side of the keyboard. R "+forward" E "+left" T "+right" F "+backward" SPACE "+up" ADD "++autorun" X "powexecname sprint" Targeting A "target_enemy_near" Y "target_enemy_next" I click on the team window to target teammates. If it's an buff like speed boost or bubbles I can buff directly via targetting an enemy that the teammate is fighting. Powers Tray 3 is most of my active clicks, this is where I put most of my attacks/bread and butter powers G "powexectray 1 3" SHIFT+G "powexectray 2 3" H "powexectray 3 3" SHIFT+H "powexectray 4 3" J "powexectray 5 3" Q "powexectray 6 3" S "powexectray 7 3" W "powexectray 8 3" B "powexectray 9 3" U "powexectray 10 3" Tray 2 are for buffs such as build up or heals or long recharge powers such as nukes Z "powexectray 1 2" usually aim D "powexectray 2 2" usually build up of a self heal SHIFT+Y "powexectray 4 2" usually my nuke SHIFT+U "powexectray 5 2" usually my incarnate nuke N "powexectray 7 2" set for whatever I occasionally use The default tray is where my travel powers/incarnate/team buffs like shields sit. Slot 9 is reserved for my travel power/jetpack. 0 "powexec_slot 10" 1 "powexec_slot 1" 2 "powexec_slot 2" 3 "powexec_slot 3" 4 "powexec_slot 4" 5 "powexec_slot 5" 6 "powexec_slot 6" 7 "powexec_slot 7" 8 "powexec_slot 8" TAB "powexec_slot 9" Misc \ "popmenu start" I built a pop menu to load my default settings Inspirations I normaly just click on the inspirations myself F1 "inspexec_slot 1" F2 "inspexec_slot 2" F3 "inspexec_slot 3" F4 "inspexec_slot 4" F5 "inspexec_slot 5" Mastermind binds - I find the numberpad binds overly complex and not necessary for 99% of content. I tend to focus fire and control all my pets at once, so the tiering is not useful to me. G "powexectray 1 3$$petcomall attack" V "petcomall dismiss" X "powexecname sprint$$petcomall follow defensive" J "petcomall goto" I do use a set of rotating binds for buffing mm henchmen that lets me use one key to apply both buffs. I also use rotating binds for my kheldians but the core control binds don't deviate from my default binds listed above.
-
I'm really confused about how Frigid Protection works...
Nemu replied to Story Archer's topic in Blaster
Most ATs would die to have an endurance sustain that blasters have access to. Slotting it means you rarely have to worry about endurance issues. Others may disagree, a lot of players will overlook everything else a power does and focus only on healing if a power has a healing component. My advice is don't get too hung up on heals on these sustain powers, it won't save you. Slot it for endurance recovery, it allows you run more toggles such as tough/weave/maneuvers and those help you a lot more than a measly 35hp/second bonus to regeneration will ever accord you. -
Hi Sakura Sun, happy to help! First let's define the scope and the game plan: As I mentioned in game one of the easier routes to bump up your survival is building for defense. If your primary playstyle is ranged then high range defense is a good build goal. Accelerate metabolism is a cornerstone buff and people gravitate towards making it perma when building radiation emission. The build in the screenshot is primarily focused on recharge and damage via damage procs. But it has questionable omissions in IO sets such as the other Defender Archetype Origin set (Superior Vigilant Assault) that gives 10% global recharge at just 3 slots. One thing it definitely does not have is the kind of survival that aligns with your goals. My mids export is erroring out so I'm attaching a build via PDF. This version is the "no expense spared" version Expensive Rad Rad.pdf On Page 4 you will see the stat breakdown. Notice the 45% range defense - that's the softcap for most content and it means most mobs will have only a 5% chance of hitting you with a ranged attack. Notice that on top you also have 74% smashing/lethal damage resistance, which is the most common damage type in the game. Notice further down you also have 85% recharge resistance, which means that enemies that apply slows will not instantly neuter your powers recharge timer. This is especially important for accelerate metabolism, as your endurance management depends on it. Hasten and Accelerate metabolism are both perma and you will have one hard hitting single target hold in dominate. The downside to this build is that it uses quite a few expensive Winter IO sets and Purple sets. If you work up the budget it can be something to work towards. Alternatively you can accomplish similar survival/recharge goals without the slow resist through much cheaper IOs: Cheaper Rad rad.pdf The cost difference between the two builds is around half a billion inf. Performance wise, you will start feeling "super" with the cheap version.
-
Do you use your melee powers as a blaster? If no there's no advantage to fire/fire compared to fire/ice. In fact Fire/ice is better because it has more tricks to keep you safe. If you do use your melee powers often and fight big pack of mobs all the time then fire/fire is a good fit. All fire/fire has is damage and if you don't pay attention and/or don't have support you'll die a lot. The fire epic is the pool of choice for range blasters, bonfire with a kb-kd IO is pretty OP. Bad blasters also swear by rise of the phoenix. Fire/fire/fire is thematic and that's why a lot of people play it, similar to ice/ice/cold and elec/elec/elec. Rarely do these samey combos have synergy outside of theme. There's also something to be said about diversifying your damage types. Having said that, there's no reason why you can't keep your fire/ice and still level your fire/fire. The game overall is pretty easy and even the 2nd best or 30th best combo can still hang with the rest and contribute.
-
I would drop static discharge, between psi scream, shockwave and howl you have a full cone chain. That lets you fit in evasive maneuvers for more air mobility. If you plan to take advantage of powers that puts you in melee range you are better off dropping the entire flight pool, pick up combat jumping + super speed and learn to joust. Getting stuck in animation right in the middle of a pack while you are trying to fire off a 2 second AoE is a great way to get yourself in trouble even if you do build for defense. When I see people asking of build help, 90% of the time it's not the build that'll take you to the next level, it's understanding game mechanics. A quick glance at your build tells me that you are probably not at the ranged defense softcap despite the artilleries. You most likely don't have 95% chance to hit +4 mobs either. Recharge looks low for a secondary whose endurance/HP sustain depends on recharge. And as I said you can redirect those slots into static discharge into your other cones. Going 5 slots deep into luck of the gambler just for some S/L resist is also not the most efficient use of slots. For a cookie cutter template I would pick up scorpion shield and build for S/L + Ranged defense. It's possible to still melee blast with pure range defense and a resist shield but that's where mobility becomes even more paramount because you will have to constantly move to trick Mob AI into not meleeing you. If you don't want to do that, then keep a steady supply of lucks, pop one or two before you engage and convert others into purples in your downtime. Here's a quick workup of what a cookie cutter build focused on S/L + Range defense looks like. I always try to keep a healthy dose of slow resist as well, and it's pretty important for Mental Manip. Any slows will neuter the recharge of drain psyche and that's a significant part of your survival on top of your defenses. Sonic Mental.mbd If you want to squeeze more procs in then you'll have to sacrifice defense. A common strategy is to build towards 32.5% defense so that one luck softcaps you. That gives you a bit more room to fit procs in. Just remember if you are going to proc out a hold you still need enough ACC bonuses to make sure it hits. However, based on your comment about catching a lot of aggro, I think you are better off with the cookie cutter template till you learn all the blaster tricks of the trade.
-
You guys are way behind on the Axe trend. That was very 2020. Now whirlwind is the new cool. Don't miss out and pick up whirlwind today!
-
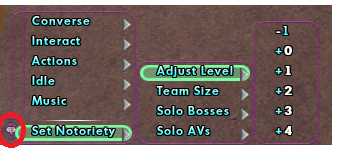
It depends on how far you want to dial up the difficulty. You may or may not know this but you can set your difficulty. There's a speech bubble next to where you type in chat and you can set notoriety and select mob levels in missions relative to your level and the team size. You should have no issues with SOs with the default difficulty level for the most part. It's when you ramp up that you'll start noticing your survival taking a hit. However if you team a lot then your teammates can help out in that department.
-
I have seen a fair share of panda hate I must say. A lot people out there want to make panda steaks. That's constitutes a hostile work environment people.