We are aware that the servers are down and are working on a solution.
×

PsiBug
-
Posts
107 -
Joined
-
Last visited
Content Type
Profiles
Forums
Events
Store
Articles
Patch Notes
Everything posted by PsiBug
-
I am attempting to track them down to suggest such a thing. Possibly they may be laying low to avoid unwanted celebrity. New changes will probably be implemented soon that will render this quirk unnecessary. Additional observations, an immunes surgeon in the mission teleported, which is not typical immunes surgeon behavior. I'm not sure if that indicates the additional abilities of incarnate cimerorans, or if it suggests the foes in the mission were "reskinned" CoT or Skyraiders or some other faction with teleporting members. I'm pretty sure I read about such happy bugged missions somewhere else. or I might be thinking of the bugged (?) mission that gives Void hunters (an "odorous cloud" or something like that). Hardcore badgers may benefit from checking any blue radio, or tip or regular missions in the lvl 50 range that might be temporarily ahead of the incarnate cimeroran curve.
-
Hi, the mission was in Peregrine Island. I suspect it was a radio mission that used to be some other villain group but got changed to incarnate Cimerorans due to some kind of unexpected programming coincidence when the new content was added. The mission is in a cave and contains a glowie (if you have the mission, do not click the glowie or you will complete/lose the mission).
-
Hi, For the Legatus badge, (defeat 100 incarnate level Cimeroran traitors), there is at least one blue side mission that currently has them. I believe it is a radio mission (or possibly a tip mission) and the mission objective is "Get the Neural Scrambler". It is possible that the mission owner would have had to acquire the mission before the introduction of the new badge, as the mission may have been inadvertently (or intentionally) changed with the addition of the new badges and associated updates. A generous player invited my to join for the badge. About 81 traitors in the first run then the remaining 19 after a reset. I don't have permission to give out the player name, but check your alts for an old level 50 tip that might involve a neural scrambler or Cimerorans. =:Psibug
-
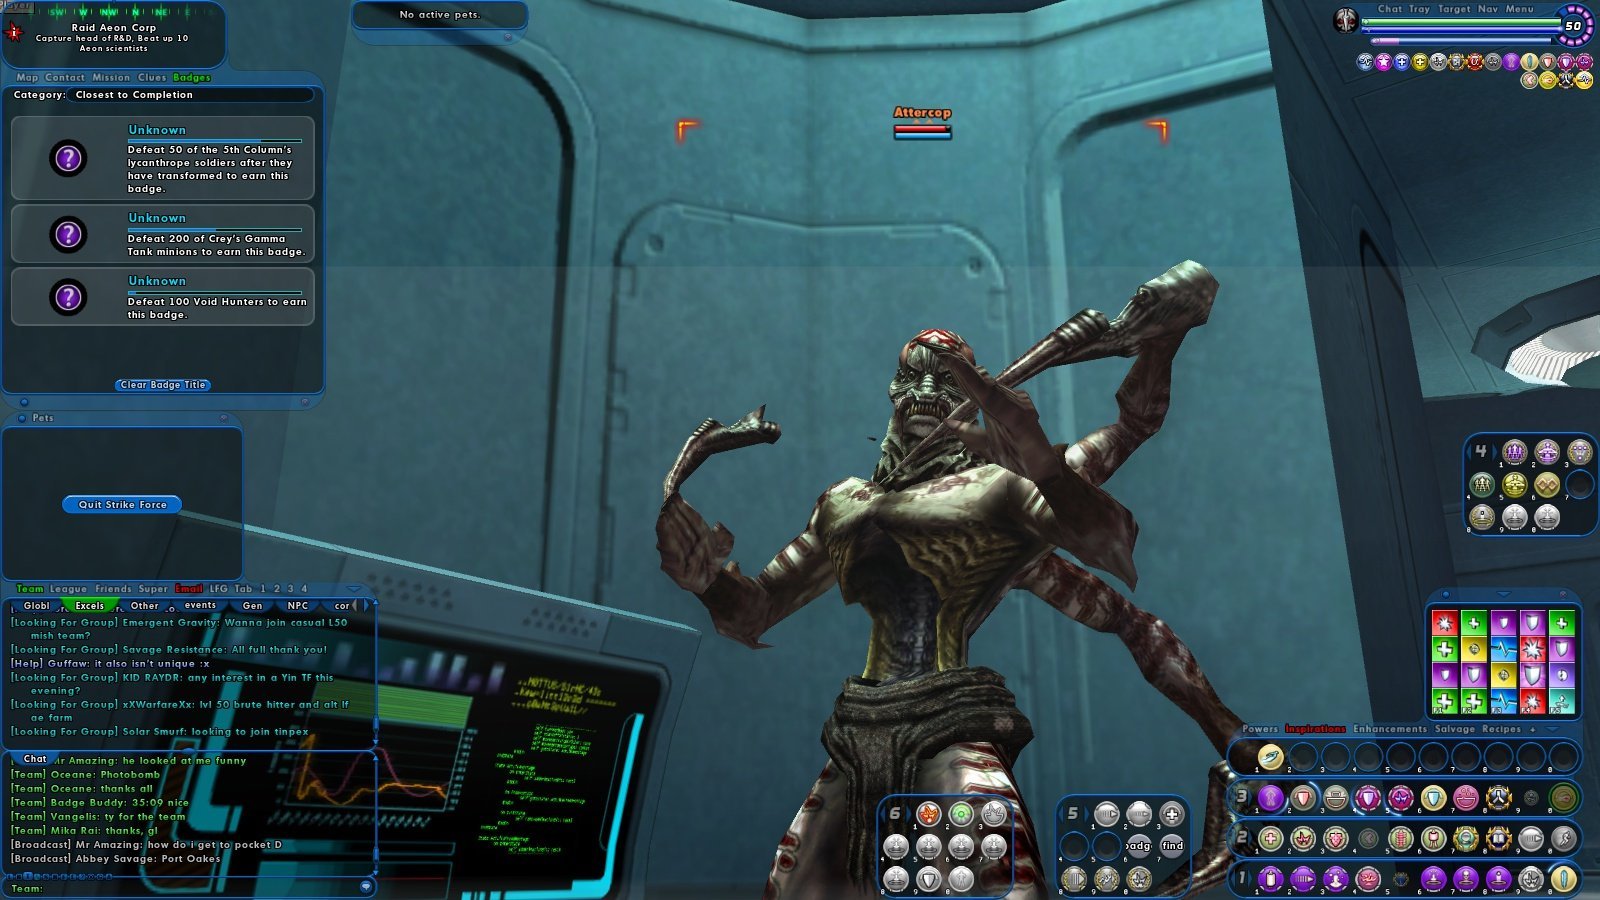
Dr Aeon SF... little alcove... scientist transforms into large, hideous arachnoid called ATTERCOP! OH THE HUMANITY!

-
Solo-Old-LRSF from ouro, is it harder then Regular LRSF ?
PsiBug replied to xeaon's topic in General Discussion
If you choose "old school challenge" as your difficulty setting (which is necessary for the new badge) I believe the EBs all become AVs as they were in the olden days. Without that setting, the old SF has some newer game mechanics applied to it (I think). <EDIT: Looks like the main effect of the "old school challenge" setting is disabling incarnate powers and enhancement set bonuses. I've made a few incomplete solo attempts, but I don't actually have a clear recollection or any specific notes about the EB/Hero conversions during those attempts compared to the team runs that I have done.> =:Psibug -
Hi, Edit: Operative Grillo's "Escaped!" arc seems better than Regent Koral's arc mentioned below, and is level 50. Regent Korol's arc ("Countess Coup", the first redside arc in Ouro in the 40-45 range, I believe) is virtually solid Crey tanks as long as your difficulty setting is high enough to ensure the foes are all level 46 or higher. It's a very good source for Gamma tanks. I just ran it at +1x1 and x2 and it seemed as though there was a gamma tank in pretty much every group. Note: first mission is timed at 75 minutes in an Arachnos base, but the rest are untimed if you like resetting stuff. The second mission is especially good if you are a flyer, because its in one of those big open freighter ships. Double reminder: be sure to set your difficulty high enough for lvl 46 or higher foes to spawn, otherwise you get some silly lvl 45 Crey people in suits instead of all tanks. =:Psibug
-
(This post mostly reiterates information that has been provided in previous replies) The times I have gotten the Can't Touch This badge, there have been two team members staying at range, not fighting, in the furthest corners from the rest of the team (in the same room). Those two players had the responsibilities of staying out of the blue patches, and staying far from Midas. It probably helps for everyone to have sprint on and no one should fly. It helps if everybody tries to watch for the blue beams and everybody needs to understand the difference between a safe distance from the beam and "not quite far enough". A recent failure may have been due to pets running too far from the damage dealers, so the team may want to consider no pets during this portion. I suspect a reset is possible as long as Midas has not yet been defeated, but I have not confirmed that. =:Psibug
-
NAMED VAHZ BOSSES: As Jaktar and Ukase (and possibly others) have mentioned, if you are having trouble getting the named Vahziloks in the abandoned sewers, clear the room.If necessary, run a couple hundred yards away to let the room repopulate and you'll probably get them pretty quickly. Regarding GAMMA TANKS in Janet Kellum's Arc: Her arc maxes out at lvl 45 I believe and Gamma's start at 46 so be sure to set your difficulty high enough to spawn lvl 46 crey in those missions (for example if you are lvl 45, set your difficulty to +1).
-
Yes, in the SG settings form, there is an auto demote setting that I think is 15 or 30 days by default. I think you can set it for at least 90 days or maybe longer. =:Psibug
-
Hi, After about 6 failed MoEden attempts, mostly failed due to defeats by Crystal Titan footstomps, I decided to try an all-fly MoEden. I recruited a Pick Up Group with only the requirements of: A) one member needs to be a tank please and B) everyone needs a fly or hover power (including temps) please. I got lucky with an attentive and patient team which is probably the most important factor. Ice tank, controllers, corruptor, defender, one MM and a sentinel I think. I planned to do three attempts so I told everyone to just try to stay alive and not sweat the deaths. Well, they swept through the early parts pretty easily which is not unusual. We cleared about 1.5 bridges to ensure 2 or more ambrosias each (including some brought from previous attempts). Then, after the mold wall, instead of taking the time to clear anything around the titan, we just gathered in front of the titan, all flying/hovering. I asked that the tank use an ambrosia and head to the left side at waist level (of the titan) or higher, and after a few seconds, everyone else ambrosia-up and head to the right side, higher than the titan's head. The titan went down smoothly in a reasonable amount of time. No teammates perished. The word "amazeballs" may have been used. The Devouring earth from the Titan room swarmed a bit but we just chipped them off, freed the heroes and got the badge. Thank you team. More knowledgeable players than myself may have additional safeguards to suggest, but if you are having trouble with this badge, I recommend the tank+ fly strategy. Thanks team! =:Psibug
-
How can I change my face to a custom face model?
PsiBug replied to noneofyourbusiness11's topic in General Discussion
Thanks! That link, in my previous reply above, is another thread right here in these forums (forums.homecomingservers.com). You can find it in the Tools, Utilities, and Downloads section of the forums if you want to check it out. (Or if you were referring to the ourodev link in the other thread, the user that posted it also posted an updated working link in one of his later replies I believe.) I was able to use GIMP for some vidiotmap editing but the resulting zone maps would not work properly in the game if I recall correctly. Thanks again! Do you know if there is an available plugin for handling .dds files? (in Paint3D) Worked on an emblem tonight among other things. Chest emblems seem to follow the same steps and use the same settings as the face texture tested in the previous reply: =:Psibug
-
How can I change my face to a custom face model?
PsiBug replied to noneofyourbusiness11's topic in General Discussion
Getting back to the original question, if you get into the process of adding a custom face image, you will need to extract one of the existing face textures (preferably one of the larger more detailed ones.. and one that you will not be using on any other characters, and one that is gender correct for your in-game persona), pull out the .dds file, open it in photoshop or some other image editor that handles .dds files. You will see at this point , that the face textures in the game are warped in a way that makes them look a little weird when not wrapped around a 3d model. You will probably need to copy your face image into a new layer of the face texture in the .dds file and try to warp yours image in a way that approximates the original face texture. in other words, make the eyes, mouth and nose of your new face line up with the eyes, mouth and nose of the original game face. Then go the the remaining steps mentioned in the previous reply to recombine everything back into a texture file... and test it in the game. That may seem like a lot of confusing gibberish, especially if you don't have a lot of image editing or 3d experience, but if you just take it one small step at a time, like I did, hopefully you can sort it out. Otherwise reply here with questions and I will try to get you on track. =:P (Psibug) -
How can I change my face to a custom face model?
PsiBug replied to noneofyourbusiness11's topic in General Discussion
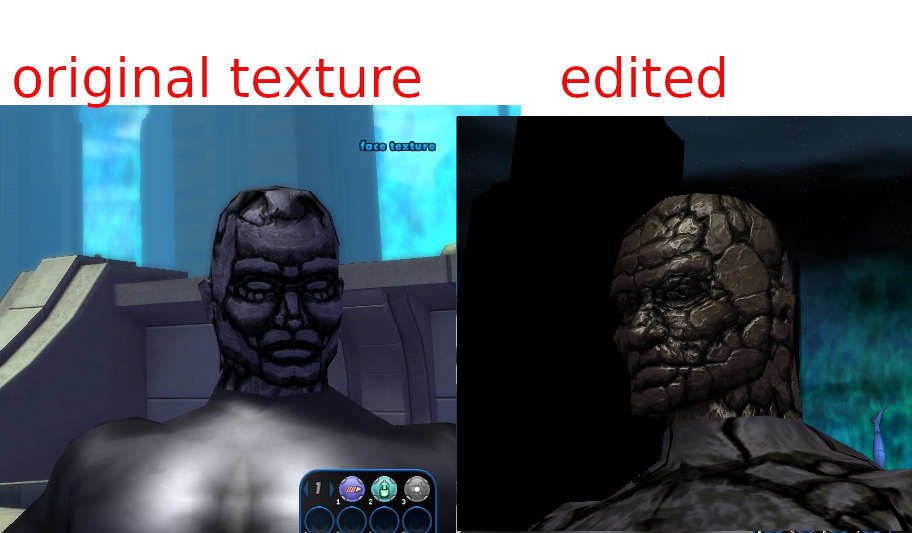
Hi, Here is an example of a face texture that I extracted, edited and imported back into the game. Got the bump map working too by saving the same image with "normals" settings. Things are kind of hectic here, but I'll try to come back and provide more detailed instructions with screenshots when I get caught up on my paid work. I'm going to attach the edited texture files in case anyone wants to test drive them. The correct folder location for the two files will be <your CoH folder>\data\texture_library\V_PLAYERS\AVATAR\Male\Face\CoH_Converted (If you have videotmaps installed, you will probablyalready have that data folder. If that whole directory structure does not exist, I think you can just add it.) =:Psibug v_face_Stone_01.texture v_face_Stone_01_bump.texture
-
Finally sorted out how to successfully edit and replace face textures in this other thread: Same steps seem to work for chest emblems and other costume pieces, although I have only tested a few pieces so far. Hope that helps, =:Psibug
-
How can I change my face to a custom face model?
PsiBug replied to noneofyourbusiness11's topic in General Discussion
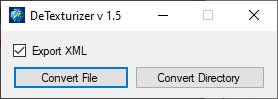
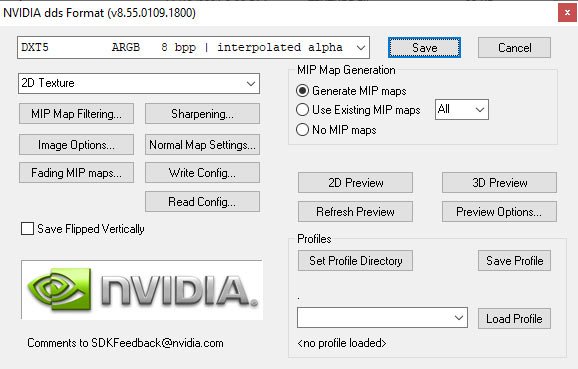
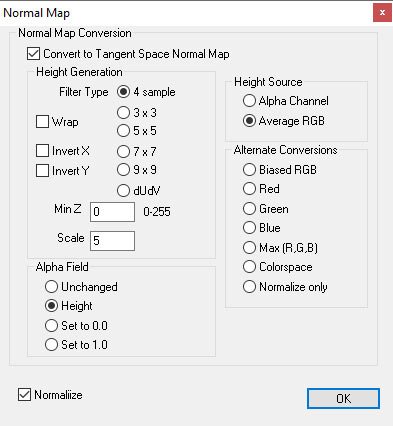
UPDATE! I revisited my face replacements, and solved some of the problems that I had been encountering. I have successfully extracted a face texture, edited it and returned it to the game in a way that functions correctly. 1) If you do not already have the tools mentioned in this post, you can visit the thread linked in my previous reply to download them. You may also want to take the time to read the other thread(s) in order to absorb some of the relevant information discussed there. I also did some simple googling to find youtube videos or other tutorials that helped me find my way through this process. 2) Run Pigg Viewer Pro, use "Open Directory" to open the pigg folder in your game directory. Expand the folder structure in the left pane of Pigg viewer pro and scroll down to texture_library/players and v_players, then locate and preview the male or female face texture files. After you select a texture file that you wish to replace with your edited face texture, right-click the texture file name in the left pane and select the option to extract the texture file. Save it to a folder where you plan to save your work-in-progress files. The finished file will eventually need to be copied to a specific folder named "data/texture_library..." inside your CoHchat directory, so look at the texture file location in Pigg Viewer Pro and create a matching directory structure in your working folder. 3) Run Detexturizer , and with the XML file option checked, click "convert file to locate and break the .texture file into an image (usually .dds) and an .xml file. 4) Use nVidia's .dds plugin (download info is in my previous reply) to import the image into Photoshop. I did this by locating the .texture file in windows explorer, right-clicking it and selecting "open with... Photoshop". An nVidia dialog box should appear. The import option I used was "convert to 8bit" and I did not select the option to import mipmaps. The mipmaps will be re-generated during a later step. 5) Edit the image as desired. Good idea to save the a copy of your edited image (plus layers if applicable) in a lossless format such as .PSD or the native format of whatever image editing software you are using. Remember that the final output image needs to have the resolution and dimensions as the original .dds file. Be aware of the Alpha channel. many of the face textures have a 50% alpha channel (this apparently allows skin and mask colors to be applied) and the eye areas typically have 0% alpha. 6) Save as .dds using nvidia plugin. Use the dxt5 ARGB 8 bit (not dxt5_NM) save setting from the dropdown list. Also select the option to create mipmaps. The new .dds file should be same file size as original, and should have the same name as the original .dds file. 7) ( if you want to keep a backup copy of the source file, delete or rename the original .texture file, or move it to a folder called "source files" or whatever folder name you prefer). Run Detexturizer, with file type: "XML Files (*.xml)" selected in the dropdown menu in the lower right hand corner of the file location window, to locate the original .xml and recombine it with the new .dds into a .texture file: Again, you should see that the new .texture file is the same size and same name as the original .texture file that it will replace in the game. 8 ) Copy the new .texture file to the ...<your city of heroes game folder>/data/texture_library... folder location that matches the directory structure where the original .texture was located in the pigg file. (Completely exit the game before adding new files or the game will crash.) 9) Run the game and test your new texture. 10) If the texture you are editing is paired with a bump texture, you can edit and re-save the bump texture as a .dds pretty much the same way with the correct _bump file name and the same file settings PLUS the following settings under the "Normal Map Settings" button on the nvidia save window. =:Psibug
-
How can I change my face to a custom face model?
PsiBug replied to noneofyourbusiness11's topic in General Discussion
UPDATE: I worked out the issues I was having and can now replace face textures successfully. I had some success replacing some of the older smaller face texture files using the resources mentioned in the following thread: =:P -
Seems like there are a variety of issues that can cause this symptom or similar symptoms, particularly with Windows 10. In addition to the suggestions above, 1) If you have other applications running in the background, you could try closing them. 2) If you have applications pinned to the task bar, you could unpin them test to see if the problem is resolved, and then pin them back. There is speculation that certain pinned applications may cause the symptom. 3) Some people have written that restarting explorer.exe resolves the problem. Presumably this is done using ctrl+alt+del to bring up the Task Manager and finding explorer.exe under DEtails tab. End task then start task (?) I don't know if that's something that's considered safe to do. 4) If you have unread windows notifications, the notifications icon in the task bar may be pulling focus and keeping the task bar visible. In addition to simply clearing the notifications, you can change some settings in the windows notifications section of your system settings to stop incoming notifications from various sources. I think this was the solution that worked for me a couple of years back. =:P
-
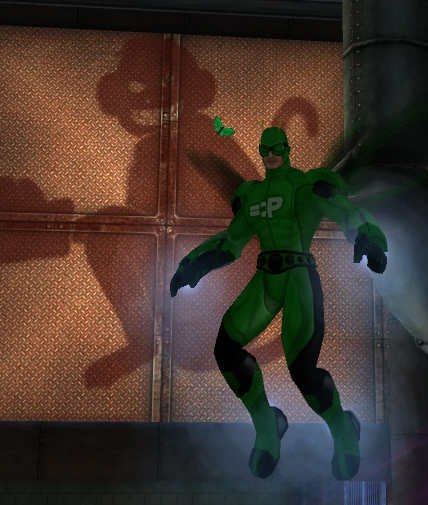
Glowing costume parts and other luminosity maps displaying incorrectly
PsiBug replied to PsiBug's topic in Help & Support
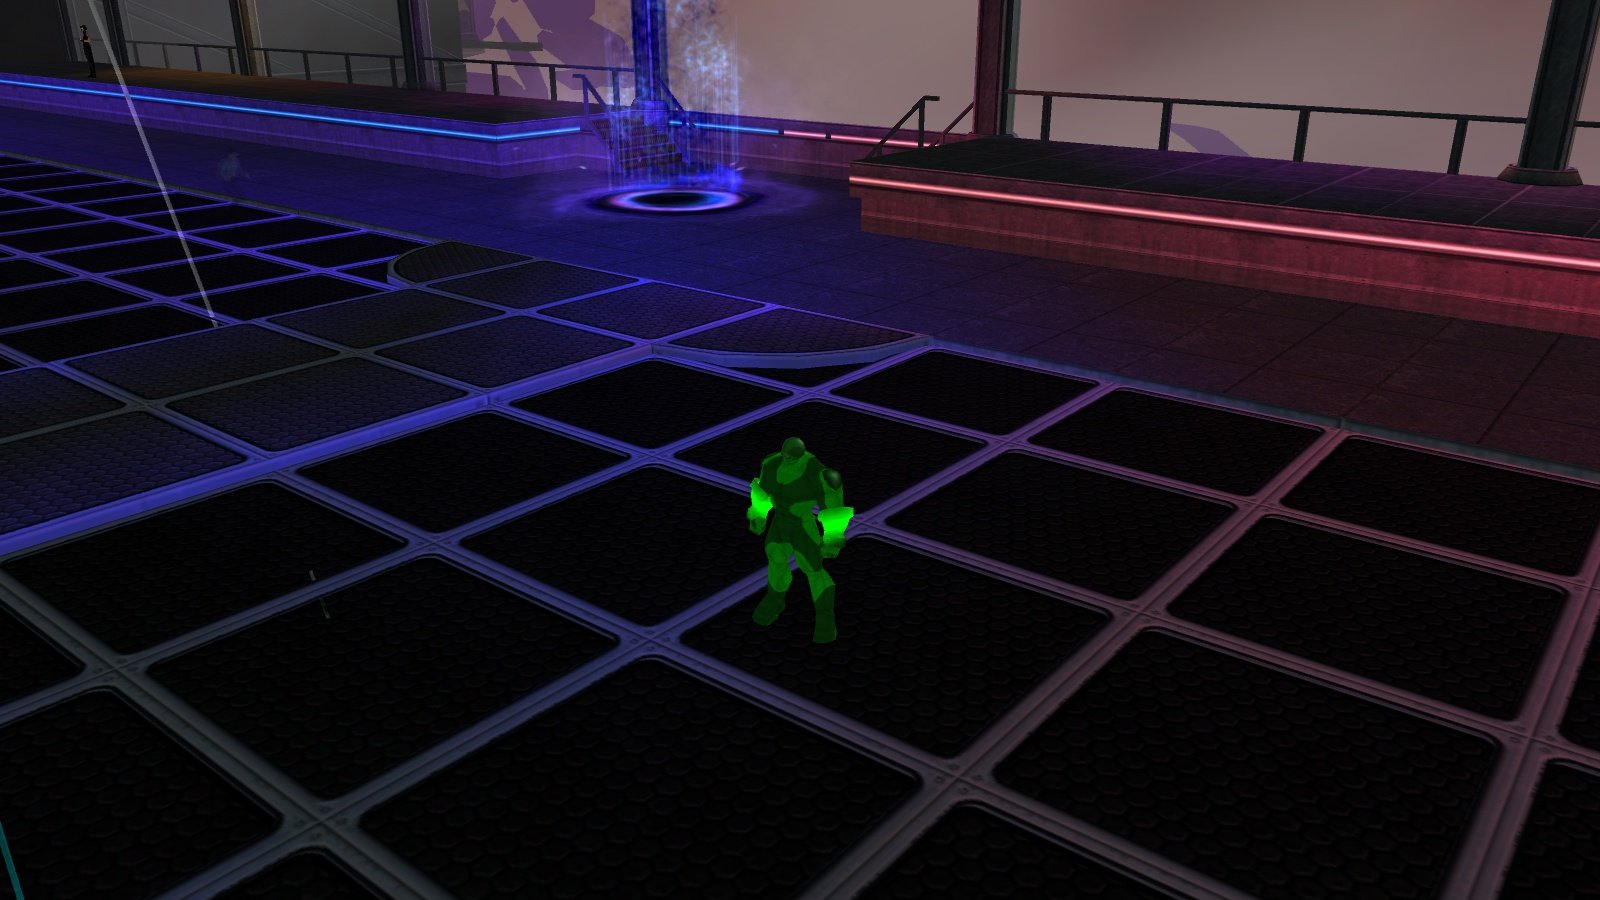
I Located the setting that is not working correctly for me. Advanced Graphic Settings> Shader Quality: Set at very low or low (with or without world bump maps)---> No glow effects at all on glove (I assume this is working as intended?) set at medium---> the glowing details display incorrectly (entire glove glows, instead of just the circular glove details) set at high---> glove details glow correctly (working as intended) (With advanced graphic settings disabled, all settings under that particular slider seem to work correctly.) Screenshot showing glove details and pocket D dance floor displaying correctly (Shader Quality set at "high"):
-
Glowing costume parts and other luminosity maps displaying incorrectly
PsiBug replied to PsiBug's topic in Help & Support
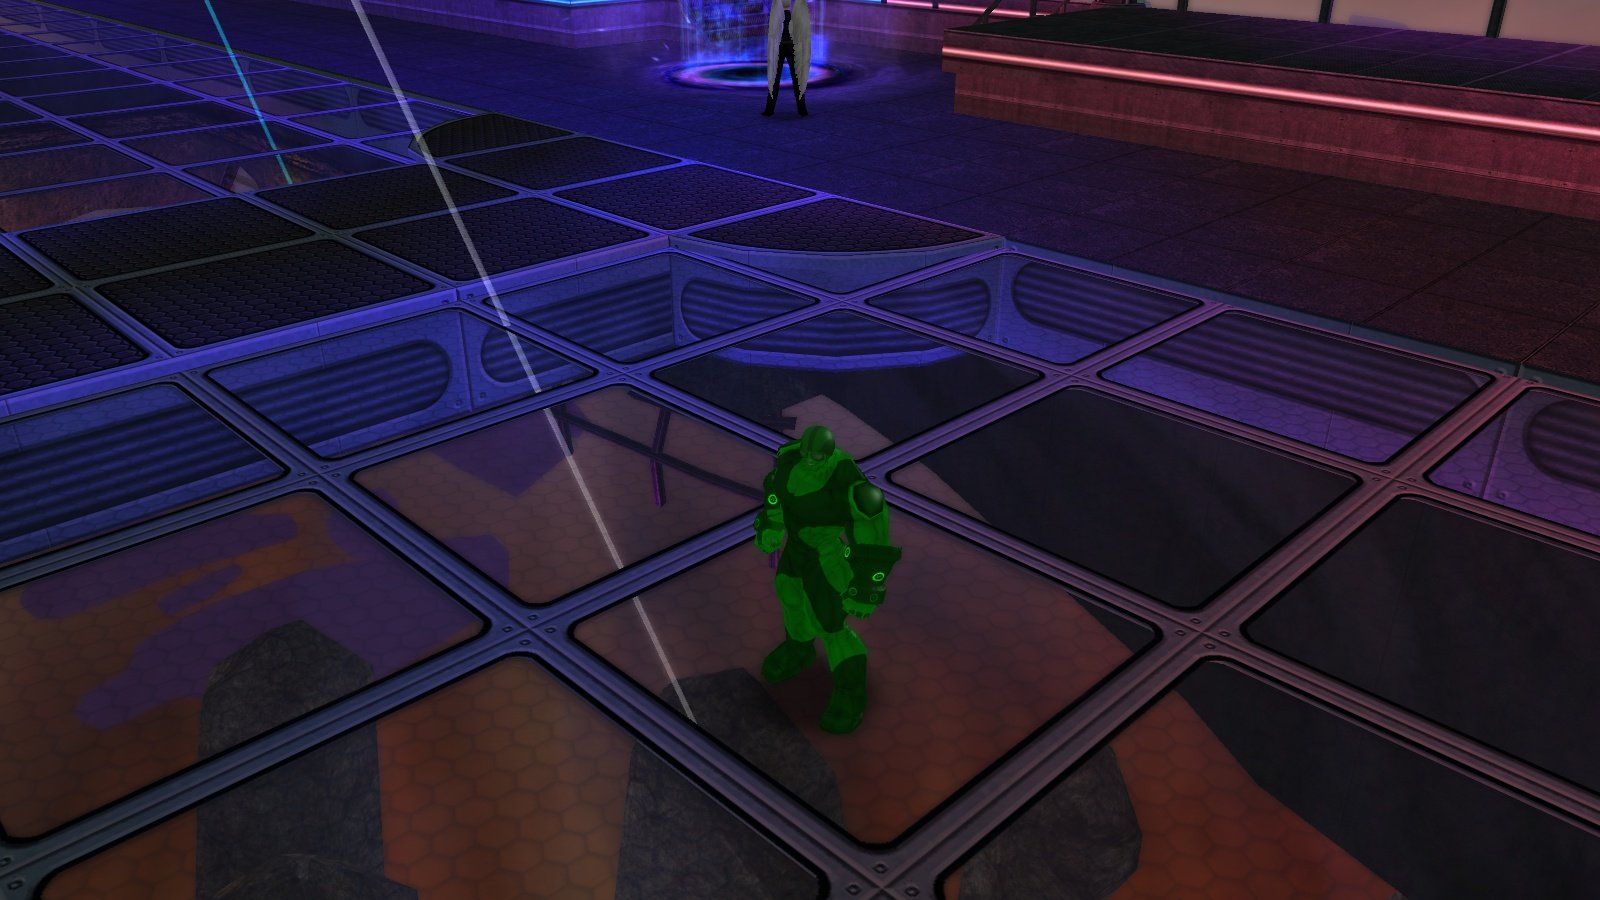
Here's an example of costume part not lighting correctly. Only the small circles on the gloves should pulsate with light, but instead the light pulse animates over the whole surface of the gloves. (you can also see the dark black below the pocket D dance floor although the view through the side windows of the club displays correctly.)
-
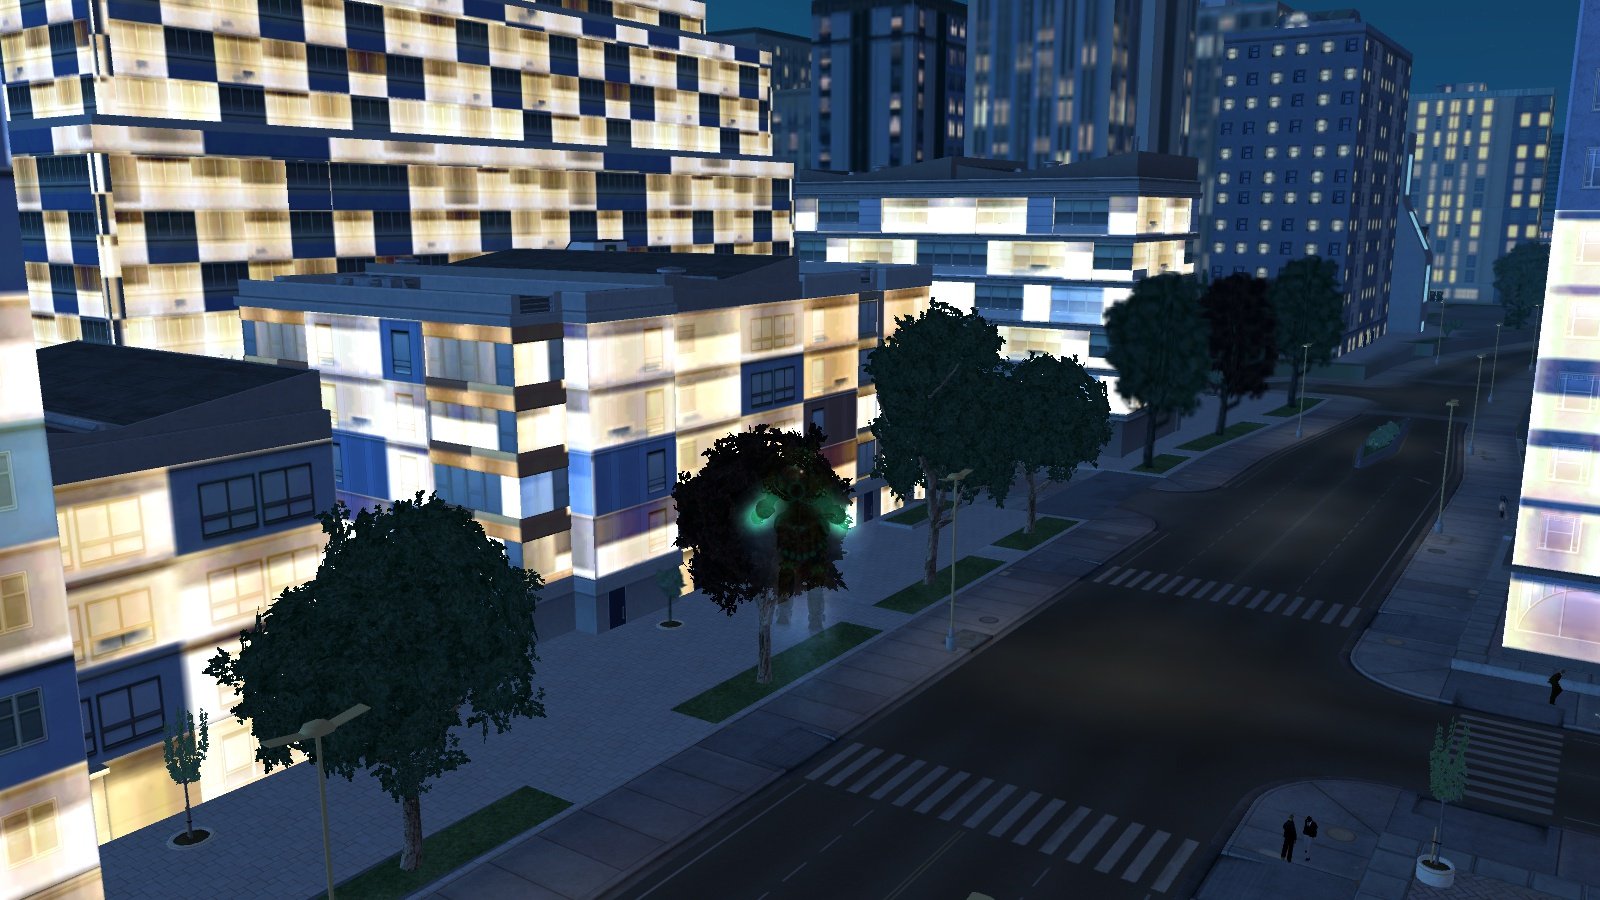
Hi, (( UPDATE: a particular setting has been identified as the cause of my problem in my second reply below. If a moderator feels that this qualifies as a BUG, please feel free to move the thread to the appropriate forum folder. )) For about the last month, I've been experiencing a symptom that I believe is a result of some of the luminosity maps, or alpha channels, in the game displaying incorrectly for me. The symptom only occurs on my desktop computer and not on my laptop. For example, at night when windows light up, I see entire sections of wall light up instead of just the windows: Some gloves and other costume parts that should have glowing details, instead glow all over. Beneath the floor of pocket D it is now pitch black instead of the usual pale glowing environment. Windows 10 64bit My video card is an old nVidia geforce GT 720 and the drivers were last updated September 2020. I Thiiiiink the symptom started in September 2021. I temporarily renamed the data folder which contains texture replacements such as vidiotmaps and restarted the game with no change to the symptom. I'll continue troubleshooting, testing settings, updating drivers etc. Just wondered if anyone else had seen problems with lighting recently in the game. I suspect it is an issue on my computer. -PsiBug
-
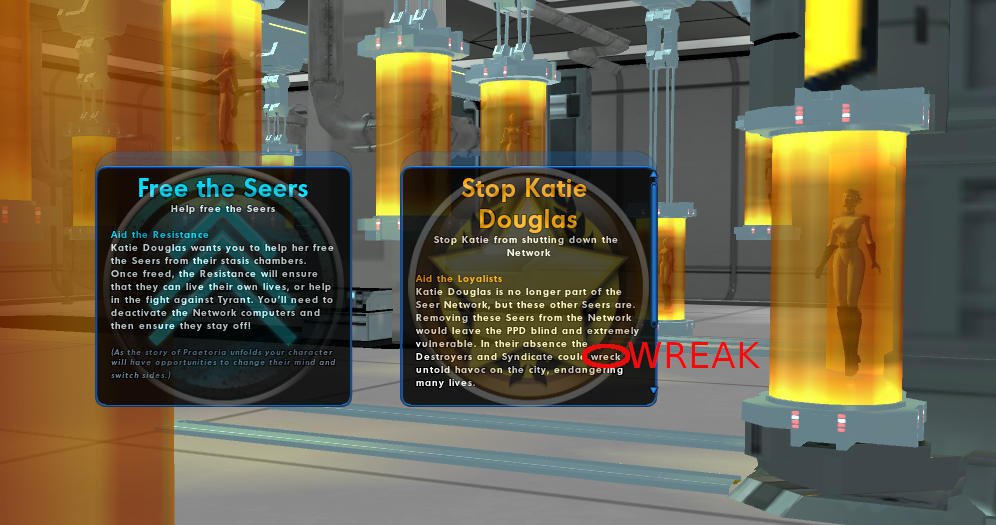
Hi, Ouro Mission name: Mind Freedom (Imperial Warden, Ch. 5) I believe that the phrase "wreck untold havoc" should read "wreak untold havoc".
-
Since the original Paladin event was restored, there are three construction sites and each site can randomly spawn a Paladin (as long as that construction site does not already have an active Paladin). In other words, a maximum of three Paladins can exist in KR, and no more will spawn until one or more of the existing ones have been defeated. At 6 merits each, three Paladins are an excellent opportunity.
-
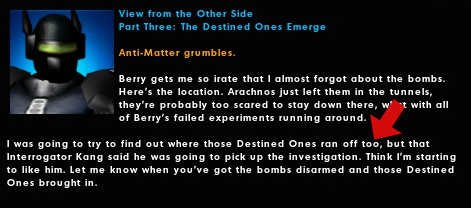
Contact: Anti-Matter View from the Other Side Part Three: The Destined Ones Emerge Correction: 'to' ('expressing motion in the direction of a particular location'), instead of 'too' (meaning 'excessively' or 'also')
-
Good job!
-
The Efficiency Expert badge is only awarded to the mission owner. Also, I believe that it is the ONLY badge you cannot get through Ouro. It requires the successful completion of 6 timed missions including some defeat-alls, and you only get one chance at those missions on any character, so plan accordingly! I believe that this has been changed so that you can get the badge by accompanying another mission owner.