The Beta Account Center is temporarily unavailable
×


Nemu
-
Posts
1418 -
Joined
-
Last visited
-
Days Won
3
Content Type
Profiles
Forums
Events
Store
Articles
Patch Notes
Everything posted by Nemu
-
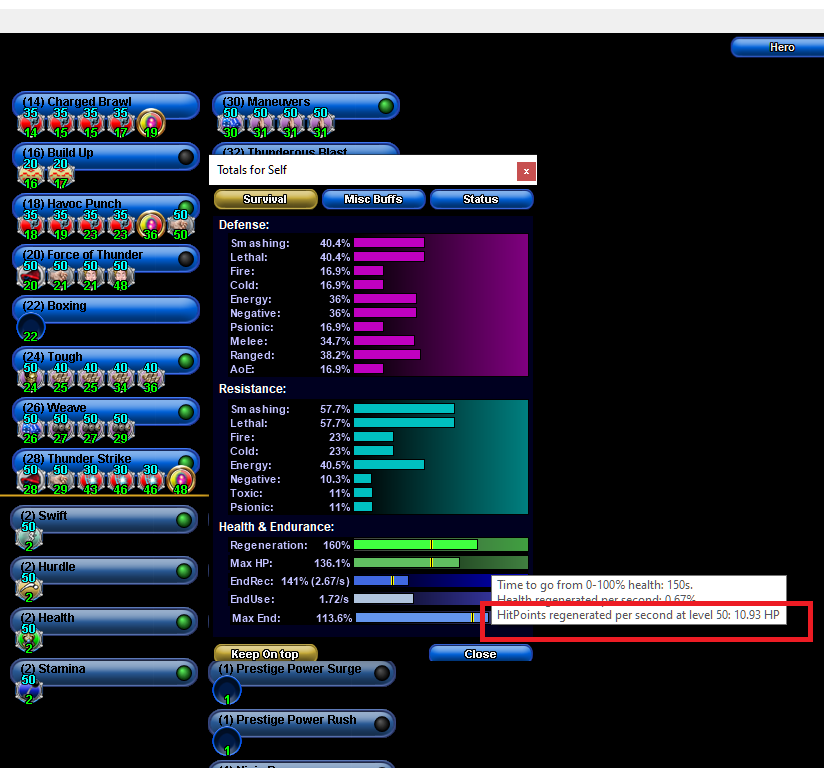
Your regen without FOT Your regen with FOT in my build: Regen with the same build except with FOT slotted for heal over ED cap And that's at level 50. You can be the judge of whether it's worth it or not, set bonuses aside. I use FoT as an offensive tool and open fights with it, and that's what I like about this sustain. Like I said, most people don't bother with thunder strike because of "lol meta DPA" but there is a lot of synergy between this and TS which form the cornerstone of your survival as anything /elec.

-
Yes, use my build if you want elecx3, swap out short circuit with lightning field and slot it up the same. Take everything in context and check out the numbers on that build instead of just looking at how fully I slotted the ranged attacks - 40% defense to both s/l AND range, you are not going to get too much better than that sticking to a resist shield. And I also don't sacrifice slotting on the melee stuff. The ranged attacks are mules for set bonuses but you can take them off the tray and never use them. Unless you really want to go hardcore concept at absolutely exclude them from the build altogether. In that case you might want go with a defense shield like the one hyperstrike provided to shore up survival. Take my advice on FOT and Thunderstrike slotting.
-
I lean more towards S/L defense and Ranged defense if the build allows for it. The reason this combination is better than pure typed defenses is that a lot of the crippling debuffs (carnie ring mistress, tarantula mistress, etc..) are ranged and don't have a type. Just because you are in melee doesn't mean ranged defense is not useful, a few ranged -def attacks that may not carry a s/l component and your S/L defense is next to nothing. Here is my Grav/Psi/Ice build to give you some ideas, I could have dropped the flight pool for leadership for slightly more defense but I'm a slave to concept. Villain Plan by Mids' Reborn : Hero Designer 2.6.0.7 https://github.com/ImaginaryDevelopment/imaginary-hero-designer Click this DataLink to open the build! Scarlett Schwerkraft: Level 50 Science Dominator Primary Power Set: Gravity Control Secondary Power Set: Psionic Assault Power Pool: Speed Power Pool: Leaping Power Pool: Flight Power Pool: Fighting Ancillary Pool: Ice Mastery Villain Profile: Level 1: Lift -- SprWntBit-Acc/Dmg(A), SprWntBit-Acc/Dmg/EndRdx(5), SprWntBit-Rchg/SlowProc(13), SprWntBit-Dmg/EndRdx/Acc/Rchg(15), SprWntBit-Acc/Dmg/Rchg(25) Level 1: Psionic Dart -- Empty(A) Level 2: Gravity Distortion -- BslGaz-Acc/Hold(A), BslGaz-Acc/Rchg(3), BslGaz-EndRdx/Rchg/Hold(3), BslGaz-Acc/EndRdx/Rchg/Hold(5) Level 4: Super Speed -- WntGif-ResSlow(A) Level 6: Propel -- Apc-Dmg(A), Apc-Acc/Dmg/Rchg(7), Apc-Acc/Rchg(7), Apc-Dmg/EndRdx(9), Apc-Dam%(9), FrcFdb-Rechg%(17) Level 8: Combat Jumping -- LucoftheG-Def/Rchg+(A), Ksm-ToHit+(15) Level 10: Telekinetic Thrust -- SprBlsCol-Acc/Dmg(A), SprBlsCol-Dmg/EndRdx(11), SprBlsCol-Acc/Dmg/EndRdx(11), SprBlsCol-Dmg/EndRdx/Acc/Rchg(13), SprBlsCol-Rchg/HoldProc(17), FrcFdb-Rechg%(31) Level 12: Hasten -- RechRdx-I(A), RechRdx-I(23) Level 14: Hover -- LucoftheG-Def/Rchg+(A) Level 16: Fly -- BlsoftheZ-ResKB(A) Level 18: Gravity Distortion Field -- BslGaz-Acc/Hold(A), BslGaz-Acc/Rchg(19), BslGaz-EndRdx/Rchg/Hold(19), BslGaz-Acc/EndRdx/Rchg/Hold(21) Level 20: Drain Psyche -- PreOptmz-Acc/Rech(A), PreOptmz-EndMod/End(21), PreOptmz-EndMod/Rech(23), PreOptmz-EndMod/Acc/Rech(27), PreOptmz-EndMod/Acc/End(45), PreOptmz-EndMod/End/Rech(45) Level 22: Boxing -- Empty(A) Level 24: Tough -- StdPrt-ResDam/Def+(A), GldArm-3defTpProc(25), UnbGrd-Max HP%(27) Level 26: Wormhole -- SprAscoft-Conf/Hold/Immob/Sleep/Stun/Fear/Rchg(A), SprAscoft-Acc/Conf/Hold/Immob/Sleep/Stun/Fear(34), SprAscoft-Acc/Conf/Hold/Immob/Sleep/Stun/Fear/EndRdx(36), SprAscoft-Acc/Conf/Hold/Immob/Sleep/Stun/Fear/EndRdx/Rchg(37), SprAscoft-EndRdx/Rchg(37), SprAscoft-Rchg/+Dmg%(37) Level 28: Crushing Field -- Artl-Acc/Dam(A), Artl-Dam/End(29), Artl-Dam/Rech(29), Artl-Acc/Dam/Rech(33), Artl-Acc/Rech/Rng(33), Artl-End/Rech/Rng(33) Level 30: Weave -- LucoftheG-Def/Rchg+(A), ShlWal-Def/EndRdx(31), ShlWal-Def(31), ShlWal-ResDam/Re TP(34) Level 32: Singularity -- ExpRnf-Acc/Rchg(A), ExpRnf-EndRdx/Dmg/Rchg(34), ExpRnf-Acc/Dmg/Rchg(43), ExpRnf-Dmg/EndRdx(43), ExpRnf-Acc/Dmg(43), ExpRnf-+Res(Pets)(50) Level 35: Sleet -- Artl-Acc/Dam(A), Artl-Dam/End(36), Artl-Dam/Rech(36), Artl-End/Rech/Rng(39), Artl-Acc/Dam/Rech(40), Artl-Acc/Rech/Rng(45) Level 38: Psychic Shockwave -- SprAvl-Acc/Dmg(A), SprAvl-Dmg/EndRdx(39), SprAvl-Acc/Dmg/EndRdx(39), SprAvl-Acc/Dmg/EndRdx/Rchg(40), SprAvl-Rchg/KDProc(40) Level 41: Frozen Armor -- LucoftheG-Def/Rchg+(A), Rct-Def(42), Rct-Def/EndRdx(42), Rct-ResDam%(42) Level 44: Ice Storm -- Rgn-Dmg(A), Rgn-Acc/Dmg/Rchg(46), Rgn-Acc/Rchg(46), Rgn-Knock%(46), Rgn-Dmg/EndRdx(48) Level 47: Psionic Lance -- StnoftheM-Acc/Dmg(A), StnoftheM-Dmg/EndRdx(48), StnoftheM-Acc/ActRdx/Rng(48), StnoftheM-Dmg/EndRdx/Rchg(50), StnoftheM-Dam%(50) Level 49: Afterburner -- LucoftheG-Def/Rchg+(A) Level 1: Brawl -- Empty(A) Level 1: Domination Level 1: Quick Form Level 1: Prestige Power Dash -- Empty(A) Level 1: Prestige Power Slide -- Empty(A) Level 1: Prestige Power Quick -- Empty(A) Level 1: Prestige Power Rush -- Empty(A) Level 1: Prestige Power Surge -- Empty(A) Level 1: Sprint -- Empty(A) Level 2: Rest -- Empty(A) Level 4: Ninja Run Level 2: Swift -- Flight-I(A) Level 2: Health -- Pnc-Heal/+End(A) Level 2: Hurdle -- Jump-I(A) Level 2: Stamina -- EndMod-I(A) Level 0: Born In Battle Level 0: High Pain Threshold Level 0: Invader Level 0: Marshal Level 50: Musculature Radial Paragon ------------
-
Blapping is a stupid term. No other AT calls a playstyle that incorporates both primary and secondary powers like it's out of the norm. People equate the term "blasters" to "ranged" and I think if anything a label should be put on those that favor ranged only, not the other way around. But I digress... You have to make sacrifices to get your survival up if you plan on getting in melee AND you are taking a resist shield. Hasten is nice but not entirely necessary. Fortunately /elec has a few powers to stick in force feedback procs so that can compensate for the lack of hasten. You are also fortunate that /Elec is the BEST secondary for melee oriented blasters. Don't build for single target focus, take the AoEs. Blasters don't survive wars of attrition well and you need the AoEs to get rid of the fodder so you can focus on the hard targets. Force of Thunder and Thunder Strike both need a kb-kd IO and a force feedback proc. You may think the scatter is a good thing that will keep you safe but it's not, keep your enemies close and you can chain KD them and drain them for maximum crowd control, if they scatter they may just stand where they are and shoot you. Put the kb-kb proc in those powers. It's a game changer. When you engage crowds hop in with ball lightning and when you land in the middle of the pack use force of thunder, then short circuit, then thunder strike, then ball lightning and short circuit again if it's recharged. At this point the mobs still alive should be close to drained and you can use your single target attacks to mop up and refresh the AoEs as needed. Hero Plan by Mids' Reborn : Hero Designer 2.6.0.7 https://github.com/ImaginaryDevelopment/imaginary-hero-designer Click this DataLink to open the build! Level 50 Science Blaster Primary Power Set: Electrical Blast Secondary Power Set: Electricity Manipulation Power Pool: Leaping Power Pool: Concealment Power Pool: Fighting Power Pool: Leadership Ancillary Pool: Electrical Mastery Hero Profile: Level 1: Lightning Bolt -- Thn-Acc/Dmg(A), Thn-Dmg/EndRdx(13), Thn-Dmg/Rchg(13), Thn-Acc/Dmg/Rchg(36), Thn-Acc/Dmg/EndRdx(37), Thn-Dmg/EndRdx/Rchg(37) Level 1: Electric Fence -- HO:Endo(A) Level 2: Ball Lightning -- Artl-Acc/Dam(A), Artl-Dam/End(3), Artl-Dam/Rech(3), Artl-Acc/Dam/Rech(5), Artl-Acc/Rech/Rng(5), Artl-End/Rech/Rng(7) Level 4: Super Jump -- BlsoftheZ-ResKB(A), BlsoftheZ-Travel/EndRdx(50) Level 6: Short Circuit -- SprAvl-Acc/Dmg(A), SprAvl-Rchg/KDProc(7), SprAvl-Acc/Dmg/EndRdx/Rchg(9), SprAvl-Acc/Dmg/EndRdx(11), SprAvl-Acc/Dmg/Rchg(11), EndMod-I(50) Level 8: Aim -- RctRtc-ToHit/Rchg(A), RctRtc-Pcptn(9) Level 10: Combat Jumping -- LucoftheG-Def/Rchg+(A) Level 12: Stealth -- LucoftheG-Def/Rchg+(A) Level 14: Charged Brawl -- KntCmb-Acc/Dmg(A), KntCmb-Dmg/EndRdx(15), KntCmb-Dmg/EndRdx/Rchg(15), KntCmb-Dmg/Rchg(17), HO:Nucle(19) Level 16: Build Up -- RctRtc-ToHit/Rchg(A), RctRtc-ToHit(17) Level 18: Havoc Punch -- KntCmb-Acc/Dmg(A), KntCmb-Dmg/EndRdx(19), KntCmb-Dmg/Rchg(23), KntCmb-Dmg/EndRdx/Rchg(23), HO:Nucle(36), FrcFdb-Rechg%(50) Level 20: Force of Thunder -- SuddAcc--KB/+KD(A), FrcFdb-Rechg%(21), AbsAmz-Acc/Stun/Rchg(21), AbsAmz-Acc/Rchg(48) Level 22: Boxing -- Empty(A) Level 24: Tough -- GldArm-3defTpProc(A), RctArm-ResDam/EndRdx(25), RctArm-ResDam/Rchg(25), RctArm-ResDam/EndRdx/Rchg(34), RctArm-ResDam(36) Level 26: Weave -- LucoftheG-Def/Rchg+(A), ShlWal-Def/EndRdx(27), ShlWal-Def(27), ShlWal-ResDam/Re TP(29) Level 28: Thunder Strike -- SuddAcc--KB/+KD(A), FrcFdb-Rechg%(29), Erd-Dmg(43), Erd-Acc/Dmg/Rchg(46), Erd-Acc/Dmg/EndRdx/Rchg(46), HO:Nucle(48) Level 30: Maneuvers -- LucoftheG-Def/Rchg+(A), Rct-Def(31), Rct-Def/EndRdx(31), Rct-ResDam%(31) Level 32: Thunderous Blast -- SprBlsWrt-Acc/Dmg(A), SprBlsWrt-Dmg/Rchg(33), SprBlsWrt-Acc/Dmg/Rchg(33), SprBlsWrt-Acc/Dmg/EndRdx(33), SprBlsWrt-Acc/Dmg/EndRdx/Rchg(34), SprBlsWrt-Rchg/Dmg%(34) Level 35: Power Sink -- PreOptmz-Acc/Rech(A), PreOptmz-EndMod/End(37), PreOptmz-EndMod/Rech(40), PreOptmz-EndMod/Acc/End(40), PreOptmz-EndMod/Acc/Rech(43), PreOptmz-EndMod/End/Rech(43) Level 38: Shocking Grasp -- SprBlsCol-Acc/Dmg(A), SprBlsCol-Dmg/EndRdx(39), SprBlsCol-Acc/Dmg/EndRdx(39), SprBlsCol-Dmg/EndRdx/Acc/Rchg(39), SprBlsCol-Rchg/HoldProc(40) Level 41: Shocking Bolt -- BslGaz-Acc/Hold(A), BslGaz-Acc/Rchg(42), BslGaz-EndRdx/Rchg/Hold(42), BslGaz-Acc/EndRdx/Rchg/Hold(42) Level 44: Charged Armor -- StdPrt-ResDam/Def+(A), UnbGrd-ResDam(45), UnbGrd-ResDam/EndRdx(45), UnbGrd-ResDam/EndRdx/Rchg(45), UnbGrd-Max HP%(46) Level 47: Tactics -- RctRtc-ToHit/Rchg(A), RctRtc-ToHit(48) Level 49: Vengeance -- LucoftheG-Def/Rchg+(A) Level 1: Brawl -- Empty(A) Level 1: Defiance Level 1: Quick Form Level 1: Prestige Power Dash -- Empty(A) Level 1: Prestige Power Slide -- Empty(A) Level 1: Prestige Power Quick -- Empty(A) Level 1: Prestige Power Rush -- Empty(A) Level 1: Prestige Power Surge -- Empty(A) Level 1: Sprint -- UnbLea-Stlth(A) Level 2: Rest -- Empty(A) Level 4: Ninja Run Level 2: Swift -- Run-I(A) Level 2: Health -- Pnc-Heal/+End(A) Level 2: Hurdle -- Jump-I(A) Level 2: Stamina -- PrfShf-End%(A) Level 50: Agility Core Paragon Level 0: Freedom Phalanx Reserve Level 0: Portal Jockey Level 0: Task Force Commander Level 0: The Atlas Medallion Level 50: Ageless Radial Epiphany Level 50: Diamagnetic Core Flawless Interface Level 50: Ion Radial Final Judgement Level 50: Support Core Embodiment ------------
-
I don't see the need to slot health and reaction time for end recovery but then again my build doesn't run assault and acrobatics. My panda is a punching and kicking machine! Hero Plan by Mids' Reborn : Hero Designer 2.6.0.7 https://github.com/ImaginaryDevelopment/imaginary-hero-designer Click this DataLink to open the build! Action Panda: Level 50 Natural Blaster Primary Power Set: Dual Pistols Secondary Power Set: Martial Combat Power Pool: Speed Power Pool: Leaping Power Pool: Fighting Power Pool: Leadership Ancillary Pool: Mace Mastery Hero Profile: Level 1: Dual Wield -- SprDfnBrr-Acc/Dmg(A), SprDfnBrr-Acc/Dmg/Rchg(9), SprDfnBrr-Acc/Dmg/EndRdx(9), SprDfnBrr-Acc/Dmg/EndRdx/Rchg(11), SprDfnBrr-Rchg/+Status Protect(11), SprDfnBrr-Dmg/Rchg(13) Level 1: Ki Push -- KntCmb-Acc/Dmg(A), KntCmb-Dmg/EndRdx(7), KntCmb-Dmg/EndRdx/Rchg(7), KntCmb-Dmg/Rchg(13) Level 2: Storm Kick -- SprBlsCol-Acc/Dmg(A), SprBlsCol-Dmg/EndRdx(3), SprBlsCol-Acc/Dmg/EndRdx(3), SprBlsCol-Acc/Dmg/Rchg(5), SprBlsCol-Dmg/EndRdx/Acc/Rchg(5), SprBlsCol-Rchg/HoldProc(15) Level 4: Reach for the Limit Level 6: Super Speed -- WntGif-ResSlow(A) Level 8: Bullet Rain -- FrcFdb-Rechg%(A), Rgn-Dmg(17), Rgn-Acc/Dmg/Rchg(23), Rgn-Acc/Rchg(23), Rgn-Dmg/EndRdx(25), Rgn-Knock%(37) Level 10: Swap Ammo Level 12: Combat Jumping -- LucoftheG-Def/Rchg+(A), Ksm-ToHit+(50) Level 14: Hasten -- RechRdx-I(A), RechRdx-I(15) Level 16: Dragon's Tail -- FrcFdb-Rechg%(A), HO:Nucle(17), Erd-Dmg(39), Erd-Acc/Dmg/Rchg(39), Erd-Acc/Dmg/EndRdx/Rchg(39) Level 18: Executioner's Shot -- Apc-Dmg(A), Apc-Acc/Dmg/Rchg(19), Apc-Acc/Rchg(19), Apc-Dmg/EndRdx(21), Apc-Dam%(21) Level 20: Reaction Time -- EndMod-I(A) Level 22: Boxing -- Stg-Acc/Rchg(A), Stg-Acc/EndRdx(37), Stg-Acc/Stun/Rchg(45) Level 24: Tough -- GldArm-3defTpProc(A), StdPrt-ResDam/Def+(25), Ags-ResDam/EndRdx(43), Ags-ResDam(43), Ags-Psi/Status(43) Level 26: Piercing Rounds -- SprFrzBls-Acc/Dmg(A), SprFrzBls-Dmg/EndRdx(27), SprFrzBls-Acc/Dmg/EndRdx(27), SprFrzBls-Acc/Dmg/Rchg(33), SprFrzBls-Dmg/EndRdx/Acc/Rchg(33), SprFrzBls-Rchg/ImmobProc(33) Level 28: Weave -- LucoftheG-Def/Rchg+(A), Rct-Def(29), Rct-Def/EndRdx(29), Rct-ResDam%(31) Level 30: Maneuvers -- LucoftheG-Def/Rchg+(A), ShlWal-Def/EndRdx(31), ShlWal-Def(31), ShlWal-ResDam/Re TP(48) Level 32: Hail of Bullets -- FrcFdb-Rechg%(A), Arm-Dmg(34), Arm-Acc/Dmg/Rchg(34), Arm-Acc/Rchg(34), Arm-Dmg/EndRdx(36), Arm-Dam%(37) Level 35: Scorpion Shield -- LucoftheG-Def/Rchg+(A), LucoftheG-Def/EndRdx(36), LucoftheG-Def(36) Level 38: Burst of Speed -- FuroftheG-ResDeb%(A), SprBlsWrt-Acc/Dmg(40), SprBlsWrt-Rchg/Dmg%(40), Erd-Dmg(40), Erd-%Dam(42), Erd-Acc/Dmg/EndRdx/Rchg(42) Level 41: Cross Punch -- SprAvl-Acc/Dmg(A), SprAvl-Acc/Dmg/EndRdx/Rchg(42), SprAvl-Rchg/KDProc(45), SprAvl-Dmg/EndRdx(46), SprAvl-Acc/Dmg/EndRdx(46), SprAvl-Acc/Dmg/Rchg(46) Level 44: Pistols -- SprWntBit-Acc/Dmg(A), SprWntBit-Dmg/Rchg(45), SprWntBit-Acc/Dmg/EndRdx(48), SprWntBit-Acc/Dmg/Rchg(48), SprWntBit-Dmg/EndRdx/Acc/Rchg(50), SprWntBit-Rchg/SlowProc(50) Level 47: Inner Will -- RechRdx-I(A) Level 49: Super Jump -- BlsoftheZ-ResKB(A) Level 1: Brawl -- Empty(A) Level 1: Defiance Level 1: Quick Form Level 1: Prestige Power Dash -- Empty(A) Level 1: Prestige Power Slide -- Empty(A) Level 1: Prestige Power Quick -- Empty(A) Level 1: Prestige Power Rush -- Empty(A) Level 1: Prestige Power Surge -- Empty(A) Level 1: Sprint -- Empty(A) Level 2: Rest -- Empty(A) Level 4: Ninja Run Level 2: Swift -- Run-I(A) Level 2: Health -- Pnc-Heal/+End(A) Level 2: Hurdle -- Jump-I(A) Level 2: Stamina -- EndMod-I(A) Level 50: Agility Core Paragon Level 0: Freedom Phalanx Reserve Level 0: Portal Jockey Level 0: Task Force Commander Level 0: The Atlas Medallion Level 10: Chemical Ammunition Level 10: Cryo Ammunition Level 10: Incendiary Ammunition ------------
-
Seriously: Alt-itis, What To Do? A Discussion on Self-Control
Nemu replied to a topic in General Discussion
I'm going to guess your knowledge of the game is at the point where you don't have a feel of the design formula (not the actual math/numbers, but a general sense of what various powers do without needing to play the set) and that you are not a min maxer so you can't assess the full potential of the toons you make. So you want to try everything. There are a few things that allow me to focus on a character, a solid build goal which enable setting milestones that you can look forward to, and a good bio/concept. It's a lot easier to stick with something if you know what you want and what the toon will ultimately be able to do and that drives you to get there, otherwise you are always looking for the next high. You may not be there yet, so pick something that really endears you, ask for build advice on forums and also ask "what can I look forward to and when do I achieve what I'm looking forward to?" with the build people supply you so you understand the milestones. -
I'd do something like this: Less defense overall but it does softcap neg so your only hole is psi. More -res procs, more slow resist, more recharge via FF procs, more energize and energy drain uptime which means better endurance management. More mitigation options, if you are going to dip into energy mastery it'd be a shame to skip energy torrent. It's too useful not to pick up, both from a mitigation perspective and also from a proc perspective. That and shockwave and the chance to proc KD in eviscerate will buy you time against most enemy factions and compensate for the lower overall defenses. The build doesn't really need hasten and the only power that really benefits from it is energize, but energize helps with the insane end cost of Focused Acc so it's your call. If you are so enamored with flying you can drop SS for fly. Hero Plan by Mids' Reborn : Hero Designer 2.6.0.7 https://github.com/ImaginaryDevelopment/imaginary-hero-designer Click this DataLink to open the build! Level 50 Natural Scrapper Primary Power Set: Claws Secondary Power Set: Energy Aura Power Pool: Speed Power Pool: Leaping Power Pool: Fighting Ancillary Pool: Body Mastery Hero Profile: Level 1: Strike -- Hct-Dmg(A), Hct-Acc/Dmg/Rchg(5), Hct-Acc/Rchg(37), Hct-Dmg/EndRdx(40), Hct-Dam%(40) Level 1: Kinetic Shield -- LucoftheG-Def/Rchg+(A), LucoftheG-Def/EndRdx(39), LucoftheG-Def(40) Level 2: Dampening Field -- GldArm-3defTpProc(A), RctArm-ResDam/EndRdx(3), RctArm-ResDam/Rchg(3), RctArm-ResDam(5), UnbGrd-Max HP%(37) Level 4: Super Speed -- WntGif-ResSlow(A) Level 6: Spin -- Arm-Dmg(A), Arm-Acc/Dmg/Rchg(7), Arm-Acc/Rchg(7), Arm-Dmg/EndRdx(9), Arm-Dam%(9), FuroftheG-ResDeb%(43) Level 8: Follow Up -- SprScrStr-Acc/Dmg(A), SprScrStr-Dmg/Rchg(11), SprScrStr-Acc/Dmg/Rchg(11), SprScrStr-Dmg/EndRdx/Rchg(13), SprScrStr-Acc/Dmg/EndRdx/Rchg(13), SprScrStr-Rchg/+Crit(36) Level 10: Entropic Aura -- EndRdx-I(A) Level 12: Combat Jumping -- LucoftheG-Def/Rchg+(A) Level 14: Power Shield -- LucoftheG-Def/Rchg+(A), Rct-Def(15), Rct-Def/EndRdx(15), Rct-ResDam%(17) Level 16: Energy Protection -- StdPrt-ResDam/Def+(A), RctArm-ResDam/EndRdx(17), RctArm-ResDam(19), RctArm-ResDam/Rchg(19) Level 18: Focus -- Apc-Dmg(A), Apc-Acc/Dmg/Rchg(23), Apc-Acc/Rchg(23), Apc-Dmg/EndRdx(25), Apc-Dam%(25), FrcFdb-Rechg%(46) Level 20: Energy Cloak -- LucoftheG-Def/Rchg+(A), ShlWal-Def/EndRdx(21), ShlWal-Def(21), ShlWal-ResDam/Re TP(37) Level 22: Boxing -- Empty(A) Level 24: Tough -- RctArm-ResDam/EndRdx(A), RctArm-ResDam(33), RctArm-ResDam/EndRdx/Rchg(34) Level 26: Eviscerate -- SprAvl-Acc/Dmg(A), SprAvl-Dmg/EndRdx(27), SprAvl-Acc/Dmg/EndRdx(27), SprAvl-Acc/Dmg/Rchg(31), SprAvl-Acc/Dmg/EndRdx/Rchg(33), SprAvl-Rchg/KDProc(42) Level 28: Energize -- Pnc-Heal/EndRedux(A), Pnc-EndRdx/Rchg(29), Pnc-Heal/Rchg(29), Pnc-Heal/EndRedux/Rchg(31), Pnc-Heal(31), DctWnd-Heal/Rchg(39) Level 30: Weave -- LucoftheG-Def/Rchg+(A), LucoftheG-Def/EndRdx(45), LucoftheG-Def(45) Level 32: Shockwave -- FrcFdb-Rechg%(A), SuddAcc--KB/+KD(33), SprFrzBls-Acc/Dmg(34), SprFrzBls-Acc/Dmg/EndRdx(34), SprCrtStr-Rchg/+50% Crit(36), Dmg-I(36) Level 35: Energy Drain -- HO:Membr(A), PreOptmz-EndMod/Rech(45), EffAdp-EndMod/EndRdx(46), EffAdp-EndMod/Rchg(46) Level 38: Focused Accuracy -- EndRdx-I(A), HO:Cyto(39) Level 41: Laser Beam Eyes -- SprWntBit-Acc/Dmg(A), SprWntBit-Acc/Dmg/EndRdx(42), SprWntBit-Acc/Dmg/Rchg(42), SprWntBit-Dmg/EndRdx/Acc/Rchg(43), SprWntBit-Rchg/SlowProc(43) Level 44: Physical Perfection -- PrfShf-End%(A) Level 47: Energy Torrent -- FrcFdb-Rechg%(A), Artl-Acc/Dam(48), Artl-Dam/End(48), Artl-Acc/Dam/Rech(48), Ann-ResDeb%(50), Ann-Acc/Dmg/EndRdx(50) Level 49: Hasten -- RechRdx-I(A), RechRdx-I(50) Level 1: Brawl -- Empty(A) Level 1: Critical Hit Level 1: Quick Form Level 1: Prestige Power Dash -- Empty(A) Level 1: Prestige Power Slide -- Empty(A) Level 1: Prestige Power Quick -- Empty(A) Level 1: Prestige Power Rush -- Empty(A) Level 1: Prestige Power Surge -- Empty(A) Level 1: Sprint -- Empty(A) Level 2: Rest -- Empty(A) Level 4: Ninja Run Level 2: Swift -- Run-I(A) Level 2: Health -- Pnc-Heal/+End(A) Level 2: Hurdle -- Jump-I(A) Level 2: Stamina -- PrfShf-End%(A) Level 0: Freedom Phalanx Reserve Level 0: Portal Jockey Level 0: Task Force Commander Level 0: The Atlas Medallion Level 50: Musculature Radial Paragon ------------
-
What AT/Powers would you pick for level 20ish content?
Nemu replied to SuperPlyx's topic in Archetypes
This right here. No kind of leveling melee builds mature enough for level 20ish content. They will get chewed up by anything and everything without support. Support carries lowbie content. If you want to build and park toons that excel at lowbie content, go with elec affinity. -
Maybe there are less tanks because those that want to tank are playing squishies first to learn what squishies are vulnerable to so they can understand target prioritization, LOS, aggro radius and all that good stuff so they can be the bestest tank evar! That's my story and I'm sticking with it!
-
EA is a defensive support set.. I like my Thugs/EA. I know that if I get on a team I can pull a team through very bad situations because EA offers layered mitigation that covers a lot of debuff holes that result in cascade failure such as -recharge, mez, end drain/-recovery, kb, -to hit and lastly damage. The absorb and the heal cycle quickly and can top off a team facing multiple adds and in a war of attrition EA has the most tools in its kit to make sure that the team comes out on top. It's not a DPS set for sure, but as a survival support set I think it's a powerhouse.
-
Didn't read the question but here's the answer Fire/Elec Fire/Elec Fire/Elec Because you are a MFing tank mage, a MFing Tank Mage, a MFing tank mage. I may be slightly biased.
-
Build looking for some changes (Bane Spider)
Nemu replied to Ghost Spider's topic in Arachnos Soldier & Widow
I went mace mastery first because it fits thematically but I just specced into leviathan. with that you get 3 AoEs and you can slot -res procs into each of them and Arctic breath does -res natively. The problem with banes is that they don't have good AoE or AoE burst and prolonged fights against large groups is a war of attrition that favors the enemy since banes can't kill the fodder fast enough. Mace mastery doesn't do anything to help with this but leviathan does. Combined with heavy burst and venom grenade you have plenty of AoE to mow down fodder so you can focus on the hard targets, and the -res that each of those longish recharge patron powers can proc/do is icing on the cake. You will need to change your playstyle, start at range and unload your cones, then move in to engage the harder targets. This build softcaps Melee/Range/AoE and Psi defense and features plenty of slow resistance and the majority of attacks has -res or the potential to proc it. Also you shoot sharks! Hero Plan by Mids' Reborn : Hero Designer 2.6.0.7 https://github.com/ImaginaryDevelopment/imaginary-hero-designer Click this DataLink to open the build! McBane: Level 50 Natural Arachnos Soldier Primary Power Set: Bane Spider Soldier Secondary Power Set: Bane Spider Training Power Pool: Leaping Power Pool: Fighting Power Pool: zc_Leadership Ancillary Pool: Leviathan Mastery Hero Profile: Level 1: Bash -- TchofDth-Acc/Dmg(A), TchofDth-Dmg/EndRdx(3), TchofDth-Dmg/Rchg(3), TchofDth-Acc/Dmg/EndRdx(5), TchofDth-Dmg/EndRdx/Rchg(5), TchofDth-Dam%(7) Level 1: Bane Spider Armor Upgrade -- StdPrt-ResDam/Def+(A), ImpArm-ResDam/EndRdx(7), ImpArm-ResDam(9), ImpArm-ResPsi(9), StdPrt-ResKB(39) Level 2: Combat Training: Defensive -- LucoftheG-Def/Rchg+(A) Level 4: Combat Jumping -- LucoftheG-Def/Rchg+(A) Level 6: Super Jump -- WntGif-ResSlow(A), BlsoftheZ-ResKB(50) Level 8: Heavy Burst -- AchHee-ResDeb%(A), Bmbdmt-Dam(36), Bmbdmt-Acc/Rech/End(37), Bmbdmt-Acc/Dam/Rech(37), Bmbdmt-Acc/Dam/Rech/End(37), Bmbdmt-+FireDmg(40) Level 10: Tactical Training: Maneuvers -- LucoftheG-Def/Rchg+(A), ShlWal-Def/EndRdx(11), ShlWal-Def(11), ShlWal-ResDam/Re TP(21) Level 12: Venom Grenade -- SprDmnofA-Acc/Dmg(A), SprDmnofA-Acc/Dmg/Rchg(13), SprDmnofA-Dmg/EndRdx/Rchg(13), SprDmnofA-Acc/Dmg/EndRdx/Rchg(15), SprDmnofA-Rchg/DmgFear%(15) Level 14: Poisonous Ray -- Apc-Dmg(A), Apc-Dmg/Rchg(17), Apc-Acc/Dmg/Rchg(17), Apc-Acc/Rchg(19), Apc-Dmg/EndRdx(19), Apc-Dam%(21) Level 16: Wolf Spider Armor -- GldArm-3defTpProc(A), ImpArm-ResDam/EndRdx(25), ImpArm-ResDam(27), ImpArm-ResPsi(27) Level 18: Boxing -- Empty(A) Level 20: Tough -- ImpArm-ResDam/EndRdx(A), ImpArm-ResDam/EndRdx/Rchg(23), ImpArm-ResDam(23), UnbGrd-Max HP%(25) Level 22: Mental Training -- Run-I(A) Level 24: Cloaking Device -- Krm-Def/EndRdx(A), Krm-Def/Rchg(39), Krm-ResKB(46) Level 26: Tactical Training: Leadership -- HO:Cyto(A) Level 28: Weave -- LucoftheG-Def/Rchg+(A), Rct-Def(29), Rct-Def/EndRdx(29), Rct-ResDam%(31) Level 30: Shatter -- SprBlsCol-Acc/Dmg(A), SprBlsCol-Dmg/EndRdx(31), SprBlsCol-Acc/Dmg/EndRdx(31), FrcFdb-Rechg%(34), SprBlsCol-Dmg/EndRdx/Acc/Rchg(36), SprBlsCol-Rchg/HoldProc(36) Level 32: Crowd Control -- SprSpdBit-Rchg/Global Toxic(A), SprSpdBit-Acc/Dmg(33), SprSpdBit-Acc/Dmg/EndRdx/Rchg(33), SprSpdBit-Acc/Dmg/Rchg(33), FrcFdb-Rechg%(34), FuroftheG-ResDeb%(34) Level 35: Build Up -- GssSynFr--Build%(A) Level 38: Maneuvers -- LucoftheG-Def/Rchg+(A), HO:Cyto(39) Level 41: School of Sharks -- SprFrzBls-Acc/Dmg(A), SprFrzBls-Dmg/EndRdx(42), SprFrzBls-Acc/Dmg/EndRdx(42), SprFrzBls-Acc/Dmg/Rchg(42), SprFrzBls-Dmg/EndRdx/Acc/Rchg(43), SprFrzBls-Rchg/ImmobProc(43) Level 44: Arctic Breath -- Bmbdmt-Dam(A), Bmbdmt-Acc/Rech/End(45), Bmbdmt-Dam/Rech(45), Bmbdmt-Acc/Dam/Rech(45), Bmbdmt-Acc/Dam/Rech/End(46), Bmbdmt-+FireDmg(46) Level 47: Bile Spray -- Ann-ResDeb%(A), Rgn-Dmg(48), Rgn-Acc/Dmg/Rchg(48), Rgn-Acc/Rchg(48), Rgn-Dmg/EndRdx(50), Rgn-Knock%(50) Level 49: Surveillance -- Acc-I(A) Level 1: Brawl -- Empty(A) Level 1: Prestige Power Dash -- Empty(A) Level 1: Prestige Power Slide -- Empty(A) Level 1: Prestige Power Quick -- Empty(A) Level 1: Prestige Power Rush -- Empty(A) Level 1: Prestige Power Surge -- Empty(A) Level 1: Conditioning Level 1: Sprint -- Clr-Stlth(A) Level 2: Rest -- Empty(A) Level 4: Ninja Run Level 2: Swift -- Run-I(A) Level 2: Health -- Mrc-Rcvry+(A), Pnc-Heal/+End(40), NmnCnv-Regen/Rcvry+(40) Level 2: Hurdle -- Jump-I(A) Level 2: Stamina -- PrfShf-EndMod(A), PrfShf-End%(43) Level 50: Barrier Core Epiphany Level 50: Assault Radial Embodiment Level 50: Diamagnetic Radial Flawless Interface Level 0: Freedom Phalanx Reserve Level 0: Portal Jockey Level 0: Task Force Commander Level 0: The Atlas Medallion Level 50: Musculature Radial Paragon ------------ ------------ -
Flares animate faster and is better DPA. That .67 seconds gap really irked me on my fire/elec so that's just my personal preference. The melee stuff I took as much for their useful set bonuses as well as for their utility. If you had to skip a melee attack I'd skip aging and that might be the way to fit rain in, since the ATO can be slotted into either attack. Now go and be the manly man that Gotham deserves, or needs, or whatever.
-
I went with a natural theme for mine so no shadowmeld for me 😞 Didn't take parry but I can definitely see a use case for it since a lot of lethal damage also do -def. I don't feel the build really needs hasten, the FF procs compensate for not taking it though, Villain Plan by Mids' Reborn : Hero Designer 2.6.0.7 https://github.com/ImaginaryDevelopment/imaginary-hero-designer Click this DataLink to open the build! Survivor 1: Level 50 Natural Stalker Primary Power Set: Broad Sword Secondary Power Set: Shield Defense Power Pool: Leaping Power Pool: Fighting Power Pool: zc_Leadership Ancillary Pool: Weapon Mastery Villain Profile: Level 1: Hack -- SprAssMar-Acc/Dmg(A), SprAssMar-Dmg/Rchg(3), SprAssMar-Acc/Dmg/Rchg(3), SprAssMar-Dmg/EndRdx/Rchg(5), SprAssMar-Acc/Dmg/EndRdx/Rchg(5), SprAssMar-Rchg/Rchg Build Up(7) Level 1: Hide -- LucoftheG-Def/Rchg+(A), Ksm-ToHit+(50) Level 2: Slice -- SprAvl-Acc/Dmg(A), SprAvl-Acc/Dmg/EndRdx(7), SprAvl-Rchg/KDProc(9), HO:Nucle(9), AchHee-ResDeb%(11) Level 4: Battle Agility -- LucoftheG-Def/Rchg+(A), Rct-Def(11), Rct-Def/EndRdx(13), Rct-ResDam%(13) Level 6: Assassin's Slash -- SprStlGl-Acc/Dmg(A), SprStlGl-Acc/Dmg/EndRdx/Rchg(15), SprStlGl-Rchg/Hide%(15), SprBlsCol-Acc/Dmg(17), SprBlsCol-Dmg/EndRdx(17) Level 8: Build Up -- GssSynFr--ToHit(A), GssSynFr--ToHit/Rchg(19), GssSynFr--ToHit/Rchg/EndRdx(19), GssSynFr--Rchg/EndRdx(21), GssSynFr--ToHit/EndRdx(21), GssSynFr--Build%(23) Level 10: Combat Jumping -- LucoftheG-Def/Rchg+(A), LucoftheG-Def(45) Level 12: Deflection -- LucoftheG-Def/Rchg+(A), ShlWal-Def/EndRdx(23), ShlWal-Def(25), ShlWal-ResDam/Re TP(25), TtnCtn-ResDam/EndRdx(27), TtnCtn-ResDam(27) Level 14: True Grit -- StdPrt-ResDam/Def+(A), Mrc-Rcvry+(29), Mrc-Heal(29), NmnCnv-Regen/Rcvry+(31), TtnCtn-ResDam/Rchg(31), TtnCtn-ResDam(31) Level 16: Active Defense -- RechRdx-I(A) Level 18: Boxing -- Empty(A) Level 20: Tough -- GldArm-3defTpProc(A), TtnCtn-ResDam/EndRdx(33), TtnCtn-ResDam(33), TtnCtn-ResDam/EndRdx/Rchg(33) Level 22: Weave -- RedFrt-Def/EndRdx(A), RedFrt-Def/Rchg(34), RedFrt-EndRdx/Rchg(34), RedFrt-Def/EndRdx/Rchg(34), RedFrt-Def(36), RedFrt-EndRdx(36) Level 24: Maneuvers -- RedFrt-Def/EndRdx(A), RedFrt-Def/Rchg(36), RedFrt-EndRdx/Rchg(37), RedFrt-Def/EndRdx/Rchg(37), RedFrt-Def(37), RedFrt-EndRdx(39) Level 26: Disembowel -- SprBlsCol-Acc/Dmg/Rchg(A), SprBlsCol-Dmg/EndRdx/Acc/Rchg(39), SprBlsCol-Acc/Dmg/EndRdx(39), CrsImp-Acc/Dmg/EndRdx(40), FrcFdb-Rechg%(40) Level 28: Grant Cover -- LucoftheG-Def/Rchg+(A) Level 30: Against All Odds -- EndRdx-I(A) Level 32: Head Splitter -- SprStlGl-Dmg/Rchg(A), SprStlGl-Acc/Dmg/Rchg(40), SprStlGl-Dmg/EndRdx/Rchg(42), Mlt-Acc/Dmg/EndRdx(42), FuroftheG-ResDeb%(42), FrcFdb-Rechg%(43) Level 35: Shield Charge -- SprAvl-Acc/Dmg/Rchg(A), SprAvl-Dmg/EndRdx(43), SprAvl-Acc/Dmg/EndRdx/Rchg(43), Arm-Dam%(45), FrcFdb-Rechg%(45) Level 38: Physical Perfection -- PrfShf-End%(A) Level 41: Shuriken -- SprWntBit-Acc/Dmg(A), SprWntBit-Acc/Dmg/EndRdx(46), SprWntBit-Acc/Dmg/Rchg(46) Level 44: Exploding Shuriken -- Rgn-Dmg(A), Rgn-Acc/Dmg/Rchg(46), Rgn-Dmg/EndRdx(48), Rgn-Knock%(48), Rgn-Acc/Rchg(48), Ann-ResDeb%(50) Level 47: One with the Shield -- UnbGrd-ResDam(A), UnbGrd-Max HP%(50) Level 49: Placate -- RechRdx-I(A) Level 1: Assassination Level 1: Brawl -- Empty(A) Level 1: Quick Form Level 1: Prestige Power Dash -- Empty(A) Level 1: Prestige Power Slide -- Empty(A) Level 1: Prestige Power Quick -- Empty(A) Level 1: Prestige Power Rush -- Empty(A) Level 1: Prestige Power Surge -- Empty(A) Level 1: Sprint -- Empty(A) Level 2: Rest -- Empty(A) Level 4: Ninja Run Level 2: Swift -- Run-I(A) Level 2: Health -- Pnc-Heal/+End(A) Level 2: Hurdle -- Jump-I(A) Level 2: Stamina -- PrfShf-End%(A) ------------
-
Be a manly man and boom boom instead of pew pew. Hero Plan by Mids' Reborn : Hero Designer 2.6.0.7 https://github.com/ImaginaryDevelopment/imaginary-hero-designer Click this DataLink to open the build! Manly man man man build: Level 50 Magic Blaster Primary Power Set: Fire Blast Secondary Power Set: Temporal Manipulation Power Pool: Speed Power Pool: Leaping Power Pool: Fighting Power Pool: Leadership Ancillary Pool: Mace Mastery Hero Profile: Level 1: Flares -- SprWntBit-Acc/Dmg(A), SprWntBit-Dmg/Rchg(3), SprWntBit-Acc/Dmg/EndRdx(3), SprWntBit-Acc/Dmg/Rchg(5), SprWntBit-Dmg/EndRdx/Acc/Rchg(5), SprWntBit-Rchg/SlowProc(7) Level 1: Time Wall -- EnfOpr-Acc/Immob/Rchg(A), EnfOpr-Acc/Immob(11), EnfOpr-EndRdx/Immob(40), EnfOpr-Acc/EndRdx(40) Level 2: Fire Ball -- SprFrzBls-Acc/Dmg(A), SprFrzBls-Dmg/EndRdx(7), SprFrzBls-Acc/Dmg/EndRdx(15), SprFrzBls-Acc/Dmg/Rchg(25), SprFrzBls-Dmg/EndRdx/Acc/Rchg(25), SprFrzBls-Rchg/ImmobProc(37) Level 4: Super Speed -- BlsoftheZ-ResKB(A) Level 6: Combat Jumping -- LucoftheG-Def/Rchg+(A), LucoftheG-Def(13), Ksm-ToHit+(46) Level 8: Aging Touch -- SprBlsWrt-Acc/Dmg(A), SprBlsWrt-Dmg/Rchg(9), SprBlsWrt-Acc/Dmg/Rchg(9), SprBlsWrt-Acc/Dmg/EndRdx(11), SprBlsWrt-Acc/Dmg/EndRdx/Rchg(13), SprBlsWrt-Rchg/Dmg%(15) Level 10: Chronos -- RctRtc-ToHit/Rchg(A), RctRtc-ToHit(37) Level 12: Aim -- GssSynFr--Build%(A) Level 14: Hasten -- RechRdx-I(A), RechRdx-I(39) Level 16: End of Time -- Erd-Dmg(A), Erd-Acc/Dmg/EndRdx/Rchg(17), Erd-%Dam(17), HO:Nucle(23), Mlt-Acc/Dmg/EndRdx(23) Level 18: Blaze -- SprDfnBrr-Acc/Dmg(A), SprDfnBrr-Dmg/Rchg(19), SprDfnBrr-Acc/Dmg/Rchg(19), SprDfnBrr-Acc/Dmg/EndRdx(21), SprDfnBrr-Acc/Dmg/EndRdx/Rchg(21), SprDfnBrr-Rchg/+Status Protect(46) Level 20: Temporal Healing -- PrfShf-End%(A) Level 22: Boxing -- Empty(A) Level 24: Tough -- Ags-ResDam/EndRdx(A), Ags-Psi/Status(39), Ags-ResDam(39), StdPrt-ResDam/Def+(40) Level 26: Blazing Bolt -- Apc-Dmg(A), Apc-Acc/Dmg/Rchg(27), Apc-Acc/Rchg(27), Apc-Dmg/EndRdx(36), Apc-Dam%(37) Level 28: Weave -- LucoftheG-Def/Rchg+(A), ShlWal-Def/EndRdx(29), ShlWal-Def(29), ShlWal-ResDam/Re TP(31) Level 30: Maneuvers -- LucoftheG-Def/Rchg+(A), Rct-Def(31), Rct-Def/EndRdx(31), Rct-ResDam%(33) Level 32: Inferno -- SprAvl-Acc/Dmg(A), SprAvl-Dmg/EndRdx(33), SprAvl-Acc/Dmg/EndRdx(33), SprAvl-Acc/Dmg/Rchg(34), SprAvl-Acc/Dmg/EndRdx/Rchg(34), SprAvl-Rchg/KDProc(34) Level 35: Scorpion Shield -- LucoftheG-Def/Rchg+(A), LucoftheG-Def/EndRdx(36), LucoftheG-Def(36) Level 38: Time Lord -- GldArm-3defTpProc(A), Ags-ResDam/EndRdx(43), Ags-ResDam(43), Ags-ResDam/Rchg(43), UnbGrd-Max HP%(50) Level 41: Time Stop -- BslGaz-Acc/Hold(A), BslGaz-Acc/Rchg(42), BslGaz-EndRdx/Rchg/Hold(42), BslGaz-Acc/EndRdx/Rchg/Hold(42) Level 44: Time Shift -- AbsAmz-Stun/Rchg(A), AbsAmz-Acc/Stun/Rchg(45), AbsAmz-Acc/Rchg(45), AbsAmz-EndRdx/Stun(45), AbsAmz-ToHitDeb%(46) Level 47: Future Pain -- SprBlsCol-Acc/Dmg(A), SprBlsCol-Dmg/EndRdx(48), SprBlsCol-Acc/Dmg/EndRdx(48), SprBlsCol-Acc/Dmg/Rchg(48), SprBlsCol-Dmg/EndRdx/Acc/Rchg(50), SprBlsCol-Rchg/HoldProc(50) Level 49: Tactics -- HO:Cyto(A) Level 1: Brawl -- Empty(A) Level 1: Defiance Level 1: Quick Form Level 1: Prestige Power Dash -- Empty(A) Level 1: Prestige Power Slide -- Empty(A) Level 1: Prestige Power Quick -- Empty(A) Level 1: Prestige Power Rush -- Empty(A) Level 1: Prestige Power Surge -- Empty(A) Level 1: Sprint -- Empty(A) Level 2: Rest -- Empty(A) Level 4: Ninja Run Level 2: Swift -- Run-I(A) Level 2: Health -- Pnc-Heal/+End(A) Level 2: Hurdle -- Jump-I(A) Level 2: Stamina -- PrfShf-End%(A) Level 50: Musculature Radial Paragon ------------
-
I see, a few comments then. The build up proc is better in combat readiness, it's guaranteed to go off there and it's on demand. Secondly, if you are going to go energy mastery consider energy torrent, it's good mitigation and it does knockDOWN instead of knockback, and it can take a Force Feedback proc. This is the revised build that uses energy mastery, it uses agility to bring your S/L def to 45%, I also tried to cram in more slow resist. Villain Plan by Mids' Reborn : Hero Designer 2.6.0.7 https://github.com/ImaginaryDevelopment/imaginary-hero-designer Click this DataLink to open the build! Loose Canon: Level 50 Natural Brute Primary Power Set: Street Justice Secondary Power Set: Regeneration Power Pool: Fighting Power Pool: Speed Power Pool: Leadership Power Pool: Leaping Ancillary Pool: Energy Mastery Villain Profile: Level 1: Initial Strike -- SprBlsCol-Acc/Dmg(A), SprBlsCol-Acc/Dmg/EndRdx(3), SprBlsCol-Acc/Dmg/Rchg(5), SprBlsCol-Rchg/HoldProc(5), SprBlsCol-Dmg/EndRdx/Acc/Rchg(7) Level 1: Fast Healing -- NmnCnv-Regen/Rcvry+(A), Mrc-Rcvry+(9) Level 2: Heavy Blow -- SprBrtFur-Rech/Fury(A), SprBrtFur-Acc/Dmg/Rchg(3), SprBrtFur-Dmg/EndRdx/Rchg(7), SprBrtFur-Acc/Dmg/EndRdx/Rchg(9), SprBrtFur-Acc/Dmg(11) Level 4: Quick Recovery -- SynSck-EndMod(A), SynSck-EndMod/Rech(46), SynSck-EndMod/+RunSpeed(50) Level 6: Reconstruction -- Pnc-Heal/EndRedux(A), Pnc-EndRdx/Rchg(15), Pnc-Heal/Rchg(17), Pnc-Heal/EndRedux/Rchg(17), Pnc-Heal(19) Level 8: Rib Cracker -- KntCmb-Acc/Dmg(A), HO:Nucle(11), KntCmb-Dmg/EndRdx/Rchg(13), KntCmb-Dmg/EndRdx(13), KntCmb-Dmg/Rchg(15) Level 10: Dull Pain -- Pnc-Heal/EndRedux(A), Pnc-EndRdx/Rchg(19), Pnc-Heal/Rchg(21), Pnc-Heal/EndRedux/Rchg(21), Pnc-Heal(23) Level 12: Combat Readiness -- RctRtc-ToHit/Rchg(A), RctRtc-ToHit(33), GssSynFr--Build%(45) Level 14: Boxing -- KntCmb-Acc/Dmg(A), KntCmb-Dmg/Rchg(33), KntCmb-Dmg/EndRdx/Rchg(33), KntCmb-Dmg/EndRdx(45) Level 16: Integration -- Prv-Absorb%(A) Level 18: Spinning Strike -- Rgn-Dmg(A), FrcFdb-Rechg%(34), Rgn-Dmg/Rchg(40), Rgn-Acc/Dmg/Rchg(42), Rgn-Acc/Rchg(42), Rgn-Dmg/EndRdx(42) Level 20: Resilience -- StdPrt-ResDam/Def+(A), UnbGrd-ResDam(23), UnbGrd-ResDam/EndRdx(27), UnbGrd-ResDam/EndRdx/Rchg(27), UnbGrd-Max HP%(34) Level 22: Tough -- GldArm-3defTpProc(A), UnbGrd-Rchg/ResDam(29), UnbGrd-ResDam(29), UnbGrd-ResDam/EndRdx(31), UnbGrd-ResDam/EndRdx/Rchg(31) Level 24: Weave -- LucoftheG-Def/Rchg+(A), Rct-ResDam%(25), Rct-Def(25), Rct-Def/EndRdx(46) Level 26: Shin Breaker -- KntCmb-Acc/Dmg(A), KntCmb-Dmg/EndRdx(43), KntCmb-Dmg/Rchg(43), KntCmb-Dmg/EndRdx/Rchg(43), HO:Nucle(45) Level 28: Instant Healing -- Pnc-Heal(A), Pnc-Heal/EndRedux(37), Pnc-EndRdx/Rchg(39), Pnc-Heal/Rchg(40), Pnc-Heal/EndRedux/Rchg(40) Level 30: Hasten -- RechRdx-I(A), RechRdx-I(31) Level 32: Crushing Uppercut -- Hct-Dmg(A), Hct-Dmg/Rchg(34), Hct-Acc/Dmg/Rchg(36), Hct-Dmg/EndRdx(37), Hct-Acc/Rchg(37) Level 35: Maneuvers -- LucoftheG-Def/Rchg+(A), ShlWal-Def/EndRdx(36), ShlWal-Def(36), ShlWal-ResDam/Re TP(46) Level 38: Moment of Glory -- LucoftheG-Def/Rchg+(A), RechRdx-I(39), RechRdx-I(39) Level 41: Focused Accuracy -- HO:Cyto(A) Level 44: Physical Perfection -- PrfShf-End%(A) Level 47: Energy Torrent -- SprFrzBls-Acc/Dmg(A), SprFrzBls-Dmg/EndRdx/Acc/Rchg(48), SprFrzBls-Dmg/EndRdx(48), FrcFdb-Rechg%(48), Bmbdmt-Acc/Dam/Rech/End(50) Level 49: Combat Jumping -- LucoftheG-Def/Rchg+(A), Ksm-ToHit+(50) Level 1: Brawl -- Empty(A) Level 1: Prestige Power Dash -- Empty(A) Level 1: Prestige Power Slide -- Empty(A) Level 1: Prestige Power Quick -- Empty(A) Level 1: Prestige Power Rush -- Empty(A) Level 1: Prestige Power Surge -- Empty(A) Level 1: Fury Level 1: Sprint -- Empty(A) Level 2: Rest -- Empty(A) Level 4: Ninja Run Level 2: Swift -- Run-I(A) Level 2: Health -- Pnc-Heal/+End(A) Level 2: Hurdle -- Jump-I(A) Level 2: Stamina -- PrfShf-End%(A) Level 1: Combo Level 1 Level 1: Combo Level 2 Level 1: Combo Level 3 Level 0: Born In Battle Level 0: High Pain Threshold Level 0: Marshal Level 0: Invader Level 50: Agility Core Paragon ------------
-
Like Ivan had remarked, regen survival depends on not passive regen but high recharge to cycle your heals, also defense goes a long way, and finally as I remarked having a good bit of slow resistance. That's a lot of goals to shoot for and you will have to make compromises but you can still have a survivable and functional toon despite all that. Smashing lethal is the most common damage type so it might be worthwhile to build up defenses against that, it's not going to cover everything and certain attacks are still going to get through but it's better than no defense at all. To that's my premise - try to build for S/L defense, have decent recharge, and shoot for a modest amount of slow resistance So now I'm going to breakdown your power selection and slotting based on those goals. Initial strike - Blistering cold is a good set as it has bonuses that contribute to slow resistance and S/L defense. However the 6th slot gives you 5% fire/cold defense, that doesn't align with our goal so we are going to cut it for the time being. Fast healing- no comments there, it's fine Heavy blow - Like blistering cold the brute ATO contributes to S/L defense and recharge but again, the 6th slot gives you s/l resist which doesn't align with our build goal so we are going to cut it for the time being. Quick recovery - I think your recovery is high enough not to need 2 slots, nothing that you do is so end intensive that you need to 2 slot both stamina and QR AND get physical perfection and superior conditioning for. Assuming we leave your power selection as is you only need a perf shifter proc there, same with stamina. Reconstruction - Panacea gives you recharge so it's fine, another alternative is preventive medicine at 6 slots but we want to be conservative on slots so panacea is fine. It's actually my go to heal set for recharge bonuses Rib Cracker - The other brute ATO contributes to S/L defense but if we consider the value of the bonus Kinetic combat actually offers higher values, something to keep in mind Dull pain - same as recon, fine as it is Combat readiness - 2 recharge will certainly make it recharge fast, but 2 rectified reticle will give you S/L defense, the difference in recharge time? 27 seconds vs 33 seconds. I'd take the S/L defense bonus any day but you can make your own call Boxing - Kinetic for the S/L defense, we hate mules but we sometimes have to have them, fine as it is. Integration - The proc stays, The Heal IO brings you to 39HP regenerated per second vs 36 HP per second without that heal IO. Worth it? Spinning strike - Recharge bonus with rag which is fine, but it also does AoE knockdown! perfect place for a force feedback +recharge proc hmm? Resilience - Aegis gives fire defense, doesn't really align with our goals, you know what does give S/L defense though? Either reactive armor or unbreakable guard at 4 slots, the latter gives more, it's a good thing we cut some slots out of those powers you slotted with full sets huh? Tough - good job you slotted this one in a way that aligns with our goals Weave - we shaved some slots out of stamina and quick recovery so dump one here to bring defense to the ED cap. and also 3 piece reactive defense gives you an HP bonus, yay! Shin Breaker - why? The PvP set does nothing that aligns with our goals, let's find something else. It's a single target attack so kinetic combat is a good candidate for more S/L defense Instant healing - fine as it Hasten - you can +4 2 level 50 recharge IOs and save a slot Crushing Uppercut - purple set gives recharge, fine as it is Manuevers - consider an lotg and 3 pieces of shield wall for the same defense numbers and a little more HP, it'll take a slot away from combat jumping but there is no net loss of slots consumed. MoG - Fine as it is Combat jumping - since we took the shield wall out we are left with lotg and kismet which are fine, it can stay as it is. Epic pool: From a survival perspective energy mastery does nothing for regen. I would reconsider your decision to go with that pool. Like Ivan said darkest night from soul mastery aids in survival by reducing mob to-hit which synergizes with your building for defense. I am a fan of whirlwind from the speed pool but that's not everyone's cup of tea so let's use soul mastery. keep in mind we don't really have that many additional slots to spare so these are my recommendations Gloom - great ST filler, also does -to hit, and you can put a purple set in for the recharge bonus Darkest night - enzyme for end red/to hit debuff. The last pick can be a travel power so you can get around quicker, and it's also a good place to put a winter's gift slow resist proc. Here is what the end result can look like: Villain Plan by Mids' Reborn : Hero Designer 2.6.0.7 https://github.com/ImaginaryDevelopment/imaginary-hero-designer Click this DataLink to open the build! Loose Canon: Level 50 Natural Brute Primary Power Set: Street Justice Secondary Power Set: Regeneration Power Pool: Fighting Power Pool: Speed Power Pool: Leadership Power Pool: Leaping Ancillary Pool: Soul Mastery Villain Profile: Level 1: Initial Strike -- SprBlsCol-Acc/Dmg(A), SprBlsCol-Acc/Dmg/EndRdx(3), SprBlsCol-Acc/Dmg/Rchg(5), SprBlsCol-Rchg/HoldProc(5), SprBlsCol-Dmg/EndRdx/Acc/Rchg(7) Level 1: Fast Healing -- NmnCnv-Regen/Rcvry+(A), Mrc-Rcvry+(9) Level 2: Heavy Blow -- SprBrtFur-Rech/Fury(A), SprBrtFur-Acc/Dmg/Rchg(3), SprBrtFur-Dmg/EndRdx/Rchg(7), SprBrtFur-Acc/Dmg/EndRdx/Rchg(9), SprBrtFur-Acc/Dmg(11) Level 4: Quick Recovery -- PrfShf-End%(A) Level 6: Reconstruction -- Pnc-Heal/EndRedux(A), Pnc-EndRdx/Rchg(15), Pnc-Heal/Rchg(17), Pnc-Heal/EndRedux/Rchg(17), Pnc-Heal(19) Level 8: Rib Cracker -- KntCmb-Acc/Dmg(A), HO:Nucle(11), KntCmb-Dmg/EndRdx/Rchg(13), KntCmb-Dmg/EndRdx(13), KntCmb-Dmg/Rchg(15) Level 10: Dull Pain -- Pnc-Heal/EndRedux(A), Pnc-EndRdx/Rchg(19), Pnc-Heal/Rchg(21), Pnc-Heal/EndRedux/Rchg(21), Pnc-Heal(23) Level 12: Combat Readiness -- RctRtc-ToHit/Rchg(A), RctRtc-ToHit(33) Level 14: Boxing -- KntCmb-Acc/Dmg(A), KntCmb-Dmg/Rchg(33), KntCmb-Dmg/EndRdx/Rchg(33), KntCmb-Dmg/EndRdx(45) Level 16: Integration -- Prv-Absorb%(A) Level 18: Spinning Strike -- Rgn-Dmg(A), FrcFdb-Rechg%(34), Rgn-Dmg/Rchg(40), Rgn-Acc/Dmg/Rchg(42), Rgn-Acc/Rchg(42), Rgn-Dmg/EndRdx(42) Level 20: Resilience -- StdPrt-ResDam/Def+(A), UnbGrd-ResDam(23), UnbGrd-ResDam/EndRdx(27), UnbGrd-ResDam/EndRdx/Rchg(27), UnbGrd-Max HP%(34) Level 22: Tough -- GldArm-3defTpProc(A), UnbGrd-Rchg/ResDam(29), UnbGrd-ResDam(29), UnbGrd-ResDam/EndRdx(31), UnbGrd-ResDam/EndRdx/Rchg(31) Level 24: Weave -- LucoftheG-Def/Rchg+(A), Rct-ResDam%(25), Rct-Def(25), Rct-Def/EndRdx(50) Level 26: Shin Breaker -- KntCmb-Acc/Dmg(A), KntCmb-Dmg/EndRdx(43), KntCmb-Dmg/Rchg(43), KntCmb-Dmg/EndRdx/Rchg(43), HO:Nucle(45) Level 28: Instant Healing -- Pnc-Heal(A), Pnc-Heal/EndRedux(37), Pnc-EndRdx/Rchg(39), Pnc-Heal/Rchg(40), Pnc-Heal/EndRedux/Rchg(40) Level 30: Hasten -- RechRdx-I(A), RechRdx-I(31) Level 32: Crushing Uppercut -- Hct-Dmg(A), Hct-Dmg/Rchg(34), Hct-Acc/Dmg/Rchg(36), Hct-Dmg/EndRdx(37), Hct-Acc/Rchg(37) Level 35: Maneuvers -- LucoftheG-Def/Rchg+(A), ShlWal-Def/EndRdx(36), ShlWal-Def(36), ShlWal-ResDam/Re TP(48) Level 38: Moment of Glory -- LucoftheG-Def/Rchg+(A), RechRdx-I(39), RechRdx-I(39) Level 41: Gloom -- Apc-Dmg(A), Apc-Acc/Dmg/Rchg(45), Apc-Acc/Rchg(46), Apc-Dmg/EndRdx(46), Apc-Dam%(46) Level 44: Darkest Night -- HO:Enzym(A), DscWrd-ToHitDeb(48), DscWrd-ToHitDeb/Rchg(48), DscWrd-ToHitDeb/Rchg/EndRdx(50) Level 47: Super Speed -- WntGif-ResSlow(A) Level 49: Combat Jumping -- LucoftheG-Def/Rchg+(A), Ksm-ToHit+(50) Level 1: Brawl -- Empty(A) Level 1: Prestige Power Dash -- Empty(A) Level 1: Prestige Power Slide -- Empty(A) Level 1: Prestige Power Quick -- Empty(A) Level 1: Prestige Power Rush -- Empty(A) Level 1: Prestige Power Surge -- Empty(A) Level 1: Fury Level 1: Sprint -- Empty(A) Level 2: Rest -- Empty(A) Level 4: Ninja Run Level 2: Swift -- Run-I(A) Level 2: Health -- Pnc-Heal/+End(A) Level 2: Hurdle -- Jump-I(A) Level 2: Stamina -- PrfShf-End%(A) Level 1: Combo Level 1 Level 1: Combo Level 2 Level 1: Combo Level 3 ------------
-
With one small purple you can softcap S/L and melee, you have a decent amount of recharge bonuses but I don't see a whole lot of slow resistance I have to ask what's the goal of the build? perma hasten and high recharge to keep reconstruction up more often? respectable defenses? If you are to prioritize one thing what would that be?
-
I'm too old and too stupid to start internet arguments so instead I invite you to share your build and your sage advice.
-
One time GM_Miss PMed me, gave me some merits and a badge and a title. I remarked that the city needs more pandas and also that we need to spread the Gospel of SPIN and GM_Miss agreed. Tru story brah. So that's one GM on my side. Just need to work on influencing the rest.
-
TAKE GRANT COVER. DDR is important. I wouldn't 6 slot battle agility and weave. You'd get more S/L resist by slotting deflection than the set bonuses both sets offer. 4% toxic/psi resist is meaningless and the fire/cold resist can be gotten through winter sets that also offer slow resist which your build lacks. Phalanx fighting appears to be un-enhancable so you can shave a slot from combat jumping and dump one of the uniques in PF. This is what I've come up with while trying to retain the idea of using as many procs where it is practical. You can fit in an achilles proc and another damage proc in shred to increase it's damage but you lose out on 6% s/l/tox/psi resist in doing so. I also put the armageddon proc in shield charge and put a different damage proc in savage leap instead and overall you get more damage out of the two powers. This build also uses muscalature to push enhancement values to or over ED cap. On top of that, 90% -recharge resist. Hero Plan by Mids' Reborn : Hero Designer 2.6.0.7 https://github.com/ImaginaryDevelopment/imaginary-hero-designer Click this DataLink to open the build! Level 50 Magic Tanker Primary Power Set: Shield Defense Secondary Power Set: Savage Melee Power Pool: Leaping Power Pool: Fighting Power Pool: Speed Power Pool: Leadership Ancillary Pool: Leviathan Mastery Hero Profile: Level 1: Deflection -- LucoftheG-Def/Rchg+(A), TtnCtn-ResDam/EndRdx(5), TtnCtn-ResDam(13), StdPrt-ResDam/Def+(15) Level 1: Savage Strike -- SprGntFis-Acc/Dmg(A), SprGntFis-Acc/Dmg/EndRdx/Rchg(7), SprGntFis-Dmg/Rchg(9), SprGntFis-Acc/Dmg/Rchg(27), SprGntFis-Dmg/EndRdx/Rchg(31), SprGntFis-Rchg/+Absorb(31) Level 2: Battle Agility -- LucoftheG-Def/Rchg+(A), Rct-Def(3), Rct-Def/EndRdx(3), Rct-ResDam%(5) Level 4: True Grit -- GldArm-3defTpProc(A), TtnCtn-ResDam(15), TtnCtn-ResDam/Rchg(17), Prv-Heal(17), Prv-Absorb%(19), Prv-Heal/Rchg(19) Level 6: Shred -- SprMghoft-Rchg/Res%(A), SprMghoft-Acc/Dmg(7), SprMghoft-Dmg/Rchg(9), SprMghoft-Dmg/EndRdx/Rchg(11), SprMghoft-Acc/Dmg/Rchg(11), SprMghoft-Acc/Dmg/EndRdx/Rchg(13) Level 8: Active Defense -- EndRdx-I(A) Level 10: Against All Odds -- EndRdx-I(A) Level 12: Combat Jumping -- LucoftheG-Def/Rchg+(A) Level 14: Kick -- Empty(A) Level 16: Vicious Slash -- Hct-Dmg(A), Hct-Acc/Dmg/Rchg(40), Hct-Acc/Rchg(43), Hct-Dmg/EndRdx(43), Hct-Dam%(46) Level 18: Grant Cover -- HO:Cyto(A) Level 20: Blood Thirst -- GssSynFr--ToHit(A), GssSynFr--ToHit/Rchg(21), GssSynFr--ToHit/Rchg/EndRdx(37), GssSynFr--Rchg/EndRdx(48), GssSynFr--ToHit/EndRdx(48), GssSynFr--Build%(50) Level 22: Tough -- UnbGrd-Max HP%(A), UnbGrd-ResDam/EndRdx/Rchg(23), UnbGrd-ResDam(23), UnbGrd-ResDam/EndRdx(29) Level 24: Weave -- LucoftheG-Def/Rchg+(A), ShlWal-Def/EndRdx(25), ShlWal-Def(25), ShlWal-ResDam/Re TP(27) Level 26: Shield Charge -- Arm-Dmg/Rchg(A), Arm-Dam%(33), Arm-Acc/Dmg/Rchg(34), Arm-Acc/Rchg(34), Arm-Dmg/EndRdx(34), FrcFdb-Rechg%(36) Level 28: Rending Flurry -- SprAvl-Acc/Dmg/EndRdx(A), SprAvl-Acc/Dmg/EndRdx/Rchg(29), Obl-Acc/Dmg/EndRdx/Rchg(37), PrfZng-Dam%(37), Obl-%Dam(40), Erd-%Dam(50) Level 30: Hasten -- RechRdx-I(A), RechRdx-I(31) Level 32: Maneuvers -- LucoftheG-Def/Rchg+(A), RedFrt-Def(33), RedFrt-Def/EndRdx(33) Level 35: Tactics -- HO:Cyto(A) Level 38: Savage Leap -- SprAvl-Acc/Dmg/Rchg(A), SprAvl-Acc/Dmg(39), FuroftheG-ResDeb%(39), Obl-%Dam(39), Erd-%Dam(40), PrfZng-Dam%(50) Level 41: School of Sharks -- SprFrzBls-Acc/Dmg(A), SprFrzBls-Acc/Dmg/EndRdx(42), SprFrzBls-Rchg/ImmobProc(42), Ann-ResDeb%(42), Bmbdmt-+FireDmg(43), Bmbdmt-Dam(46) Level 44: Bile Spray -- SprFrzBls-Dmg/EndRdx/Acc/Rchg(A), SprFrzBls-Acc/Dmg/Rchg(45), SprFrzBls-Dmg/EndRdx(45), Ann-ResDeb%(45), Bmbdmt-+FireDmg(46), Bmbdmt-Acc/Dam/Rech(48) Level 47: Taunt -- PrfZng-Dam%(A) Level 49: Phalanx Fighting -- Ksm-ToHit+(A) Level 1: Brawl -- Empty(A) Level 1: Gauntlet Level 1: Prestige Power Dash -- Empty(A) Level 1: Prestige Power Slide -- Empty(A) Level 1: Prestige Power Quick -- Empty(A) Level 1: Prestige Power Rush -- Empty(A) Level 1: Prestige Power Surge -- Empty(A) Level 1: Sprint -- Empty(A) Level 2: Rest -- Empty(A) Level 4: Ninja Run Level 2: Swift -- Empty(A) Level 2: Health -- Mrc-Rcvry+(A), Pnc-Heal/+End(21), NmnCnv-Regen/Rcvry+(36) Level 2: Hurdle -- Empty(A) Level 2: Stamina -- PrfShf-End%(A), PrfShf-EndMod(36) Level 50: Melee Core Embodiment Level 50: Musculature Radial Paragon Level 1: Blood Frenzy ------------
-
I'm not saying taunt is useless first of all. I have it on my tank and I do use it and there are situations where it is really helpful (i.e. battle maiden fight in apex, as long as the controllers/dominators don't root her). People tend to think in absolutes when debating. In reality tanks don't need to have 100% aggro, This is one of those quality vs quantity issues. Tanks need to have aggro on the right targets. If the rest of the team can't handle a low threat mob or two then the rest of the team has bigger issues that they, not the tank, needs to sort out. So going back to my example, stationary tank punching away at a lower threat mob while the high threat ones are outside of the taunt aura/punchvoke radius, yeah they need taunt. Tanks that have better threat assessment, knows how to move and thus can be where they need to be when they need to be there need taunt less. I'm a huge advocate of jousting and it works the same on tanks as it does on blasters or any other AT. See a mob that's about to aggro the group because someone isn't paying attention to their aggro radius? Hop over and joust a footstomp and be back in the middle of the original mob you were keeping busy, some time later hop over and joust a handclap to keep those mobs interested and on their butts. If you have taunt you can add that to your arsenal to manage two groups despite hitting your aggro cap. Tanks that play like that are still be in a better place than those that stay in one place and rely on taunt in those situations. I also see tanks use taunt badly, like using it while standing with the team to initiate combat against AoE heavy mobs, "Hey why are all my teammates taking so much damage, silly squishies I protec U, taunt some more." Every tool has it's place, taunt, punchvoke, taunt auras, etc... knowing how to use them effectively and adopting to different situations with the tools you have is a better exercise of one's energies than wasting time on this debate talking about absolutes.
-
It's a really nice tool in the tanker arsenal but some players/powersets need it more than others. Tanks that play city of statues need taunt. They need it because they are perfectly content standing in one place doing their "tanking" and they normally don't prioritize their targets either. "Hmm there are two dark ring mistress about 10 feet from me killing my teammates but nah, I'll stand here and punch the steel strongman cuz he looks stronk AF." Tank that know how to move have less dependency on it to manage aggro.
-
Villain Plan by Mids' Reborn : Hero Designer 2.6.0.7 https://github.com/ImaginaryDevelopment/imaginary-hero-designer Click this DataLink to open the build! Princess Spinaroonie: Level 50 Natural Brute Primary Power Set: Staff Fighting Secondary Power Set: Regeneration Power Pool: Leaping Power Pool: Speed Power Pool: Fighting Power Pool: Leadership Ancillary Pool: Pyre Mastery Villain Profile: Level 1: Mercurial Blow -- SprBlsCol-Acc/Dmg(A), SprBlsCol-Acc/Dmg/Rchg(3), SprBlsCol-Dmg/EndRdx(7), SprBlsCol-Acc/Dmg/EndRdx(9), SprBlsCol-Dmg/EndRdx/Acc/Rchg(11), SprBlsCol-Rchg/HoldProc(11) Level 1: Fast Healing -- NmnCnv-Regen/Rcvry+(A), Mrc-Rcvry+(15) Level 2: Guarded Spin -- LucoftheG-Def/Rchg+(A), HO:Nucle(3), SprBrtFur-Acc/Dmg(5), SprBrtFur-Rech/Fury(5), SprBrtFur-Acc/Dmg/EndRdx/Rchg(7) Level 4: Quick Recovery -- PrfShf-End%(A) Level 6: Eye of the Storm -- SprUnrFur-Acc/Dmg(A), SprUnrFur-Acc/Dmg/Rchg(17), SprUnrFur-Dmg/EndRdx/Rchg(19), SprUnrFur-Acc/Dmg/EndRdx/Rchg(21), SprUnrFur-Rchg/+Regen/+End(21), FrcFdb-Rechg%(23) Level 8: Reconstruction -- Pnc-Heal/EndRedux(A), Pnc-EndRdx/Rchg(9), Pnc-Heal/Rchg(13), Pnc-Heal/EndRedux/Rchg(13), Pnc-Heal(15) Level 10: Combat Jumping -- LucoftheG-Def/Rchg+(A), Ksm-ToHit+(39), ShlWal-ResDam/Re TP(42) Level 12: Super Speed -- WntGif-ResSlow(A) Level 14: Hasten -- RechRdx-I(A), RechRdx-I(17) Level 16: Integration -- Prv-Absorb%(A) Level 18: Whirlwind -- SuddAcc--KB/+KD(A), EndRdx-I(19), FrcFdb-Rechg%(29) Level 20: Resilience -- StdPrt-ResDam/Def+(A), Ags-ResDam/EndRdx(40), Ags-ResDam(40), Ags-Psi/Status(46) Level 22: Boxing -- KntCmb-Acc/Dmg(A), KntCmb-Dmg/EndRdx(23), KntCmb-Dmg/Rchg(33), KntCmb-Dmg/EndRdx/Rchg(34) Level 24: Tough -- GldArm-3defTpProc(A), UnbGrd-ResDam(25), UnbGrd-ResDam/EndRdx(25), UnbGrd-ResDam/EndRdx/Rchg(27), UnbGrd-Max HP%(31) Level 26: Innocuous Strikes -- SprAvl-Acc/Dmg(A), SprAvl-Dmg/EndRdx(27), SprAvl-Acc/Dmg/EndRdx(29), SprAvl-Acc/Dmg/EndRdx/Rchg(31), SprAvl-Rchg/KDProc(31), SprAvl-Acc/Dmg/Rchg(37) Level 28: Weave -- LucoftheG-Def/Rchg+(A), Rct-Def(34), Rct-Def/EndRdx(34), Rct-ResDam%(37) Level 30: Maneuvers -- LucoftheG-Def/Rchg+(A), LucoftheG-Def/EndRdx(33), LucoftheG-Def(33) Level 32: Sky Splitter -- SprBrtFur-Acc/Dmg/Rchg(A), SprBrtFur-Dmg/Rchg(37), SprBrtFur-Dmg/EndRdx/Rchg(39), HO:Nucle(39) Level 35: Serpent's Reach -- SprWntBit-Acc/Dmg(A), SprWntBit-Dmg/Rchg(36), SprWntBit-Acc/Dmg/EndRdx(36), SprWntBit-Acc/Dmg/Rchg(36), SprWntBit-Dmg/EndRdx/Acc/Rchg(40), SprWntBit-Rchg/SlowProc(45) Level 38: Moment of Glory -- LucoftheG-Def/Rchg+(A), RechRdx-I(43), RechRdx-I(50) Level 41: Char -- SprEnt-Acc/Hold(A), SprEnt-Hold/Rchg(42), SprEnt-End/Rchg(42), SprEnt-Acc/Hold/End(43), SprEnt-Acc/Hold/End/Rchg(43), SprEnt-Rchg/AbsorbProc(45) Level 44: Dull Pain -- Pnc-Heal/EndRedux(A), Pnc-EndRdx/Rchg(45), Pnc-Heal/Rchg(46), Pnc-Heal/EndRedux/Rchg(46), Pnc-Heal(48) Level 47: Taunt -- MckBrt-Acc/Rchg(A), MckBrt-Rchg(48), MckBrt-Taunt/Rchg/Rng(48), MckBrt-Taunt/Rng(50), MckBrt-Taunt(50) Level 49: Staff Mastery Level 1: Brawl -- Empty(A) Level 1: Prestige Power Dash -- Empty(A) Level 1: Prestige Power Slide -- Empty(A) Level 1: Prestige Power Quick -- Empty(A) Level 1: Prestige Power Rush -- Empty(A) Level 1: Prestige Power Surge -- Empty(A) Level 1: Fury Level 1: Sprint -- UnbLea-Stlth(A) Level 2: Rest -- Empty(A) Level 4: Ninja Run Level 2: Swift -- Run-I(A) Level 2: Health -- Pnc-Heal/+End(A) Level 2: Hurdle -- Jump-I(A) Level 2: Stamina -- PrfShf-End%(A) Level 1: Combo Level 1 Level 1: Combo Level 2 Level 1: Combo Level 3 Level 49: Form of the Body Level 49: Form of the Mind Level 49: Form of the Soul Level 0: Born In Battle Level 0: High Pain Threshold Level 0: Invader Level 0: Marshal Level 50: Ageless Radial Epiphany Level 50: Support Radial Embodiment Level 50: Agility Core Paragon ------------ This is my staff/regen build. It's not STJ/Regen but I hope it gives you some perspective on what you can do when you focus on a finite number of goals and really build for them. I took whirlwind for the lulz initially but kept it because 1) lulz and 2) it's actually not too shabby. If you look at the totals you will see that it's softcapped to S/L at the very least (among other things). If you look at the totals for your build you will see your S/L is at around 16% which doesn't really help you too much survival wise. You have a bunch of toxic/psi resist bonuses from slotting the 6 piece of the purples sets and doctored wounds but you have to ask yourself are those bonuses really meaningful? The one thing I will note though, is that when you build for defense you will sacrifice recharge bonuses, so it's not without drawbacks. However, lower level content is usually fairly easy and having softcapped defenses while exemped down will be much more noticeable than having uber recharge. The end game has incarnate tools to fill in the recharge gap.
-
It gets a little bit more complex and as I noted in my post, you need to focus on your priorities and then weigh the efficiency of how you have things slotted. A good exercise is to focus on a single priority such as building for S/L defense and process/slot every power you have with that priority in mind. This way you can get exposed to all the sets that offer S/L defense and in the process get an idea of the sets that offer the best "bang for the buck" in terms of slot efficiency. If a set can get you 3.75% S/L defense at 4 slots and another set get your 2.5% S/L defense at 6 slots, well, I think you know which one is more efficient. At the end of that exercise you will probably have built a character way over the S/L softcap so now move to the second phase and make some cuts to your slotting and start looking at how you can leverage those cuts to fulfill your secondary goals.