The Beta Account Center is temporarily unavailable
×

.jpg.96924298801b369260d9146067533afa.jpg)
Agorazium
-
Posts
149 -
Joined
-
Last visited
-
Days Won
2
Content Type
Profiles
Forums
Events
Store
Articles
Patch Notes
Everything posted by Agorazium
-
My main is a dark/time controller. She’s my favorite character to lead teams with because even if everyone else is level 1 she can tank most enemy groups at +4 and give the team a ton of +tohit so they feel like they’re doing something. Lots of proc opportunities in both sets if you feel like your damage is low, and the -tohit from dark control is an underrated pseudo-defense buff to your whole team on top of Farsight. I think this combo has just about everything you're wanting... Debuffs: Slowed Response is easy to get on a short cooldown and can take an Achilles -res proc for massive AOE -res and -def. Time's Juncture is amazing too. Everything in Dark/ does -tohit. CC: Dark Control is one of the better control sets IMO and Shadow Field stacks very nicely with Distortion Field. Time Stop also means you can instant-hold bosses which is a weakness of controllers otherwise. The pet is not the greatest but has a lot of cone attacks - slotting an Overwhelming Force knockdown proc gives you a ton of extra soft control on top of your AOE hold, stun, and fear. Mid-level maintenance: Farsight and Chrono Shift are up every 90-120 seconds. Temporal Selection is your single-target buff which has a long-ish recharge too so you only need to click it every minute or so. Damage: Heart of Darkness is one of the best proc bombs in the game and can become a huge nuke. Slowed Response also takes multiple damage procs. I have my ST hold slotted with 5 procs since otherwise ST damage is lacking in this build. Clear position: You do have a cone in Fearsome Stare (and the immob if you need it) but everything else can be done from melee, meaning you only need to open with the cone and then jump into the enemies for the rest of the fight. This is less annoying than it sounds since the couple seconds you spend casting the fear gives your melees time to grab aggro so you should never die. Buffing: Farsight/Chrono Shift are PBAOEs so you're not going to hit everyone every time, but it's not the end of the world since you do so many other things with these powersets to keep your time alive and healthy.
-
My thought process was more that $10 and a nonsense promotion would fly under the radar. I can't have too many people getting suspicious!
-
Mind control. I want a $10/hour raise.
-
I ended up benching this character because the 4-attack chain was a little too repetitive for me, but here is the build for anyone else thinking about this combo since it did perform very well: | Copy & Paste this data into Mids Reborn : Hero Designer to view the build | |-------------------------------------------------------------------| |MxDz;1380;653;1306;HEX;| |78DA6593EB6E124114C767D945EE964B2945A048A1D0825DA8978F46DB02555B922| |61ABF92952E748500816D52BC3C810FE013F8C1B7F1FAC527D0DA967A4B6C0CAE87| |3D67424D27D9FC32FF99FF9973CEEC54F68BEE7ABD7C9B099EF596D2EF57EFEB4AA| |BA9F6EC953D5DD1B54E5B64306CF04569A55A515BAA2A6F6A6D55D76AD5555D576A| |CD085F2CAA75B5DD57E5525BED3506D5D5BD9EC2FCDB9D4E4B7E00B66EA787513DA| |654D61ABBBAD66EB8CDD996AA7461E2C2A5D6782D5CEA6A3579ADB333A85694BEAE| |F6063CBF59C8280E9FE2637C1812AB03562466691035E485C7C86C13B9E6000A681| |2D8A6688A9747308D49EC918FAF4144811CD2387206225164BF86F32C45AE8149A4| |885691D2B0D3667BCE62D249E978C9E4A5E03B60B672B3F50DA6E37C8B74BF23BE4| |75EFC40FC8854C16CE3B5D85EE349FE57C87528D4C1233B8ED1313D249E2067BE21| |97BE137F208B60769159720505DC3C8D9CF5127DC8A500B204260F9998278105964| |19CE2694C5DC79D970AC46BC8E80D64362498F7B07C15D36840813E6EF6FDC1C2A2| |23E49C4164B879EE165DE64DD433F0E706E83259E0138A6910835C0C528E0288212| |E860C184C04294C278BE1538AFC1399F845FC8DBC03354604F3CF312C915309170F| |91C9177072007E238818E32D8D514B53D4CA14B53245AD4C53AB77A10171DE80F85| |38C98DE270E909927C467C4E7C8BB90D63C37CF7FC65C935F90F903E4CA57E221F1| |0829C1C90BFC32175E62F76C202E727191443B88397E4C6E84675FF94B3488CC6A7| |259205A9033D015994794A92B1B907881DF47812E29224D5EBB113D3319CFE1C6B6| |CE4BDBD2E43933C1948E9C93E74FBB8ECF4BC333928525A8230F31BBE43DC17CFF2| |7FF6DA266E40FB0DEFC10F90F382DD2F6| |-------------------------------------------------------------------|
-
Still tinkering every couple levels but pretty happy with how this one's coming along: Artymis, Beast/TA MM.

-
These both look great! I think minimizing the gold is the way to go. Thanks so much!
-
Oh, I totally missed that in @Carnifax's build but no I would not take Voltaic Sentinel either. Too finnicky of a power and its contribution is questionable. IMO it's only good if you're on a set with several ally-only powers and plan to solo a lot.
-
I have my Cage slotted with several procs and I don’t think I’ve ever seen them chain. It’s still a solid attack power though! I recommend giving EB/TA a go because I do think it’s really fun. Elec/ is not too busy to distract from TA (which Beam definitely would do) and its lower-end base damages benefit a lot from all the -res you can throw out at large groups. I also think the pairing really suits corruptors - throw your debuff chain out and when you’re done everything is probably in Scourge range for you. I don’t think giving up on Short Circuit to stay at range is a huge loss because that power is pretty weak and slow to animate.
-
I have an elec/TA. The changes to elec definitely helped it feel less anemic and he is really fun to play now. I don't have access to my build right now but here's some tips/concerns: - Shocked from what I understand is a random chance to do additional damage, scaling in probability with how much end you have sapped from the target. It's a nice bonus especially when it happens alongside Scourge but is not something you can really plan around. - Your non-Tesla Cage attacks build stacks like EA does and then when casting Tesla Cage it chains (just damage, not the hold) to nearby targets depending on stacks. It's OK but the chain damage is honestly pretty weak. - It is really hard to cap ranged defense on this build because TA doesn't have tons of IO sets available to it. Luckily Flash Arrow can be enhanced to pretty high levels of -tohit which helps (and half of its debuff is unresistable). - I would slot Ice Arrow for proc damage so it can be used in your ST attack chain. Once you have some global recharge it is easy to keep targets held even with zero hold enhancements. The buffs to EB are nice but it definitely still feels lacking in ST damage so IMO slotting it for procs is best. - YMMV but I don't think Dark Mastery is good here. By the time you fire off your debuffs (let's say Acid/Flash/Disruption Arrows at minimum, OSA if its up, and Entangling Arrow on a hard target since it applies -res now), and then get into range for your PBAOEs, mobs will be dead or close to it and you won't get a ton of value out of Soul Drain. I dropped Short Circuit for this reason also. This is a busy build pre-APPs, I would just pick an armor you want and possibly an AOE immobilize to keep groups inside your death zone. Some people slot OSA for proc damage also but I would rather slot it for -recharge. It does plenty of damage by itself. But something to consider for sure if you feel that your burst is lacking.
-
Honestly most of my best costumes have come from finding basic matching pieces that I like and customizing around them. I think this looks really great!
-
I believe it's the "Valkyrie" chest with the Valkyrie pattern, and the imperial dynasty chest detail, with one of the Robotic Arms selected for "upper body." The belt is the Kheldian one which females don't have access to, the Carnival of Light belt is pretty close though.
-
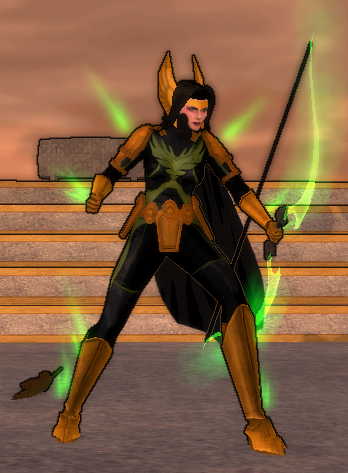
I could use help with this one! I really wanted a psychic character, a classic-looking female tank, and an excuse to use the Tech Knight belt, so here is Diamondstorm, a WP/psi melee tanker. The inspiration was Emma Frost in a Captain Marvel outfit. I like the color scheme, and I feel like it's *almost* there, but something about it just isn't clicking for me. Maybe too much gold?
-
Here is my WP/Psi which may give you some ideas. It could probably be better - I have a Dark/ tank that is basically immune to everything - but it's tough enough to get the job done 90% of the time. https://www.midsreborn.com/builds/download.php?uc=1344&c=656&a=1312&f=HEX&dc=78DA6593CB4F135114C6EF74A602A5050A94F743AA086D6504F7C6441112A54911D465D3C0152694B6E99488BA32111F5B37FE0326EAC6B57F89CFADBCE5B1C0F7A31EE7FB8444266D7FBD67BE73EEB9DFCD492E0E075F8CDE39AB8CE0F96CC675D39399DC9C2E5626174A999293CF297982C34E663E9F9B764BF9E27C85045A204A0FEBEB3AE76AFB9A93CD16F23774B18D2F923AABB59D72A5803385950AA5F2F9AC3DE2CCCC969CDC4CD05B8DE94C4116B5FF16D3BAE8CE3A8580B79E28683D1DB95070A6EC73C585924E2717D2C98C5BD2C59B2DD244B77C3F54C98FF1B7C7B25FD9F267C852BE389900AD2BE438786402FCD2ABF894E5238F5A966A06AAF98C3D13EA4FE0F16FE08A684C682C93952B59B9720D9AC03A18DC025725C78F1CC31F8176A8115C937715DEA665AB827502AC1BBC0AD6B0E39A49D0903BA862E7555EE7EBB2ACC60E66F5639FA7AA7B04367DB63CB6ED82A6648778CA504CFEF489F6343A6D6C9675A778259A5AD6AB65C74DECB8A58E0C831BB277988E84A9ADBF887AF523AC3B0AB65D029BA47E0372540373BECA7D4478979157D0F5BC068FBD21DF92EF782BEFC11F92DBCCDCE6BB38E7D125F21E791FEC79403E047F4A6E2BDD6C4D282FF65D62EDECAFDD858F61E9B9939E74B2E7383D89D393383D69106D373DEE7E8EFC8167E0D013F0B7EC1165CFD194202AE719074F5C2627C80472FAE6D05F59727B99DB7B1BB1BE5BE422185B424EEC0CA9E0D52FC9EDE7D9FA337897965709D64B6CC097939BE447720B1CD82677C0A721A56CF867D9ABD8E3D432B942FAFC38FB4BF416157F06E9F9203D8F59FBB35CEEB0FE9FCDB143919445B9440C2FB215D8AF40CDF6A1C8CE41C4549CD70ECE6BC726D8D5637A53B17BA0F5294E5517A7AA8B53F5076B44DD58
-
Released: Headphone Airquake Thorngarden Bloodshower Psystriker
-
Ran an MLTF with you earlier and this looks even better in “person”!
-
.thumb.jpg.c3702dfcdea7ee2867be9ef85b566d3d.jpg)
What are the most hybrid-y builds (apart from the Epic Archetypes)?
Agorazium replied to Gulbasaur's topic in Archetypes
I have a dark/time corrupter that is an effective tanktroller, with the stacking def/-tohit, knockdowns, holds and Dark Pit which needs heavy slot investment but is a pretty underrated power. -
Which ATs or specific power sets are most in need of a review?
Agorazium replied to KaizenSoze's topic in General Discussion
Some of the outdated support sets like Force Field and Sonic Resonance could use new mechanics. I enjoy them, but don’t really see a point in playing an FF toon when I can access Power Boosted Farsight for the same effect plus several other kinds of support/utility. Sonic at the very least needs a change to Liquefy’s recharge which has no business being as long as it is. -
Just wanted to throw in my 2 cents that Wall of Force is a pretty decent AOE for builds that otherwise lack it. I have it on a few controllers, a Grav/Energy dominator, and I think one tank. Probably not worth taking on a more DPS-oriented AT though.
-
Hi all, I am looking for input on my KM/EA build since I've never played a stalker to 50 before. This build is slightly overcapped in S/L/E/F/C defense in exchange for falling 6% short of the S/L resistance cap but I don't see a way to fix that. I read everything I could off these forums including Croax's builds which I think gave me a solid foundation but I still have some questions: - Is it worth proccing out any of my attacks? I figured no, since the AT is so reliant on its crit mechanics. - Where is the best place to slot the ATO sets? - Is there a standout APP? I really wanted Energy Torrent for theme but if there is a set that towers above the rest I might consider switching. - Is Concentrated Strike still bad? Originally I had it in the build but swapped it for FB to have a ranged option which I think might be more useful in the long run. This Villain build was built using Mids Reborn 3.0.6.0 https://github.com/LoadedCamel/MidsReborn Click this DataLink to open the build! Level 50 Mutation Stalker Primary Power Set: Kinetic Melee Secondary Power Set: Energy Aura Power Pool: Teleportation Power Pool: Fighting Power Pool: Leaping Ancillary Pool: Body Mastery Villain Profile: Level 1: Quick Strike -- Mk'Bit-Acc/Dmg(A), Mk'Bit-Dmg/EndRdx(3), Mk'Bit-Acc/EndRdx/Rchg(3), Mk'Bit-Acc/Dmg/EndRdx/Rchg(7), Mk'Bit-Dam%(43) Level 1: Hide -- ShlWal-ResDam/Re TP(A) Level 2: Body Blow -- Mk'Bit-Dam%(A), TchofDth-Dam%(5), GldStr-%Dam(7), TchofDth-Dmg/EndRdx(19), Hct-Dam%(43) Level 4: Smashing Blow -- Mk'Bit-Acc/Dmg(A), Mk'Bit-Dmg/EndRdx(9), Mk'Bit-Dmg/Rchg(9), Mk'Bit-Acc/EndRdx/Rchg(11), Mk'Bit-Acc/Dmg/EndRdx/Rchg(17), Mk'Bit-Dam%(17) Level 6: Assassin's Strike -- SprStlGl-Acc/Dmg(A), SprStlGl-Dmg/Rchg(11), SprStlGl-Acc/Dmg/Rchg(13), SprStlGl-Dmg/EndRdx/Rchg(13), SprStlGl-Acc/Dmg/EndRdx/Rchg(15), SprStlGl-Rchg/Hide%(15) Level 8: Build Up -- GssSynFr--Build%(A), GssSynFr--ToHit/Rchg(19) Level 10: Kinetic Shield -- LucoftheG-Def/Rchg+(A), LucoftheG-Def(21), LucoftheG-Def/EndRdx(21), LucoftheG-Def/Rchg(23), LucoftheG-Def/EndRdx/Rchg(42), Rct-ResDam%(42) Level 12: Power Shield -- LucoftheG-Def/Rchg+(A), LucoftheG-Def(23), LucoftheG-Def/EndRdx(25), LucoftheG-Def/Rchg(25), LucoftheG-Def/EndRdx/Rchg(42) Level 14: Entropy Shield -- EndRdx-I(A) Level 16: Kinetic Dampening -- Ags-ResDam(A), Ags-ResDam/EndRdx(27), Ags-ResDam/EndRdx/Rchg(27), Ags-Psi/Status(29), StdPrt-ResDam/Def+(43), GldArm-3defTpProc(46) Level 18: Burst -- SprAssMar-Acc/Dmg(A), SprAssMar-Dmg/Rchg(29), SprAssMar-Acc/Dmg/Rchg(31), SprAssMar-Dmg/EndRdx/Rchg(31), SprAssMar-Acc/Dmg/EndRdx/Rchg(31), SprAssMar-Rchg/Rchg Build Up(33) Level 20: Teleport -- BlsoftheZ-Travel(A), BlsoftheZ-ResKB(33) Level 22: Combat Teleport -- EndRdx-I(A) Level 24: Boxing -- Empty(A) Level 26: Tough -- UnbGrd-Max HP%(A), UnbGrd-ResDam(33), UnbGrd-ResDam/EndRdx(34), UnbGrd-ResDam/EndRdx/Rchg(34) Level 28: Energy Drain -- PreOptmz-EndMod/Rech(A), SynSck-EndMod/Rech(34), EnrMnp-Stun%(36) Level 30: Weave -- LucoftheG-Def/Rchg+(A), LucoftheG-Def/EndRdx(37), LucoftheG-Def/Rchg(37), LucoftheG-Def/EndRdx/Rchg(37), LucoftheG-Def(39) Level 32: Focused Burst -- Apc-Dmg(A), Apc-Dmg/Rchg(39), Apc-Acc/Dmg/Rchg(39), Apc-Acc/Rchg(40), Apc-Dmg/EndRdx(40), Apc-Dam%(40) Level 35: Energize -- Prv-Heal(A), Prv-Heal/EndRdx(36), Prv-EndRdx/Rchg(48), Prv-Heal/Rchg(50), Prv-Heal/Rchg/EndRdx(50), Prv-Absorb%(50) Level 38: Superior Conditioning -- PrfShf-End%(A) Level 41: Physical Perfection -- PrfShf-End%(A) Level 44: Energy Torrent -- Bmbdmt-Dam(A), Bmbdmt-Acc/Rech/End(45), Bmbdmt-Dam/Rech(45), Bmbdmt-Acc/Dam/Rech(45), Bmbdmt-Acc/Dam/Rech/End(46), Bmbdmt-+FireDmg(46) Level 47: Combat Jumping -- LucoftheG-Def/Rchg+(A) Level 49: Disrupt -- EndRdx-I(A) Level 1: Assassination Level 1: Brawl -- Empty(A) Level 1: Sprint -- Empty(A) Level 2: Rest -- Empty(A) Level 1: Swift -- Empty(A) Level 1: Hurdle -- Empty(A) Level 1: Health -- Pnc-Heal/+End(A), NmnCnv-Regen/Rcvry+(5), Mrc-Rcvry+(36) Level 1: Stamina -- PrfShf-End%(A), SynSck-EndMod(48), SynSck-EndMod/+RunSpeed(48) ------------
-
What comic book character can you NOT create?
Agorazium replied to Oklahoman's topic in General Discussion
Emma Frost. I guess you could get somewhat close with a Sentinel on Homecoming but as a melee/ranged/tank/dominator hybrid she is difficult to analog. I have a Scarlet Witch homage character who is a Dark/Time corrupter which I think works fairly well using +def and -tohit as a stand-in for probability manipulation. -
I like sets with control options since Sonic Resonance doesn't offer much more than the +/- res. Ice, Energy, Dark, Water or Earth would all fit the bill to varying degrees.
-
I have a Bots/EA that is one of my most fun toons. EA is a very busy set which I think works better on an MM since you have plenty of time to make the most of every power, and IMO EA builds are pretty flexible depending on what you want/need out of the set. I was able to solo +1x8 at level 36 (when you pick up the +Absorb and slot it out) with pets rarely ever dying thanks to the layered mitigation EA offers. I also really appreciate Empowering Circuit's +tohit buff, which when stacked with Tactics ensures my pets don't miss often in spite of their level disadvantage. The downside is that my single-target damage is terrible. EA does not do a lot outside of Empowering Circuit to boost damage and has no -res. I ended up taking Corrosive Vial for the -res proc but it still takes a while to take down bosses. Side note, I don't think building EA as a sapper is the optimal way to play the set, but I took both AOEs from Mu Mastery which when stacked with Discharge tend to sap end naturally. It's a nice extra bit of pseudo-mitigation. I would not play Nature on an MM because many of the powers have long cooldowns and I think it would be boring, but that's really a question of personal playstyle.
-
Pretty happy with how this looks on paper. Managed to fit all the flavor powers I wanted in there and still cap S/L/P resists, melee defense, and get energy resist up to 81%. Just wondering if there's more I could do to optimize it, and since this is my first staff toon, if I'm better off going for purely set bonuses in the powers rather than all the procs I put in there. This Hero build was built using Mids Reborn 3.0.4.7 https://github.com/Reborn-Team/MidsReborn Click this DataLink to open the build! Level 50 Mutation Tanker Primary Power Set: Dark Armor Secondary Power Set: Staff Fighting Power Pool: Fighting Power Pool: Teleportation Power Pool: Leaping Ancillary Pool: Soul Mastery Hero Profile: Level 1: Death Shroud -- EndRdx-I(A) Level 1: Mercurial Blow -- SprGntFis-Dmg/Rchg(A), SprGntFis-Acc/Dmg/Rchg(7), SprGntFis-Rchg/+Absorb(34), AchHee-ResDeb%(34) Level 2: Dark Embrace -- UnbGrd-ResDam(A), UnbGrd-ResDam/EndRdx(7), UnbGrd-Rchg/ResDam(9), UnbGrd-ResDam/EndRdx/Rchg(9), UnbGrd-Max HP%(11), StdPrt-ResDam/Def+(11) Level 4: Murky Cloud -- UnbGrd-ResDam(A), UnbGrd-ResDam/EndRdx(13), UnbGrd-Rchg/ResDam(13), UnbGrd-ResDam/EndRdx/Rchg(15) Level 6: Obsidian Shield -- GldArm-ResDam(A), GldArm-End/Res(15), GldArm-3defTpProc(17) Level 8: Dark Regeneration -- TchoftheN-Acc/Heal(A), TchoftheN-Acc/EndRdx/Rchg(17), TchoftheN-%Dam(19), ThfofEss-Acc/EndRdx/Rchg(19), ThfofEss-+End%(21), Obl-%Dam(21) Level 10: Guarded Spin -- SprGntFis-Acc/Dmg(A), SprGntFis-Dmg/EndRdx/Rchg(36), SprGntFis-Acc/Dmg/EndRdx/Rchg(36), LucoftheG-Def/Rchg+(36), Obl-%Dam(37), ScrDrv-Dam%(37) Level 12: Cloak of Darkness -- ShlWal-Def/EndRdx(A), ShlWal-Def/EndRdx/Rchg(23), ShlWal-Def(23), ShlWal-ResDam/Re TP(25), Rct-ResDam%(50) Level 14: Kick -- Empty(A) Level 16: Eye of the Storm -- ScrDrv-Acc/Dmg(A), ScrDrv-Dmg/EndRdx(37), ScrDrv-Acc/Dmg/EndRdx(39), ScrDrv-Dam%(39), FuroftheG-ResDeb%(39), Arm-Dam%(40) Level 18: Tough -- TtnCtn-ResDam(A), TtnCtn-ResDam/EndRdx(25), TtnCtn-ResDam/Rchg(27), TtnCtn-ResDam/EndRdx/Rchg(27) Level 20: Staff Mastery Level 22: Weave -- LucoftheG-Def/Rchg+(A), LucoftheG-Def(29), LucoftheG-Def/EndRdx(29), LucoftheG-Def/Rchg(31), LucoftheG-Def/EndRdx/Rchg(31) Level 24: Combat Teleport -- GssSynFr--Build%(A) Level 26: Oppressive Gloom -- Acc-I(A) Level 28: Serpent's Reach -- SprMghoft-Acc/Dmg(A), SprMghoft-Dmg/Rchg(31), SprMghoft-Acc/Dmg/Rchg(33), SprMghoft-Dmg/EndRdx/Rchg(33), SprMghoft-Acc/Dmg/EndRdx/Rchg(33), SprMghoft-Rchg/Res%(34) Level 30: Teleport -- BlsoftheZ-ResKB(A) Level 32: Fold Space -- RechRdx-I(A) Level 35: Innocuous Strikes -- ScrDrv-Acc/Dmg(A), ScrDrv-Dmg/EndRdx(40), ScrDrv-Acc/Dmg/EndRdx(40), ScrDrv-Dam%(42), Obl-%Dam(42), Erd-%Dam(42) Level 38: Sky Splitter -- TchofDth-Acc/Dmg(A), TchofDth-Dmg/EndRdx(43), TchofDth-Dam%(43), Mk'Bit-Dam%(45), Hct-Dam%(45), PrfZng-Dam%(45) Level 41: Soul Tentacles -- Bmbdmt-Dam(A), Bmbdmt-Acc/Rech/End(43), Bmbdmt-Dam/Rech(46), Bmbdmt-Acc/Dam/Rech(46), Bmbdmt-Acc/Dam/Rech/End(46), Bmbdmt-+FireDmg(48) Level 44: Dark Obliteration -- Ann-Acc/Dmg(A), Ann-Acc/Dmg/EndRdx(48), Ann-ResDeb%(48), PstBls-Dam%(50), Bmbdmt-+FireDmg(50) Level 47: Combat Jumping -- LucoftheG-Def/Rchg+(A) Level 49: Taunt -- PrfZng-Dam%(A) Level 1: Gauntlet Level 1: Brawl -- Empty(A) Level 1: Sprint -- Empty(A) Level 2: Rest -- Empty(A) Level 2: Swift -- Empty(A) Level 2: Hurdle -- Empty(A) Level 2: Health -- Mrc-Rcvry+(A), NmnCnv-Regen/Rcvry+(3), Pnc-Heal/+End(3) Level 2: Stamina -- PrfShf-End%(A), SynSck-EndMod(5), SynSck-EndMod/+RunSpeed(5) Level 1: Combo Level 1 Level 1: Combo Level 2 Level 1: Combo Level 3 Level 20: Form of the Body Level 20: Form of the Mind Level 20: Form of the Soul ------------
-
+1, Diantane's teams are fun! I loved doing the FW/NW arcs having never done most of those missions before.
-
Full disclosure I'm bad at math and can't wrap my head around damage formulas. But, my understanding is that ToHit and Accuracy work together in a way that both are relevant no matter how much of the other you have. I usually aim for at least +30% global accuracy from set bonuses which might be too much but I really hate missing. If you find that you are still hitting often enough without the extra 18% I suggested then those slots could definitely find use elsewhere.