The Beta Account Center is temporarily unavailable
×


Spaghetti Betty
-
Posts
1523 -
Joined
-
Last visited
-
Days Won
16
Content Type
Profiles
Forums
Events
Store
Articles
Patch Notes
Everything posted by Spaghetti Betty
-
Radiation Armor. Become the AoE Stalker with 2 more nukes.
-

Prismatic Aether and locked costume items
Spaghetti Betty replied to Zhym's topic in General Discussion
Well if you would've asked I could have given you the ~200 that were clogging up my storage space! -
Prismatic Aether and locked costume items
Spaghetti Betty replied to Zhym's topic in General Discussion

-
The "panda hate" thing was simply started by 1 guy that wanted to start a class war between the various panda toons and the sudden explosion of penguin toons on Excelsior. I wouldn't consider that real racism, even if that 1 guy is incredibly persistent in trying to make it a thing.
-
I think all the Assault sets are really cool and interesting. Savage Assault is easily my favorite. I think the thing I like the least about them is that they're tied to Dominators.
-
-
You'll never take me alive!
-
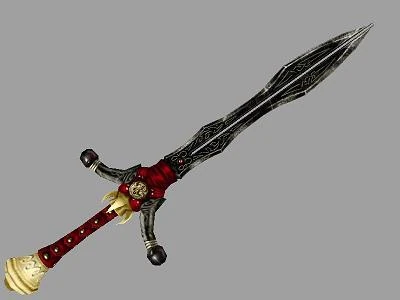
Things that make you say "Hmmm..."
Spaghetti Betty replied to Techwright's topic in General Discussion
Not really a peculiar in-universe example, but after seeing this sword up close, it definitely made me go hmm.... Also, can we have it?
-
At lot of the big offenders have already been named, so I'll just add a couple more to the list! Almost every outdoor map. I don't like them! It could be because I spend 99% of my time playing melee, but not having any structures to pull around is frustrating. There are rare exceptions, like the Mount Diable instance seen in missions like Stop Rikti Bombing. Praetorian lab maps. The rooms are just too big. Also doesn't help that most of the time you're fighting stuff immune to herding like P!Clockwork or IDF. Solo they're mostly fine since I've learned some good herding spots, but in teams they are big snoozefests for me.
-
A good chunk of it accumulated over time by playing 50s. A bigger chunk of it is from using Enhancement Converters to turn trash into treasure to sell on the AH. I let all of my uncommon and rare recipes sit in my inventory until I just eventually have all the salvage to craft them. I'll do a little researching of the supply/demand of said crafted IOs to see if they're worth selling, and if not, I'll convert until they turn into something worthwhile.
-
I go through inf way too fast to keep track of it, but I'd surmise I have about 2.5 bil spread across my roster of 120. If we're counting what's in storage I probably have about 3 bil worth of enhancements sitting around.
-
🎷🎷🎷 🎷🎷🎷
-
I would love some kind of hitbox indicator especially for cones. I feel like this would help alleviate some the stink cones get since most of the time you either have to trial and error or be a geometry wizard to understand their effective range.
-
Does this count as a costume issue? Why does only one leg disappear? Skirts/Shorts /Boots -> Gunslinger 1
-
Hey, some guys would kill for that level of talent!
-
Post your best costume designs here!
Spaghetti Betty replied to ChanelNo2's topic in Art & Multimedia
I think I might've passed by you in game! -
honoroitisfantastic firey aura / claws - Dalton Crey
Spaghetti Betty replied to honoroit's topic in Tanker
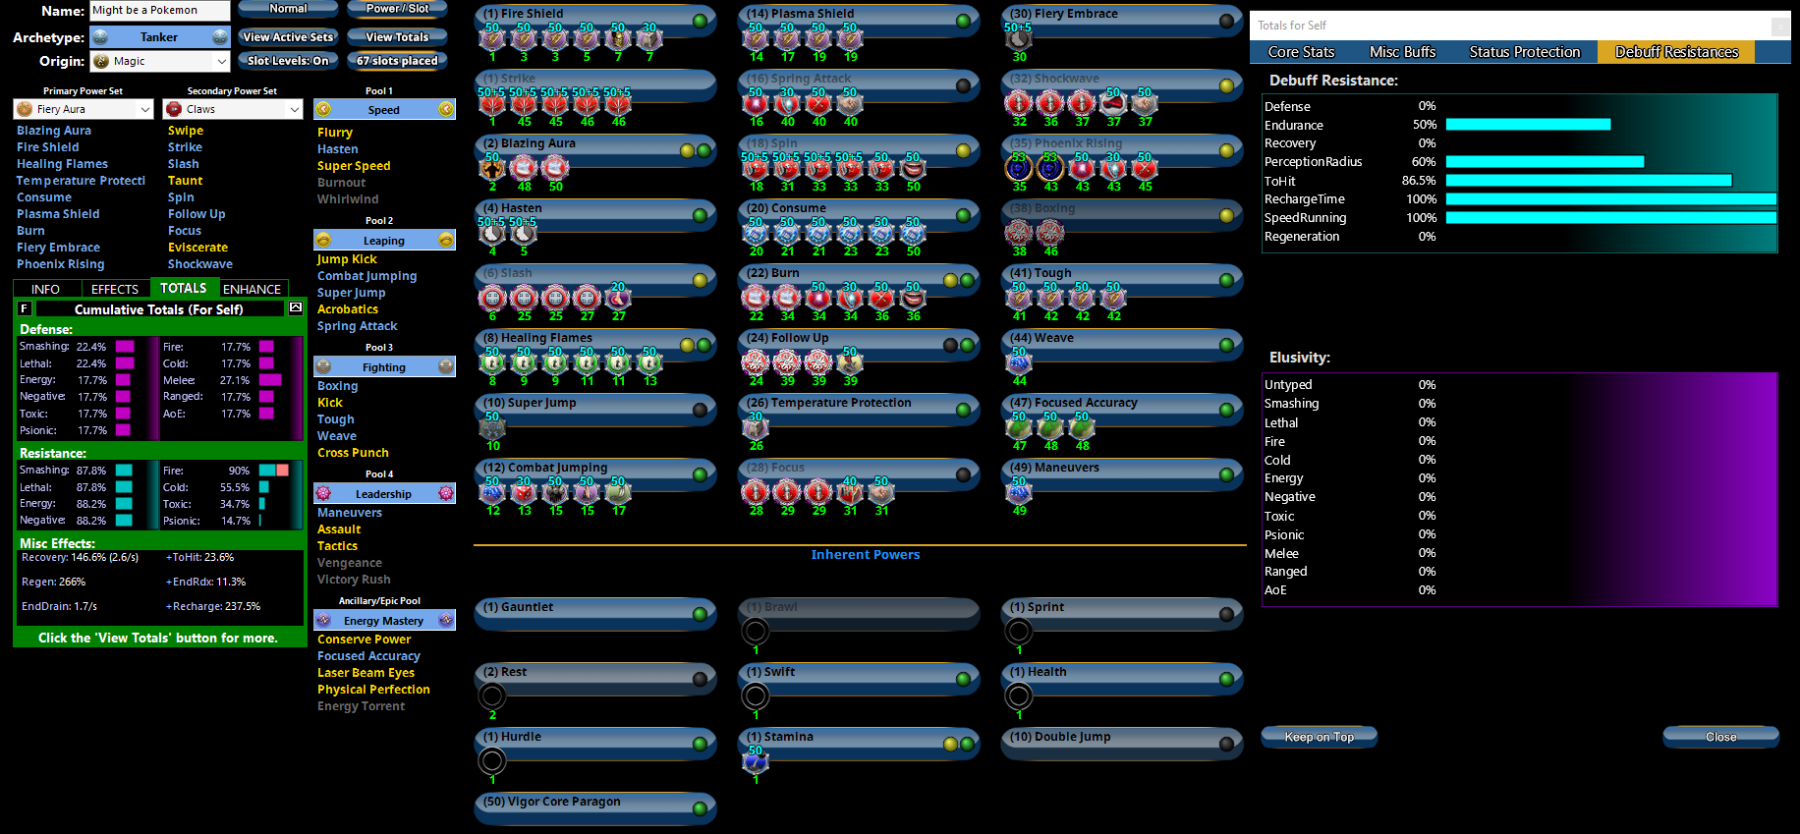
Offensive-minded Tank with Spring Attack as a requirement? Ok. Here's how I would go about it. Might be a Pokemon - Tanker (Fiery Aura - Claws).mbd An "offensive Tank" isn't necessarily a bad idea, I just think the way you're going into it is a little off kilter. What makes a Tank good at offense is its ability to stand tall while swinging, so buffing up your mitigation should definitely be considered, and it's completely possible to become a shredder that will remain unkillable in 99% of content. Spring Attack seems a little overkill with this combo, but it's in there. Since it doesn't have a very high base dmg, throwing some procs in it and calling it a day is probably the best choice. But really, Spin and Burn is probably enough. As for using Phoenix as a nuke, I think this is the best way to go about it. 2 D Sync Heal/Rech and some procs. This way it's still ED capped on Healing and Recharge while putting out some good damage. You don't have to worry about the recharge diminishing proc chances since it's already on a huge timer. Other things I wanted to include were capped Slow RES (always important on a RES-based armor), and multiple opportunities to proc Build Up. Follow Up is great at keeping your damage healthy, but these will help spike your DPS! Hope this helps! Also personally I would just ditch Spring Attack for Taunt.
-
Post your best costume designs here!
Spaghetti Betty replied to ChanelNo2's topic in Art & Multimedia
The Heaven Strider, Staff Fighting/Electric Armor Scrapper- 8155 replies
-
- 18
-

-

-

-
Jambalaya is delicious! You can ask my cousin, Jambalaya Johnathan! Also, I will now be accepting all of those love letters addressed to me that you guys have been holding onto!
-
I'm not very good at using binds. Mostly because I will simply forget they're there. In fact, I only ever really use 2: one for enabling screenshot UI, and one for opening gifts. On the other hand I usually have a tray or 2 full of targetting macros for specific TFs. Anything more than that would probably make my head explode! And I don't think anyone wants that! hopefully
-
I haven't made an Ice Armor Tank in awhile, so I've been rolling an Ice/EM the past few days. Ice/ Tanks are always a ton of fun, and can be made very sturdy even despite not having much DDR. I couldn't fit Hibernate in the build, but I still hold true that it is one of the most slept on powers in the game. What other armor set gets an invincible reset button? I've been slow levelling for now. I wish Energy Melee was more fun at low levels, but I've still been entertained. Definitely gonna make it to 50 with this one!
-
Suggestions around Staff Fighting Set
Spaghetti Betty replied to -Kobi-'s topic in Suggestions & Feedback
Try typing /loudstacking 1 to get the old aoe sounds back -
I was volunteered to lead Tinpex this time! No thanks to @PLVRIZR! If I knew I was going to lead this week, I wouldn't had gotten slammed prior. Regardless, my team had a very smooth +4 speed run totaling about 26 minutes across both parts. Missions were done afterwards while I desperately tried to get any of the usual leaders to take my team over. Here's a few pics! yes i forgot to take more again Pro tip: Don't ever freeze frame Crippling Axe Kick unless you wanna see some anatomy horror. Someone needed Unveiler, right? Defeat All with extra clickies on a CoT map, my favorite! it's not my favorite Lot of fun had this time around. Maybe I can be coaxed to lead again in the future!
-
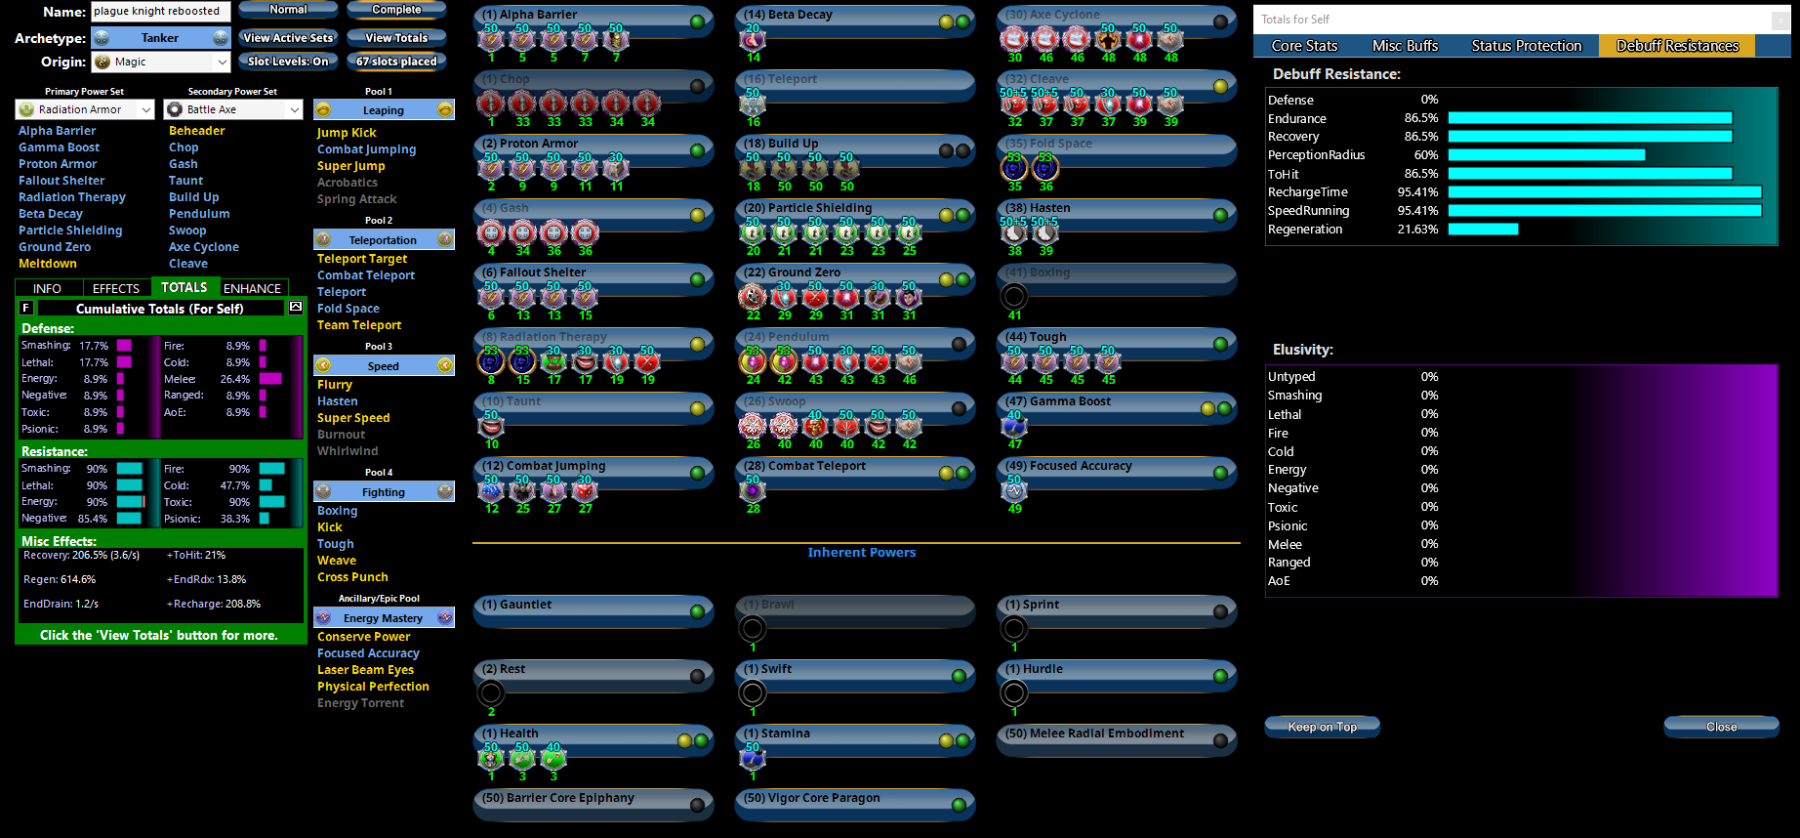
I have a take to offer as well! But you might want some deep pockets for it plague knight reboosted - Tanker (Radiation Armor).mbd I am a crazy person that turns Tanks into blasters! This build is geared more towards becoming a herding god and then splatting mobs as quickly as you gathered them up! Some of the frivolous spending can be cut by replacing the D-Syncs in Rad Therapy with boosted Healing IOs, the Acc/Dam Hami O's with similar set IOs, and the D Syncs in Fold Space with boosted Recharge IOs (it shouldn't miss, much, hopefully).
-
I'm not very keen on rolling Elemental* toons, but I do have an Elec/Elec Tank that's pretty fun to play. It can pump out some solid AoE damage, even though I opted out of Thunder Strike (I hate Thunder Strike), and stays pretty safe. Burnout is good insurance for the rare moments that things go south. * - fire/fire, ice/ice, etc.