The Beta Account Center is temporarily unavailable
×


Crysis
-
Posts
1540 -
Joined
-
Last visited
-
Days Won
1
Content Type
Profiles
Forums
Events
Store
Articles
Patch Notes
Everything posted by Crysis
-

So...what's this I hear about changes to TW?
Crysis replied to JnEricsonx's topic in General Discussion
I solo at +4/x8 pretty much everything. But if I’m going to run a PUG I always drop it to +3 and advertise I’m running +3 radio or story missions. That gives me greater assurance that people will feel challenged, still join up for the XP and not be totally useless. What’s ironic is the overwhelming majority of players =ASK= me to bump it to +4 after first mission. I oblige usually, depending on how badly other players were getting torn up. So while I agree, annoying to not be able to hit anything, it’s not the hive mind preference apparently to do anything less than +4. -
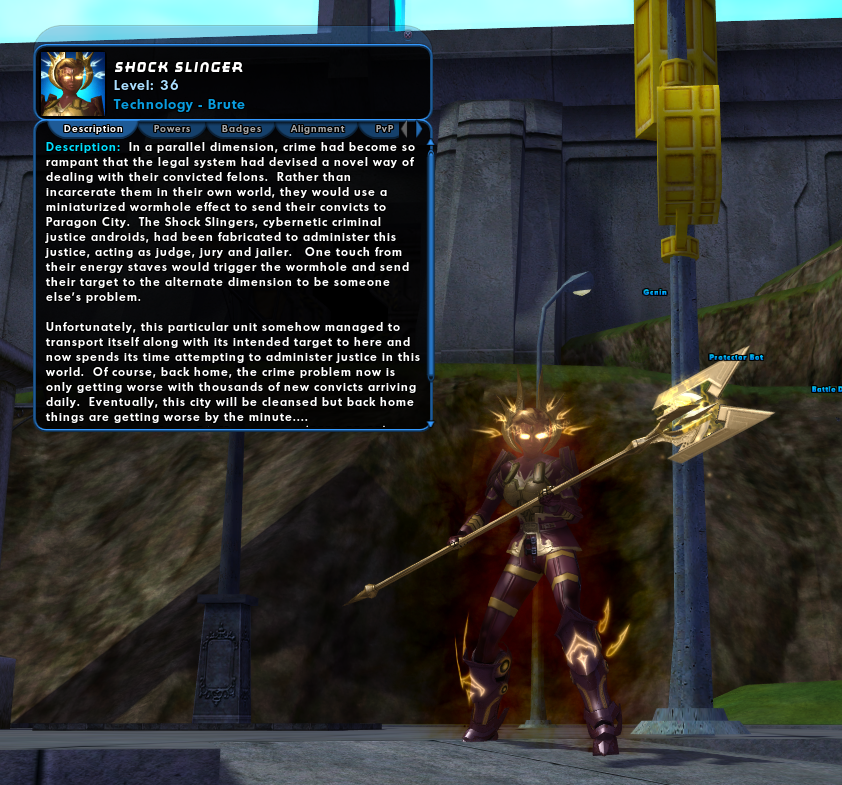
Staff/Elec brute, pseudo-homage to Judge Dredd, but with a twist.... *Photobombed by an all-MM TF running Numina LOL

-
Lam’s aren’t so bad on my Demon/Storm I’ve found. I keep them on passive until I get to a weapons chest and then put them on attack. The numpad binds are a must for this and other “close quarter” trials and TF’s (I’m looking at you Apex/Tin Mage).
-
Wait....Tactical Arrow getting nerfed? Why?
-
I don’t know the answer to your question but this was a good thread to answer more about Detonator.
-
Somewhat depends on secondary. My /Storm MM’s and /Time MM’s only have 4-5 click powers from secondary, and two of those are long duration cooldowns. So plenty of room to take primary attacks and/or pool attacks and proc those out. Web Cocoon fully procc’ed out does pretty decent damage for a MM. I can one shot a +1 minion given all my other -Res I’m throwing around.
-
BTW, and I’m surprised I never noticed this before, but nice bonus of these binds is they work on Lore Pets as well. Example: pressing Zero (all pets) and Four (Aggressive) in the prisoner escape portion of a BAF not only puts all your henchmen into Aggressive mode, but your Lore Pets also.
-
So...what's this I hear about changes to TW?
Crysis replied to JnEricsonx's topic in General Discussion
I was under the impression it wasn’t just TW but specifically TW/Bio on a Scrapper that was “ridiculously overpowered,” and thus on the short list for nerfs per Capt Powerhouse. TW/anything else isn’t in the same league as TW/Bio. -
I just finished up my latest Demon/Storm MM. I had one years ago on Live but built this one for all out carnage. As typical, /Storm is merciless on your END bar. And because I’m averaging over 230% Recharge in most missions I’m burning END like crazy. But really there’s no reason to suffer like this on HC. I routinely ran the Survival Amplifier temp power from the P2W vendor, carried several dozen charges of the Recovery temp also from the P2W vendor and also used the base amplifier for the +Recovery temp. Was this a hassle to keep all these temps running? Yup it was. Was it worth the effort? Absolutely, at least until I got Ageless. And it beats carrying a tray of blues. I do support adjusting MM End penalties. But it’s so much easier to work around these penalties now vs back on Live. As such I’m not sure I’d support spending dev time on this versus a number of other more game breaking issues.
-
guide A Comprehensive Guide to the Incarnate System
Crysis replied to Robotech_Master's topic in Guides
This is a great guide, but I think this part right here should be emphasized. I’ve seen my fair share of players who unlock Alpha, slot it to T3 for the level shift and then run straight up the Judgement and Interface trees trying to T3/T4 those out. That’s fine, free will and all that, but many of them quit before getting their other two level shifts because they find the Incarnate trials or DA story missions “too hard” or claim they “can’t do much of anything.” I always build out Alpha to T3 and Destiny plus Lore to T3 before doing anything else. The level shifts, once achieved, give you the best feel for what your “Incarnate build” is going to feel/play like. It can actively persuade you to go a different path for Hybrid, Interface and Judgement in some cases. I have some builds that struggle with Endurance all the way up to 50, but once you get Ageless to at least T3, that’s entirely a non-issue and can literally allow you to do things like totally respec into a higher recharge build, pull out most -END IO’s (that aren’t contributing to set bonuses at any rate) and replace them with Procs, etc. And run the variety of “speed” TF’s and iTrials that often would leave my character face planted as a healthy, contributing member of the league. Those three level shifts, and the benefits the T3 achievement provides, provides the backbone of your Incarnate build, the one you will ultimately play with for remainder of the game and/or retire that toon with. So getting them quickly, to me, is the key to not “wasting” the rest of the Empyrean merits you’ll earn and spend on the T4’s.- 57 replies
-
- 1
-

-
- incarnate
- incarnate trial
- (and 3 more)
-
QFT The only 50 I ever T4’d out all incarnate powers (on LIVE when there were no shortcuts), used all ATO’s, 18-24 purples, two Winter Sets AND Hami-O’s and STILL ended up melting down to strip all IO’s and deleted in disgust. Trick Arrow needs serious, serious work on a MM. Its hard to gimp Demons but.....this will do it.
-
COVBINDS for MM's. Here they are. All zipped up.
Crysis replied to vtshadow314's topic in Mastermind
Sorry, wasn't meant in a negative way, was asking if you'd somehow improved the original numpad MM binds or if they were just a repeat of the Sandolphan/WarLawk versions. Numpad MM controls are great, highly recommended for any user. I even went so far as to buy a cheap Bluetooth numpad device just so I can use this on a laptop when I travel just like I do on my main gaming rig at home. -
Weekly Discussion 53: How to Increase Villain Population
Crysis replied to GM Miss's topic in General Discussion
Not semantically perhaps. But you will NEVER have POPULATION without increased ACTIVITY. In a game world, or the real world, they go hand in hand. So I think it’s perfectly acceptable theory crafting to push to address one in the hopes it leads to more of the other. If I never take the time to make a guest comfortable in my home or place or business....they are far less likely to return a second time. Make them comfortable and they will. Comfort is highly subjective, of course. -
COVBINDS for MM's. Here they are. All zipped up.
Crysis replied to vtshadow314's topic in Mastermind
How does this differ from Sandolphan’s numpad binds, already stickied? -
For some reason, whenever playing around in newest version of MIDS, if I choose Musculature Core or Radial (doesn't matter), it shows my +RES increasing (substantially) -IF- and -ONLY IF- I also have Summon Demons toggled ON. I usually do have that toggled on so I can get some idea of what +RES looks like with the Ember Demon slotted up. But to the best of my knowledge, Musculature offers no +RES buffs. And yet...it shows it does in MIDS. Bugged?
-
Weekly Discussion 53: How to Increase Villain Population
Crysis replied to GM Miss's topic in General Discussion
Easy way to increase red population... Un-nerf some stuff but only for players who spend X hours in that zone. Start with re-enabling exemplar 2X influence when exemp’ed and playing red side. Perhaps offer 2X influence only when teamed with >4 others. I solo red side all the time and will often go hours or even days of play and never encounter another soul (Excelsior) or if I do it’s in Grandville as someone blue side is there to run the PPP arc. But if you can do something to get players active in numbers over there it will snowball. Until then.....it’s just wasted server space. -
Careful what you wish for lest you end up with invisible staff animations just like the invisible Katana once the no redraw option was added.
-
Whole thread of builds here: I used the last one posted.
-
The whole Demon/Storm combination is just epic looking. It’s like the Apocalypse. Lightning striking foes, hailstorms dropping everyone on their backs, Demons literally throwing fire and brimstone, fiery tornados flipping enemies this way and that, a fiery whip cracking overhead....sigh. Such a beautiful sight of high damage chaos.
-
Oh and if you'd like a really different take on Staff/Elec, here's a build I found that incorporated Pyre Mastery. Looks pretty solid as well. Very different slotting. Villain Plan by Mids' Reborn : Hero Designer 2.6.0.7 https://github.com/ImaginaryDevelopment/imaginary-hero-designer Click this DataLink to open the build! Malice King: Level 50 Magic Brute Primary Power Set: Staff Fighting Secondary Power Set: Electric Armor Power Pool: Leaping Power Pool: Leadership Power Pool: Fighting Power Pool: Speed Ancillary Pool: Pyre Mastery Villain Profile: Level 1: Precise Strike -- SprBrtFur-Acc/Dmg(A), SprBrtFur-Dmg/Rchg(7), SprBrtFur-Acc/Dmg/Rchg(9), SprBrtFur-Dmg/EndRdx/Rchg(15), SprBrtFur-Acc/Dmg/EndRdx/Rchg(23), SprBrtFur-Rech/Fury(27) Level 1: Charged Armor -- RctArm-ResDam/EndRdx(A), RctArm-ResDam/Rchg(3), RctArm-ResDam/EndRdx/Rchg(3), RctArm-ResDam(39) Level 2: Guarded Spin -- Obl-Dmg(A), Obl-Acc/Rchg(5), Obl-Dmg/Rchg(7), Obl-Acc/Dmg/Rchg(13), Obl-Acc/Dmg/EndRdx/Rchg(15), Obl-%Dam(21) Level 4: Conductive Shield -- UnbGrd-Max HP%(A), UnbGrd-ResDam(5) Level 6: Combat Jumping -- LucoftheG-Def/Rchg+(A) Level 8: Eye of the Storm -- Obl-Dmg(A), Obl-Acc/Rchg(9), Obl-Dmg/Rchg(13), Obl-Acc/Dmg/Rchg(21), Obl-Acc/Dmg/EndRdx/Rchg(23), Obl-%Dam(27) Level 10: Static Shield -- StdPrt-ResDam/Def+(A) Level 12: Maneuvers -- LucoftheG-Def/Rchg+(A), Ksm-ToHit+(17), ShlWal-ResDam/Re TP(43) Level 14: Super Jump -- BlsoftheZ-Travel(A), BlsoftheZ-ResKB(17) Level 16: Grounded -- GldArm-3defTpProc(A) Level 18: Lightning Field -- Obl-Dmg(A), Obl-Acc/Rchg(19), Obl-Dmg/Rchg(19), Obl-Acc/Dmg/Rchg(36), Obl-Acc/Dmg/EndRdx/Rchg(36), Obl-%Dam(37) Level 20: Boxing -- KntCmb-Acc/Dmg(A), KntCmb-Dmg/EndRdx(25), KntCmb-Dmg/Rchg(31), KntCmb-Dmg/EndRdx/Rchg(37) Level 22: Lightning Reflexes -- Run-I(A) Level 24: Hasten -- RechRdx-I(A), RechRdx-I(25) Level 26: Staff Mastery Level 28: Energize -- NmnCnv-Heal/EndRdx(A), NmnCnv-Heal/Rchg(29), NmnCnv-Heal(29) Level 30: Tough -- RctArm-ResDam/EndRdx(A), RctArm-ResDam/Rchg(31), RctArm-ResDam/EndRdx/Rchg(31), RctArm-ResDam(39) Level 32: Sky Splitter -- KntCmb-Acc/Dmg(A), KntCmb-Dmg/EndRdx(33), KntCmb-Dmg/Rchg(33), KntCmb-Dmg/EndRdx/Rchg(33), Hct-Acc/Dmg/Rchg(34), Hct-Dam%(36) Level 35: Power Sink -- EffAdp-EndMod(A), EffAdp-EndMod/Rchg(40) Level 38: Innocuous Strikes -- Obl-Dmg(A), Obl-Acc/Rchg(39), Obl-Dmg/Rchg(40), Obl-Acc/Dmg/Rchg(40), Obl-Acc/Dmg/EndRdx/Rchg(43), Obl-%Dam(46) Level 41: Ring of Fire -- EnfOpr-Acc/Rchg(A), EnfOpr-EndRdx/Immob(42), EnfOpr-Acc/EndRdx(42), EnfOpr-Immob/Rng(42), EnfOpr-Acc/Immob/Rchg(43), EnfOpr-Acc/Immob(46) Level 44: Fire Blast -- Apc-Dmg/Rchg(A), Apc-Acc/Dmg/Rchg(45), Apc-Acc/Rchg(45), Apc-Dmg/EndRdx(45), Apc-Dam%(46) Level 47: Fire Ball -- Rgn-Dmg/Rchg(A), Rgn-Acc/Dmg/Rchg(48), Rgn-Acc/Rchg(48), Rgn-Dmg/EndRdx(48), Rgn-Knock%(50) Level 49: Weave -- LucoftheG-Def/Rchg+(A), LucoftheG-Def/EndRdx(50), Rct-ResDam%(50) Level 1: Brawl -- Acc-I(A) Level 1: Sprint -- Clr-Stlth(A) Level 2: Rest -- RechRdx-I(A) Level 1: Fury Level 1: Prestige Power Dash -- Empty(A) Level 1: Prestige Power Slide -- Empty(A) Level 1: Prestige Power Quick -- Empty(A) Level 1: Prestige Power Rush -- Empty(A) Level 1: Prestige Power Surge -- Empty(A) Level 4: Ninja Run Level 2: Swift -- Run-I(A) Level 2: Health -- NmnCnv-Regen/Rcvry+(A), Mrc-Rcvry+(11), RgnTss-Regen+(37) Level 2: Hurdle -- Jump-I(A) Level 2: Stamina -- PrfShf-EndMod(A), PrfShf-EndMod/Rchg(11), PrfShf-EndMod/Acc(34), PrfShf-End%(34) Level 32: Form of the Body Level 32: Form of the Mind Level 32: Form of the Soul Level 1: Combo Level 1 Level 1: Combo Level 2 Level 1: Combo Level 3 Level 50: Agility Core Paragon ------------ | Copy & Paste this data into Mids' Reborn : Hero Designer to view the build | |-------------------------------------------------------------------| |MxDz;1548;732;1464;HEX;| |78DA6594CB6F525110C6CFE55EFA005AA02F6A1F14E80384720BB6EA4EA3B635DA9| |250896E09A1A72D095272C1C42EDD6BA2AD8FADDAD6D7C23FC577526DDCAB0B1F89| |6E7C549CDEF94A8990C06FCE9CFBCDCC993B87C4E549C7D3D3578E0BC57E2A9F299| |5D2278D4B65694D641673595508614F64F2B9ACF4CDE40A8B8DB4EE31F7D3099997| |524F95330B0BE9E9DCE25299B6FB786B522EC84249EA5379992D1BB96CFA847171D| |9709F292C494316CAFA9EE1482E2FE7F559992992D6B9B79897466929576C31D77B| |916DE62A559472DE3D55CC65F5E48A4135644A6569AC745355A3F47DE617F854ACE| |22ED51ED744C33D66D37D66EB3AB36B83D9B3C95CDF9529A656155E32829AB00C80| |7EE64880F9DC8F47298FF2DB62EAB53FCC861DA6E32FB3B5C2EC109C6793542AE75| |1D49FECD37EA0266AAF95F784B553317D2F2857237235225713723990AB03B9BA90| |AB07B91E90AA19F19A3D64F46BC24DC1ECECB3D891C3B523CCBDF00CEB3CF44C0BE| |7545AB639A6EB3DF321799D88E93CA49ABA0D5AB951A31B35B6A1C636D438881A07| |51E3106A5428573B6BD5F62421A089EE39A6F71C7328C57C44E844EECEA830F501D| |27BD04F4F847DDDE04BEADD018E5D794CBFBD6C5B7AE7F8DC7D29F03C53A558FD98| |817ECC801733E0FD6F06DE52EC019C790075FB50B70F75FB50B73F84B347984F76D| |DE6045594C055F605AF31B728EE30E20EA39723E86510BD0CA29761F4328A5E6E11| |42D086AEF3990EDE0057C13566F826337A8BF98EB411D66A9128C71DD5C13130867| |C71E636697468F471F68D4D8087C123CCF851DC13EA710CF317C3FCC55DE0773E47| |9F56BDC7F477C33D9CD5AAF793869A6325B5EA3D140ADEF9B4F95CD27CE7E1DA381| |5FA88589D275EE719AFF34CD4799A5D62B7E76696CF364A88CA144CE5D77D9F45B9| |C0A7B39DE5C9193AC637F14BAD2EC4BA6FFB3E5559E553DAD698FEDBE01DE6ABFD0| |9ACBCAEB1DFD4D81FBAAA95573ED6D89F6AEC5F64C761FF036BEBF699| |-------------------------------------------------------------------|
-
I didn't get a lot of feedback on my post on Staff/Elec that I made a day or so before yours. Yours looks stronger than mine, but I did question the whole Fly/Hover/Afterburner picks. Flight may be thematic for you, and Hover could just be a set mule, but looks like you are planning on running it during combat. That doesn't resonate with me for a Staff brute, especially with how some of the attacks work. So I took your build and my own, made a few tweaks and ended up with this. I'm at 42 now, and its every bit as powerful as I recall from Live. Contrary to a lot of posts I've seen elsewhere, Endurance can be an issue, which is why I threw in Superior Conditioning at 41. I'll likely respec out at 50. Here's mine. I liked yours a lot. Villain Plan by Mids' Reborn : Hero Designer 2.6.0.7 https://github.com/ImaginaryDevelopment/imaginary-hero-designer Click this DataLink to open the build! Level 50 Mutation Brute Primary Power Set: Staff Fighting Secondary Power Set: Electric Armor Power Pool: Leadership Power Pool: Speed Power Pool: Fighting Power Pool: Leaping Ancillary Pool: Energy Mastery Villain Profile: Level 1: Precise Strike -- SprBlsCol-Acc/Dmg(A), SprBlsCol-Dmg/EndRdx(3), SprBlsCol-Acc/Dmg/EndRdx(11), SprBlsCol-Acc/Dmg/Rchg(23), TchofDth-Dam%(37), SprBlsCol-Rchg/HoldProc(43) Level 1: Charged Armor -- UnbGrd-ResDam(A), UnbGrd-ResDam/EndRdx(3), UnbGrd-Rchg/ResDam(13), UnbGrd-ResDam/EndRdx/Rchg(31), ImpArm-ResPsi(37), GldArm-3defTpProc(43) Level 2: Guarded Spin -- SprBrtFur-Acc/Dmg(A), SprBrtFur-Dmg/Rchg(5), SprBrtFur-Acc/Dmg/Rchg(13), SprBrtFur-Dmg/EndRdx/Rchg(31), SprBrtFur-Acc/Dmg/EndRdx/Rchg(39), SprBrtFur-Rech/Fury(43) Level 4: Lightning Field -- SprAvl-Acc/Dmg(A), SprAvl-Dmg/EndRdx(7), SprAvl-Acc/Dmg/EndRdx(19), SprAvl-Acc/Dmg/EndRdx/Rchg(33), SprAvl-Rchg/KDProc(39), FuroftheG-ResDeb%(46) Level 6: Conductive Shield -- TtnCtn-ResDam/EndRdx(A), TtnCtn-ResDam/EndRdx/Rchg(9), TtnCtn-ResDam(19), TtnCtn-EndRdx(34), StdPrt-ResDam/Def+(40), ImpArm-ResPsi(46) Level 8: Eye of the Storm -- Arm-Dmg/Rchg(A), Arm-Acc/Dmg/Rchg(9), Arm-Acc/Rchg(21), Arm-Dmg/EndRdx(34), Arm-Dam%(40), FrcFdb-Rechg%(46) Level 10: Maneuvers -- LucoftheG-Def/Rchg+(A), LucoftheG-Def/EndRdx(11), Ksm-ToHit+(25) Level 12: Staff Mastery Level 14: Super Speed -- BlsoftheZ-ResKB(A) Level 16: Static Shield -- UnbGrd-ResDam(A), UnbGrd-ResDam/EndRdx(17), UnbGrd-Rchg/ResDam(17), UnbGrd-ResDam/EndRdx/Rchg(25), ImpArm-ResPsi(40) Level 18: Grounded -- Ags-Psi/Status(A) Level 20: Serpent's Reach -- Apc-Dmg/Rchg(A), Apc-Acc/Dmg/Rchg(21), Apc-Acc/Rchg(23), Apc-Dmg/EndRdx(36), Apc-Dam%(42) Level 22: Lightning Reflexes -- Run-I(A) Level 24: Kick -- FrcFdb-Rechg%(A) Level 26: Innocuous Strikes -- SprUnrFur-Acc/Dmg(A), SprUnrFur-Acc/Dmg/Rchg(27), SprUnrFur-Dmg/EndRdx/Rchg(27), SprUnrFur-Dmg/Rchg(34), SprUnrFur-Acc/Dmg/EndRdx/Rchg(36), SprUnrFur-Rchg/+Regen/+End(42) Level 28: Energize -- DctWnd-Heal/EndRdx/Rchg(A), NmnCnv-Heal/EndRdx/Rchg(29), Prv-Heal/Rchg(29) Level 30: Super Jump -- BlsoftheZ-Travel(A) Level 32: Sky Splitter -- Hct-Dmg/Rchg(A), Hct-Acc/Dmg/Rchg(33), Hct-Acc/Rchg(33), Hct-Dmg/EndRdx(37), Hct-Dam%(42), FrcFdb-Rechg%(50) Level 35: Power Sink -- EnrMnp-Stun%(A), PrfShf-EndMod/Acc(36) Level 38: Hasten -- RechRdx-I(A), RechRdx-I(39) Level 41: Superior Conditioning -- PrfShf-End%(A) Level 44: Tough -- UnbGrd-ResDam/EndRdx(A), UnbGrd-Rchg/ResDam(45), UnbGrd-ResDam/EndRdx/Rchg(45), UnbGrd-Max HP%(45) Level 47: Weave -- LucoftheG-Def/EndRdx(A), LucoftheG-Def/EndRdx/Rchg(48), LucoftheG-Def/Rchg+(48), ShlWal-ResDam/Re TP(48) Level 49: Combat Jumping -- LucoftheG-Def/EndRdx(A), LucoftheG-Def(50), LucoftheG-Def/Rchg+(50) Level 1: Brawl -- Empty(A) Level 1: Prestige Power Dash -- Empty(A) Level 1: Prestige Power Slide -- Clr-Stlth(A) Level 1: Prestige Power Quick -- Empty(A) Level 1: Prestige Power Rush -- Empty(A) Level 1: Prestige Power Surge -- Empty(A) Level 1: Fury Level 1: Sprint -- Empty(A) Level 2: Rest -- IntRdx-I(A) Level 4: Ninja Run Level 2: Swift -- Flight-I(A) Level 2: Health -- Mrc-Rcvry+(A), NmnCnv-Regen/Rcvry+(5), Pnc-Heal/+End(15), Prv-Absorb%(31) Level 2: Hurdle -- Jump-I(A) Level 2: Stamina -- PrfShf-EndMod(A), PrfShf-End%(7), PwrTrns-+Heal(15) Level 1: Combo Level 1 Level 1: Combo Level 2 Level 1: Combo Level 3 Level 12: Form of the Body Level 12: Form of the Mind Level 12: Form of the Soul Level 0: Born In Battle Level 0: High Pain Threshold Level 0: Invader Level 0: Marshal Level 50: Musculature Radial Paragon Level 50: Degenerative Core Flawless Interface Level 50: Ion Core Final Judgement Level 50: Ageless Radial Epiphany Level 50: Longbow Radial Superior Ally Level 50: Assault Radial Embodiment ------------ | Copy & Paste this data into Mids' Reborn : Hero Designer to view the build | |-------------------------------------------------------------------| |MxDz;1637;773;1546;HEX;| |78DA6594CB4F535110C6CFEDBD3C5A0A6D296D290FA12DD017BDB42A0B5F212A60A| |2D460306ADC340D5CA0496D9BB624B274E1CA8D627C2CD480808A0BFF14DF5163DC| |AB31A80B9F0B53A7F71BDA266D72F39B3367BE3373E69CD3F8C571F3936397C684D| |472349D2C141247F24B45AD39BE544C1653D98C2CE8D7445F97EE4FC4B5B4A6A933| |C5E4FC7C6232B5B0584C65167A3035AECD6B9982A64EA4B5D9623E359B389CBF90C| |D0BCB74369B56A7B4E49C962F2CA672267D3C93D3B4B956DDDC59C6BC1398A3817B| |22979A5527325A7E6139114F168A5A7E19A5755231A3F43DF508FE951AC45545889| |8220CD740D30AE8BC0E0E2428CCAF88D00D8CD7CB3289B53F64687F82E6DFE0AE3F| |E04050827637C6CF3C2C25ADB40A9FB2C6DAFBAC5D078736C0D026B8412A99F3CA7| |7504BE35DB0FD1ED8BF0A0EAD819131683749D5C0DA8690A4FB9A2360BB0A7A4640| |BF8BD84B5AAEFDB9078758D636ED33508C5134EF073B0E809E83A0FF9001792F833| |6121A91D76074607D9315ECFC27F43C2F68FD16C4947C14DF8A5CA2F503D6784023| |0BE6150BF7DBCAFDB672BF3BB9DF7EAEF92145DBA011B651E47B4379EC585BB147B| |87E15748E80BE28188C21F7238A76F03A8E88D0E70C54A38B7D2EDEE75B5ADBCD3D| |729BD1FBAE36A605F4B4823E2B18B4815BA4EA86D6D07D52D273F49C667E9175BA2| |8672FF7A5F73D72BEA39C7D9CB3CF8FBAFB03CC203810E2FD84A18971BD8F49E5D5| |6F6249F25E219F9DEABA89582FE51AC4FEA4C130F63CC434DA8408F0DE03B7B0964| |CF161F8E4309FCB309FCB309FCBF05FBEEB14AB72AC6AC51E47EC4C07F304629D14| |1BE5BB13E5D8580793637B94CA3B2E5F9F524984EA3C51A5F25EE932721FEAA2F6D| |479F6D67926AB2B95A6EA66A795CADB165237F7CB4A6F16BED2B689E6B90EC987F9| |6F559F2C1DC7DD55CEE0BEB679F8FF601BFC5AAB0F40FFBDEA33482BD85B239F4BD| |B2F458FF9E8AC545AFA54637FAEB15F96DF20DBAF6AECD735F62993BE57DD3E5B63| |9FABB1CFD7D853F4D8626C4FBAAAB6BB836CEEE26D7BD5B63BAAF696B71AFF1F753| |B083B| |-------------------------------------------------------------------|
-
I amended my post. I really was more focused on the disappointment that was Bots/EA. See my amended reply above. "New" is often considered "hot" simply because it's different. And /EA is very different....but I think needs to go back to formula for MM's. It's just not all that impressive in my book.
-
Def not my top tier MM. /EA has a great +RES shield, absorb shield and some +END stuff with -END debuffs. It's "ok" but nowhere near the powerhouse of a Thugs/Time, Demon/Time, Demon/Cold, Thugs/Storm, Demon/Storm, Bots/Time, Bots/Storm, Bots/Traps, etc etc etc..... It's a very good build, decent middle of the road, and will keep almost any henchmen types healthy. But it's top tier powers are utterly useless on the MM or the henchmen. Amp Up is good for a team-mate/duo partner, but does almost nothing for you or your henchmen. It's a broken version of Power Boost and, as such, you'll get more mileage out of Power Boost. Defib is...an odd duck really. It does work, but unless you are solo, you won't get much use out of it. The Immobilize helps make it more effective. I literally just slapped this together on the fly. You could likely do far better with some effort. But as-is, it's softcapped DEF to S/L, 73% S/L RES and 68% RES to Fire, plus 55% RES to Toxic. Perhaps use it as a starting point and see where you go? Villain Plan by Mids' Reborn : Hero Designer 2.6.0.7 https://github.com/ImaginaryDevelopment/imaginary-hero-designer Click this DataLink to open the build! Bots EA: Level 50 Technology Mastermind Primary Power Set: Demon Summoning Secondary Power Set: zn_Electrical Affinity Power Pool: Leaping Power Pool: Speed Power Pool: Leadership Power Pool: Fighting Ancillary Pool: Mace Mastery Villain Profile: Level 1: Summon Demonlings -- SprMarofS-Acc/Dmg(A), SprMarofS-EndRdx/+Resist/+Regen(3), CaltoArm-Acc/Dmg(3), CaltoArm-Dmg/EndRdx(15), CaltoArm-Acc/Dmg/Rchg(31), CaltoArm-+Def(Pets)(33) Level 1: Shock -- PreOptmz-Acc/Rech(A), PreOptmz-EndMod/End(39), PreOptmz-EndMod/Rech(40), PreOptmz-EndMod/Acc/End(40), PreOptmz-EndMod/Acc/Rech(46), PreOptmz-EndMod/End/Rech(50) Level 2: Rejuvenating Circuit -- Prv-Heal(A), Prv-Heal/EndRdx(5), Prv-EndRdx/Rchg(5), Prv-Heal/Rchg(7), Prv-Heal/Rchg/EndRdx(7), Prv-Absorb%(37) Level 4: Discharge -- PreOptmz-Acc/Rech(A), PreOptmz-EndMod/End(9), PreOptmz-EndMod/Rech(9), PreOptmz-EndMod/Acc/End(11), PreOptmz-EndMod/Acc/Rech(11), PreOptmz-EndMod/End/Rech(40) Level 6: Enchant Demon -- EndRdx-I(A) Level 8: Lash -- SprBlsCol-Rchg/HoldProc(A), SprBlsCol-Acc/Dmg(25), SprBlsCol-Dmg/EndRdx(31), SprBlsCol-Acc/Dmg/EndRdx(34), SprBlsCol-Dmg/EndRdx/Acc/Rchg(34) Level 10: Energizing Circuit -- PreOptmz-Acc/Rech(A), PreOptmz-EndMod/End(17), PreOptmz-EndMod/Rech(21), PreOptmz-EndMod/Acc/End(21), PreOptmz-EndMod/Acc/Rech(37), PreOptmz-EndMod/End/Rech(37) Level 12: Summon Demons -- SprMarofS-Dmg(A), SprMarofS-Acc/Dmg/EndRdx(13), RctArm-ResDam/EndRdx(13), RctArm-ResDam/EndRdx/Rchg(15), RctArm-ResDam(29), SvrRgh-PetResDam(33) Level 14: Combat Jumping -- LucoftheG-Def/Rchg+(A) Level 16: Faraday Cage -- ImpSki-Status(A), GldArm-3defTpProc(17), StdPrt-ResDam/Def+(19), GldArm-End/Res(34), GldArm-ResDam(46) Level 18: Hasten -- RechRdx-I(A), RechRdx-I(19) Level 20: Empowering Circuit -- RctRtc-Pcptn(A) Level 22: Maneuvers -- ShlWal-Def/EndRdx(A), ShlWal-Def(23), ShlWal-ResDam/Re TP(23), Rct-ResDam%(25), LucoftheG-Def/Rchg+(46) Level 24: Hell on Earth -- ExpRnf-+Res(Pets)(A), ExpRnf-Acc/Rchg(43), ExpRnf-Acc/Dmg(43), ExpRnf-Acc/Dmg/Rchg(45), CaltoArm-EndRdx/Dmg/Rchg(45), SprCmmoft-Rchg/PetAoEDef(45) Level 26: Summon Demon Prince -- SprMarofS-Dmg/EndRdx(A), SprMarofS-Acc/EndRdx(27), SlbAll-Dmg(27), SlbAll-Build%(29), ImpSwf-Dam%(31), EdcoftheM-PetDef(33) Level 28: Assault -- EndRdx-I(A) Level 30: Super Speed -- WntGif-ResSlow(A) Level 32: Abyssal Empowerment -- EndRdx-I(A) Level 35: Insulating Circuit -- DctWnd-Heal/EndRdx(A), DctWnd-Heal/Rchg(36), DctWnd-Heal/EndRdx/Rchg(36), DctWnd-Heal(36) Level 38: Scorpion Shield -- LucoftheG-Def/EndRdx(A), LucoftheG-Def(39), LucoftheG-Def/Rchg+(39) Level 41: Web Envelope -- GrvAnc-Immob/Rchg(A), GrvAnc-Acc/Immob/Rchg(42), GrvAnc-Acc/Rchg(42), GrvAnc-Immob/EndRdx(42), GrvAnc-Hold%(43) Level 44: Kick -- Empty(A) Level 47: Tough -- UnbGrd-ResDam(A), UnbGrd-ResDam/EndRdx(48), UnbGrd-Rchg/ResDam(48), UnbGrd-Max HP%(48) Level 49: Weave -- LucoftheG-Def/EndRdx(A), LucoftheG-Def(50), LucoftheG-Def/Rchg+(50) Level 1: Brawl -- Empty(A) Level 1: Prestige Power Dash -- Empty(A) Level 1: Prestige Power Slide -- Empty(A) Level 1: Prestige Power Quick -- Empty(A) Level 1: Prestige Power Rush -- Empty(A) Level 1: Prestige Power Surge -- Empty(A) Level 1: Sprint -- Clr-Stlth(A) Level 1: Supremacy Level 2: Rest -- Empty(A) Level 4: Ninja Run Level 2: Swift -- Run-I(A) Level 2: Health -- Mrc-Rcvry+(A) Level 2: Hurdle -- Jump-I(A) Level 2: Stamina -- EndMod-I(A) Level 1: Fiery Demonling Level 12: Hellfire Gargoyle Level 26: Hellfire Demonling Level 50: Agility Core Paragon Level 50: Ageless Core Epiphany Level 1: Cold Demonling Level 26: Demon Prince Level 12: Ember Demon ------------ | Copy & Paste this data into Mids' Reborn : Hero Designer to view the build | |-------------------------------------------------------------------| |MxDz;1576;739;1478;HEX;| |78DA6594DB4E13511486F774064B0B4869A180B4A52D470B2D8CE2E946C3D104A8A| |280872BD294294CD2536849C4637803351AA306F5CA4B6FF5157C094F57A2224421| |089AD4E5ACDF7692366DBFBDFF596BAF7FAF3D33D16B23D5AFCEAE9E1192633819C| |BE5E6A2B15C5E5B4AE9E979FB8C165F4C67929985155908611DCAE473FED1412B8D| |03A5A8B9E9E5542A938E8C68F48F899E5E6833450C2D271291D1A416CF2FE9F1587| |26E3091D0D37A7E45544F6532C9C8A416CB5286DD984C67356DBEF6BF3EAF2DE516| |F56C8D311FD31716F314E819CDEAF18869FD682CAEC1F74A13B90BD3EFB143E053A| |810971421544558AE82EF2C42781571F03DD3F781E9FFC4BC1E32E5EE724EE72F66| |D71EB8CF0CFF66AA7F9837285742AEF4593634651DFCC23CF015FCC66CDF60DEA45| |C19B932EA56A26E25EADA51D78EBA5DA8FB94F65BC1B9A22240506DE2096956D614| |EB438E6BBACBF4DD6306EE830F98B7C8830D1E6CF0E080877A78A88787767868878| |735AA5725716ED50C6BD557401F5DE8A29E07989E20D3BF238CEB6E325AC3B9A2A6| |4132B4DBE4A59635A5D62B1967E338C2BD7236F23CA0F23CDCC70CD23A759C23D5F| |5701F9CE01D5ACF851EB9D6E8AC5D8AA8A3F806D46818E335DCE3E004B3E9276AC0| |D733DA67237AD4B86D31B4D026B8C5ECFD017EE47BAAF72DAFF19C729B91DB3CCBB| |D3974193CCD399E61A6EF25EFD1BF2E8C5E39C96B0B7AD412E0BEB591E6C59EBC2D| |B2B1CF1754A3155A2BEE8555DA7B90353938C1FB688B82E7C0F3CC37B44C07D7B17| |43858EBAC07D183D714D38D7BABFB02FB3D7C119C0667D09359A685BCF6C0574F81| |3E422625C295E4C83677A86F07DC05F7F0F4506C3F5CF5C3950A572A5C7994E2934| |BDF7F1542654A7F99A2962947CB94813265D2ACD87887D1925698528A6F02211919| |3647F1F92E6CD8E92ACE520AF3596E9AB5717E3EBE9BB56E8EDB326B7E3EDF63A57| |756E1248DAB303E1E2ADE6F857D378562FCC8551A0F98724F99E24F98D6F90BA41F| |0B47| |-------------------------------------------------------------------|
-
Since you posted this in Brute forum, the general trend you’ll see on Brute builds posted here is positional Melee Def is softcapped and usually also S/L and maybe even Energy as well. That’s because a lot of the melee IO sets will build these bonuses out for you. And honestly since you’ll spend most of your time in melee and S/L damage is the most common typed damage in the game that’s just fine.
-
Curious.... Has the change cut market prices dramatically, or has a decrease in demand done so? Or an increase in supply? Corollary or causal from the influence nerf?