The Beta Account Center is temporarily unavailable
×


brasilgringo
-
Posts
672 -
Joined
-
Last visited
Content Type
Profiles
Forums
Events
Store
Articles
Patch Notes
Everything posted by brasilgringo
-
I know Snarky a way back had a master of cones build. Dark and energy are two sets I haven't used much if at all, and Dark's DOTs always bummed me out. I wanted to see if there was a way to rely on procs to help and to really focus on Cones with the help of Boost Range from the secondary. Energy seems a bit clickly but the high uptime on energize, Power Boost (+ def), and boost range seem like they could really help. Anyway, here's a first pass. I can't figure out how to get more + ranged def (to try to soft-cap before power boost) without sacrifing procs for sets. Open to help on that front. Plus perhaps any slotting better for health/stam (though maybe not needed between Energize, Life drain). No melee attacks taken - meant to be ranged / cone thrower who leaps in for Blackfart. Anyone tried anything like this and has feedback? This Hero build was built using Mids Reborn 3.1.2.5 https://github.com/LoadedCamel/MidsReborn Click this DataLink to open the build! Level 50 Magic Blaster Primary Power Set: Dark Blast Secondary Power Set: Energy Manipulation Power Pool: Leaping Power Pool: Speed Power Pool: Fighting Power Pool: Leadership Ancillary Pool: Soul Mastery Hero Profile: Level 1: Gloom -- SprDfnBrr-Acc/Dmg(A), SprDfnBrr-Dmg/Rchg(3), SprDfnBrr-Acc/Dmg/Rchg(3), SprDfnBrr-Acc/Dmg/EndRdx(5), SprDfnBrr-Acc/Dmg/EndRdx/Rchg(5), SprDfnBrr-Rchg/+Status Protect(7) Level 1: Power Thrust -- ExpStr-Acc/KB(A), ExpStr-Dam%(7), ExpStr-Dmg/KB(9) Level 2: Umbral Torrent -- HO:Nucle(A), ExpStr-Dam%(9), Bmbdmt-+FireDmg(11), CldSns-%Dam(11), PstBls-Dam%(13), OvrFrc-Dam/KB(13) Level 4: Build Up -- RechRdx-I(A) Level 6: Aim -- GssSynFr--Build%(A) Level 8: Moonbeam -- StnoftheM-Acc/Dmg(A), StnoftheM-Dmg/EndRdx(15), StnoftheM-Acc/ActRdx/Rng(15), StnoftheM-Dmg/EndRdx/Rchg(17), StnoftheM-Dam%(17), GldJvl-Dam%(19) Level 10: Combat Jumping -- LucoftheG-Def/Rchg+(A), WntGif-ResSlow(19), ShlWal-ResDam/Re TP(21), BlsoftheZ-Travel/EndRdx(21), BlsoftheZ-ResKB(23), Ksm-ToHit+(23) Level 12: Tenebrous Tentacles -- HO:Nucle(A), JvlVll-Dam%(25), Bmbdmt-+FireDmg(25), PstBls-Dam%(27), CldSns-%Dam(27), TraoftheH-Dam%(29) Level 14: Hasten -- RechRdx-I(A), RechRdx-I(29) Level 16: Energize -- NmnCnv-Regen/Rcvry+(A), NmnCnv-EndRdx/Rchg(31), NmnCnv-Heal/EndRdx(31), NmnCnv-Heal/Rchg(31), NmnCnv-Heal/EndRdx/Rchg(33), NmnCnv-Heal(33) Level 18: Abyssal Gaze -- HO:Nucle(A), GhsWdwEmb-Dam%(33), CldSns-%Dam(34), GldJvl-Dam/End/Rech(34), Apc-Dam%(34), UnbCns-Dam%(36) Level 20: Super Speed -- BlsoftheZ-Travel/EndRdx(A), BlsoftheZ-ResKB(36) Level 22: Kick -- Empty(A) Level 24: Tough -- GldArm-3defTpProc(A), StdPrt-ResDam/Def+(36) Level 26: Life Drain -- Thn-Acc/Dmg(A), Thn-Dmg/EndRdx(37), Thn-Acc/Dmg/EndRdx(37), TchoftheN-%Dam(37), TchoftheN-Heal(39), TchoftheN-Heal/HP/Regen/Rchg(39) Level 28: Power Boost -- RechRdx-I(A) Level 30: Weave -- LucoftheG-Def/Rchg+(A), RedFrt-Def(39), RedFrt-Def/EndRdx(40) Level 32: Blackstar -- SprBlsWrt-Dmg/Rchg(A), SprBlsWrt-Acc/Dmg(40), SprBlsWrt-Acc/Dmg/Rchg(40), SprBlsWrt-Acc/Dmg/EndRdx(42), SprBlsWrt-Acc/Dmg/EndRdx/Rchg(42), SprBlsWrt-Rchg/Dmg%(42) Level 35: Boost Range -- RechRdx-I(A) Level 38: Maneuvers -- LucoftheG-Def/Rchg+(A), Rct-ResDam%(43), Rct-Def(43) Level 41: Night Fall -- JvlVll-Dam%(A), PstBls-Acc/Dmg/EndRdx(43), PstBls-Dam%(45), Bmbdmt-Acc/Dam/Rech(45), Bmbdmt-+FireDmg(45), CldSns-%Dam(46) Level 44: Dark Embrace -- UnbGrd-Max HP%(A), UnbGrd-ResDam(46), UnbGrd-ResDam/EndRdx(46), UnbGrd-Rchg/ResDam(48) Level 47: Soul Tentacles -- HO:Nucle(A), Bmbdmt-+FireDmg(48), PstBls-Dam%(48), JvlVll-Acc/Dmg/End/Rech(50), TraoftheH-Dam%(50), Ann-ResDeb%(50) Level 49: Tactics -- HO:Cyto(A) Level 1: Brawl -- Empty(A) Level 1: Defiance Level 1: Sprint -- Empty(A) Level 2: Rest -- Empty(A) Level 1: Swift -- Empty(A) Level 1: Health -- Pnc-Heal/+End(A) Level 1: Hurdle -- Empty(A) Level 1: Stamina -- PrfShf-End%(A) Level 49: Quick Form Level 20: Speed Phase ------------
-

Trapdoor Test Results - the other half of Pylon testing?
brasilgringo replied to Kanil's topic in Scrapper
Can you share your build? -
🤷♂️ https://forums.homecomingservers.com/topic/33953-dual-pistols-martial-build-help/?do=findComment&comment=438103
-
Here's a rebuild taking your suggestions into account. I had given up on EC due to the long animation time and corpse-blasting. But hey why not try it again. I kept procced Supressive Fire as it's nice at range and it should trigger the build-up proc, so opening with it could really help the damage from EC and maybe 1 other attack in the 5 sec window (including HOB). Yeh I'm always stuck with Clarion. I hate mez. Once I build to Tier 3 or 4 I usually build out Barrier or Rebirth for TFs where Mez isn't that much of a pain like ITF or Tinpex etc. This Hero build was built using Mids Reborn 3.1.2.5 https://github.com/LoadedCamel/MidsReborn Click this DataLink to open the build! Atirador: Level 50 Mutation Blaster Primary Power Set: Dual Pistols Secondary Power Set: Martial Combat Power Pool: Leaping Power Pool: Fighting Power Pool: Leadership Power Pool: Speed Ancillary Pool: Mu Mastery Hero Profile: Level 1: Dual Wield -- SprDfnBrr-Acc/Dmg(A), SprDfnBrr-Dmg/Rchg(3), SprDfnBrr-Acc/Dmg/EndRdx(3), SprDfnBrr-Acc/Dmg/Rchg(5), SprDfnBrr-Acc/Dmg/EndRdx/Rchg(5), SprDfnBrr-Rchg/+Status Protect(7) Level 1: Ki Push -- KntCmb-Acc/Dmg(A), KntCmb-Dmg/EndRdx(7), KntCmb-Dmg/Rchg(9), KntCmb-Dmg/EndRdx/Rchg(9) Level 2: Storm Kick -- Hct-Dmg(A), Hct-Dmg/Rchg(11), Hct-Acc/Dmg/Rchg(11), Hct-Acc/Rchg(13), Hct-Dmg/EndRdx(13), FrcFdb-Rechg%(15) Level 4: Combat Jumping -- LucoftheG-Def/Rchg+(A), WntGif-ResSlow(15), Ksm-ToHit+(17), BlsoftheZ-Travel(17), BlsoftheZ-ResKB(19), ShlWal-ResDam/Re TP(19) Level 6: Swap Ammo Level 8: Bullet Rain -- SprFrzBls-Acc/Dmg(A), SprFrzBls-Acc/Dmg/EndRdx(21), PstBls-Dam%(21), Bmbdmt-+FireDmg(23), FrcFdb-Rechg%(23), Ann-ResDeb%(25) Level 10: Kick -- FrcFdb-Rechg%(A) Level 12: Suppressive Fire -- Acc-I(A), UnbCns-Dam%(25), GldJvl-Dam%(27), Apc-Dam%(27), GhsWdwEmb-Dam%(29), Dcm-Build%(29) Level 14: Reach for the Limit Level 16: Dragon's Tail -- SprAvl-Acc/Dmg(A), SprAvl-Dmg/EndRdx(31), SprAvl-Acc/Dmg/EndRdx(31), SprAvl-Acc/Dmg/Rchg(31), SprAvl-Acc/Dmg/EndRdx/Rchg(33), FrcFdb-Rechg%(33) Level 18: Executioner's Shot -- SprWntBit-Acc/Dmg(A), SprWntBit-Acc/Dmg/EndRdx(33), SprWntBit-Dmg/EndRdx/Acc/Rchg(34), IceMisTrmt-+ColdDmg(34), GldJvl-Dam%(34), TchofLadG-%Dam(36) Level 20: Reaction Time -- PreOptmz-Acc/Rech(A), PreOptmz-EndMod/End(36), PreOptmz-EndMod/Rech(36), PreOptmz-EndMod/Acc/End(37), PreOptmz-EndMod/Acc/Rech(37), PreOptmz-EndMod/End/Rech(37) Level 22: Tough -- StdPrt-ResDam/Def+(A), GldArm-3defTpProc(39) Level 24: Maneuvers -- LucoftheG-Def/Rchg+(A), Rct-Def(39), Rct-ResDam%(40) Level 26: Tactics -- GssSynFr--ToHit(A), GssSynFr--ToHit/Rchg(40), GssSynFr--ToHit/Rchg/EndRdx(40), GssSynFr--Rchg/EndRdx(42), GssSynFr--ToHit/EndRdx(42), GssSynFr--Build%(42) Level 28: Inner Will -- Prv-Absorb%(A) Level 30: Burst of Speed -- FuroftheG-ResDeb%(A) Level 32: Hail of Bullets -- SprBlsWrt-Acc/Dmg(A), SprBlsWrt-Dmg/Rchg(43), SprBlsWrt-Acc/Dmg/Rchg(43), SprBlsWrt-Acc/Dmg/EndRdx(43), SprBlsWrt-Acc/Dmg/EndRdx/Rchg(45), SprBlsWrt-Rchg/Dmg%(45) Level 35: Weave -- LucoftheG-Def/Rchg+(A), RedFrt-Def(45), RedFrt-Def/EndRdx(46) Level 38: Eagles Claw -- SprBlsCol-Acc/Dmg(A), SprBlsCol-Dmg/EndRdx/Acc/Rchg(39), SprBlsCol-Dmg/EndRdx(46), SprBlsCol-Acc/Dmg/EndRdx(46), SprBlsCol-Rchg/HoldProc(48), Hct-Dam%(48) Level 41: Charged Armor -- UnbGrd-ResDam(A), UnbGrd-ResDam/EndRdx(48), UnbGrd-Rchg/ResDam(50), UnbGrd-Max HP%(50) Level 44: Hasten -- RechRdx-I(A), RechRdx-I(50) Level 47: Super Speed -- BlsoftheZ-ResKB(A) Level 49: Vengeance -- LucoftheG-Def/Rchg+(A) Level 1: Defiance Level 1: Brawl -- Empty(A) Level 1: Sprint -- Clr-Stlth(A) Level 2: Rest -- Empty(A) Level 2: Swift -- Run-I(A) Level 2: Hurdle -- Jump-I(A) Level 2: Health -- Pnc-Heal/+End(A) Level 2: Stamina -- PrfShf-End%(A) Level 44: Speed Phase Level 50: Musculature Core Paragon Level 50: Pyronic Core Judgement Level 50: Degenerative Core Flawless Interface Level 50: Clarion Core Epiphany Level 50: Assault Core Embodiment Level 50: Task Force Commander Level 50: The Atlas Medallion Level 50: Portal Jockey Level 6: Chemical Ammunition Level 6: Cryo Ammunition Level 6: Incendiary Ammunition ------------
-
Thanks for the feedback so far. This is where I'm at currently / been able to get to. Seems to have 32%-33% Melee and Ranged def, with 31.2% S/L and 29% E/N. So basically one small purple will soft-cap you for melee/ranged and close to it for S/L/E/N. In addition, swapping into Fire epic brings the resistance up to 52% S/L, ~50%Fire, and 40% cold. Plus you get Bonfire whose recharge will be helped by all the FF procs. I don't love the BoS slotting but maybe it can apply the -RES proc sometimes. I suppose I could pull one slot from BoS (leaving the -RES proc) and move a slot into Maneuvers to 3-slot Reactive Defenses including the scaling resistance proc? You lose some Fire/Cold res (3.75%) but maybe the scaling resist is better even on a blaster if you don't get 1-shot by something? This Hero build was built using Mids Reborn 3.1.2.5 https://github.com/LoadedCamel/MidsReborn Click this DataLink to open the build! Atirador: Level 50 Mutation Blaster Primary Power Set: Dual Pistols Secondary Power Set: Martial Combat Power Pool: Leaping Power Pool: Fighting Power Pool: Leadership Power Pool: Speed Ancillary Pool: Flame Mastery Hero Profile: Level 1: Dual Wield -- SprDfnBrr-Acc/Dmg(A), SprDfnBrr-Dmg/Rchg(3), SprDfnBrr-Acc/Dmg/EndRdx(3), SprDfnBrr-Acc/Dmg/Rchg(5), SprDfnBrr-Acc/Dmg/EndRdx/Rchg(5), SprDfnBrr-Rchg/+Status Protect(7) Level 1: Ki Push -- SprBlsCol-Rchg/HoldProc(A), SprBlsCol-Dmg/EndRdx/Acc/Rchg(7), SprBlsCol-Acc/Dmg/Rchg(9), SprBlsCol-Acc/Dmg/EndRdx(9), SprBlsCol-Acc/Dmg(11) Level 2: Storm Kick -- KntCmb-Acc/Dmg(A), KntCmb-Dmg/EndRdx(11), KntCmb-Dmg/Rchg(13), KntCmb-Dmg/EndRdx/Rchg(13), Hct-Dam%(15), FrcFdb-Rechg%(15) Level 4: Combat Jumping -- LucoftheG-Def/Rchg+(A), WntGif-ResSlow(17), Ksm-ToHit+(17), BlsoftheZ-Travel(19), BlsoftheZ-ResKB(19), ShlWal-ResDam/Re TP(21) Level 6: Swap Ammo Level 8: Bullet Rain -- SprFrzBls-Acc/Dmg(A), SprFrzBls-Acc/Dmg/EndRdx(21), PstBls-Dam%(23), Bmbdmt-+FireDmg(23), FrcFdb-Rechg%(25), Ann-ResDeb%(25) Level 10: Kick -- FrcFdb-Rechg%(A) Level 12: Suppressive Fire -- Acc-I(A), UnbCns-Dam%(27), GldJvl-Dam%(29), Apc-Dam%(29), GhsWdwEmb-Dam%(31), Dcm-Build%(31) Level 14: Reach for the Limit Level 16: Dragon's Tail -- SprAvl-Acc/Dmg(A), SprAvl-Dmg/EndRdx(31), SprAvl-Acc/Dmg/EndRdx(33), SprAvl-Acc/Dmg/Rchg(33), SprAvl-Acc/Dmg/EndRdx/Rchg(33), FrcFdb-Rechg%(34) Level 18: Executioner's Shot -- SprWntBit-Acc/Dmg(A), SprWntBit-Acc/Dmg/EndRdx(34), SprWntBit-Dmg/EndRdx/Acc/Rchg(34), IceMisTrmt-+ColdDmg(36), GldJvl-Dam%(36), TchofLadG-%Dam(36) Level 20: Reaction Time -- PreOptmz-Acc/Rech(A), PreOptmz-EndMod/End(37), PreOptmz-EndMod/Rech(37), PreOptmz-EndMod/Acc/End(37), PreOptmz-EndMod/Acc/Rech(39), PreOptmz-EndMod/End/Rech(39) Level 22: Tough -- StdPrt-ResDam/Def+(A), GldArm-3defTpProc(39) Level 24: Maneuvers -- LucoftheG-Def/Rchg+(A), RedFrt-Def/EndRdx(40), RedFrt-Def(40) Level 26: Tactics -- GssSynFr--ToHit(A), GssSynFr--ToHit/Rchg(27), GssSynFr--ToHit/Rchg/EndRdx(42), GssSynFr--Rchg/EndRdx(42), GssSynFr--ToHit/EndRdx(43), GssSynFr--Build%(43) Level 28: Inner Will -- Prv-Heal/Rchg/EndRdx(A), Prv-Heal/Rchg(40) Level 30: Burst of Speed -- FuroftheG-Dam/End/Rech(A), FuroftheG-ResDeb%(42) Level 32: Hail of Bullets -- SprBlsWrt-Acc/Dmg(A), SprBlsWrt-Dmg/Rchg(43), SprBlsWrt-Acc/Dmg/Rchg(45), SprBlsWrt-Acc/Dmg/EndRdx(45), SprBlsWrt-Acc/Dmg/EndRdx/Rchg(45), SprBlsWrt-Rchg/Dmg%(46) Level 35: Weave -- LucoftheG-Def/Rchg+(A), RedFrt-Def(46), RedFrt-Def/EndRdx(46) Level 38: Bonfire -- SuddAcc--KB/+KD(A), FrcFdb-Rechg%(50) Level 41: Fire Shield -- UnbGrd-ResDam(A), UnbGrd-ResDam/EndRdx(48), UnbGrd-Rchg/ResDam(48), UnbGrd-Max HP%(48) Level 44: Hasten -- RechRdx-I(A), RechRdx-I(50) Level 47: Super Speed -- BlsoftheZ-ResKB(A), BlsoftheZ-Travel/EndRdx(50) Level 49: Rise of the Phoenix -- Prv-Absorb%(A) Level 1: Defiance Level 1: Brawl -- Empty(A) Level 1: Sprint -- Empty(A) Level 2: Rest -- Empty(A) Level 2: Swift -- Run-I(A) Level 2: Hurdle -- Jump-I(A) Level 2: Health -- Pnc-Heal/+End(A) Level 2: Stamina -- PrfShf-End%(A) Level 44: Speed Phase Level 6: Chemical Ammunition Level 6: Cryo Ammunition Level 6: Incendiary Ammunition ------------ V2 with the BoS slotting change - recharge goes from like 37 secs to 41 secs. This Hero build was built using Mids Reborn 3.1.2.5 https://github.com/LoadedCamel/MidsReborn Click this DataLink to open the build! Atirador: Level 50 Mutation Blaster Primary Power Set: Dual Pistols Secondary Power Set: Martial Combat Power Pool: Leaping Power Pool: Fighting Power Pool: Leadership Power Pool: Speed Ancillary Pool: Flame Mastery Hero Profile: Level 1: Dual Wield -- SprDfnBrr-Acc/Dmg(A), SprDfnBrr-Dmg/Rchg(3), SprDfnBrr-Acc/Dmg/EndRdx(3), SprDfnBrr-Acc/Dmg/Rchg(5), SprDfnBrr-Acc/Dmg/EndRdx/Rchg(5), SprDfnBrr-Rchg/+Status Protect(7) Level 1: Ki Push -- SprBlsCol-Rchg/HoldProc(A), SprBlsCol-Dmg/EndRdx/Acc/Rchg(7), SprBlsCol-Acc/Dmg/Rchg(9), SprBlsCol-Acc/Dmg/EndRdx(9), SprBlsCol-Acc/Dmg(11) Level 2: Storm Kick -- KntCmb-Acc/Dmg(A), KntCmb-Dmg/EndRdx(11), KntCmb-Dmg/Rchg(13), KntCmb-Dmg/EndRdx/Rchg(13), Hct-Dam%(15), FrcFdb-Rechg%(15) Level 4: Combat Jumping -- LucoftheG-Def/Rchg+(A), WntGif-ResSlow(17), Ksm-ToHit+(17), BlsoftheZ-Travel(19), BlsoftheZ-ResKB(19), ShlWal-ResDam/Re TP(21) Level 6: Swap Ammo Level 8: Bullet Rain -- SprFrzBls-Acc/Dmg(A), SprFrzBls-Acc/Dmg/EndRdx(21), PstBls-Dam%(23), Bmbdmt-+FireDmg(23), FrcFdb-Rechg%(25), Ann-ResDeb%(25) Level 10: Kick -- FrcFdb-Rechg%(A) Level 12: Suppressive Fire -- Acc-I(A), UnbCns-Dam%(27), GldJvl-Dam%(29), Apc-Dam%(29), GhsWdwEmb-Dam%(31), Dcm-Build%(31) Level 14: Reach for the Limit Level 16: Dragon's Tail -- SprAvl-Acc/Dmg(A), SprAvl-Dmg/EndRdx(31), SprAvl-Acc/Dmg/EndRdx(33), SprAvl-Acc/Dmg/Rchg(33), SprAvl-Acc/Dmg/EndRdx/Rchg(33), FrcFdb-Rechg%(34) Level 18: Executioner's Shot -- SprWntBit-Acc/Dmg(A), SprWntBit-Acc/Dmg/EndRdx(34), SprWntBit-Dmg/EndRdx/Acc/Rchg(34), IceMisTrmt-+ColdDmg(36), GldJvl-Dam%(36), TchofLadG-%Dam(36) Level 20: Reaction Time -- PreOptmz-Acc/Rech(A), PreOptmz-EndMod/End(37), PreOptmz-EndMod/Rech(37), PreOptmz-EndMod/Acc/End(37), PreOptmz-EndMod/Acc/Rech(39), PreOptmz-EndMod/End/Rech(39) Level 22: Tough -- StdPrt-ResDam/Def+(A), GldArm-3defTpProc(39) Level 24: Maneuvers -- LucoftheG-Def/Rchg+(A), Rct-Def(40), Rct-Def/EndRdx(40), Rct-ResDam%(42) Level 26: Tactics -- GssSynFr--ToHit(A), GssSynFr--ToHit/Rchg(27), GssSynFr--ToHit/Rchg/EndRdx(42), GssSynFr--Rchg/EndRdx(42), GssSynFr--ToHit/EndRdx(43), GssSynFr--Build%(43) Level 28: Inner Will -- Prv-Heal/Rchg/EndRdx(A), Prv-Heal/Rchg(40) Level 30: Burst of Speed -- FuroftheG-ResDeb%(A) Level 32: Hail of Bullets -- SprBlsWrt-Acc/Dmg(A), SprBlsWrt-Dmg/Rchg(43), SprBlsWrt-Acc/Dmg/Rchg(45), SprBlsWrt-Acc/Dmg/EndRdx(45), SprBlsWrt-Acc/Dmg/EndRdx/Rchg(45), SprBlsWrt-Rchg/Dmg%(46) Level 35: Weave -- LucoftheG-Def/Rchg+(A), RedFrt-Def(46), RedFrt-Def/EndRdx(46) Level 38: Bonfire -- SuddAcc--KB/+KD(A), FrcFdb-Rechg%(50) Level 41: Fire Shield -- UnbGrd-ResDam(A), UnbGrd-ResDam/EndRdx(48), UnbGrd-Rchg/ResDam(48), UnbGrd-Max HP%(48) Level 44: Hasten -- RechRdx-I(A), RechRdx-I(50) Level 47: Super Speed -- BlsoftheZ-ResKB(A), BlsoftheZ-Travel/EndRdx(50) Level 49: Rise of the Phoenix -- Prv-Absorb%(A) Level 1: Defiance Level 1: Brawl -- Empty(A) Level 1: Sprint -- Empty(A) Level 2: Rest -- Empty(A) Level 2: Swift -- Run-I(A) Level 2: Hurdle -- Jump-I(A) Level 2: Health -- Pnc-Heal/+End(A) Level 2: Stamina -- PrfShf-End%(A) Level 44: Speed Phase Level 6: Chemical Ammunition Level 6: Cryo Ammunition Level 6: Incendiary Ammunition ------------
-
Potential template for typed defense blapper builds
brasilgringo replied to EnjoyTheJourney's topic in Blaster
xx -
<<but global recharge bonuses are not factored into that calculation, so that means you can use global recharge to make those powers recharge faster but still retain their proc chances.>> I had heard that Agility alpha nerfs proc chances - is that an exception to the global-recharge issue?
-
Thanks. That's exactly how I had been using BoS and DT, including using DT for the KD and to proc FF +recharge. I will go back to the drawing board.
-
Doh! (/facepalm) ... I didn't realize HOB was giving +Def and left one. I was trying to get to ~32% S/L/R def or 32% M/R def and then add in a damage shield from epic (vs. *always* taking Scorp Shield). i was trying to keep the attacks largely proc'd out including the FF recharge proc and -RES where possible. I was looking for a build that kept Storm Kick (with procs) as I heard it makes good DPS in a single-target chain (with Proc'd supressive fire and ES etc.). I am not hung up on Eagle's Claw (the anim is too long for my liking) and Nemu convinced me to abandon DT due to short radius; i had been OK wth DT using BOS to port in and then DT's quick anim time, but I get his point. I had to 6-slot Reaction Time for end as previously I've always had end issues on this DP/build. I not a DPS guru but I assumed proccing would have better results than slotting complete sets. Your comments make me question that (vs. your build). At a high level, recognzing this is more of a concept toon, trying to tune up my DP/Martial so it doesn't feel so second class to my Fire/* and even now Elec/* blasters. Maybe I should reroll him as a Sent or Def, who knows.
-
Current state of tweaks incorporating some feedback above. Thoughts? BoS is now a set mule. Got to ~35% M / R def so 1 small purple will cap melee and ranged def. Went into the Fire Mastery pool for the shield and the fast ST hold and the Bonfire. What's the best accepted slotting for Bonfire? Doesn't really feel like Martial brings much to the table being honest. This Hero build was built using Mids Reborn 3.1.2.5 https://github.com/LoadedCamel/MidsReborn Click this DataLink to open the build! Atirador: Level 50 Mutation Blaster Primary Power Set: Dual Pistols Secondary Power Set: Martial Combat Power Pool: Leaping Power Pool: Leadership Power Pool: Fighting Power Pool: Speed Ancillary Pool: Flame Mastery Hero Profile: Level 1: Dual Wield -- SprDfnBrr-Acc/Dmg(A), SprDfnBrr-Dmg/Rchg(3), SprDfnBrr-Acc/Dmg/EndRdx(3), SprDfnBrr-Acc/Dmg/Rchg(5), SprDfnBrr-Acc/Dmg/EndRdx/Rchg(5), SprDfnBrr-Rchg/+Status Protect(7) Level 1: Ki Push -- SprBlsCol-Rchg/HoldProc(A), SprBlsCol-Dmg/EndRdx/Acc/Rchg(7), SprBlsCol-Acc/Dmg/Rchg(9), SprBlsCol-Acc/Dmg/EndRdx(9), SprBlsCol-Acc/Dmg(11) Level 2: Storm Kick -- KntCmb-Acc/Dmg(A), KntCmb-Dmg/EndRdx(11), KntCmb-Dmg/Rchg(13), KntCmb-Dmg/EndRdx/Rchg(13), Hct-Dam%(15), FrcFdb-Rechg%(15) Level 4: Reach for the Limit Level 6: Swap Ammo Level 8: Bullet Rain -- SprFrzBls-Acc/Dmg(A), SprFrzBls-Acc/Dmg/EndRdx(17), PstBls-Dam%(17), Bmbdmt-+FireDmg(19), FrcFdb-Rechg%(19), Ann-ResDeb%(21) Level 10: Burst of Speed -- SprBlsWrt-Dmg/Rchg(A), SprBlsWrt-Acc/Dmg/Rchg(21), SprBlsWrt-Acc/Dmg/EndRdx(23), SprBlsWrt-Acc/Dmg(23), SprBlsWrt-Acc/Dmg/EndRdx/Rchg(25), SprBlsWrt-Rchg/Dmg%(25) Level 12: Suppressive Fire -- HO:Nucle(A), GldNet-Dam%(27), GldJvl-Dam%(27), Apc-Dam%(29), GhsWdwEmb-Dam%(29), Dcm-Build%(31) Level 14: Combat Jumping -- LucoftheG-Def/Rchg+(A), WntGif-ResSlow(31), Ksm-ToHit+(31), BlsoftheZ-Travel(33), BlsoftheZ-ResKB(33) Level 16: Maneuvers -- LucoftheG-Def/Rchg+(A), RedFrt-Def/EndRdx(33), RedFrt-Def(34) Level 18: Executioner's Shot -- SprWntBit-Acc/Dmg(A), SprWntBit-Acc/Dmg/EndRdx(34), SprWntBit-Dmg/EndRdx/Acc/Rchg(34), IceMisTrmt-+ColdDmg(36), GldJvl-Dam%(36), TchofLadG-%Dam(36) Level 20: Reaction Time -- PwrTrns-EndMod(A), PwrTrns-Dam/Rech(37), PwrTrns-Dam/EndMod(37), PwrTrns-Dam/Acc/End(37), PwrTrns-Dam/Acc/Rech/End(39), PwrTrns-+Heal(39) Level 22: Kick -- FrcFdb-Rechg%(A) Level 24: Tough -- StdPrt-ResDam/Def+(A), GldArm-3defTpProc(39) Level 26: Tactics -- HO:Cyto(A) Level 28: Inner Will -- Prv-Heal/Rchg/EndRdx(A), Prv-Heal/Rchg(40) Level 30: Super Speed -- BlsoftheZ-ResKB(A) Level 32: Hail of Bullets -- Arm-Dmg(A), Arm-Dmg/Rchg(40), Arm-Dmg/EndRdx(40), Arm-Acc/Dmg/Rchg(42), Arm-Dam%(42), FuroftheG-ResDeb%(42) Level 35: Char -- HO:Nucle(A), GldJvl-Dam%(43), NrnSht-Dam%(43), GldNet-Dam%(43), GhsWdwEmb-Dam%(45), UnbCns-Dam%(45) Level 38: Bonfire -- SuddAcc--KB/+KD(A), Bmbdmt-+FireDmg(45), FrcFdb-Rechg%(46), Ann-ResDeb%(46) Level 41: Fire Shield -- UnbGrd-ResDam(A), UnbGrd-ResDam/EndRdx(46), UnbGrd-Rchg/ResDam(48), UnbGrd-Max HP%(48) Level 44: Weave -- LucoftheG-Def/Rchg+(A), ShlWal-Def/EndRdx(48), ShlWal-Def(50), ShlWal-ResDam/Re TP(50) Level 47: Hasten -- RechRdx-I(A), RechRdx-I(50) Level 49: Rise of the Phoenix -- Prv-Absorb%(A) Level 1: Defiance Level 1: Brawl -- Empty(A) Level 1: Sprint -- Empty(A) Level 2: Rest -- Empty(A) Level 2: Swift -- Run-I(A) Level 2: Hurdle -- Jump-I(A) Level 2: Health -- Pnc-Heal/+End(A) Level 2: Stamina -- PrfShf-End%(A) Level 44: Speed Phase Level 6: Chemical Ammunition Level 6: Cryo Ammunition Level 6: Incendiary Ammunition ------------
-
Thanks for the feedback Stych, that's good info. I bet the in-game chatter (where I heard this) has to do with the combat log list order. But maybe nobody tested it like you did. If that's the case would it actually be better to put a damage proc into HoB instead of the -RES proc? I mean, just more dmg to kill mobs rather than trying to lower their -RES for whatever attacks come next?
-
Thanks @Nemu. I will take a detailed look - some great ideas in there. I hadn't thought of going ranged-only ... i've been using storm kick and DT in the rotation and to trigger FF procs. Not sure how I feel about being so far from 32% S/L def and only keeping 32% Ranged def. If I can see a path to it maybe I'll go Flame Mastery and pick up bonfire. Anyway more experimenting to do. 1 question: I heard that in-game if you don't put the -RES procs as the last (most far right slot) proc/IO in a power, it affects when the game triggers the -RES (beginning of power or later). I see in your MIDS you put the -RES procs as the first or 2nd slots in the power. Is what I heard about in-game not true? E.g., I thought I had to put the Fury of Glad -RES proc as the last slot in Hail of Bullets so that it triggers first upon firing the power (and then maybe affects the dmg ticks). Cheers,
-
Counterpoint: This Hero build was built using Mids Reborn 3.1.2.5 https://github.com/LoadedCamel/MidsReborn Click this DataLink to open the build! Radical Solutions: Level 50 Magic Blaster Primary Power Set: Fire Blast Secondary Power Set: Atomic Manipulation Power Pool: Leaping Power Pool: Speed Power Pool: Fighting Power Pool: Leadership Ancillary Pool: Mace Mastery Hero Profile: Level 1: Flares -- SprDfnBrr-Acc/Dmg(A), SprDfnBrr-Dmg/Rchg(3), SprDfnBrr-Acc/Dmg/Rchg(3), SprDfnBrr-Acc/Dmg/EndRdx(5), SprDfnBrr-Acc/Dmg/EndRdx/Rchg(5), SprDfnBrr-Rchg/+Status Protect(11) Level 1: Electron Shackles -- Acc-I(A) Level 2: Fire Ball -- Artl-Acc/Dam(A), Artl-Acc/Dam/Rech(7), Artl-Dam/End(7), PstBls-Dam%(9), Bmbdmt-+FireDmg(9), JvlVll-Dam%(43) Level 4: Combat Jumping -- LucoftheG-Def/Rchg+(A), Ksm-ToHit+(11), BlsoftheZ-Travel(27), BlsoftheZ-ResKB(27) Level 6: Super Speed -- BlsoftheZ-Travel/EndRdx(A), BlsoftheZ-ResKB(13) Level 8: Rain of Fire -- Artl-Acc/Dam(A), Artl-Dam/Rech(13), Artl-Acc/Dam/Rech(15), Artl-Acc/Rech/Rng(15), Artl-Dam/End(17), Artl-End/Rech/Rng(19) Level 10: Ionize -- RctRtc-ToHit(A), RctRtc-ToHit/Rchg(17) Level 12: Aim -- GssSynFr--Build%(A), RctRtc-Pcptn(23), RctRtc-ToHit/Rchg(42) Level 14: Hasten -- RechRdx-I(A), RechRdx-I(25) Level 16: Beta Decay -- AchHee-ResDeb%(A) Level 18: Blaze -- Thn-Acc/Dmg(A), Thn-Acc/Dmg/EndRdx(19), Thn-Dmg/EndRdx(21), Apc-Dam%(21), GldJvl-Dam%(23) Level 20: Metabolic Acceleration -- PreOptmz-EndMod/End/Rech(A), PreOptmz-EndMod/End(31), PreOptmz-EndMod/Acc/Rech(31), PreOptmz-Acc/Rech(31), PreOptmz-EndMod/Rech(33), PreOptmz-EndMod/Acc/End(33) Level 22: Kick -- ExpStr-Dmg/KB(A), ExpStr-Acc/KB(48), ExpStr-Dam%(50) Level 24: Tough -- StdPrt-ResDam/Def+(A), GldArm-3defTpProc(25), UnbGrd-Max HP%(43) Level 26: Blazing Bolt -- StnoftheM-Acc/Dmg(A), GldJvl-Dam%(29), StnoftheM-Dmg/EndRdx(36), StnoftheM-Acc/ActRdx/Rng(36), StnoftheM-Dmg/EndRdx/Rchg(36), StnoftheM-Dam%(37) Level 28: Atom Smasher -- SprAvl-Rchg/KDProc(A), SprAvl-Acc/Dmg/EndRdx/Rchg(29), SprAvl-Acc/Dmg(33), SprAvl-Dmg/EndRdx(34), SprAvl-Acc/Dmg/EndRdx(34), Arm-Dam%(34) Level 30: Weave -- LucoftheG-Def/Rchg+(A), ShlWal-Def/EndRdx(40), ShlWal-Def(40), ShlWal-ResDam/Re TP(45) Level 32: Inferno -- SprBlsWrt-Rchg/Dmg%(A), SprBlsWrt-Dmg/Rchg(37), SprBlsWrt-Acc/Dmg/Rchg(39), SprBlsWrt-Acc/Dmg/EndRdx(39), SprBlsWrt-Acc/Dmg/EndRdx/Rchg(39), SprBlsWrt-Acc/Dmg(42) Level 35: Scorpion Shield -- LucoftheG-Def/Rchg+(A), Rct-Def(37), Rct-Def/EndRdx(43), Rct-ResDam%(50) Level 38: Positronic Fist -- SprBlsCol-Acc/Dmg(A), SprBlsCol-Dmg/EndRdx/Acc/Rchg(40), SprBlsCol-Rchg/HoldProc(42), SprBlsCol-Dmg/EndRdx(45), SprBlsCol-Acc/Dmg/EndRdx(45) Level 41: Maneuvers -- LucoftheG-Def/Rchg+(A), LucoftheG-Def(48) Level 44: Negatron Slam -- Mk'Bit-Acc/Dmg(A), Mk'Bit-Dmg/EndRdx(46), Mk'Bit-Dmg/Rchg(46), Mk'Bit-Dam%(46), Mk'Bit-Acc/EndRdx/Rchg(48), Mk'Bit-Acc/Dmg/EndRdx/Rchg(50) Level 47: Tactics -- HO:Cyto(A) Level 49: Vengeance -- LucoftheG-Def/Rchg+(A) Level 1: Defiance Level 1: Brawl -- Empty(A) Level 1: Sprint -- Empty(A) Level 2: Rest -- Empty(A) Level 2: Swift -- Run-I(A) Level 2: Hurdle -- Jump-I(A) Level 2: Health -- Pnc-Heal/+End(A) Level 2: Stamina -- PrfShf-End%(A) Level 49: Quick Form Level 1: Prestige Power Dash -- Empty(A) Level 1: Prestige Power Slide -- Empty(A) Level 1: Prestige Power Quick -- Empty(A) Level 1: Prestige Power Rush -- Empty(A) Level 1: Prestige Power Surge -- Empty(A) Level 4: Ninja Run Level 50: Musculature Core Paragon Level 50: Task Force Commander Level 50: The Atlas Medallion Level 50: Portal Jockey Level 50: Freedom Phalanx Reserve Level 6: Speed Phase ------------
-
Alrighty. Thanks. See my comments.
-
Hi forum team - Below is an in-process rebuild of my proc-heavy DP/Martial blaster in the blaster forums. looking for input on tuning him up. the build-up proc / proc'd out Supressive Fire is great and has a strong chance to trigger (per Nemu), bringing a way to get build up into a set that lacks it. I had to look at 6-slotting the sustain because I've always had end problems. I like the FF recharge procs as they really add up and help all the powers come back faster. tactics is I think a must have for the +Perception and to-hit. not a fan of Eagle's Claw due to animation time and theoretically better dps chain w/o it. Don't like Piercing Rounds due to anim time. Might give up or remove slots from Burst of Speed as it doesn't really seem to do much damage or proc much. Was trying to keep 45% S/L at least but could go back to ~32% S/L/R to let a small purple soft-cap. a lot of one-slot wonder powers kind of just placeholders if we move slots around (e.g., take em out of BoS). Input appreciated. The in-process build: This Hero build was built using Mids Reborn 3.1.2.5 https://github.com/LoadedCamel/MidsReborn Click this DataLink to open the build! Atirador: Level 50 Mutation Blaster Primary Power Set: Dual Pistols Secondary Power Set: Martial Combat Power Pool: Leaping Power Pool: Fighting Power Pool: Leadership Power Pool: Speed Ancillary Pool: Mace Mastery Hero Profile: Level 1: Dual Wield -- SprDfnBrr-Acc/Dmg(A), SprDfnBrr-Dmg/Rchg(3), SprDfnBrr-Acc/Dmg/EndRdx(3), SprDfnBrr-Acc/Dmg/Rchg(5), SprDfnBrr-Acc/Dmg/EndRdx/Rchg(5), SprDfnBrr-Rchg/+Status Protect(7) Level 1: Ki Push -- SprBlsCol-Acc/Dmg(A), SprBlsCol-Dmg/EndRdx(7), SprBlsCol-Acc/Dmg/Rchg(9), SprBlsCol-Dmg/EndRdx/Acc/Rchg(9), SprBlsCol-Rchg/HoldProc(11) Level 2: Storm Kick -- KntCmb-Acc/Dmg(A), KntCmb-Dmg/EndRdx(11), KntCmb-Dmg/Rchg(13), KntCmb-Dmg/EndRdx/Rchg(13), Hct-Dam%(15), FrcFdb-Rechg%(15) Level 4: Reach for the Limit Level 6: Swap Ammo Level 8: Bullet Rain -- SprBlsWrt-Acc/Dmg/EndRdx/Rchg(A), SprBlsWrt-Rchg/Dmg%(17), PstBls-Dam%(17), Bmbdmt-+FireDmg(19), FrcFdb-Rechg%(19), Ann-ResDeb%(21) Level 10: Burst of Speed -- SprBlsWrt-Dmg/Rchg(A), SprBlsWrt-Acc/Dmg/Rchg(21), Erd-Dmg(23), Erd-Dmg/Rchg(23), Erd-%Dam(25), FuroftheG-ResDeb%(25) Level 12: Suppressive Fire -- Dcm-Build%(A), UnbCns-Dam%(27), GldJvl-Dam%(27), NrnSht-Dam%(29), GhsWdwEmb-Dam%(29), GldNet-Dam%(31) Level 14: Combat Jumping -- LucoftheG-Def/Rchg+(A), Empty(31), Ksm-ToHit+(40) Level 16: Dragon's Tail -- SprBlsWrt-Acc/Dmg(A), SprBlsWrt-Acc/Dmg/EndRdx(31), Erd-Dmg(33), Erd-Acc/Dmg/EndRdx/Rchg(33), Erd-%Dam(33), FrcFdb-Rechg%(34) Level 18: Executioner's Shot -- Apc-Dmg(A), Apc-Dmg/EndRdx(34), Apc-Dam%(34), ShlBrk-%Dam(36), GldJvl-Dam%(36), TchofLadG-%Dam(36) Level 20: Reaction Time -- PreOptmz-Acc/Rech(A), PreOptmz-EndMod/End(37), PreOptmz-EndMod/Rech(37), PreOptmz-EndMod/Acc/End(37), PreOptmz-EndMod/Acc/Rech(39), PreOptmz-EndMod/End/Rech(39) Level 22: Kick -- FrcFdb-Rechg%(A) Level 24: Tough -- StdPrt-ResDam/Def+(A), GldArm-3defTpProc(40), UnbGrd-ResDam/EndRdx/Rchg(42), UnbGrd-ResDam/EndRdx(42), UnbGrd-ResDam(42), UnbGrd-Max HP%(43) Level 26: Weave -- LucoftheG-Def/Rchg+(A), Rct-Def(43), Rct-ResDam%(43), Rct-Def/EndRdx(45) Level 28: Inner Will -- Prv-Absorb%(A), Prv-Heal/Rchg(45) Level 30: Maneuvers -- LucoftheG-Def/Rchg+(A), RedFrt-Def/EndRdx(50), RedFrt-Def(50) Level 32: Hail of Bullets -- Arm-Dmg(A), Arm-Dmg/Rchg(46), Arm-Dmg/EndRdx(46), Arm-Acc/Dmg/Rchg(46), Arm-Dam%(48), Erd-%Dam(48) Level 35: Scorpion Shield -- LucoftheG-Def/Rchg+(A), RedFrt-Def/EndRdx(48), RedFrt-Def(50) Level 38: Tactics -- EndRdx-I(A), RctRtc-ToHit/Rchg(39), RctRtc-ToHit(40) Level 41: Hasten -- RechRdx-I(A), RechRdx-I(45) Level 44: Super Speed -- BlsoftheZ-ResKB(A) Level 47: Super Jump -- WntGif-ResSlow(A) Level 49: Vengeance -- LucoftheG-Def/Rchg+(A) Level 1: Defiance Level 1: Brawl -- Empty(A) Level 1: Sprint -- Empty(A) Level 2: Rest -- Empty(A) Level 2: Swift -- Run-I(A) Level 2: Hurdle -- Jump-I(A) Level 2: Health -- Pnc-Heal/+End(A) Level 2: Stamina -- PrfShf-End%(A) Level 49: Double Jump Level 44: Speed Phase Level 6: Chemical Ammunition Level 6: Cryo Ammunition Level 6: Incendiary Ammunition ------------ My actual live build (before proposed changes above / input here): DP-Martial_Blaster_in-process-rebuild.mxd
-
@Nemuis the man. Good to think about what he posts. For counterpoint/suggestions, here is my Water/Rad blaster. I liked pairing the AOE of water with good single-target from rad including proc'd Posi Cell and melee Negatron Slam. I targeted 32%-35% S/L/R def so that 1 small purple would soft-cap me. He's fun to play when I want a break from my Fire/X blasters. This Hero build was built using Mids Reborn 3.1.2.5 https://github.com/LoadedCamel/MidsReborn Click this DataLink to open the build! Level 50 Natural Blaster Primary Power Set: Water Blast Secondary Power Set: Atomic Manipulation Power Pool: Speed Power Pool: Leaping Power Pool: Teleportation Power Pool: Fighting Ancillary Pool: Mace Mastery Hero Profile: Level 1: Aqua Bolt -- SprDfnBrr-Rchg/+Status Protect(A), SprDfnBrr-Dmg/Rchg(3), SprDfnBrr-Acc/Dmg(3), SprDfnBrr-Acc/Dmg/EndRdx/Rchg(5), SprDfnBrr-Acc/Dmg/EndRdx(5), SprDfnBrr-Acc/Dmg/Rchg(7) Level 1: Electron Shackles -- TraoftheH-Immob/Acc(A) Level 2: Water Burst -- PstBls-Acc/Dmg(A), PstBls-Acc/Dmg/EndRdx(9), PstBls-Dam%(9), Bmbdmt-Acc/Dam/Rech(11), Bmbdmt-+FireDmg(11), FrcFdb-Rechg%(13) Level 4: Positron Cell -- GldJvl-Acc/Dmg(A), GldJvl-Dam%(13), Apc-Dam%(15), UnbCns-Dam%(15), GhsWdwEmb-Dam%(17), GldNet-Dam%(17) Level 6: Whirlpool -- Bmbdmt-Dam(A), Bmbdmt-+FireDmg(19), JvlVll-Dam%(19), PstBls-Dam%(21), Ann-ResDeb%(21), AchHee-ResDeb%(23) Level 8: Super Speed -- BlsoftheZ-Travel/EndRdx(A), BlsoftheZ-ResKB(23) Level 10: Ionize -- GssSynFr--Build%(A), GssSynFr--ToHit/Rchg(25) Level 12: Combat Jumping -- LucoftheG-Def/Rchg+(A), ShlWal-ResDam/Re TP(25), Ksm-ToHit+(27) Level 14: Dehydrate -- GldJvl-Acc/Dmg(A), GldJvl-Dam%(27), TchofLadG-%Dam(29), TchoftheN-%Dam(29), ShlBrk-%Dam(31), AchHee-ResDeb%(31) Level 16: Tidal Forces -- RechRdx-I(A) Level 18: Water Jet -- SprBlsWrt-Acc/Dmg(A), SprBlsWrt-Dmg/Rchg(31), SprBlsWrt-Acc/Dmg/Rchg(33), SprBlsWrt-Acc/Dmg/EndRdx(33), SprBlsWrt-Acc/Dmg/EndRdx/Rchg(33), SprBlsWrt-Rchg/Dmg%(34) Level 20: Metabolic Acceleration -- NmnCnv-Regen/Rcvry+(A), NmnCnv-EndRdx/Rchg(34), NmnCnv-Heal/EndRdx(34), NmnCnv-Heal(36), NmnCnv-Heal/Rchg(36), NmnCnv-Heal/EndRdx/Rchg(36) Level 22: Beta Decay -- AchHee-ResDeb%(A) Level 24: Hasten -- RechRdx-I(A), RechRdx-I(37) Level 26: Negatron Slam -- SprBlsCol-Acc/Dmg(A), SprBlsCol-Acc/Dmg/EndRdx(37), SprBlsCol-Acc/Dmg/Rchg(37), SprBlsCol-Dmg/EndRdx/Acc/Rchg(39), SprBlsCol-Rchg/HoldProc(39), Hct-Dam%(39) Level 28: Teleport Target -- BlsoftheZ-ResKB(A), BlsoftheZ-Travel(40) Level 30: Combat Teleport -- BlsoftheZ-Travel/EndRdx(A), BlsoftheZ-ResKB(40) Level 32: Geyser -- Rgn-Dmg(A), Rgn-Dmg/Rchg(40), Rgn-Acc/Dmg/Rchg(42), Rgn-Acc/Rchg(42), Rgn-Dmg/EndRdx(42), FrcFdb-Rechg%(43) Level 35: Fold Space -- Acc-I(A), RechRdx-I(43) Level 38: Scorpion Shield -- Rct-Def(A), Rct-Def/EndRdx(43), Rct-EndRdx/Rchg(45), Rct-Def/Rchg(45), Rct-Def/EndRdx/Rchg(45), Rct-ResDam%(46) Level 41: Boxing -- Empty(A) Level 44: Radioactive Cloud -- Lck-%Hold(A), Lck-Acc/Hold(46), Lck-Acc/Rchg(46), Lck-Acc/EndRdx/Rchg/Hold(48), Lck-Rchg/Hold(48), Lck-EndRdx/Rchg/Hold(48) Level 47: Tough -- GldArm-3defTpProc(A), StdPrt-ResDam/Def+(50) Level 49: Weave -- LucoftheG-Def/Rchg+(A), Rct-Def(50), Rct-Def/EndRdx(50) Level 1: Defiance Level 1: Brawl -- Empty(A) Level 1: Sprint -- Clr-Stlth(A) Level 2: Rest -- Empty(A) Level 1: Swift -- Run-I(A) Level 1: Hurdle -- Jump-I(A) Level 1: Health -- Pnc-Heal/+End(A) Level 1: Stamina -- PrfShf-EndMod(A), PrfShf-End%(7) Level 1: Combo Level 1 Level 1: Combo Level 2 Level 1: Combo Level 3 Level 14: Speed Phase ------------
-
Thanks for the check/verification. All I know is that on my dark/savage dom, when I alternate Feral Charge and Call Hawk with FF +rchrg procs, it "feels" like the proc is up 50%+ of the time, which is great for keeping permadom. Fun times.
-
Here's a time/ice build I've been messing with on live. With PB+Clarion it pushes ~45% def to all. Also power-boosted vengeance is really nice on teams. The build chased recharge so it has 176% w/o Cronoshift and I think 226% with (perma) Cronoshift. Cardiac was really necessary to fix endurance issues. Recharge is high enough you can chain the 3 ice blasts for single-target. Damage from Ice Storm and even Blizzard feels weak -- you really miss the corrupter scourges. The Soul Storm procs well but is painfully slow to cast - I think about replacing it with Soul Drain slotted with 5 Armageddons (+10% recharge) and the Gladiation -RES but (a) it would only be up ever 60 seconds and (b) the buff from Soul Drain really wouldn't affect that much besides Blizzard, since the blast attacks are mainly proc damage. Anyway, posting it in case it's useful for anyone or anyone has suggestions. This Hero build was built using Mids Reborn 3.1.2.5 https://github.com/LoadedCamel/MidsReborn Click this DataLink to open the build! Frostytime: Level 50 Technology Defender Primary Power Set: Time Manipulation Secondary Power Set: Ice Blast Power Pool: Speed Power Pool: Leaping Power Pool: Fighting Power Pool: Leadership Ancillary Pool: Soul Mastery Hero Profile: Level 1: Temporal Mending -- Prv-Heal(A), Prv-Heal/EndRdx(3), Prv-EndRdx/Rchg(3), Prv-Heal/Rchg(5), Prv-Heal/Rchg/EndRdx(5), Prv-Absorb%(7) Level 1: Ice Bolt -- SprVglAss-Acc/Dmg(A), SprVglAss-Acc/Dmg/EndRdx(7), SprVglAss-Dmg/EndRdx/Rchg(9), IceMisTrmt-+ColdDmg(43), GldJvl-Dam%(46), GldJvl-Acc/Dmg(46) Level 2: Time's Juncture -- DarWtcDsp-ToHitDeb(A), DarWtcDsp-ToHitdeb/Rchg/EndRdx(9), DarWtcDsp-Rchg/EndRdx(11), DarWtcDsp-ToHitDeb/EndRdx(11) Level 4: Super Speed -- BlsoftheZ-ResKB(A), BlsoftheZ-Travel/EndRdx(21) Level 6: Combat Jumping -- LucoftheG-Def/Rchg+(A), BlsoftheZ-ResKB(17) Level 8: Distortion Field -- BslGaz-Acc/Hold(A), BslGaz-Rchg/Hold(15), BslGaz-Acc/EndRdx/Rchg/Hold(17), BslGaz-Acc/Rchg(19), Lck-%Hold(19) Level 10: Aim -- GssSynFr--Build%(A) Level 12: Kick -- Empty(A) Level 14: Tough -- ImpSki-ResDam/EndRdx(A), ImpSki-ResDam/Rchg(21), ImpSki-EndRdx/Rchg(23), ImpSki-ResDam/EndRdx/Rchg(23), ImpSki-Status(25), StdPrt-ResDam/Def+(25) Level 16: Freeze Ray -- GldJvl-Acc/Dmg(A), GldJvl-Dam%(27), UnbCns-Dam%(27), GldNet-Dam%(29), GhsWdwEmb-Dam%(29), NrnSht-Dam%(31) Level 18: Farsight -- AdjTrg-ToHit(A), AdjTrg-ToHit/Rchg(31), AdjTrg-ToHit/EndRdx/Rchg(31), AdjTrg-EndRdx/Rchg(33), AdjTrg-ToHit/EndRdx(33), LucoftheG-Def/Rchg+(33) Level 20: Ice Storm -- SprVglAss-Dmg/Rchg(A), SprVglAss-Acc/Dmg/EndRdx/Rchg(34), SprVglAss-Rchg/+Absorb(34) Level 22: Weave -- LucoftheG-Def/Rchg+(A), ShlWal-ResDam/Re TP(34), Rct-ResDam%(36) Level 24: Hasten -- RechRdx-I(A) Level 26: Slowed Response -- HO:Lyso(A), AchHee-ResDeb%(50) Level 28: Bitter Ice Blast -- GldJvl-Acc/Dmg(A), GldJvl-Dam/End/Rech(36), IceMisTrmt-+ColdDmg(36), CldSns-%Dam(37), ImpSwf-Dam%(37), Apc-Dam%(37) Level 30: Maneuvers -- LucoftheG-Def/Rchg+(A), LucoftheG-Def/EndRdx(39), LucoftheG-EndRdx/Rchg(45) Level 32: Chrono Shift -- Pnc-Heal/EndRedux(A), Pnc-EndRdx/Rchg(39), Pnc-Heal/Rchg(39), Pnc-Heal/EndRedux/Rchg(40), Pnc-Heal(40) Level 35: Dark Embrace -- UnbGrd-ResDam(A), UnbGrd-ResDam/EndRdx(40), UnbGrd-ResDam/EndRdx/Rchg(42), UnbGrd-Max HP%(42), GldArm-3defTpProc(42) Level 38: Blizzard -- Rgn-Dmg/Rchg(A), Rgn-Acc/Dmg/Rchg(43), Rgn-Acc/Rchg(43), Rgn-Dmg/EndRdx(45), Rgn-Dmg(45) Level 41: Power Boost -- RechRdx-I(A) Level 44: Soul Storm -- GldJvl-Dam%(A), GldJvl-Acc/Dmg(48), GhsWdwEmb-Dam%(48), GldNet-Dam%(48), NrnSht-Dam%(50), Dcm-Build%(50) Level 47: Assault -- EndRdx-I(A) Level 49: Vengeance -- LucoftheG-Def/Rchg+(A) Level 1: Vigilance Level 1: Brawl -- Empty(A) Level 1: Sprint -- Clr-Stlth(A), Clr-EndRdx(46) Level 2: Rest -- Empty(A) Level 2: Swift -- Empty(A) Level 2: Hurdle -- Empty(A) Level 2: Health -- Mrc-Rcvry+(A), NmnCnv-Regen/Rcvry+(13), Pnc-Heal/+End(13) Level 2: Stamina -- PrfShf-EndMod(A), PrfShf-End%(15) Level 4: Speed Phase Level 1: Prestige Power Dash -- Empty(A) Level 1: Prestige Power Slide -- Empty(A) Level 1: Prestige Power Quick -- Empty(A) Level 1: Prestige Power Rush -- Empty(A) Level 1: Prestige Power Surge -- Empty(A) Level 4: Ninja Run Level 50: Clarion Radial Epiphany Level 50: Cardiac Core Paragon Level 50: Pyronic Core Final Judgement ------------
-
Help me squeek out the most of my build [StJ/Inv].
brasilgringo replied to kosten07's topic in Stalker
Idk if it helps with any ideas but attached are some builds I was using on my Sav/Invuln or messing around with before they "fixed" Hemorrhage. Sav-Inv Stalker Croax.mxd StJ-Inv stalker.mxd Sav-Inv Stalker Alt.mxd savage-inv stalker.mxd -
The biggest problem I've seen on our TFJ runs is that when people move to avoid the "crackle", the DPS stops and he regens. Well that and dying a lot, but that's different. Ranged toons thankfully can keep attacking when they dodge, so that's helpful.
-
How do we feel about Ground Zero in Rad Armor?
brasilgringo replied to aethereal's topic in Scrapper
I try to hit Build Up and then GZ (and RT) at the start of spawns ... on teams you won't see the full effect due to mobs being dead-ed before the DOT ticks, but solo or when you are on harder targets it helps whittle them down over time while you focus on the bosses/lts/AVs. -
How do we feel about Ground Zero in Rad Armor?
brasilgringo replied to aethereal's topic in Scrapper
Yessir! That's why I went EM/Rad (build in post above) to add some AOE to an ST primary. -
How do we feel about Ground Zero in Rad Armor?
brasilgringo replied to aethereal's topic in Scrapper
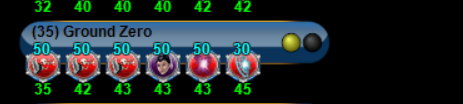
Yep I usually hit it after Build Up and proc it out. See my Live build below.
-
If anyone wants to go small height / huge body type / beast stance, beasty hands (pointy ones), that would be good too. I really appreciate the great suggestions.
-
That is some amazing work with tights and colors and the shield / eyes. Wow! thanks.