Psyonico
-
Posts
2859 -
Joined
-
Last visited
-
Days Won
16
Content Type
Profiles
Forums
Events
Store
Articles
Patch Notes
Everything posted by Psyonico
-
No, Leveling Pacts do not exist in homecoming, though I don't remember why they were removed.
-
 I'm against it for the simple reason of then it wouldn't be autohit.
 -
Stone Armor is getting buffs in the next patch. Here is what is on the Beta server right now: In my experience with a stone tanker, I generally build to offset granite's penalties, while capping Def/Res in Granite. What this does outside of Granite is a thing of beauty, even though you don't have as much mitigation, you've got a ton of damage and recharge.
-
City of Villains exists already, when you create a character you have the choice to be a hero or a villain, or, if you choose Going Rogue, a Praetorian. you can also change alignment at any time.
-
"superior", "extreme", etc. Are a little bit meaningless, they're meant to compare damage of powers within a set, not a baseline of raw damage output. Example: snap shot in archery says (I think) "light" damage for every AT, however, when you compare the damage of snap shot between a defender and a blaster you'll see a difference in damage.
-
Sentinel's epic powers need serious love
Psyonico replied to Diantane's topic in Suggestions & Feedback
You know, Diantane, I'm starting to think this game isn't for you. -
https://cod.uberguy.net/html/power.html?power=epic.power_mastery.power_build_up It doesn't say that it affects Regen or Recovery in COD. I don't think it ever has affected it.
-
I *may* be wrong, but I don't think Power Boost affects AB or either RA, because Power Boost doesn't affect Regen/Recovery.
-
Thematically, it makes sense that Rommy would get weaker each time he rezzes. He's being powered by the Nicti, which are being consumed to give him one more chance, however, he's now got fewer Nicti powering him, hence, weaker. I'm not saying it *should* change,, but I'm not sure why the ambushes stop after the first defeat.
-
/jranger
-
yes, everything but Defender is currently broken.
-
Randomization is unpredictable.
-
When you've got perma-PA, Spectral Terror isn't an every fight thing like it is when you don't have it. However, Spectral Terror *is* useful for over aggroing. If you are planning on exemplaring regularly, I would suggest getting Deceive in before 38. I made just a couple changes to your build to fit in EMP arrow. I dropped Tarantula and moved a couple slots around to get enough slots into EMP arrow. It still requires Spiritual to get perma PA, but it gives you everything you need.
-
This has really gotten me thinking. Thanks to Flash Arrow's unresistable debuff (at least 1/2 of it is) getting perma PA and effectively capped S/L/E defense is possible. I've decided to re-work my build to fit in Scorpion Shield and Tough/Weave without losing any recharge. I'm thinking I'm going to work toward this build instead of what I previously posted.
-
Depending on what you're trying to do, that few seconds can be the difference between living and dying. As for the build; If you throw in Spiritual Core Paragon, you've got Perma PA. However, I noticed you skipped Flash, Poison Gas Arrow, and EMP Arrow. PGA and EMP (once it gets fixed) are really great powers, Flash, some people love it, others hate it. I can see why you skipped them, as with Flash Arrow you've got capped S/L/E Defense, but the damage mitigation both PGA/EMP provide is excellent. Here is my Ill/TA for comparison, nowhere near as much defense, but has a bit more global recharge.
-
/Dark Melee is another good choice depending on your primary. Dark has a self heal that can fill the hole that (for example) shield has.
-
Feel free to just mail me inf 😁
-
I'd say the concern is burn-in if you're playing for long periods at a time.
-
Now I'm confused... Are you saying that controllers can't solo level 54 AVs without damage mitigation? I'd say that's pretty much a given. I chose my illusion/storm over my illusion/dark because of the comment you made about to-hit debuffs being helpful when you aren't at capped defense, the concept is the same though... PA doing the tanking and some damage while I whittle away with tar patch, blind, spectral wounds, with howling Twilight there to do a good chunk of -Regen. If, however that is still out of the scope of what you're looking for, I suspect a dark/energy perma-dom would be a good choice. I can't crunch the numbers right now, but I suspect with power boost and clarion radial you could get the ~10 stacked confuses needed to confuse through PToD, then your pets could (slowly) whittle away at the AV while you basically just keep confusing it and throwing in an attack randomly when you aren't casting confuse/hasten/PB/clarion/domination
-
Official Unofficial Guess what's in Page 3 discussion
Psyonico replied to 0th Power's topic in General Discussion
I'm surprised it took this long for someone to post this video. -
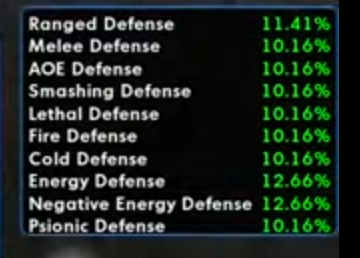
1. you're moving the goalpost, you said you can't do it without capped defense/to-hit debuffs, I showed you it's possible. 2. I put up all my defense numbers on the right hand side of the video (I forgot my toggles at the beginning of the fight, so they were lower than what they were after I turned them on)

-
Ok, to make things go a little faster, I slotted a Degenerative Interface.
-
Fine, I just soloed (edit: at 54) Chimera on my Illusion/Storm with just an Alpha and a Destiny slotted, not capped defense, and did not use hurricane. It took me about 14 minutes to do and for some reason it didn't record correctly, otherwise I'd upload the video proof of it. I'll play around with my settings and do it again later.
-
Looks like you've over slotted for accuracy at the expense of Damage and End Redux, which is where your problem is. You also don't have a Numina unique slotted, which will help a little. I've made just a couple of small changes to the build which should help with endurance without sacrificing much. Dark has no Defense Debuff Resistance, so Ageless Radial is generally a good idea to fix that, it will also fill up your endurance bar every 2 minutes if you are still having problems.
-
My Illusion/Dark soloed Arbiter Sands in the MLTF without defense at the soft cap, I probably would solo the Maria Arc as AVs but I did it before I was fully built out and the flashback version is only EBs, even with AVs turned on, when you're solo.