Vulpoid
-
Posts
520 -
Joined
-
Last visited
Content Type
Profiles
Forums
Events
Store
Articles
Patch Notes
Everything posted by Vulpoid
-
"I thought vampires didn't like the light?" "We love it. I only wanted to prepare you."
-
I thought vampires didn't like the light?
-

Force Feedback: Chance for +Recharge Single Slot In Kick?
Vulpoid replied to Vulpoid's topic in General Discussion
Well... That was a 2 Million Inf lesson learned. *sigh* -
Force Feedback: Chance for +Recharge Single Slot In Kick?
Vulpoid replied to Vulpoid's topic in General Discussion
But does it work in the game without actually using Kick in your attack chain? What is the point of this slotting technique? Is it a global type proc advantage? -
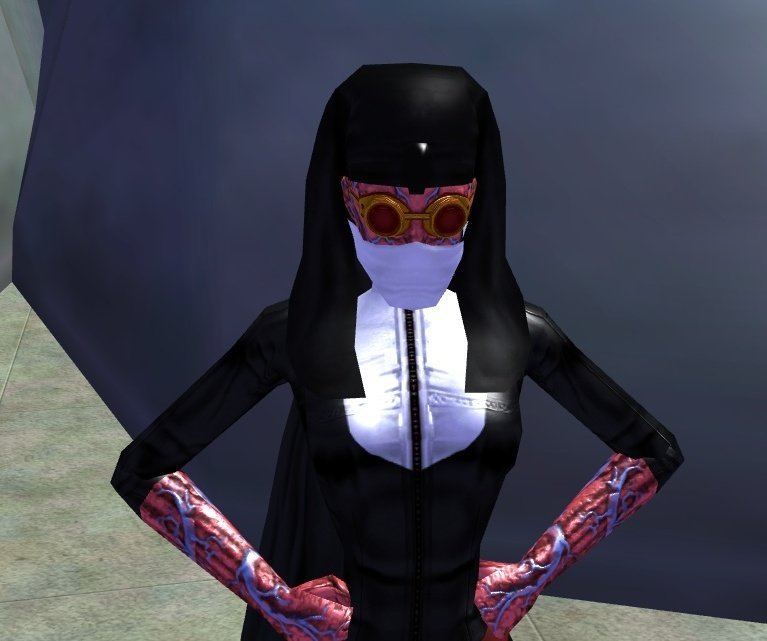
I did OK with Sister Blister.

-
I have seen Force Feedback: Chance for +Recharge slotted as the only enhancement in Kick in several builds. Are people using the attack in their attack chain? Does it have a chance to Proc if I don't click on Kick? I can't imagine many folks are using the power unslotted for Damage, Accuracy or without additional slots for any set bonuses. What am I missing?
-
I respectfully disagree, and feel @UltraAlt eloquently shared many of my feelings and concerns. I have a tendency to be hyperbolic and silly in my phrasing and I really appreciate the honest tone and explanation of this poster's thoughts. It is well written and validates my confirmation bias. ( small joke, but I mean what I said.)
-
What makes for a healthy game community?
Vulpoid replied to Glacier Peak's topic in General Discussion
I love you more everyday. Even if you are a wizened undead misanthrope. Maybe because of it. -
It is still Build Up, though... Right? If you take Earth Manipulation to pair with it, that is double Build Up. Even if the gimmick mechanic leaves something to be desired, it is still cool to get +to hit and damage, Right?
-
Immunity to polio was a lot harder to earn in the 1920s. But we did not deny the vaccine to future generations because they hadn't worked hard enough for it. Things change, and that is OK. Be happy for those who do not have to suffer.
-
I went scrapper. It was my first 50 on live. ( before brutes existed) I absolutely felt like a Speedster. I had Teleport, Super Speed and Concealment as well to duplicate other aspects of being faster than fast.
-
I have never understood this desire to share the fragile, beautiful things that make you happy in life with the common rabble. Imagine your favorite restaurant packed every night with tourists and their screaming children. ...your favorite nature walk now littered with ripe poo bags and broken beer bottles. ...having to take a number like at a deli counter before enjoying an evening with your significant other. We have absolutely nothing to gain by inviting more bloated bioforms into out perfect game. Quit it. Shhhhhh........
- 82 replies
-
- 12
-

-

-

-

-
There were also a line of comic books and two novels that provide stories within the world of COH/V/X https://archive.paragonwiki.com/wiki/Novels https://archive.paragonwiki.com/wiki/City_of_Heroes_(Comic_Book)
-
Can the current Devs add new costume pieces?
Vulpoid replied to LKN-351's topic in General Discussion
I think you just post them here so we can all use them right now...😁 -
Warshades..ok where's them macros!?
Vulpoid replied to The_Warpact's topic in Peacebringer & Warshade
Copied from the net. Bind files attached below: Binds for Making the most of your Kheldian For each type of Kheldian, I recommend having 3 files for binds. What the binds assume is that you put your nova blasts in tray 4, your dwarf attacks in tray 3, and you use use 1/2/5 for three trays of human junk. What matters is that tray 1 is normally on the bottom, and 3 and 4 are off-screen normally, but swap in when you change forms . A lot of people use similar binds and toggle on shields in their switch from Dwarf to human mode. I used to, but it irked me when it interference with things like the PB Triple-Alpha (see below), or when popping out of Black Dwarf to do a 2nd Mire. With these binds, the q key switches you to nova form, and the e key is dwarf. If you’re already in the form you pick, you switch back to human. (But if you’re in nova and click e, you’ll drop nova and immediately begin shifting to dwarf form) Here’s the set for warshades: ws_humanform.txt Quote: e “powexec_toggleon Black Dwarf$$bind SHIFT+LBUTTON powexec_name Black Dwarf Step$$goto_tray 3$$bind_load_file c:cohws_blackdwarf.txt” q “powexec_toggleon Dark Nova$$goto_tray 4$$bind_load_file c:cohws_nova.txt” ws_blackdwarf.txt Quote: e “powexec_toggleoff Black Dwarf$$bind SHIFT+LBUTTON powexec_name Shadow Step$$goto_tray 1$$bind_load_file c:cohws_humanform.txt” q “powexec_toggleoff Black Dwarf$$powexec_toggleon Dark Nova$$goto_tray 4$$bind_load_file c:cohws_nova.txt ws_nova.txt Quote: e “powexec_toggleoff Dark Nova$$goto_tray 3$$bind SHIFT+LBUTTON powexec_name Black Dwarf Step$$powexec_toggleon Black Dwarf$$bind_load_file c:cohws_blackdwarf.txt” q “powexec_toggleoff Dark Nova$$goto_tray 1$$bind SHIFT+LBUTTON powexec_name Shadow Step$$bind_load_file c:cohws_humanform.txt” One notable difference here is that we rebind a bind for dwarf form. With my warshade, I like using shift+left mouse button to teleport to wherever I am pointing. Placing that circle is a pain. But since both forms have teleports which use different names, we rebind them, so whichever form we’re in, shift+LCLICK is the right teleport.There are two other must-have binds; some other people have put forth more complicated versions which scan for White Dwarves, Bright Novas, and Shadow Cysts. I don’t worry about those, because they’re easy to spot from a distance. Not as true for voids, and not at ALL true for quantums, which tend to blend in completely. so I do: /bind b “target_name quantum$$target_name void” /bind v “team I see that $target is carrying a Quantum weapon! Please make sure that $target is taken care of quickly!” That lets you quickly target and warn a team about a Quantum/Void. Using the b key is pretty critical – I always do it before going into any fight. You’ll still be caught unawares once in a while, say going around a corner or such, but at least you won’t stupidly charge a big pack with a Quantum sitting in the middle! Here’s another great one that’s floating around, that’s a brilliant bind: /bind TAB “target_enemy_next$$target_custom_next enemy alive quantum$$target_custom_next enemy alive void$$target_custom_next enemy alive cyst” About the only reason you’d stick with the b bind and not use the tab bind is that you didn’t like the “X not found!” spam. For Warshades, I also like having a dead-corpse bind. I use this: /bind z target_custom_next enemy defeated That will cycle through defeated enemies so you can pick a corpse to blow up. A note on setting up trays A lot of powers you’ll use regularly you’ll want to know WHEN they are recharged. While it is hard to tell an almost-recharged power from a fully-recharged power when it is faded out, when a power recharges fully, it does a little “burst” on screen, even when faded. So if you are in dwarf form, you can keep an eye on Eclipse, and know when it is ready again because of the “pop”. I often slot certain powers in multiple trays, not to use, but to keep an eye on their recharge. For example, while my dwarf mire sits in the 1-key position in my dwarf tray, it ALSO sits at the far right of my top tray. (I use an ergo keyboard, so reaching for keys past 5 is generally infeasible; so I use 3 trays + dwarf/nova attacks in their own trays, and pack them all into numbers 1-5 unless they’re rarely used. So 6-10 is for rare things like rest or accolade powers, or for “monitoring” as I describe here) So when in nova or human form, I can see Black Dwarf Mire “pop” when it is ready. ws_blackdwarf.txt ws_humanform.txt ws_nova.txt -
Flurry, Sands of Mu, Shadow Maul.... WAAP!WAAP!WAAP! WAAP!WAAP!WAAP! WAAP!WAAP!WAAP! Not the most effective, but very fun and Speedster-like....
-
Any new slotting ideas?
-
Here is a great guide to building a Dark/Dark Defender https://web.archive.org/web/20120904092553/http://boards.cityofheroes.com/showthread.php?t=127276 Here is a completed build: Hero Plan by Mids' Reborn : Hero Designer 2.7.2.10 https://github.com/Crytilis/mids-reborn-hero-designer Click this DataLink to open the build! Solar Twilight: Level 50 Magic Defender Primary Power Set: Dark Miasma Secondary Power Set: Dark Blast Power Pool: Flight Power Pool: Speed Power Pool: Fighting Power Pool: Leaping Ancillary Pool: Dark Mastery Hero Profile: Level 1: Twilight Grasp -- TchoftheN-Heal(A), TchoftheN-Heal/HP/Regen/Rchg(3), TchoftheN-Acc/Heal(3), TchoftheN-Acc/EndRdx/Rchg(5), TchoftheN-Acc/EndRdx/Heal/HP/Regen(5), TchoftheN-%Dam(7) Level 1: Dark Blast -- SprWntBit-Dmg/Rchg(A), SprWntBit-Acc/Dmg/EndRdx(7), SprWntBit-Acc/Dmg/Rchg(9), SprWntBit-Dmg/EndRdx/Acc/Rchg(9), SprWntBit-Acc/Dmg(11), SprWntBit-Rchg/SlowProc(11) Level 2: Gloom -- SprDfnBst-Acc/Dmg(A), SprDfnBst-Dmg/Rchg(13), SprDfnBst-Dmg/EndRdx/Rchg(13), SprDfnBst-Acc/Dmg/EndRdx(15), SprDfnBst-Acc/Dmg/EndRdx/Rchg(15), SprDfnBst-Rchg/Heal%(17) Level 4: Hover -- LucoftheG-Def(A), BlsoftheZ-ResKB(21), BlsoftheZ-Travel/EndRdx(23), BlsoftheZ-Travel(23), LucoftheG-Def/EndRdx(25), LucoftheG-Def/Rchg+(25) Level 6: Fly -- BlsoftheZ-ResKB(A), BlsoftheZ-Travel(27) Level 8: Moonbeam -- StnoftheM-Acc/Dmg(A), StnoftheM-Acc/ActRdx/Rng(27), StnoftheM-Dmg/EndRdx/Rchg(29), StnoftheM-Dmg/EndRdx(29), StnoftheM-Dmg/ActRdx/Rchg(31) Level 10: Shadow Fall -- LucoftheG-Def/EndRdx(A), LucoftheG-Def(31), LucoftheG-Def/Rchg+(31), StdPrt-ResDam/Def+(33), ShlWal-ResDam/Re TP(33) Level 12: Howling Twilight -- RechRdx-I(A) Level 14: Afterburner -- LucoftheG-Def/Rchg+(A) Level 16: Fearsome Stare -- SphIns-Acc/EndRdx/Rchg(A), SphIns-ToHitDeb/EndRdx/Rchg(33), SphIns-Acc/Rchg(34), SphIns-Acc/ToHitDeb(34), SphIns-%ToHit(34), SphIns-ToHitDeb(36) Level 18: Hasten -- RechRdx-I(A), RechRdx-I(36) Level 20: Tenebrous Tentacles -- EnfOpr-Acc/Immob/Rchg(A), EnfOpr-Acc/EndRdx(36), EnfOpr-Acc/Rchg(37), EnfOpr-EndRdx/Immob(37), EnfOpr-Acc/Immob(37), EnfOpr-Immob/Rng(39) Level 22: Darkest Night -- DarWtcDsp-ToHitDeb(A) Level 24: Night Fall -- SprVglAss-Acc/Dmg(A), SprVglAss-Dmg/Rchg(39), SprVglAss-Dmg/EndRdx/Rchg(39), SprVglAss-Acc/Dmg/EndRdx(40), SprVglAss-Acc/Dmg/EndRdx/Rchg(40), SprVglAss-Rchg/+Absorb(40) Level 26: Petrifying Gaze -- BslGaz-Acc/EndRdx/Rchg/Hold(A), BslGaz-EndRdx/Rchg/Hold(42), BslGaz-Acc/Rchg(42), BslGaz-Rchg/Hold(42) Level 28: Boxing -- Acc-I(A) Level 30: Tough -- ImpArm-ResDam/EndRdx(A), ImpArm-ResDam/EndRdx/Rchg(43) Level 32: Dark Servant -- BslGaz-Acc/EndRdx/Rchg/Hold(A), BslGaz-EndRdx/Rchg/Hold(43), BslGaz-Acc/Rchg(43), BslGaz-Acc/Hold(45) Level 35: Weave -- LucoftheG-Def/EndRdx(A), LucoftheG-Def(45), LucoftheG-Def/Rchg+(45) Level 38: Combat Jumping -- Ksm-ToHit+(A), LucoftheG-Def/Rchg+(46) Level 41: Dark Consumption -- PrfShf-EndMod/Acc/Rchg(A) Level 44: Dark Embrace -- UnbGrd-ResDam/EndRdx(A), UnbGrd-ResDam(46), UnbGrd-Max HP%(46), UnbGrd-ResDam/EndRdx/Rchg(50) Level 47: Blackstar -- SprAvl-Acc/Dmg(A), SprAvl-Dmg/EndRdx(48), SprAvl-Acc/Dmg/EndRdx(48), SprAvl-Acc/Dmg/Rchg(48), SprAvl-Acc/Dmg/EndRdx/Rchg(50), SprAvl-Rchg/KDProc(50) Level 49: Tar Patch -- RechRdx-I(A) Level 1: Brawl -- Acc-I(A) Level 1: Sprint -- Run-I(A) Level 2: Rest -- RechRdx-I(A) Level 1: Vigilance Level 4: Ninja Run Level 2: Swift -- Flight-I(A) Level 2: Hurdle -- Jump-I(A) Level 2: Health -- NmnCnv-Regen/Rcvry+(A), Mrc-Rcvry+(17) Level 2: Stamina -- PrfShf-EndMod(A), PrfShf-EndMod/Acc(19), PrfShf-End%(19), PrfShf-EndMod/Rchg(21) Level 1: Prestige Power Slide -- Empty(A) Level 1: Prestige Power Dash -- Empty(A) Level 1: Prestige Power Quick -- Empty(A) Level 1: Prestige Power Surge -- Empty(A) Level 1: Prestige Power Rush -- Empty(A) Level 1: Quick Form Level 10: Shadow Recall -- Empty(A) Level 50: Agility Core Paragon Level 50: Barrier Core Epiphany Level 50: Ion Core Final Judgement Level 50: Assault Radial Embodiment Level 50: Diamagnetic Radial Flawless Interface Level 50: Banished Pantheon Core Superior Ally
-
I volunteer to be an Influence Sink. Heck, I'll be an Influence Toilet.
-
Breaking up Troll raves in the caves in The Hollows always seemed like a real jerk move anyway. They are just hanging out, getting high, dancing and having drum circles in a cave. Why is that my business? Why am I beating them up? Poor guys...
-
City Of Data has it listed that way as well. https://cod.uberguy.net/html/power.html?power=epic.dark_mastery.soul_drain
-
Tell us more... What AT and power sets have peaked your interest for this project?
-
You can turn off visual effects on your own character for any power pool. /bind KEY "SuppressCloseFX 1$$SuppressCloseFXdist 300" This will turn off your auras and armors visual effects for you, in your view only, unless you scroll 300 feet out. Others will still see them. change the number as you desire to make the effect re-appear. 50-100 is a good middle ground. /bind KEY "SuppressCloseFX 0" will turn all the visual fireworks back on. Pick two keys you like.
-
Do you know ( I have not tried) if Combat Jumping gives you the same "stop on a dime" maneuverability that having Hover does while having Mystic Flight or Flying running? Without hover, the flight powers have you slow coast to a stop. Has anybody tried to run Combat Jumping? -Thanks!