The Beta Account Center is temporarily unavailable
×


brasilgringo
-
Posts
672 -
Joined
-
Last visited
Content Type
Profiles
Forums
Events
Store
Articles
Patch Notes
Everything posted by brasilgringo
-
Also pretty cool, thank you. i'd probably make him beast stance and tiny, but it's a great jumping off point!
-
Great name and concept! Thanks.
-
Sadly not yet. I will likely end up going Magic (for Blackwand bonus dmg) and turning him Vig after I do the patron arc to unlock Mu.
-
Gratefully accepting ideas for an Elec/Shield/Mu Stalker build. Open to all body types. Worth considering something small and animalistic or even tall/alien. Less is more. Thanks!
-
This is the build I've been playing with on Test. I may make it on live. It seems to hold up pretty well even to Carnies on +4/+8. I got it from the boards - sorry I can't remember from whom. I wish I could figure how to slot more health into True Grit but I guess slot sacrifices have to be made somewhere. This Villain build was built using Mids Reborn 3.1.2.5 https://github.com/LoadedCamel/MidsReborn Click this DataLink to open the build! Level 50 Mutation Stalker Primary Power Set: Electrical Melee Secondary Power Set: Shield Defense Power Pool: Leaping Power Pool: Speed Power Pool: Fighting Power Pool: Leadership Ancillary Pool: Mu Mastery Villain Profile: Level 1: Havoc Punch -- Mk'Bit-Acc/Dmg(A), Mk'Bit-Dmg/EndRdx(3), Mk'Bit-Dmg/Rchg(3), Mk'Bit-Acc/EndRdx/Rchg(5), Mk'Bit-Acc/Dmg/EndRdx/Rchg(5), Mk'Bit-Dam%(7) Level 1: Hide -- Ksm-ToHit+(A), ShlWal-ResDam/Re TP(7) Level 2: Deflection -- Ags-ResDam/EndRdx/Rchg(A), Ags-ResDam/EndRdx(9), LucoftheG-Def(9), LucoftheG-Def/Rchg+(11), Ags-ResDam(11), Ags-Psi/Status(13) Level 4: Battle Agility -- RedFrt-Def/EndRdx(A), RedFrt-Def/Rchg(17), RedFrt-EndRdx/Rchg(17), RedFrt-Def/EndRdx/Rchg(19), RedFrt-Def(19), RedFrt-EndRdx(21) Level 6: Assassin's Shock -- SprStlGl-Rchg/Hide%(A), SprStlGl-Acc/Dmg/EndRdx/Rchg(21), SprStlGl-Acc/Dmg(23), SprStlGl-Dmg/Rchg(23), SprStlGl-Acc/Dmg/Rchg(25), SprStlGl-Dmg/EndRdx/Rchg(25) Level 8: Build Up -- GssSynFr--Build%(A), GssSynFr--ToHit/EndRdx(27), GssSynFr--ToHit(27), GssSynFr--ToHit/Rchg(29), GssSynFr--ToHit/Rchg/EndRdx(29), GssSynFr--Rchg/EndRdx(31) Level 10: True Grit -- RctArm-ResDam(A), RctArm-ResDam/EndRdx(31), StdPrt-ResDam/Def+(31) Level 12: Combat Jumping -- LucoftheG-Def/Rchg+(A), LucoftheG-Def(33) Level 14: Hasten -- RechRdx-I(A), RechRdx-I(33) Level 16: Active Defense -- RechRdx-I(A) Level 18: Chain Induction -- Hct-Dmg(A), Hct-Acc/Dmg/Rchg(33), Hct-Dmg/Rchg(34), Hct-Dmg/EndRdx(34), Hct-Dam%(34) Level 20: Against All Odds -- EndRdx-I(A) Level 22: Boxing -- Acc-I(A) Level 24: Tough -- UnbGrd-Max HP%(A), UnbGrd-ResDam/EndRdx/Rchg(36), UnbGrd-ResDam(36), UnbGrd-ResDam/EndRdx(36) Level 26: Thunder Strike -- SprAssMar-Acc/Dmg(A), SprAssMar-Dmg/Rchg(37), SprAssMar-Acc/Dmg/Rchg(37), SprAssMar-Dmg/EndRdx/Rchg(37), SprAssMar-Acc/Dmg/EndRdx/Rchg(39), SprAssMar-Rchg/Rchg Build Up(39) Level 28: Grant Cover -- LucoftheG-Def/Rchg+(A) Level 30: Weave -- LucoftheG-Def/Rchg+(A), Rct-ResDam%(39), Rct-Def(40), Rct-Def/EndRdx(50) Level 32: Lightning Rod -- Obl-Dmg(A), Obl-Acc/Rchg(40), Obl-Dmg/Rchg(40), Obl-Acc/Dmg/Rchg(42), Obl-Acc/Dmg/EndRdx/Rchg(42), Obl-%Dam(42) Level 35: Shield Charge -- Arm-Dmg(A), Arm-Dam%(43), Arm-Acc/Dmg/Rchg(43), Arm-Acc/Rchg(43), Arm-Dmg/EndRdx(45) Level 38: One with the Shield -- GldArm-3defTpProc(A) Level 41: Zapp -- StnoftheM-Dam%(A), StnoftheM-Acc/Dmg(45), StnoftheM-Dmg/EndRdx(45), StnoftheM-Dmg/EndRdx/Rchg(46), StnoftheM-Dmg/ActRdx/Rchg(46) Level 44: Ball Lightning -- Rgn-Dmg(A), Rgn-Dmg/Rchg(46), Rgn-Acc/Dmg/Rchg(48), Rgn-Dmg/EndRdx(48), Rgn-Acc/Rchg(48) Level 47: Maneuvers -- LucoftheG-Def/Rchg+(A), LucoftheG-Def(50), LucoftheG-Def/EndRdx(50) Level 49: Super Speed -- WntGif-ResSlow(A) Level 1: Assassination Level 1: Brawl -- Empty(A) Level 1: Sprint -- Clr-Stlth(A) Level 2: Rest -- Empty(A) Level 2: Swift -- Run-I(A) Level 2: Hurdle -- Jump-I(A) Level 2: Health -- NmnCnv-Regen/Rcvry+(A), Mrc-Rcvry+(13), Pnc-Heal/+End(15) Level 2: Stamina -- PrfShf-End%(A), PrfShf-EndMod(15) Level 49: Quick Form Level 1: Prestige Power Dash -- Empty(A) Level 1: Prestige Power Slide -- Empty(A) Level 1: Prestige Power Quick -- Empty(A) Level 1: Prestige Power Rush -- Empty(A) Level 1: Prestige Power Surge -- Empty(A) Level 4: Ninja Run Level 50: Musculature Core Paragon Level 50: Ageless Core Epiphany Level 50: Ion Core Final Judgement Level 50: Assault Core Embodiment Level 50: Reactive Core Flawless Interface Level 50: Longbow Core Superior Ally Level 49: Speed Phase ------------
-
Can u share the rebuild?
-
This is where I've ended up after a lot of board searching and minor tweaks to what I think was a build from @Force Redux. Thoughts? Currently leveling up in some TFs. Probably go Musculature for Alpha, Clarion for mez protect and to stack with Farsight (buffs Farsight) since I didn't take Power Boost, and then Degen / Ion unless people have other suggestions. This Villain build was built using Mids Reborn 3.1.2.5 https://github.com/LoadedCamel/MidsReborn Click this DataLink to open the build! Time Thug: Level 50 Technology Mastermind Primary Power Set: Thugs Secondary Power Set: Time Manipulation Power Pool: Leaping Power Pool: Speed Power Pool: Leadership Ancillary Pool: Mu Mastery Villain Profile: Level 1: Call Thugs -- HO:Nucle(A), HO:Nucle(3), BldMnd-Acc/Dmg/EndRdx(3), OvrFrc-Dam/KB(5), EdcoftheM-Acc/Dmg/EndRdx(5), SvrRgh-PetResDam(7) Level 1: Time Crawl -- TmpRdn-Acc/EndRdx(A) Level 2: Temporal Mending -- Prv-Heal(A), Prv-Heal/EndRdx(7), Prv-EndRdx/Rchg(9), Prv-Heal/Rchg(9), Prv-Heal/Rchg/EndRdx(11), Prv-Absorb%(11) Level 4: Time's Juncture -- DarWtcDsp-ToHitDeb(A), DarWtcDsp-ToHitdeb/Rchg/EndRdx(17), DarWtcDsp-ToHitDeb/EndRdx(17), DarWtcDsp-ToHitDeb/Rchg(19) Level 6: Equip Thugs -- EndRdx-I(A) Level 8: Combat Jumping -- LucoftheG-Def/Rchg+(A), BlsoftheZ-Travel/EndRdx(19), BlsoftheZ-ResKB(21) Level 10: Super Speed -- BlsoftheZ-ResKB(A), BlsoftheZ-Travel/EndRdx(21) Level 12: Call Enforcer -- HO:Nucle(A), MarofSpr-Acc/Dmg(23), SprMarofS-Acc/Dmg(23), GssSynFr--Build%(25), TchofLadG-%Dam(25), AchHee-ResDeb%(27) Level 14: Maneuvers -- LucoftheG-Def/Rchg+(A), LucoftheG-Def/EndRdx(27), LucoftheG-Def(29) Level 16: Distortion Field -- BslGaz-Acc/Hold(A), BslGaz-Acc/Rchg(29), BslGaz-EndRdx/Rchg/Hold(31), BslGaz-Acc/EndRdx/Rchg/Hold(31), Lck-%Hold(31), PcnoftheT-EndRdx/Rchg/Slow(33) Level 18: Gang War -- ExpRnf-+Res(Pets)(A), CaltoArm-+Def(Pets)(33), SprCmmoft-Rchg/PetAoEDef(33), SprCmmoft-Acc/Dmg/EndRdx/Rchg(34), SprCmmoft-Acc/Dmg/Rchg(34), SprCmmoft-Dmg/EndRdx/Rchg(34) Level 20: Time Stop -- BslGaz-Acc/Hold(A), BslGaz-Acc/EndRdx/Rchg/Hold(36), BslGaz-Acc/Rchg(36), BslGaz-EndRdx/Rchg/Hold(36), Lck-%Hold(37) Level 22: Tactics -- RctRtc-ToHit(A), RctRtc-Pcptn(37) Level 24: Hasten -- RechRdx-I(A), RechRdx-I(37) Level 26: Call Bruiser -- HO:Nucle(A), HO:Nucle(39), SprMarofS-Acc/Dmg/EndRdx(39), SprMarofS-EndRdx/+Resist/+Regen(39), ExpStr-Dam%(40), SlbAll-Build%(40) Level 28: Farsight -- LucoftheG-Def/Rchg+(A), HO:Membr(40), HO:Membr(42) Level 30: Burnout -- RechRdx-I(A) Level 32: Upgrade Equipment -- EndRdx-I(A) Level 35: Slowed Response -- HO:Lyso(A), AchHee-ResDeb%(42), RechRdx-I(42) Level 38: Chrono Shift -- DctWnd-Heal/EndRdx/Rchg(A), PrfShf-EndMod/Rchg(43), NmnCnv-Heal/Rchg(43), EnrMnp-EndMod/Rchg(43) Level 41: Charged Armor -- GldArm-3defTpProc(A), StdPrt-ResDam/Def+(45), TtnCtn-ResDam(45), TtnCtn-ResDam/EndRdx(45) Level 44: Electrifying Fences -- TraoftheH-Dam%(A), Bmbdmt-+FireDmg(46), PstBls-Dam%(46), Ann-Acc/Dmg/EndRdx(46), Ann-Acc/Dmg(48), Ann-ResDeb%(48) Level 47: Electric Shackles -- BslGaz-Acc/Hold(A), BslGaz-Acc/Rchg(48), BslGaz-Slow%(50), BslGaz-EndRdx/Rchg/Hold(50), Lck-%Hold(50) Level 49: Temporal Selection -- HrmHln-Heal/EndRdx/Rchg(A) Level 1: Supremacy Level 1: Brawl -- Empty(A) Level 1: Sprint -- Clr-Stlth(A) Level 2: Rest -- Empty(A) Level 2: Swift -- Empty(A) Level 2: Hurdle -- Empty(A) Level 2: Health -- Mrc-Rcvry+(A), NmnCnv-Regen/Rcvry+(13), Pnc-Heal/+End(13) Level 2: Stamina -- EndMod-I(A), PrfShf-EndMod(15), PrfShf-End%(15) Level 10: Speed Phase Level 1: Prestige Power Dash -- Empty(A) Level 1: Prestige Power Slide -- Empty(A) Level 1: Prestige Power Quick -- Empty(A) Level 1: Prestige Power Rush -- Empty(A) Level 1: Prestige Power Surge -- Empty(A) Level 4: Ninja Run Level 50: Musculature Core Paragon Level 1: Punk Level 1: Arsonist Level 26: Bruiser Level 12: Enforcer ------------
-
I figure SC works better as a proc-bomb with non-ATO procs (-RES, dmg procs).
-
Here's mine on Live. Below it is a diff version from someone else here that uses Fire (RES) shield. I like mine. This Villain build was built using Mids Reborn 3.1.2.5 https://github.com/LoadedCamel/MidsReborn Click this DataLink to open the build! Level 50 Mutation Dominator Primary Power Set: Darkness Control Secondary Power Set: Savage Assault Power Pool: Speed Power Pool: Leaping Power Pool: Fighting Power Pool: Leadership Ancillary Pool: Ice Mastery Villain Profile: Level 1: Dark Grasp -- BslGaz-Acc/Hold(A), BslGaz-Acc/EndRdx/Rchg/Hold(3), BslGaz-Rchg/Hold(3), BslGaz-Acc/Rchg(5) Level 1: Call Swarm -- AchHee-ResDeb%(A) Level 2: Living Shadows -- SprAscoft-Acc/Conf/Hold/Immob/Sleep/Stun/Fear(A), SprAscoft-Conf/Hold/Immob/Sleep/Stun/Fear/Rchg(5), SprAscoft-EndRdx/Rchg(9), SprAscoft-Acc/Conf/Hold/Immob/Sleep/Stun/Fear/EndRdx(13), SprAscoft-Rchg/+Dmg%(34), SprAscoft-Acc/Conf/Hold/Immob/Sleep/Stun/Fear/EndRdx/Rchg(37) Level 4: Vicious Slash -- Mk'Bit-Acc/Dmg(A), Mk'Bit-Dmg/EndRdx(6), Mk'Bit-Dam%(9), Mk'Bit-Acc/Dmg/EndRdx/Rchg(6), Mk'Bit-Dmg/Rchg(11), Mk'Bit-Acc/EndRdx/Rchg(6) Level 6: Possess -- CrcPrs-Conf(A), CrcPrs-Conf/Rchg(13), CrcPrs-Acc/Conf/Rchg(15), CrcPrs-Conf/EndRdx(15), CrcPrs-Acc/Rchg(17), CrcPrs-Conf%(17) Level 8: Fearsome Stare -- CldSns-ToHitDeb(A), CldSns-Acc/ToHitDeb(19), CldSns-Acc/Rchg(19), CldSns-ToHitDeb/EndRdx/Rchg(21), CldSns-Acc/EndRdx/Rchg(21), CldSns-%Dam(23) Level 10: Hasten -- RechRdx-I(A), RechRdx-I(11) Level 12: Heart of Darkness -- AbsAmz-Acc/Rchg(A), Arm-Dam%(31), Erd-%Dam(31), ScrDrv-Dam%(33), Obl-%Dam(33), CldSns-%Dam(33) Level 14: Super Speed -- BlsoftheZ-ResKB(A), BlsoftheZ-Travel/EndRdx(31) Level 16: Spot Prey -- GssSynFr--ToHit/Rchg(A), GssSynFr--ToHit(34), GssSynFr--ToHit/Rchg/EndRdx(39), GssSynFr--ToHit/EndRdx(40), GssSynFr--Build%(40), GssSynFr--Rchg/EndRdx(45) Level 18: Combat Jumping -- LucoftheG-Def/Rchg+(A), Ksm-ToHit+(29) Level 20: Rending Flurry -- Arm-Acc/Dmg/Rchg(A), Arm-Dmg(27), ScrDrv-Dam%(23), Erd-%Dam(25), Obl-%Dam(25), FuroftheG-ResDeb%(27) Level 22: Weave -- LucoftheG-Def/Rchg+(A), LucoftheG-Def(36), LucoftheG-Def/EndRdx(36) Level 24: Kick -- FrcFdb-Rechg%(A) Level 26: Shadow Field -- BslGaz-Acc/Hold(A), BslGaz-Acc/Rchg(36), BslGaz-Rchg/Hold(37), BslGaz-EndRdx/Rchg/Hold(37) Level 28: Tough -- StdPrt-ResDam/Def+(A), GldArm-3defTpProc(29) Level 30: Blood Craze -- DctWnd-Heal/Rchg(A) Level 32: Maneuvers -- LucoftheG-Def/Rchg+(A), LucoftheG-Def(34) Level 35: Call Hawk -- Apc-Dmg(A), Apc-Dam%(39), Thn-Acc/Dmg/Rchg(40), GldJvl-Dam%(42), CldSns-%Dam(42), FrcFdb-Rechg%(42) Level 38: Feral Charge -- Hct-Dmg(A), Hct-Dam%(39), TchofDth-Dam%(43), Mk'Bit-Dam%(43), GldStr-%Dam(45), FrcFdb-Rechg%(45) Level 41: Sleet -- RechRdx-I(A) Level 44: Frozen Armor -- LucoftheG-Def/Rchg+(A), LucoftheG-Def/EndRdx(46), LucoftheG-Def(46) Level 47: Ice Storm -- Rgn-Knock%(A), Rgn-Dmg/Rchg(48), Rgn-Acc/Dmg/Rchg(48), Rgn-Acc/Rchg(48), Rgn-Dmg/EndRdx(50) Level 49: Hoarfrost -- DctWnd-Heal/Rchg(A) Level 1: Domination Level 1: Brawl -- Empty(A) Level 1: Sprint -- Clr-Stlth(A) Level 2: Rest -- Empty(A) Level 2: Swift -- Run-I(A) Level 2: Hurdle -- Jump-I(A) Level 2: Health -- Mrc-Rcvry+(A), Pnc-Heal/+End(7), Prv-Absorb%(43) Level 2: Stamina -- PrfShf-EndMod(A), PrfShf-End%(7) Level 1: Blood Frenzy Level 1: Prestige Power Dash -- Empty(A) Level 1: Prestige Power Slide -- Empty(A) Level 1: Prestige Power Quick -- Empty(A) Level 1: Prestige Power Rush -- Empty(A) Level 1: Prestige Power Surge -- Empty(A) Level 4: Ninja Run Level 50: Intuition Radial Paragon Level 14: Speed Phase ------------ This Villain build was built using Mids Reborn 3.1.2.5 https://github.com/LoadedCamel/MidsReborn Click this DataLink to open the build! Level 50 Magic Dominator Primary Power Set: Darkness Control Secondary Power Set: Savage Assault Power Pool: Speed Power Pool: Leaping Power Pool: Leadership Power Pool: Fighting Ancillary Pool: Fire Mastery Villain Profile: Level 1: Dark Grasp -- BslGaz-Acc/Hold(A), BslGaz-Acc/Rchg(3), BslGaz-Rchg/Hold(3), BslGaz-EndRdx/Rchg/Hold(5) Level 1: Call Swarm -- Empty(A) Level 2: Living Shadows -- SprAscoft-Acc/Conf/Hold/Immob/Sleep/Stun/Fear(A), SprAscoft-Conf/Hold/Immob/Sleep/Stun/Fear/Rchg(5), SprAscoft-EndRdx/Rchg(7), SprAscoft-Acc/Conf/Hold/Immob/Sleep/Stun/Fear/EndRdx(7), SprAscoft-Acc/Conf/Hold/Immob/Sleep/Stun/Fear/EndRdx/Rchg(9), SprAscoft-Rchg/+Dmg%(9) Level 4: Vicious Slash -- Dmg-I(A), Dmg-I(13), FrcFdb-Rechg%(15), TchofDth-Dam%(15), GldStr-%Dam(17), ExpStr-Dam%(17) Level 6: Possess -- CrcPrs-Conf(A), CrcPrs-Conf/Rchg(19), CrcPrs-Acc/Conf/Rchg(19), CrcPrs-Acc/Rchg(21), CrcPrs-Conf/EndRdx(21), CrcPrs-Conf%(23) Level 8: Hasten -- RechRdx-I(A), RechRdx-I(23) Level 10: Combat Jumping -- LucoftheG-Def/Rchg+(A) Level 12: Heart of Darkness -- AbsAmz-Acc/Rchg(A), Erd-%Dam(25), Obl-%Dam(25), CldSns-%Dam(27), Arm-Dam%(27), FuroftheG-ResDeb%(29) Level 14: Maneuvers -- LucoftheG-Def/Rchg+(A), Ksm-ToHit+(29), ShlWal-ResDam/Re TP(31) Level 16: Spot Prey -- GssSynFr--Build%(A) Level 18: Tactics -- ToHit-I(A), ToHit-I(31) Level 20: Fearsome Stare -- CldSns-ToHitDeb(A), CldSns-Acc/ToHitDeb(31), CldSns-Acc/Rchg(33), CldSns-ToHitDeb/EndRdx/Rchg(33), CldSns-Acc/EndRdx/Rchg(33), CldSns-%Dam(34) Level 22: Boxing -- AbsAmz-Stun(A), AbsAmz-Stun/Rchg(34), AbsAmz-Acc/Stun/Rchg(34), AbsAmz-EndRdx/Stun(36), AbsAmz-ToHitDeb%(36) Level 24: Tough -- GldArm-3defTpProc(A), StdPrt-ResDam/Def+(36), GldArm-ResDam(37) Level 26: Shadow Field -- UnbCns-Dam%(A), UnbCns-Hold(37), UnbCns-Hold/Rchg(37), UnbCns-Acc/Hold/Rchg(48), UnbCns-Acc/Rchg(50) Level 28: Blood Craze -- Prv-Heal(A), Prv-Heal/Rchg(39) Level 30: Weave -- LucoftheG-Def/Rchg+(A), Rct-Def(39), Rct-ResDam%(39) Level 32: Super Speed -- Clr-Stlth(A), Clr-EndRdx(40) Level 35: Call Hawk -- Apc-Dmg(A), FrcFdb-Rechg%(40), CldSns-%Dam(40), ExpStr-Dam%(42), GldJvl-Dam%(42), Apc-Dam%(42) Level 38: Feral Charge -- Dmg-I(A), FrcFdb-Rechg%(43), ExpStr-Dam%(43), GldStr-%Dam(43), TchofDth-Dam%(45), Hct-Dam%(45) Level 41: Fire Ball -- Rgn-Dmg(A), JvlVll-Dam%(45), Bmbdmt-+FireDmg(46), PstBls-Dam%(46), Ann-ResDeb%(46) Level 44: Fire Shield -- UnbGrd-ResDam(A), UnbGrd-Max HP%(48), ResDam-I(48) Level 47: Rise of the Phoenix -- Prv-Absorb%(A), Prv-Heal/Rchg(50) Level 49: Vengeance -- LucoftheG-Def/Rchg+(A) Level 1: Domination Level 1: Brawl -- Empty(A) Level 1: Sprint -- Clr-RunSpd(A), Empty(50) Level 2: Rest -- Empty(A) Level 2: Swift -- Empty(A) Level 2: Hurdle -- Empty(A) Level 2: Health -- Mrc-Rcvry+(A), Pnc-Heal/+End(11), NmnCnv-Regen/Rcvry+(11) Level 2: Stamina -- PrfShf-End%(A), PrfShf-EndMod(13) Level 1: Blood Frenzy Level 1: Prestige Power Dash -- Empty(A) Level 1: Prestige Power Slide -- Empty(A) Level 1: Prestige Power Quick -- Empty(A) Level 1: Prestige Power Rush -- Empty(A) Level 1: Prestige Power Surge -- Empty(A) Level 4: Ninja Run Level 50: Musculature Core Paragon Level 32: Speed Phase ------------ Here'e mine on Live. The FF recharge procs and HoD as a proc-bomb are key.
-
Also epic pool Power Boost plus the def power for pets (forget its name - that consumes stacks) is 100% win.
-
I put a proc'd out Short Circuit on my recent Elec/Cold corr and the idea was to use it (and its 20' range) to proc the Fury -RES on mobs before starting to blast (and to stack with -Sleet). Put I'm not seeing the procs (-RES, plus 3 damage procs) proc as much as I'd have hoped. Debating whether to switch it with a proc'd Tesla Cage just to have another decent single-target attack, even if the chain damage from Tesla is weaksauce. Anyone have good recent experience with the 2?
-
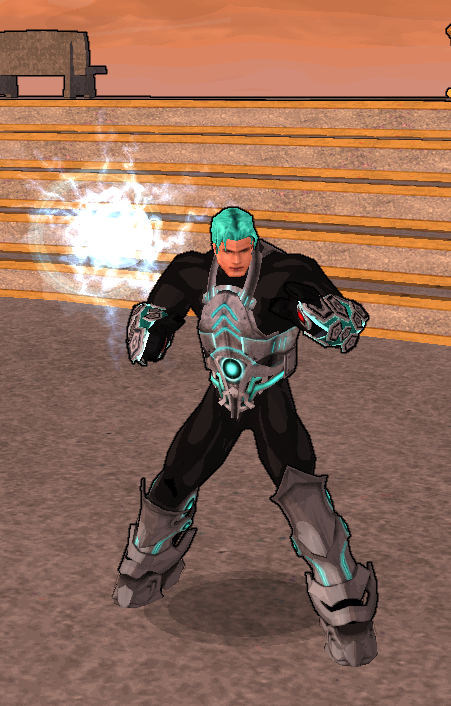
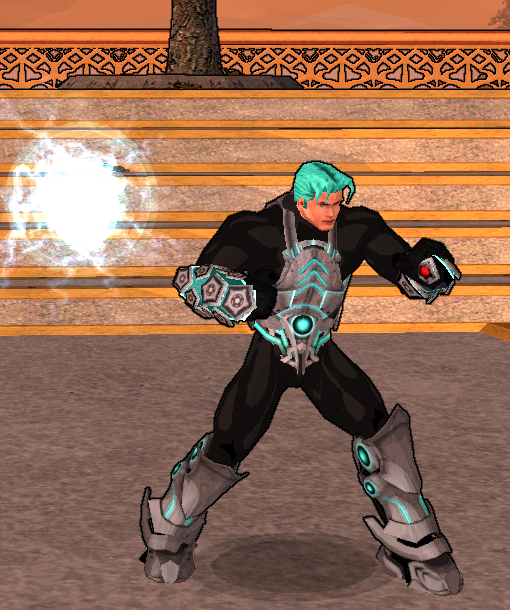
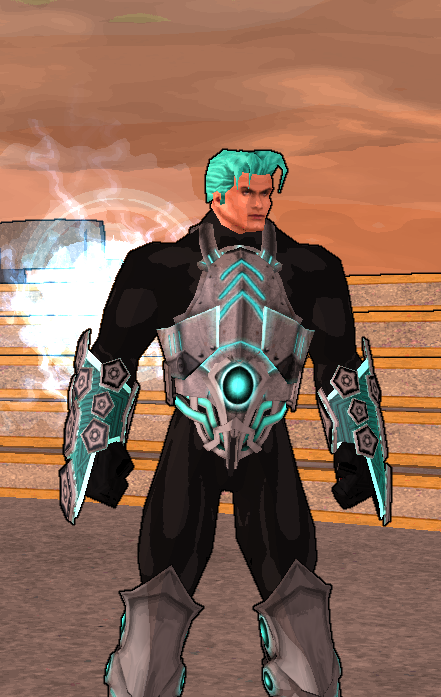
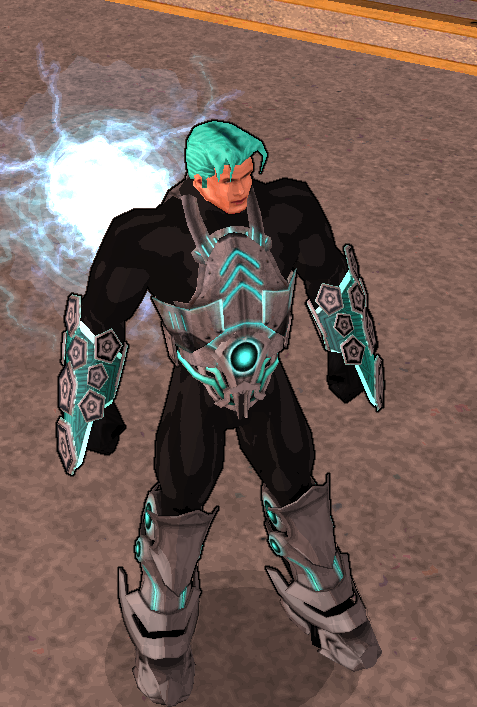
Thanks! I feel like that guitarist that Dave Grohl called up to play with the Foos, lol, with you complementing my post. (It's actually Spectrum with the 2 darkest shades of black - I liked it better than "Tights").
-
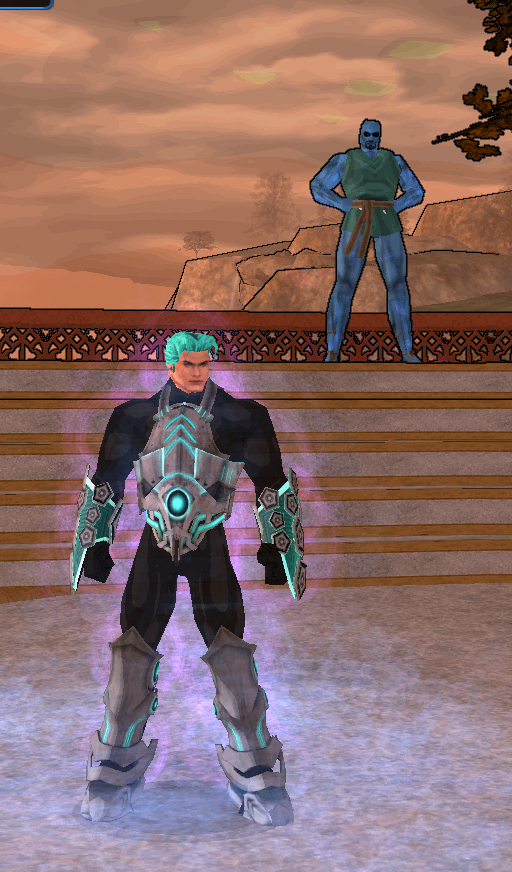
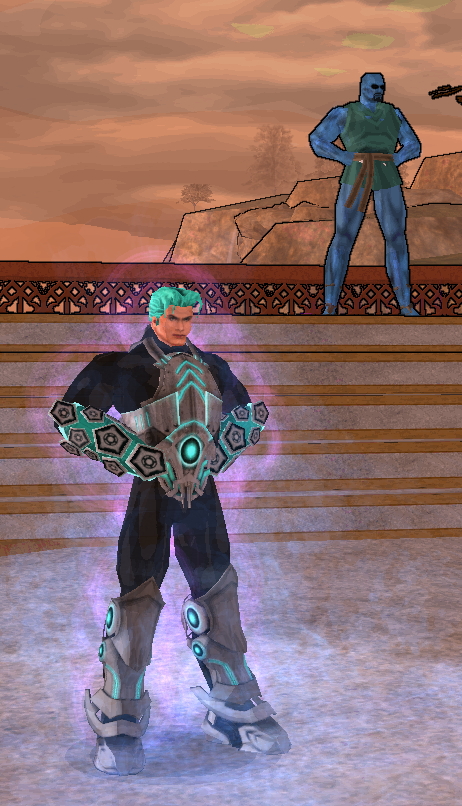
I was massively inspired by @Player2 and came up with this (below). The Ascension belt fits even better with the Resistance chest on the Huge model. One of my fav costumes I've done. Presenting Snowshock (Ele/Cold corr).

- 8155 replies
-
- 13
-

-

-

-

Macro help - target and cast next teammate
brasilgringo replied to svmcgarry's topic in Tools, Utilities & Downloads
does anyone have a macro for Ice Shield and Glacial Shield on /Cold (corrs or doms or whatever) that will target nearest friendly and cast on them automatically - either 1 or both sheilds? the "teammate" one above seems quite buggy. also if you know how to make the macro icon the actual power icon, that would be awesome. Thx. if you can't do 2 shields in one press, I'd appreciate one macro for each (with icons) that targets the nearest friend -
I did a lot of beta testing and MIDS-fu the last several days trying to find an Elec/Cold Corr or Cold/Elec Defender with decent resists, ~32% Melee / Ranged def (to soft-cap with 1 small purple), and a decent attack chain for single-target and AOE. This is the best I could come up with. Corr: Defender I tried to do some combat parsing and it looks (and feels) like the Corr does more damage especially with the big hitters (Zapp, TB), an that VS gets to Scourge too on the Corr. Generally the fighting felt smoother / faster on the Corr esp. with Lightning Bolt doing decent damage and benefiting from Scourge as well as Shocked procs. It's a shame the big hitters in /Cold come so late on Corrs but that's what you get. Posting here if of benefit to anyone.
-
True dat. SC is basically a wide-area proc deliver system now, including -RES. Fun times!
-
I think Elec/ is tied with or slightly better than Fire -- esp now with Elec changes -- on Sents due to the way Elec was tweaked (esp Tesla Cage) for Sents, and that it has no annoying Repel like Fire has in the Blaze replacement power.
-
I'm very curious how the new post-buff Tesla Cage is on corrupters. Basically as a proc'd out version (5 dmg procs and an acc/dmg IO). Is the chaining any good? Does the power still have an annoying slow cast time? I see a lot of builds taking a proc'd Tesla Cage but not taking Short Circuit, which with its sped-up animation and wide radius (20') seems to me to be good / better now (given its end-drain setting up Shocked). Worth trying to fit both into a build? Elec/Cold seems the obvious choice.
-
AAO?
-
Now that ASF went live, what do you think of it?
brasilgringo replied to Albion's topic in General Discussion
It was painfully long and bad rewards. 'Nuff said. -
This will be an interesting study between SM/BIO and SM/RAD. My guess is on single targets like Pylons the /Bio will be stronger but in AOE situations the /RAD will be stronger (due to procc'd GZ and RT). /RAD also has that sweet +dmg buff from Meltdown on scrapps. Love to see builds as folks come up with them. My EM/RAD is a nice mix already of ST and AOE, but I think Tremor will really help SM now.
-
Electrical Blast / Electricity Manipulation Blaster
brasilgringo replied to Small Onez's topic in Blaster
I read on the beta forums that Tesla Cage was still pretty underwhelming on Elec blasters with the changes. VS is great. I can see the benefit of Elec/Elec to basically go PS->BL or PS->SC or even PS->TB so that you've end-drained everything and get SHOCKED procs on the attacks right away, though I wonder if you can get there just with Elec/ primary using SC. I suppose if you have Power Sink you can just slot SC for proc-damage and -RES procs, given its faster anim now. You get a lot of AOE/PBAOE with SC-BL and Dynamo running and TB. I'd be curious to see how people come up with builds. I posted my Elec/Nin with SC back in the rotation and it's fun, definitely feels more powerful with the changes including VS and SC. Wish the Shocked procs were stronger though. -
This is my current Elec/Bio. Built primarily for damage and then resists, and then I just carry purples which are super cheap when I need to up defenses (usually when not on teams - teams bring enough +def you don't have to worry about it, usually). I put Short Circuit back in due to the reduced animation time and wanting to have another big AOE that can take procs and also help proc Shocked. That said, my Elec/Nin blaster feels much stronger. The limited target caps on the Sent Nuke are pretty annoying. This Hero build was built using Mids Reborn 3.0.6.0 https://github.com/LoadedCamel/MidsReborn Click this DataLink to open the build! Level 50 Magic Sentinel Primary Power Set: Electrical Blast Secondary Power Set: Bio Armor Power Pool: Speed Power Pool: Leaping Power Pool: Fighting Ancillary Pool: Psionic Mastery Hero Profile: Level 1: Charged Bolts -- SprOppStr-Acc/Dmg(A), SprOppStr-Dmg/Rchg(3), SprOppStr-Acc/Dmg/Rchg(3), SprOppStr-Acc/Dmg/EndRdx(5), SprOppStr-Acc/Dmg/EndRdx/Rchg(5) Level 1: Hardened Carapace -- UnbGrd-ResDam(A), UnbGrd-ResDam/EndRdx(7), UnbGrd-Rchg/ResDam(7), UnbGrd-ResDam/EndRdx/Rchg(9), GldArm-3defTpProc(9) Level 2: Inexhaustible -- PwrTrns-EndMod(A), PwrTrns-+Heal(11) Level 4: Environmental Adaptation -- LucoftheG-Def/Rchg+(A), ShlWal-Def/EndRdx(11), ShlWal-Def/EndRdx/Rchg(13), ShlWal-Def(13), ShlWal-ResDam/Re TP(15), Rct-ResDam%(15) Level 6: Ball Lightning -- Ann-Acc/Dmg(A), Ann-Acc/Dmg/Rchg(17), Ann-ResDeb%(17), PstBls-Dam%(19), JvlVll-Dam%(19), Bmbdmt-+FireDmg(21) Level 8: Zapping Bolt -- Apc-Acc/Rchg(A), Apc-Dmg(21), Apc-Acc/Dmg/Rchg(23), Apc-Dmg/EndRdx(23), Apc-Dam%(25), GldJvl-Dam%(25) Level 10: Adaptation Level 12: Aim -- GssSynFr--Build%(A) Level 14: Tesla Cage -- GldJvl-Acc/Dmg(A), GldJvl-Dam%(27), NrnSht-Dam%(27), GhsWdwEmb-Dam%(29), GldNet-Dam%(29), SprOppStr-Rchg/+Opportunity(31) Level 16: Ablative Carapace -- Pnc-Heal/EndRedux(A), Pnc-EndRdx/Rchg(31), Pnc-Heal/Rchg(31), Pnc-Heal/EndRedux/Rchg(33), Pnc-Heal(33) Level 18: Voltaic Sentinel -- CaltoArm-Acc/Rchg(A), CaltoArm-Acc/Dmg(33), CaltoArm-Dmg/EndRdx(34), CaltoArm-Acc/Dmg/Rchg(34), CaltoArm-EndRdx/Dmg/Rchg(34) Level 20: Rebuild DNA -- Prv-Heal(A), Prv-Heal/EndRdx(36), Prv-EndRdx/Rchg(36), Prv-Heal/Rchg(36), Prv-Heal/Rchg/EndRdx(37), Prv-Absorb%(37) Level 22: Hasten -- RechRdx-I(A), RechRdx-I(37) Level 24: Combat Jumping -- LucoftheG-Def/Rchg+(A), Ksm-ToHit+(39) Level 26: Short Circuit -- OvrFrc-Acc/Dmg(A), OvrFrc-Dam/KB(48), Arm-Dam%(48), Obl-%Dam(50), Erd-%Dam(50), FuroftheG-ResDeb%(50) Level 28: Boxing -- Empty(A) Level 30: Super Speed -- WntGif-ResSlow(A) Level 32: Thunderous Blast -- SprSntWar-Acc/Dmg(A), SprSntWar-Dmg/Rchg(39), SprSntWar-Acc/Dmg/Rchg(39), SprSntWar-Acc/Dmg/EndRdx(40), SprSntWar-Acc/Dmg/EndRdx/Rchg(40), SprSntWar-Rchg/+Absorb(40) Level 35: Genomic Evolution -- UnbGrd-ResDam(A), UnbGrd-ResDam/EndRdx(42), UnbGrd-Rchg/ResDam(42), UnbGrd-Max HP%(42) Level 38: Mind Probe -- SprBlsCol-Acc/Dmg(A), SprBlsCol-Dmg/EndRdx(43), SprBlsCol-Acc/Dmg/EndRdx(43), SprBlsCol-Acc/Dmg/Rchg(43), SprBlsCol-Dmg/EndRdx/Acc/Rchg(45), SprBlsCol-Rchg/HoldProc(45) Level 41: Dominate -- GldJvl-Acc/Dmg(A), GldJvl-Dam%(45), NrnSht-Dam%(46), GhsWdwEmb-Dam%(46), UnbCns-Dam%(46), Dcm-Build%(48) Level 44: Parasitic Leech -- NmnCnv-Heal/Rchg(A) Level 47: Tough -- StdPrt-ResDam/Def+(A) Level 49: Weave -- LucoftheG-Def/Rchg+(A) Level 1: Opportunity Level 1: Brawl -- Empty(A) Level 1: Sprint -- Empty(A) Level 2: Rest -- Empty(A) Level 2: Swift -- Flight-I(A) Level 2: Hurdle -- Jump-I(A) Level 2: Health -- NmnCnv-Regen/Rcvry+(A) Level 2: Stamina -- PrfShf-End%(A) Level 30: Speed Phase Level 1: Prestige Power Dash -- Empty(A) Level 1: Prestige Power Slide -- Empty(A) Level 1: Prestige Power Quick -- Empty(A) Level 1: Prestige Power Rush -- Empty(A) Level 1: Prestige Power Surge -- Empty(A) Level 4: Ninja Run Level 50: Musculature Core Paragon Level 10: Defensive Adaptation Level 10: Efficient Adaptation Level 10: Offensive Adaptation ------------
-
Hi forum team ... looking at tweaking my Elec/Nin for the new elec blast changes. Basically involves putting Short Circuit back into the build, with the goal of SC->BallLightning to open spawns. How are people slottling SC post-changes for maximum proc'age (it has a nice wide area)? I heard that the endo-drain is sufficient enough it doesn't need slotting up. I like the KD procs in it, plus the FuryGlad -RES fits (had to take it out of Golden Dragonfly, but Mids says Dragonfly can take Achilles -RES to make up for it?). From what I can see on the beta forums, Tesla Cage still isn't really worth it. I didn't slot up VS for end-drain either. This Hero build was built using Mids Reborn 3.0.5.6 https://github.com/Reborn-Team/MidsReborn Click this DataLink to open the build! Sith Warrior: Level 50 Magic Blaster Primary Power Set: Electrical Blast Secondary Power Set: Ninja Training Power Pool: Leaping Power Pool: Speed Power Pool: Fighting Power Pool: Leadership Ancillary Pool: Mace Mastery Hero Profile: Level 1: Lightning Bolt -- SprDfnBrr-Acc/Dmg(A), SprDfnBrr-Dmg/Rchg(3), SprDfnBrr-Acc/Dmg/Rchg(3), SprDfnBrr-Acc/Dmg/EndRdx(5), SprDfnBrr-Rchg/+Status Protect(5) Level 1: Immobilizing Dart -- TraoftheH-Immob/Acc(A) Level 2: Ball Lightning -- Rgn-Dmg/Rchg(A), Rgn-Acc/Dmg/Rchg(7), Rgn-Acc/Rchg(7), Rgn-Dmg/EndRdx(9), Rgn-Knock%(9) Level 4: Choking Powder -- GldJvl-Acc/Dmg(A), GldJvl-Dam%(11), Apc-Dam%(13), UnbCns-Dam%(13), GhsWdwEmb-Dam%(15), NrnSht-Dam%(15) Level 6: Combat Jumping -- LucoftheG-Def/Rchg+(A), BlsoftheZ-ResKB(17), BlsoftheZ-Travel/EndRdx(17), WntGif-ResSlow(19), Ksm-ToHit+(19) Level 8: Sting of the Wasp -- Hct-Dmg(A), Hct-Dam%(21), TchofLadG-%Dam(21), TchofDth-Dam%(23), GldStr-%Dam(23), AchHee-ResDeb%(25) Level 10: Shinobi -- LucoftheG-Def/Rchg+(A), HO:Cyto(25) Level 12: Zapp -- StnoftheM-Dam%(A), StnoftheM-Acc/Dmg(27), StnoftheM-Dmg/EndRdx/Rchg(27), StnoftheM-Dmg/EndRdx(29), StnoftheM-Acc/ActRdx/Rng(29), GldJvl-Dam%(31) Level 14: Aim -- GssSynFr--Build%(A), RechRdx-I(31) Level 16: Super Speed -- BlsoftheZ-Travel/EndRdx(A), BlsoftheZ-ResKB(31) Level 18: Hasten -- RechRdx-I(A), RechRdx-I(33) Level 20: Kuji-In Toh -- EndMod-I(A), EndMod-I(33), Pnc-Heal(33), Pnc-Heal/EndRedux(34), Pnc-Heal/Rchg(34), UnbGrd-Max HP%(34) Level 22: Short Circuit -- OvrFrc-Acc/Dmg(A), OvrFrc-Dam/KB(36), ScrDrv-Dam%(36), Obl-%Dam(36), Erd-%Dam(37), FuroftheG-ResDeb%(37) Level 24: Boxing -- Acc-I(A) Level 26: Tough -- StdPrt-ResDam/Def+(A), GldArm-3defTpProc(37) Level 28: Voltaic Sentinel -- ExpRnf-Acc/Dmg(A), ExpRnf-Dmg/EndRdx(39), ExpRnf-Acc/Dmg/Rchg(39), ExpRnf-EndRdx/Dmg/Rchg(39) Level 30: Weave -- LucoftheG-Def/Rchg+(A), ShlWal-Def(40), ShlWal-Def/EndRdx(40), ShlWal-ResDam/Re TP(40) Level 32: Thunderous Blast -- SprBlsWrt-Rchg/Dmg%(A), SprBlsWrt-Acc/Dmg/EndRdx/Rchg(42), SprBlsWrt-Acc/Dmg/Rchg(42), SprBlsWrt-Acc/Dmg/EndRdx(42), SprBlsWrt-Acc/Dmg(43), SprBlsWrt-Dmg/Rchg(43) Level 35: Scorpion Shield -- LucoftheG-Def/Rchg+(A), Rct-Def/EndRdx(43), Rct-Def(45), Rct-ResDam%(45) Level 38: Golden Dragonfly -- Arm-Dmg(A), Arm-Dam%(45), Erd-%Dam(46), TchofLadG-%Dam(46), FrcFdb-Rechg%(46), AchHee-ResDeb%(48) Level 41: Blinding Powder -- CrcPrs-Conf%(A), CrcPrs-Conf/EndRdx(48), CrcPrs-Conf(48), CrcPrs-Conf/Rchg(50), CrcPrs-Acc/Conf/Rchg(50), CrcPrs-Acc/Rchg(50) Level 44: Assault -- EndRdx-I(A) Level 47: Tactics -- HO:Cyto(A) Level 49: Maneuvers -- LucoftheG-Def/Rchg+(A) Level 1: Defiance Level 1: Brawl -- Empty(A) Level 1: Sprint -- Clr-Stlth(A) Level 2: Rest -- Empty(A) Level 2: Swift -- Run-I(A) Level 2: Hurdle -- Jump-I(A) Level 2: Health -- Prv-Absorb%(A) Level 2: Stamina -- PrfShf-End%(A), PrfShf-EndMod(11) Level 49: Quick Form Level 1: Prestige Power Dash -- Empty(A) Level 1: Prestige Power Slide -- Empty(A) Level 1: Prestige Power Quick -- Empty(A) Level 1: Prestige Power Rush -- Empty(A) Level 1: Prestige Power Surge -- Empty(A) Level 4: Ninja Run Level 50: Musculature Radial Paragon Level 16: Speed Phase ------------
-
I'm not used to playing Blasters much, so a lil help?
brasilgringo replied to Xandyr's topic in Blaster
Don't forget that Suppressive Fire procs really well and is a fast attack. Also theory-crafters say that you can get a better single-target dps rotation w/o EC. This Hero build was built using Mids Reborn 3.0.5.6 https://github.com/Reborn-Team/MidsReborn Click this DataLink to open the build! Atirador: Level 50 Mutation Blaster Primary Power Set: Dual Pistols Secondary Power Set: Martial Combat Power Pool: Fighting Power Pool: Leaping Power Pool: Leadership Power Pool: Speed Ancillary Pool: Mace Mastery Hero Profile: Level 1: Dual Wield -- SprDfnBrr-Dmg/Rchg(A), SprDfnBrr-Acc/Dmg(3), SprDfnBrr-Rchg/+Status Protect(3), SprDfnBrr-Acc/Dmg/Rchg(5), SprDfnBrr-Acc/Dmg/EndRdx/Rchg(5), SprDfnBrr-Acc/Dmg/EndRdx(7) Level 1: Ki Push -- KntCmb-Dmg/EndRdx(A), KntCmb-Dmg/EndRdx/Rchg(7), KntCmb-Dmg/Rchg(9), KntCmb-Acc/Dmg(9) Level 2: Pistols -- SprWntBit-Acc/Dmg(A), SprWntBit-Acc/Dmg/Rchg(11), SprWntBit-Dmg/EndRdx/Acc/Rchg(11), SprWntBit-Dmg/Rchg(13), SprWntBit-Acc/Dmg/EndRdx(13), AchHee-ResDeb%(15) Level 4: Storm Kick -- KntCmb-Dmg/EndRdx/Rchg(A), KntCmb-Acc/Dmg(15), KntCmb-Dmg/EndRdx(17), KntCmb-Dmg/Rchg(17), Hct-Dam%(19), FrcFdb-Rechg%(19) Level 6: Reach for the Limit Level 8: Bullet Rain -- SprBlsWrt-Acc/Dmg/EndRdx/Rchg(A), SprBlsWrt-Rchg/Dmg%(21), Bmbdmt-Dam(21), PstBls-Dam%(23), FrcFdb-Rechg%(23), Ann-ResDeb%(25) Level 10: Burst of Speed -- SprBlsWrt-Dmg/Rchg(A), SprBlsWrt-Acc/Dmg/Rchg(25), Erd-%Dam(27), Erd-Dmg(27), Erd-Dmg/Rchg(29), FuroftheG-ResDeb%(29) Level 12: Swap Ammo Level 14: Suppressive Fire -- UnbCns-Acc/Rchg(A), UnbCns-Dam%(31), GldJvl-Dam%(31), NrnSht-Dam%(31), GhsWdwEmb-Dam%(33), GldNet-Dam%(33) Level 16: Dragon's Tail -- SprBlsWrt-Acc/Dmg(A), SprBlsWrt-Acc/Dmg/EndRdx(33), Erd-%Dam(34), Erd-Acc/Dmg/EndRdx/Rchg(34), Erd-Dmg(34), FrcFdb-Rechg%(36) Level 18: Executioner's Shot -- Apc-Dmg/EndRdx(A), Apc-Dmg(36), Apc-Dam%(36), ShlBrk-%Dam(37), GldJvl-Dam%(37), TchofLadG-%Dam(37) Level 20: Kick -- KntCmb-Acc/Dmg(A), KntCmb-Dmg/EndRdx(48), KntCmb-Dmg/Rchg(48), KntCmb-Knock%(50) Level 22: Tough -- StdPrt-ResDam/Def+(A), GldArm-3defTpProc(39), RctArm-ResDam(39), RctArm-ResDam/Rchg(39), RctArm-ResDam/EndRdx(40), UnbGrd-Max HP%(40) Level 24: Weave -- LucoftheG-Def/Rchg+(A), ShlWal-ResDam/Re TP(40), Rct-Def(42), Rct-ResDam%(42) Level 26: Combat Jumping -- LucoftheG-Def/Rchg+(A), Ksm-ToHit+(42) Level 28: Inner Will -- Prv-Absorb%(A) Level 30: Maneuvers -- LucoftheG-Def/Rchg+(A), RedFrt-Def(43), RedFrt-Def/EndRdx(43) Level 32: Hail of Bullets -- Arm-Dmg(A), Arm-Acc/Dmg/Rchg(43), Arm-Dmg/Rchg(45), Arm-Dmg/EndRdx(45), Arm-Dam%(45), Erd-%Dam(46) Level 35: Scorpion Shield -- LucoftheG-Def/Rchg+(A), RedFrt-Def(46), RedFrt-Def/EndRdx(46) Level 38: Reaction Time -- PrfShf-End%(A), PwrTrns-+Heal(48), PwrTrns-EndMod(50) Level 41: Web Envelope -- HO:Endo(A) Level 44: Hasten -- RechRdx-I(A), RechRdx-I(50) Level 47: Super Speed -- BlsoftheZ-ResKB(A) Level 49: Super Jump -- WntGif-ResSlow(A) Level 1: Defiance Level 1: Brawl -- Empty(A) Level 1: Sprint -- Empty(A) Level 2: Rest -- EndMod-I(A) Level 2: Swift -- Run-I(A) Level 2: Hurdle -- Jump-I(A) Level 2: Health -- Pnc-Heal/+End(A) Level 2: Stamina -- PrfShf-End%(A) Level 12: Chemical Ammunition Level 12: Cryo Ammunition Level 12: Incendiary Ammunition Level 49: Double Jump Level 47: Speed Phase ------------